Finding the perfect hairstyle for 3C 4A hair texture can feel like discovering a hidden treasure, especially when you’re working with shorter lengths.
If you have tightly coiled curls that range from pencil-sized spirals to densely packed coils, you already know your hair possesses incredible versatility and natural volume that deserves to be celebrated.
The 27 Top 3C 4A Hairstyles for Short Hair You’ll Love showcases stunning options that honor your natural texture while offering practical styling solutions for everyday wear and special occasions.
Short hair with 3C 4A texture opens up a world of creative possibilities, from defined wash-and-gos to protective styles that promote healthy hair growth.
This comprehensive guide walks you through professionally curated hairstyles that work specifically for your curl pattern, complete with styling tips, maintenance advice, and inspiration to help you embrace your natural beauty with confidence.
Whether you’re transitioning from relaxed hair, growing out a big chop, or simply exploring new ways to style your curls, you’ll discover looks that complement your face shape, lifestyle, and personal aesthetic while keeping your hair healthy and thriving.
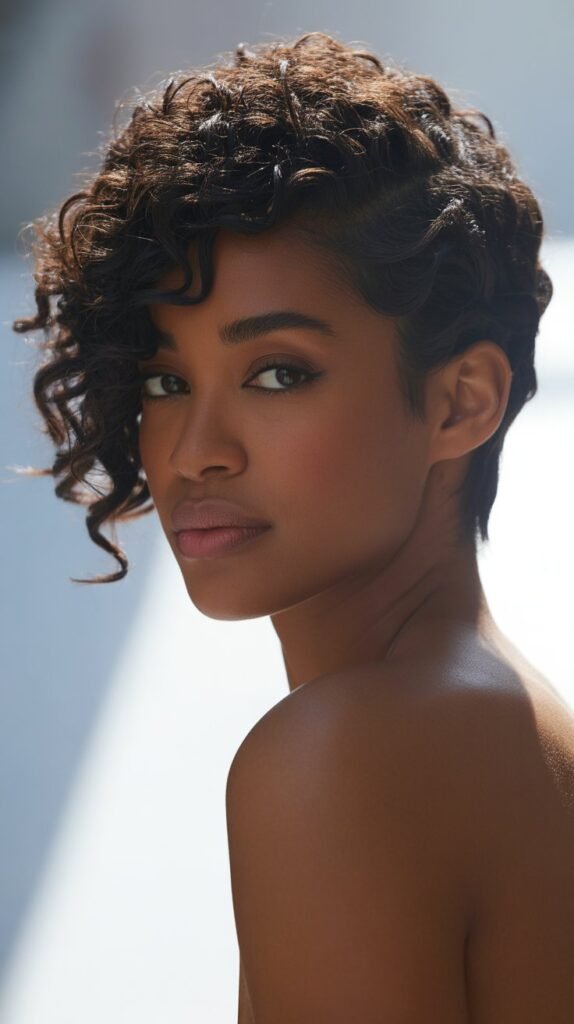
1. Tapered TWA (Teeny Weeny Afro)
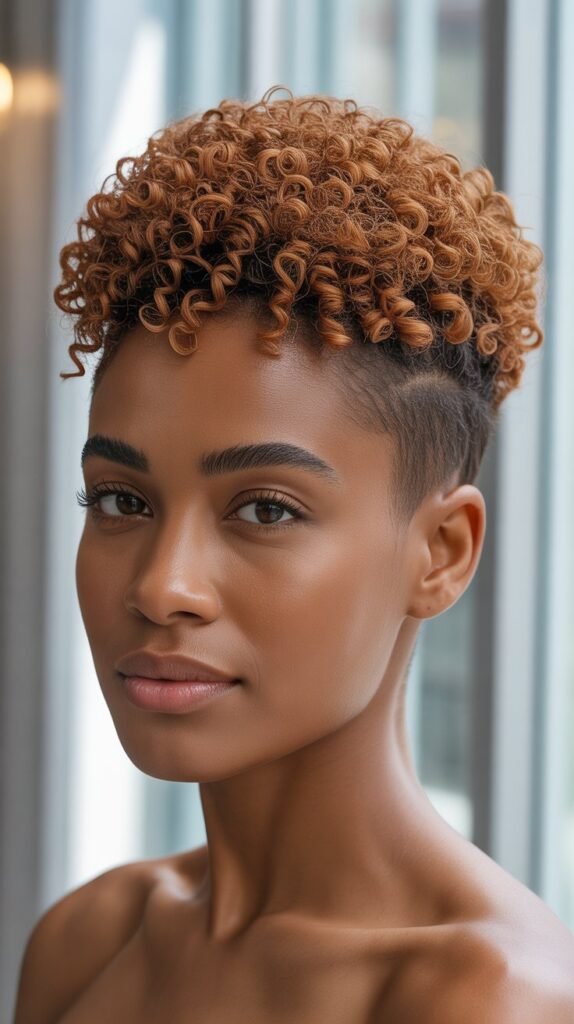
The tapered TWA represents one of the most liberating and stylish options for 3C 4A hair, offering a bold statement that emphasizes facial features while minimizing daily styling time.
This cut features shorter sides and back with slightly more length on top, creating a flattering silhouette that works beautifully with naturally coiled textures.
Styling Benefits:
- The tapered cut reduces bulk on the sides while maintaining volume at the crown, creating a balanced and modern aesthetic that suits most face shapes.
- This style requires minimal daily manipulation, which helps prevent breakage and allows your hair to thrive in its natural state.
- The shorter length makes deep conditioning treatments more effective since product can penetrate every strand without the challenge of longer hair.
- You can easily switch between a sleek, defined look and a fuller, fluffier texture depending on your styling approach.
Maintenance Tips:
- Visit your barber or stylist every 3-4 weeks to maintain the tapered shape and prevent the style from growing out unevenly.
- Use a moisturizing cream or curl-defining gel on damp hair to enhance your natural curl pattern and add shine.
- Sleep with a satin bonnet or on a satin pillowcase to preserve moisture and prevent frizz overnight.
- Deep condition weekly to keep your coils soft, manageable, and healthy despite frequent trimming.
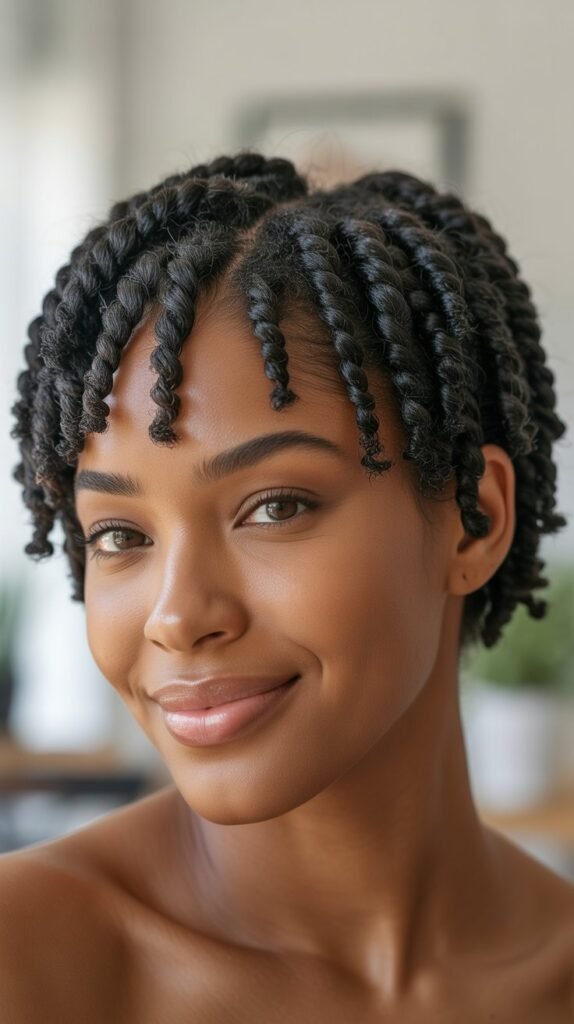
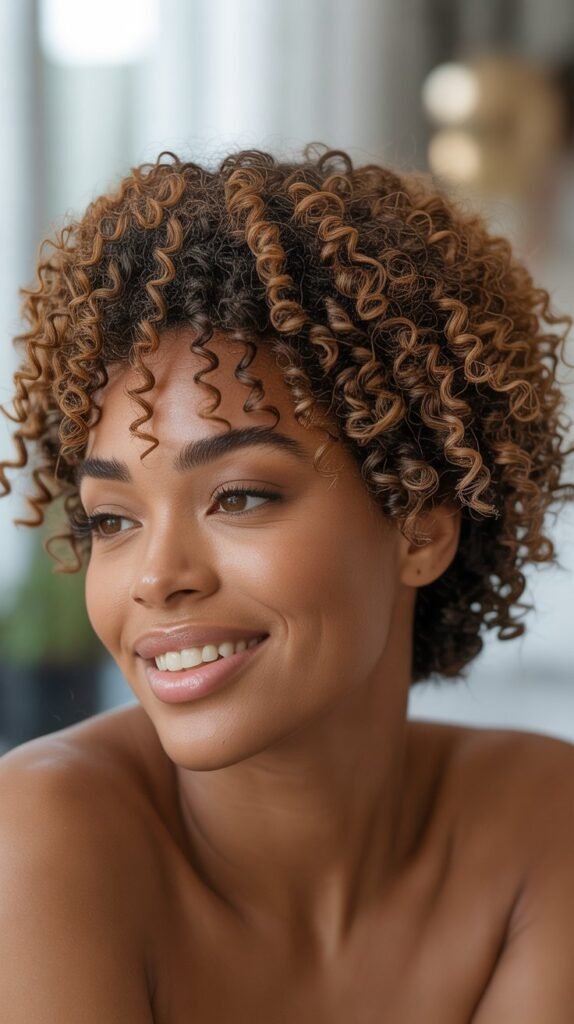
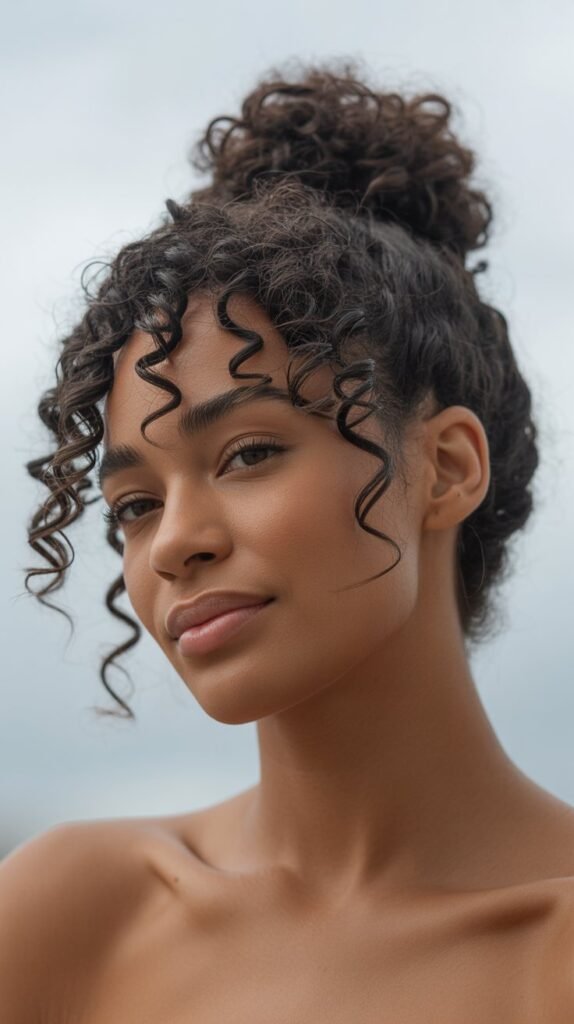
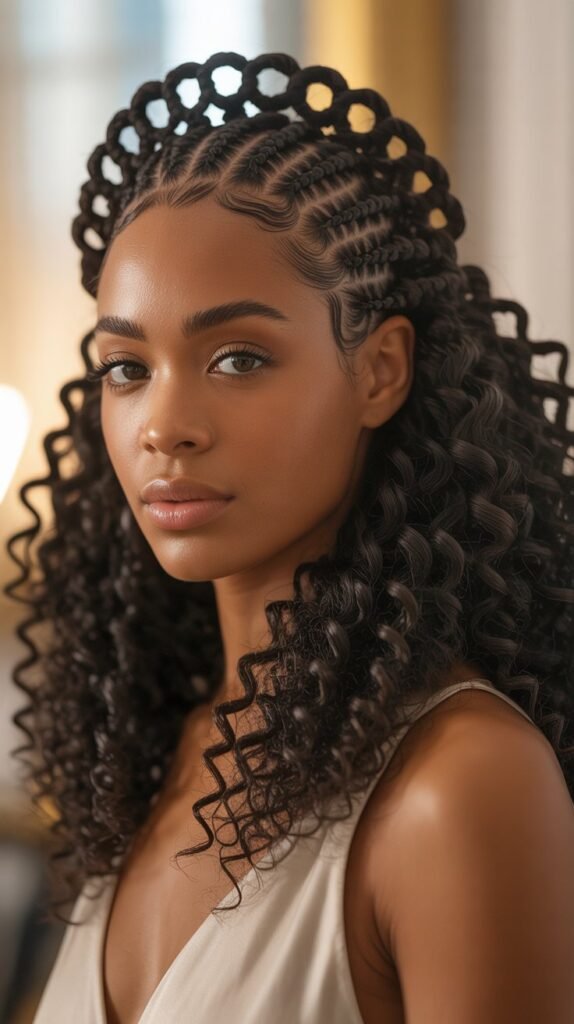
2. Finger Coils
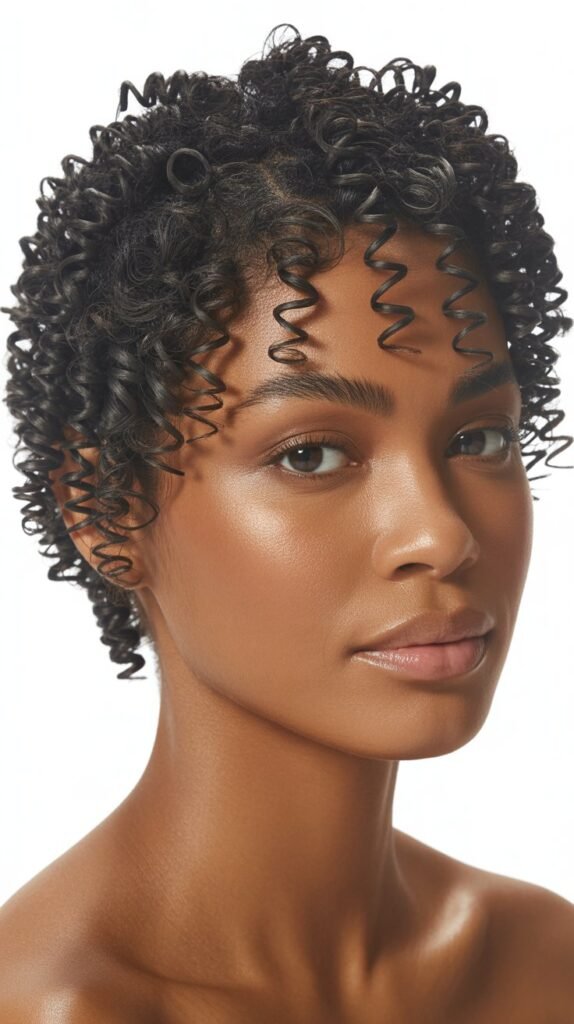
Finger coils create stunning definition by wrapping small sections of hair around your finger to form uniform, springy spirals that showcase the natural beauty of 3C 4A textures.
This technique transforms your hair into a head full of perfectly formed corkscrews that can last for several days with proper maintenance.
Styling Process:
- Start with freshly washed and conditioned hair that’s still damp but not dripping wet for optimal product absorption and coil formation.
- Apply a generous amount of curl-enhancing cream or gel to each small section before wrapping it around your finger from root to tip.
- The smaller your sections, the more defined and numerous your coils will be, though this also increases styling time.
- Allow your hair to air dry completely or sit under a hooded dryer to set the coils and prevent frizz.
Longevity and Care:
- Finger coils can last 5-7 days when properly maintained with nightly care and minimal manipulation during the day.
- Refresh your style by lightly misting with water and applying a small amount of curl cream to any coils that have lost definition.
- Protect your coils at night by wearing a satin bonnet or using the pineapple method to preserve the style while you sleep.
- Avoid touching your hair throughout the day as this can cause frizz and disrupt the coil pattern you’ve created.
3. Wash and Go with Definition
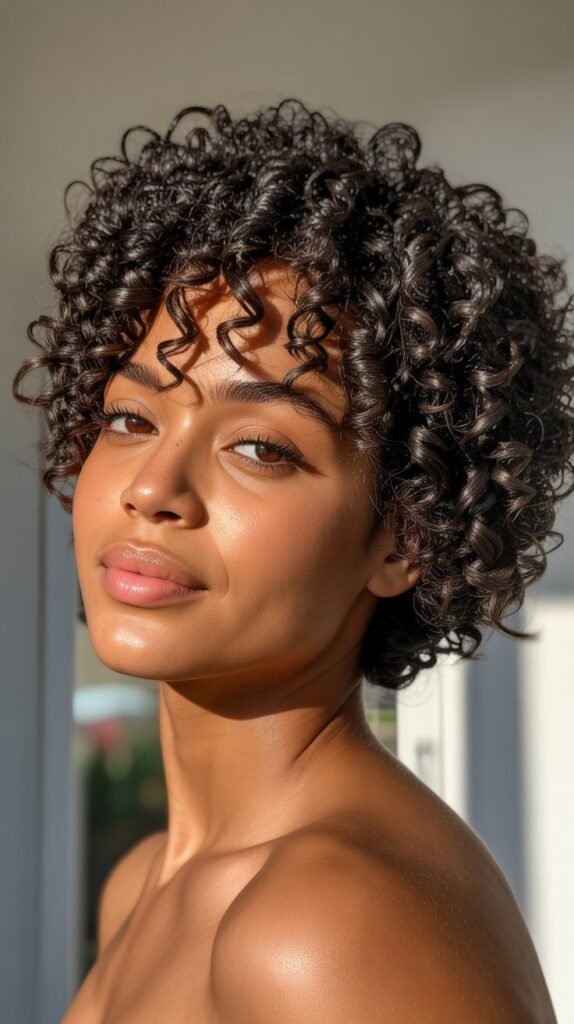
The wash and go remains a favorite among naturalistas because it embraces your hair’s natural texture while providing definition and reducing styling time to a minimum.
For 3C 4A hair, this style showcases your beautiful coil pattern while keeping your routine simple and effective.
Application Technique:
- Begin with soaking wet hair immediately after washing to ensure maximum product distribution and curl clumping.
- Apply your styling products using the praying hands method or raking technique to encourage curl formation and minimize frizz.
- Scrunch your hair gently upward to enhance volume and help your curls form their natural pattern.
- Consider using the bowl method or simply dunking your head under running water after applying products to boost definition even further.
Product Recommendations:
- Layer a leave-in conditioner for moisture, followed by a curl cream for definition, and seal with a gel for hold and longevity.
- Look for products specifically formulated for coily hair textures that provide moisture without weighing down your natural volume.
- Experiment with different product combinations to find what works best for your unique hair characteristics and climate.
- Avoid products with drying alcohols or heavy silicones that can build up on coily hair and prevent moisture absorption.
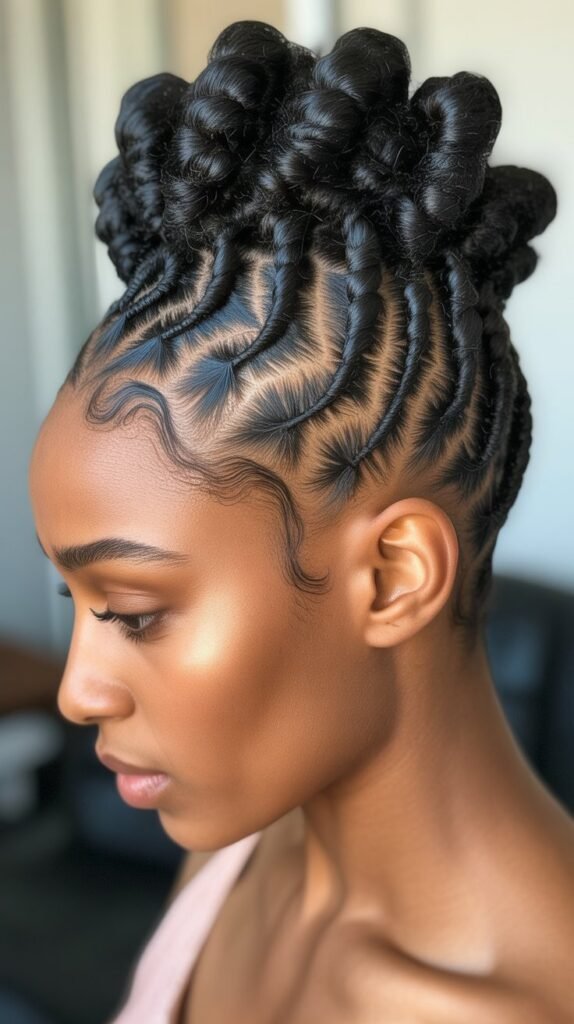
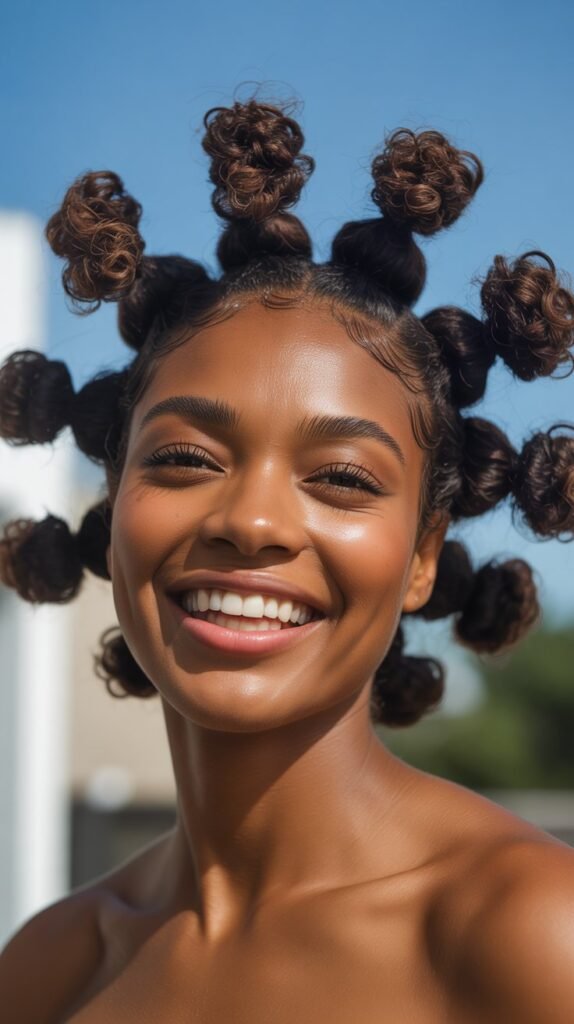
4. Bantu Knots
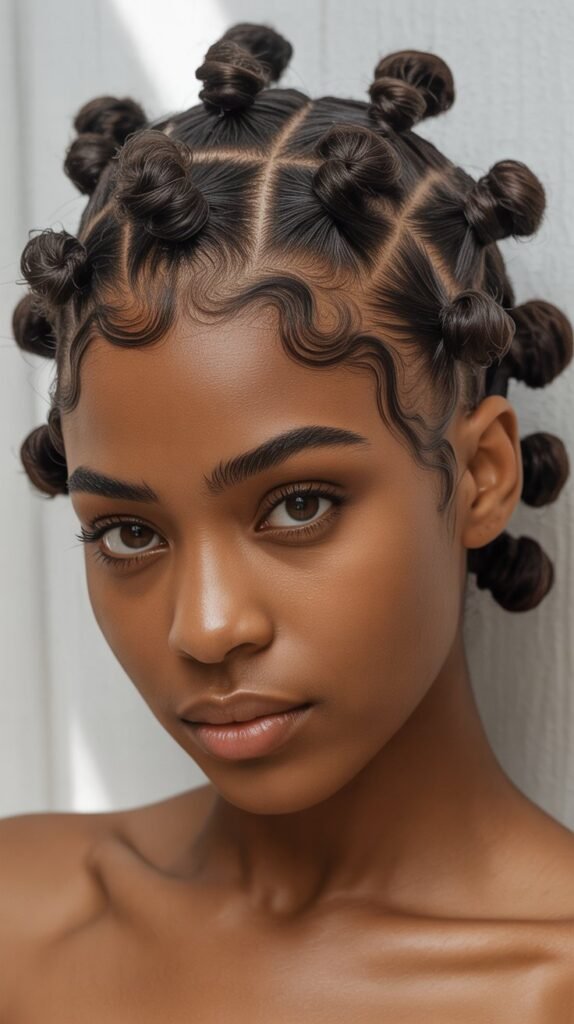
Bantu knots serve as both a stunning standalone style and a technique for achieving beautiful knot-outs once unraveled.
This traditional African hairstyle involves sectioning the hair and twisting each section into small, coiled buns that sit close to the scalp.
Creating the Style:
- Section your hair into squares or triangles depending on your desired pattern, making sure each section is roughly the same size for uniformity.
- Apply a twisting cream or butter to each section before twisting the hair from root to tip and then wrapping it around itself to form a knot.
- Secure each knot by tucking the ends underneath or using a small bobby pin if your hair is particularly short.
- The size of your sections determines both the look of the knots and the curl pattern of the resulting knot-out.
Styling Versatility:
- Wear the Bantu knots as a complete style for a bold, geometric look that stands out and protects your ends.
- Unravel the knots after they’ve completely dried to reveal bouncy, defined curls with incredible volume and dimension.
- Sleep with the knots in overnight to create a beautiful textured look the next day without heat styling.
- Combine different knot sizes throughout your head to create a more dynamic, varied curl pattern when unraveled.
5. Two-Strand Twists
Two-strand twists offer a versatile protective style that works exceptionally well on short 3C 4A hair by reducing manipulation while creating an elegant, defined look.
This technique involves dividing each section of hair into two parts and wrapping them around each other from root to tip.
Installation Method:
- Work with freshly washed and moisturized hair to ensure your twists have good slip and won’t create unnecessary tension on your scalp.
- Take small to medium sections depending on how defined you want your twist-out to be if you plan to unravel them later.
- Apply a twisting cream or butter to each section before dividing it in half and wrapping the two pieces around each other.
- Twist all the way to the ends and either let them coil on themselves or secure with a small rubber band if needed.
Duration and Benefits:
- Two-strand twists can last 1-2 weeks on short hair with proper nightly maintenance and periodic moisturizing throughout the wear time.
- This style keeps your ends protected and reduces the daily manipulation that can lead to breakage and length retention issues.
- You can wash your hair while in twists by diluting shampoo with water and applying it to your scalp without disturbing the style.
- The twists create a beautiful crimped pattern when unraveled, giving you a completely different textured look without heat.
6. Flat Twist Updo
A flat twist updo combines the protective benefits of flat twisting with the elegance of an upswept style, making it perfect for formal events or days when you want a polished appearance.
This style keeps hair secure against the scalp while creating beautiful patterns and texture.
Creating the Design:
- Section your hair into the desired pattern, whether that’s straight back, curved, or forming a specific design on your scalp.
- Take three-strand sections at the hairline and begin flat twisting by adding hair from each side as you move along the scalp, similar to cornrowing.
- Work toward the crown or nape of your neck depending on your design, securing the ends by continuing to twist them without adding new hair.
- Pin the twisted ends into an updo formation, tucking them creatively to create height, swirls, or other decorative elements.
Style Variations:
- Create a mohawk effect by flat twisting the sides toward the center and leaving the middle section fuller or twisted into a single flat twist.
- Form a low bun by gathering all flat twists at the nape and pinning them into a circular or twisted formation.
- Add accessories like decorative pins, beads, or hair jewelry to elevate the style for special occasions and add personal flair.
- Combine flat twists with other techniques like Bantu knots or two-strand twists on the ends for added texture and visual interest.
7. Curly Mohawk
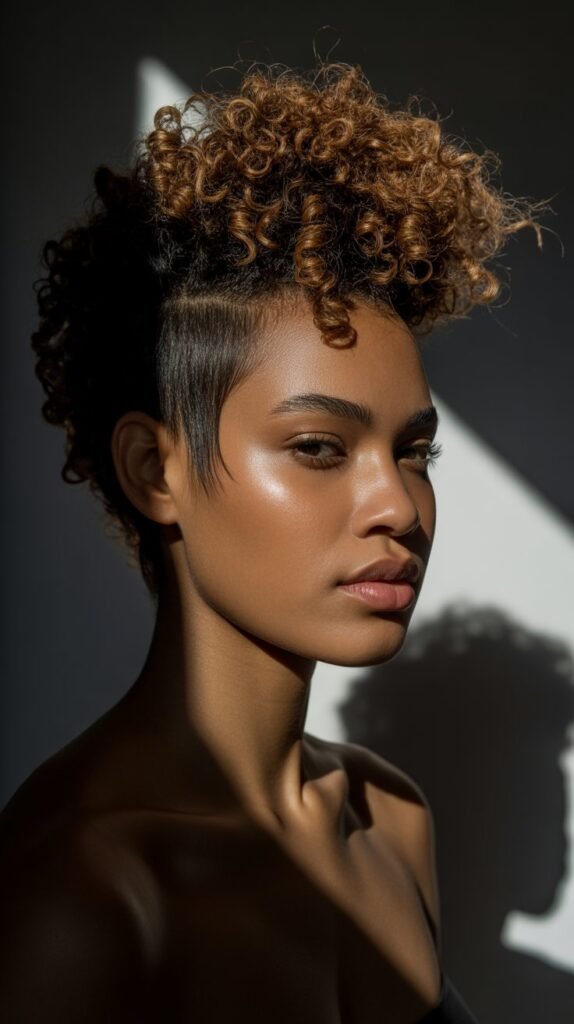
The curly mohawk makes a bold fashion statement by emphasizing height and volume in the center while keeping the sides sleek or closely cropped.
This edgy style works beautifully with the natural volume of 3C 4A hair and can be adapted for various occasions.
Achieving the Look:
- Define the center section by creating clean parts on both sides, leaving a strip of hair from your forehead to the crown or nape.
- Slick down the sides using a strong-hold gel, edge control, or pomade, smoothing the hair flat against your scalp.
- Enhance the middle section with curl-defining products and manipulate the hair upward to create maximum height and volume.
- Use bobby pins strategically placed underneath the mohawk section to add extra lift if your hair needs additional support.
Styling Options:
- Vary the width of your mohawk from narrow for a dramatic look to wider for a more wearable everyday style.
- Add color to the mohawk section to make it stand out even more and create a high-fashion editorial appearance.
- Create a faux hawk by pinning or twisting the center section upward without actually cutting the sides short.
- Combine with shaved designs on the sides for an ultra-modern look that showcases both your hair and scalp as canvas.
8. Pineapple Updo
The pineapple updo concentrates all your hair at the crown of your head, creating a fountain-like effect that’s both practical and stylish for short 3C 4A hair.
This simple yet effective style protects your curls overnight and works as a cute daytime look.
Creating the Style:
- Gather all your hair toward the highest point of your head using your hands rather than a brush to avoid disrupting your curl pattern.
- Secure with a satin scrunchie or soft hair tie that won’t create dents or cause breakage when you sleep.
- Allow your curls to cascade freely from the top, creating a pineapple or fountain shape that frames your face beautifully.
- Adjust the positioning based on your head shape and where you want the most volume to appear.
Practical Applications:
- Use this style as a nighttime preservation method to protect your curls and reduce friction while you sleep.
- Transform it into a daytime style by fluffing the curls at the crown and using bobby pins to secure any shorter pieces.
- Pull out a few face-framing pieces to soften the look and add a romantic, effortless quality to the style.
- Refresh the pineapple each morning by lightly misting with water and applying a small amount of curl cream to revive your coils.
9. Mini Afro Puffs
Mini afro puffs create an adorable, youthful look by sectioning short hair into multiple small puffs positioned around the head.
This playful style works particularly well for 3C 4A textures because it celebrates natural volume while keeping hair manageable.
Styling Steps:
- Section your hair into 4-6 areas depending on how many puffs you want and how much hair you have to work with.
- Smooth edges with a brush and edge control if desired, though this step is optional for a more natural appearance.
- Gather each section and secure with small elastic bands or colorful scrunchies that complement your outfit or personality.
- Fluff each puff individually to maximize volume and create perfectly rounded shapes that stand out.
Customization Ideas:
- Position puffs symmetrically for a neat, balanced look or place them randomly for a more artistic, free-spirited vibe.
- Add accessories like beads, ribbons, or decorative elastics to make each puff a statement piece.
- Create different-sized puffs throughout your head for visual interest and dimension rather than making them all uniform.
- Experiment with placement patterns such as a straight line down the middle, puffs on each side, or a crown of puffs around the perimeter.
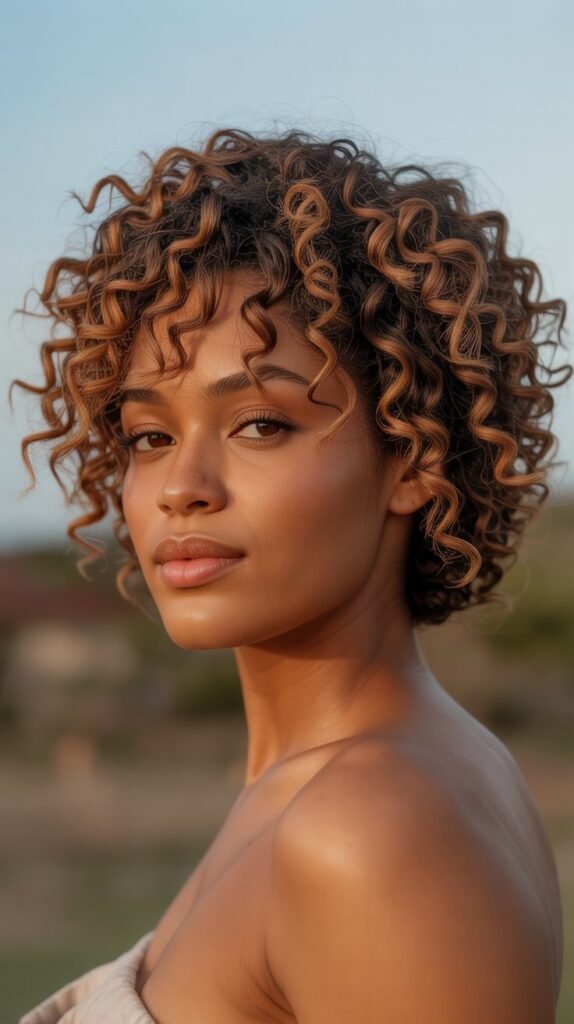
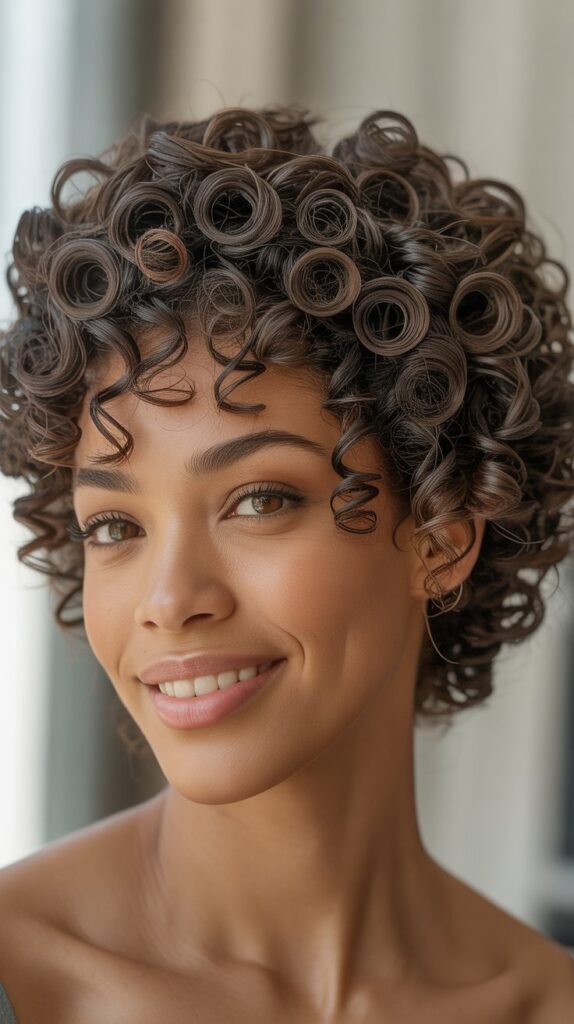
10. Defined Coil Out
A coil out involves creating spiral coils throughout your hair using various techniques, then carefully separating them once dry to achieve maximum volume with maintained definition.
This style showcases the beauty of 3C 4A textures while providing impressive fullness.
Application Process:
- Work with damp, product-laden hair and section it into small parts for more definition or larger parts for a looser result.
- Use finger coiling, rod sets, or flexi-rod techniques to create the initial coil formation throughout your entire head.
- Allow your hair to dry completely, which may take several hours or require overnight setting depending on your hair density.
- Gently separate each coil by pulling it apart with your fingers, working from the ends toward the roots to create volume.
Maximizing Results:
- Apply a light oil to your fingertips before separating coils to reduce frizz and add shine without weighing down your hair.
- Fluff at the roots with a pick or your fingers to lift the hair away from your scalp and create an airy, voluminous look.
- Set your style with a light-hold hairspray or by carefully tucking your hair into a bonnet at night to preserve the definition.
- Avoid over-separating, which can lead to excessive frizz and loss of the curl pattern you worked hard to create.
11. Slicked Back Style
The slicked back style offers a sleek, sophisticated appearance that contrasts beautifully with the natural texture of 3C 4A hair while providing a polished look suitable for professional and formal settings.
This style smooths hair away from the face while allowing texture to show in other areas.
Achieving Sleekness:
- Apply a strong-hold gel or pomade to damp hair, focusing on the front and sides where you want the most control and shine.
- Use a brush with firm bristles or a fine-toothed comb to smooth the hair back toward the crown, working in sections.
- Tie a silk or satin scarf around your hairline and leave it in place for 10-15 minutes to set the style and eliminate flyaways.
- Allow the back section to showcase your natural texture or define it with curling products for a beautiful contrast.
Style Variations:
- Create a low bun or puff at the back by gathering the slicked hair and securing it with an elastic band.
- Add a deep side part before slicking the hair back for a vintage-inspired look with modern appeal.
- Incorporate decorative headbands, scarves, or hair accessories along the hairline to add personality and color.
- Combine with shaved patterns on the sides to create an edgy contrast between sleek and textured elements.
12. Twist Out
The twist out delivers beautiful, defined waves and curls by unraveling two-strand twists after they’ve completely dried.
This beloved style works exceptionally well on 3C 4A hair, creating elongated curls with incredible volume and movement.
Installation and Removal:
- Create two-strand twists on freshly washed, moisturized hair using a twisting cream or butter for hold and definition.
- Allow the twists to dry completely, which typically requires overnight setting or several hours under a hooded dryer.
- Apply a light oil or serum to your palms and fingertips before carefully unraveling each twist from end to root.
- Separate each unraveled twist into 2-3 smaller sections to increase volume while maintaining the wavy curl pattern.
Achieving the Best Results:
- Smaller twists create tighter, more defined curls while larger twists produce looser, more relaxed waves.
- Avoid unraveling twists that are still damp, as this causes frizz and disrupts the curl pattern formation.
- Fluff your roots with a pick after unraveling to add height and create a more balanced silhouette.
- Refresh the style on subsequent days by lightly misting sections with water and retwisting them overnight.
13. Headband Accent
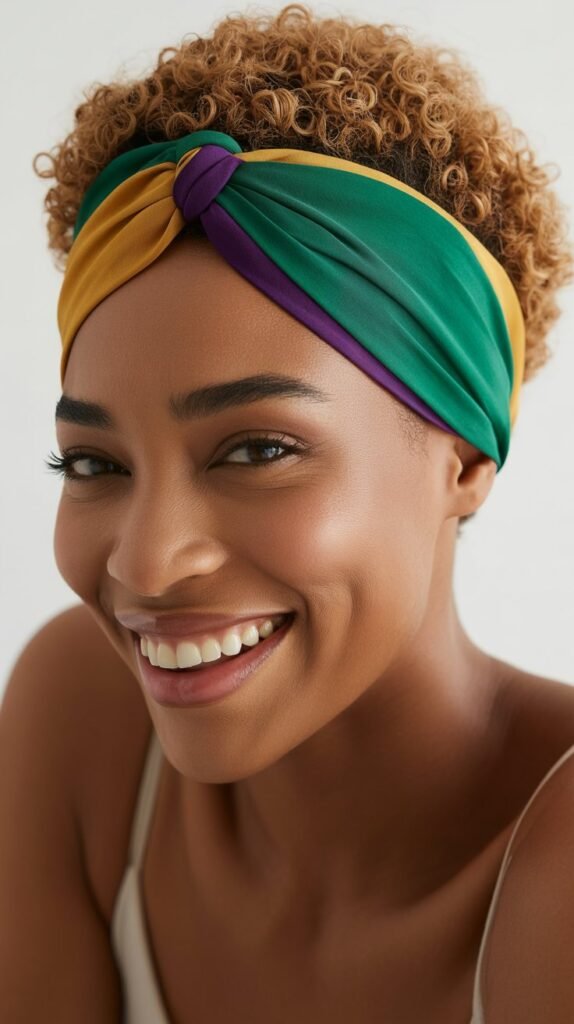
Adding a headband to your natural 3C 4A hair creates an instant style upgrade while serving the practical purpose of keeping hair off your face.
This accessory-based approach works with various hair states and textures, making it incredibly versatile.
Styling with Headbands:
- Position a wide fabric headband across your hairline to add color, pattern, or texture that complements your outfit.
- Place a thin elastic headband about an inch back from your hairline to create a lifted crown effect with your curls cascading over it.
- Use braided or twisted headbands made from your own hair for an integrated look that appears more intricate and cohesive.
- Layer multiple thin headbands in coordinating or contrasting colors for a bohemian, fashion-forward appearance.
Headband Types and Placement:
- Fabric headbands work well for casual looks and come in endless patterns, from florals to geometric designs.
- Metal or embellished headbands add elegance and work beautifully for formal events or evening occasions.
- Knotted turban-style headbands create a vintage aesthetic while providing secure hold throughout the day.
- Sport headbands with grips keep hair controlled during physical activity while adding an athletic, energetic vibe to your look.
14. Passion Twists (Short Version)
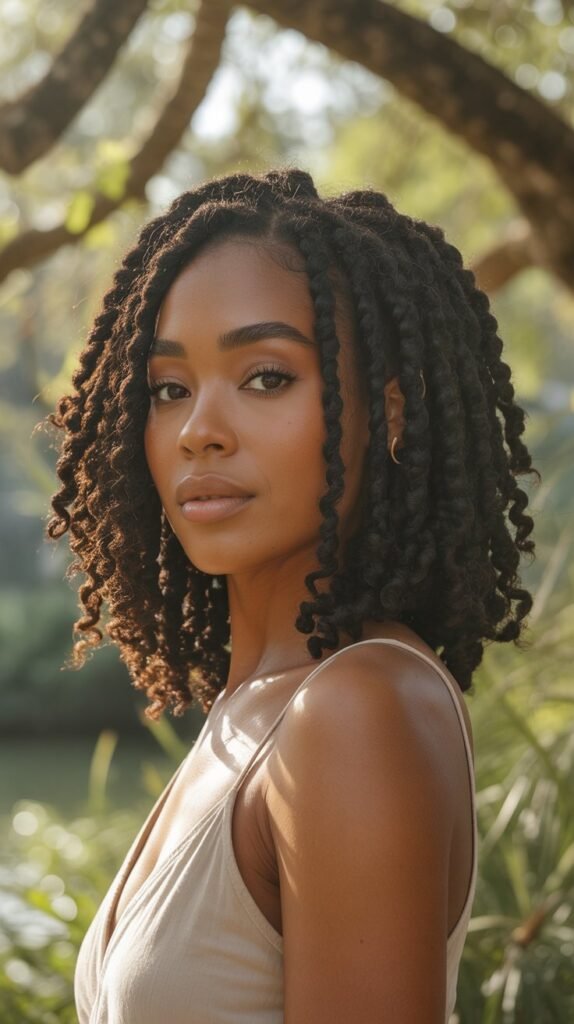
Short passion twists bring a trendy, bohemian flair to protective styling by combining water-wave hair extensions with your natural 3C 4A texture.
This style offers the look of longer hair while maintaining manageability and a lighter weight on your scalp.
Installation Process:
- Section your hair into small to medium squares across your entire head for a full, uniform appearance.
- Take pre-separated passion twist hair and divide it in half, placing your natural hair in the middle between the two sections.
- Begin twisting the three sections together, ensuring the extension hair wraps around your natural hair smoothly from root to tip.
- Seal the ends by dipping them briefly in hot water or using a lighter carefully to prevent unraveling.
Maintenance and Duration:
- Short passion twists typically last 4-6 weeks when properly maintained with regular moisturizing and nighttime protection.
- Spray your scalp with a leave-in conditioner mixture weekly to keep your natural hair underneath hydrated and healthy.
- Sleep with a satin bonnet or on a satin pillowcase to reduce frizz and extend the life of your protective style.
- Avoid heavy products that create buildup on the twists, opting instead for lightweight oils and sprays.
15. Defined Curly Frohawk
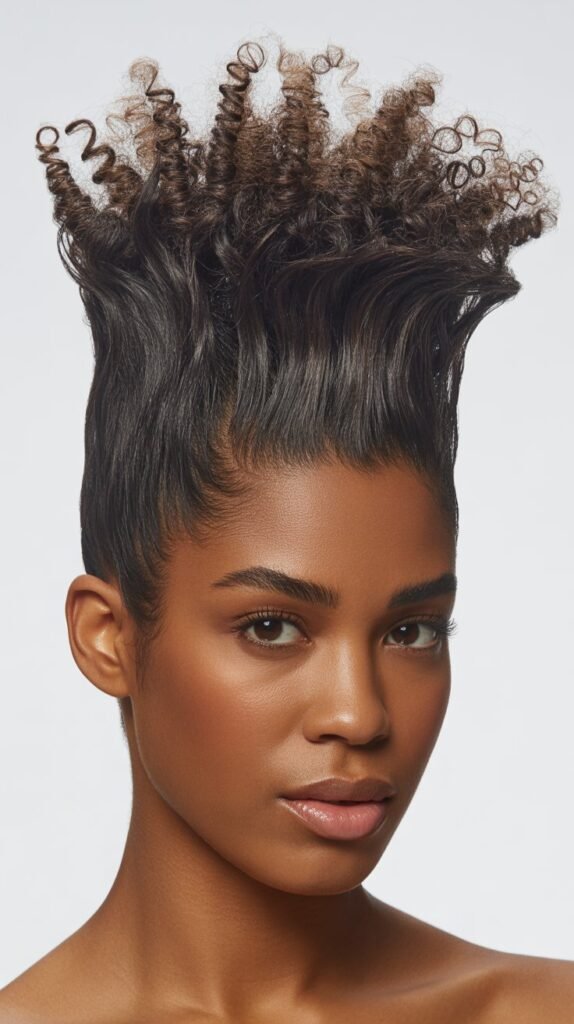
The defined curly frohawk elevates the standard mohawk by emphasizing curl definition throughout the center section while keeping sides controlled.
This style perfectly balances edgy and elegant for 3C 4A textures.
Creating Definition:
- Section your hair into three parts: two sides and one center strip running from forehead to nape.
- Apply curl-defining products heavily to the center section, using techniques like finger coiling or shingling for maximum definition.
- Smooth the side sections down with gel and a brush, creating a stark contrast between the defined center and sleek sides.
- Pin or twist the center section upward and forward to create height that defies gravity and draws the eye.
Style Enhancements:
- Add temporary color to the center section using hair chalk or wash-out dye for extra visual impact.
- Incorporate small braids or flat twists within the mohawk section to add texture and intricate detail.
- Create graduated height by pinning the back lower than the front for a dramatic, cascading effect.
- Use edge control to create swooping designs or baby hair patterns along the sides for an artistic touch.
16. Flat Twist Out
A flat twist out combines the sleekness of flat twists close to the scalp with the volume and curl pattern created when you unravel them.
This style works wonderfully on short 3C 4A hair, providing days of defined, stretched curls.
Creating the Base:
- Section damp, moisturized hair into 6-12 parts depending on how much definition you want in the final result.
- Create flat twists by taking small sections at the hairline and adding hair as you twist along the scalp, similar to cornrowing.
- Continue each flat twist until you run out of hair to add, then finish with a two-strand twist hanging freely.
- Allow the flat twists to dry completely overnight or under a hooded dryer before unraveling for best results.
Unraveling Technique:
- Carefully untwist each flat twist starting from the ends and working toward the roots to prevent tangling and frizz.
- Apply a light serum or oil to your hands before unraveling to add shine and reduce friction.
- Separate each unraveled section into 2-3 parts to create volume while maintaining the wave pattern.
- Fluff the roots and shape the hair with your fingers to achieve your desired silhouette and fullness.
17. Curly Top Knot
A curly top knot gathers your 3C 4A coils at the crown in a single, elevated bun that showcases your natural texture while creating a chic, effortless look.
This style works for casual days and can be dressed up for more formal occasions.
Forming the Knot:
- Gather all your hair at the highest point of your head, using your hands to smooth it upward without brushing out your curl pattern.
- Secure with a hair tie or scrunchie, leaving the ends to fan out in their natural coily state.
- Arrange the resulting puff or bun by fluffing the curls and positioning them to create a rounded, intentional shape.
- Pull out a few face-framing pieces if desired to soften the look and add romantic appeal.
Variations and Accessories:
- Create a messier, more undone top knot by loosely gathering hair without smoothing the sides completely.
- Wrap a colorful scarf or fabric around the base of the knot to add color and secure any shorter pieces.
- Position the knot at different heights (high crown, mid-crown, or lower) to change the entire feel of the style.
- Add decorative hair pins, flowers, or jeweled accessories to the knot for special events and occasions.
18. Chunky Twist Out
Chunky twist outs use larger sections to create a fuller, looser curl pattern with more volume and less definition than traditional twist outs.
This approach works beautifully on short 3C 4A hair when you want a statement-making, voluminous look.
Creating Larger Twists:
- Section damp hair into 8-12 large parts rather than the 20-30 sections used for a standard twist out.
- Apply generous amounts of twisting cream or butter to each section before creating thick two-strand twists.
- Allow the twists to dry completely, which may take less time than smaller twists due to the increased section size.
- Unravel carefully and separate each twist into 2-4 sections to create maximum volume with soft, flowing waves.
Styling Considerations:
- Chunky twist outs create a more relaxed, bohemian appearance compared to the defined look of smaller twists.
- This style works well when you want to elongate your curl pattern and showcase the fullness of your hair.
- Use less separation on the twist-out sections if you prefer more defined, chunkier waves rather than maximum volume.
- Refresh by retwisting only the sections that have lost definition rather than your entire head.
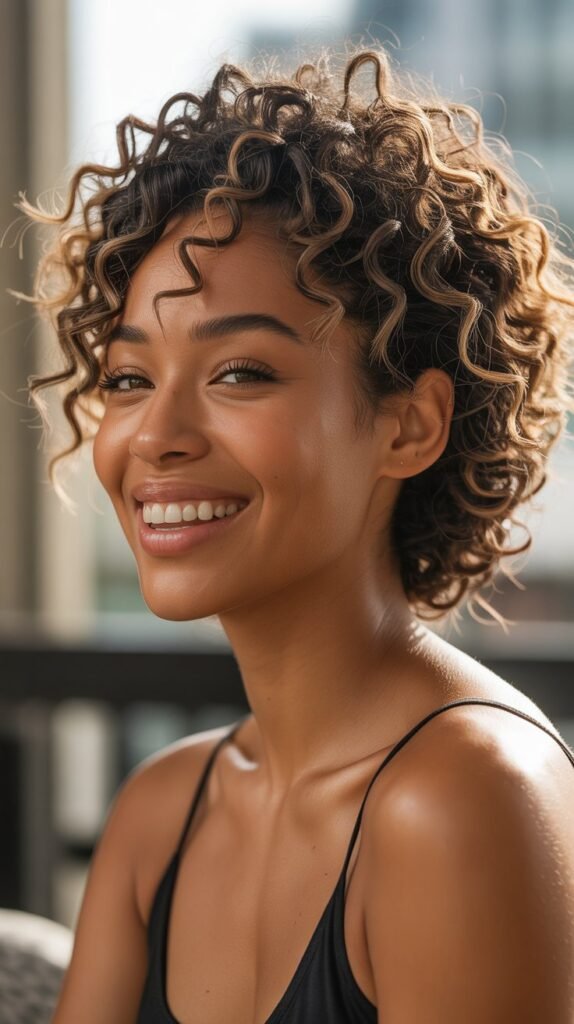
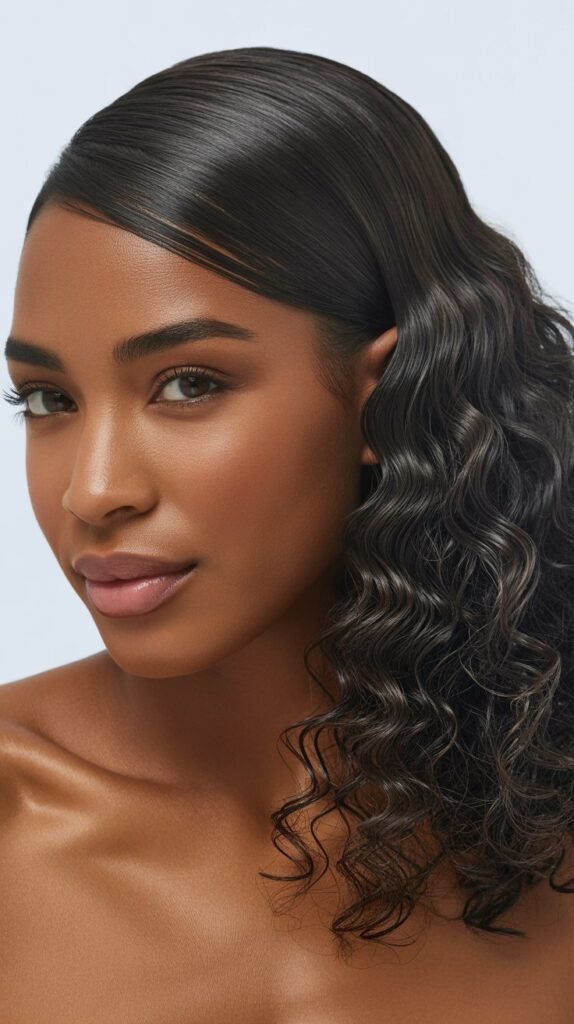
19. Curly Side Part
A curly side part creates instant sophistication by shifting your natural part dramatically to one side, allowing your 3C 4A curls to fall asymmetrically for a fashion-forward appearance.
This simple technique completely transforms your look without requiring any special tools.
Creating the Part:
- Use the tail of a rat-tail comb to create a clean, straight part from your forehead to the crown on either side.
- Apply edge control or gel along the part line to keep it defined and prevent curls from crossing over.
- Style the hair on the smaller side slicked down or pinned back for contrast against the fuller opposite side.
- Define the curls on the fuller side with curl cream and gentle scrunching to create maximum impact.
Styling the Sides Differently:
- Create flat twists or cornrows on the smaller side while leaving the larger side with loose, defined curls for textural contrast.
- Add a decorative hair clip or pin on the smaller side to secure the hair and add a fashionable accent.
- Tuck the smaller side behind your ear for a casual, asymmetric look that’s effortless yet polished.
- Switch sides periodically to prevent your hair from adapting too permanently to one directional growth pattern.
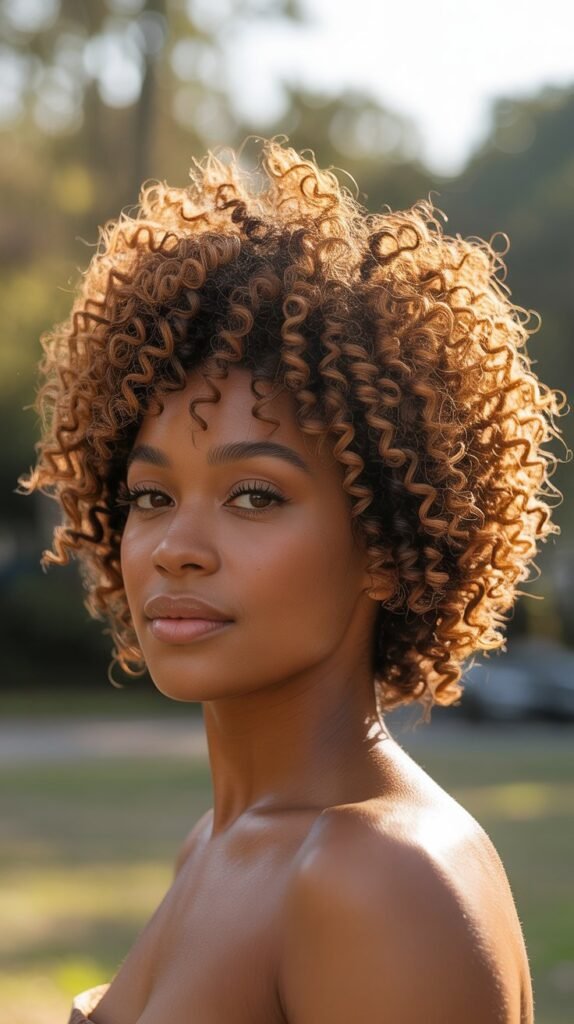
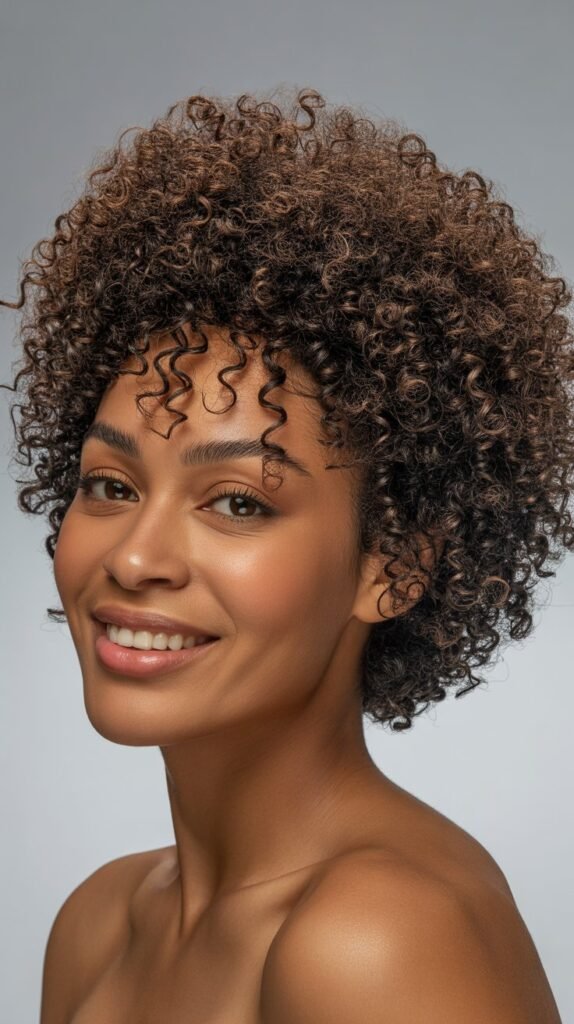
20. Natural Afro
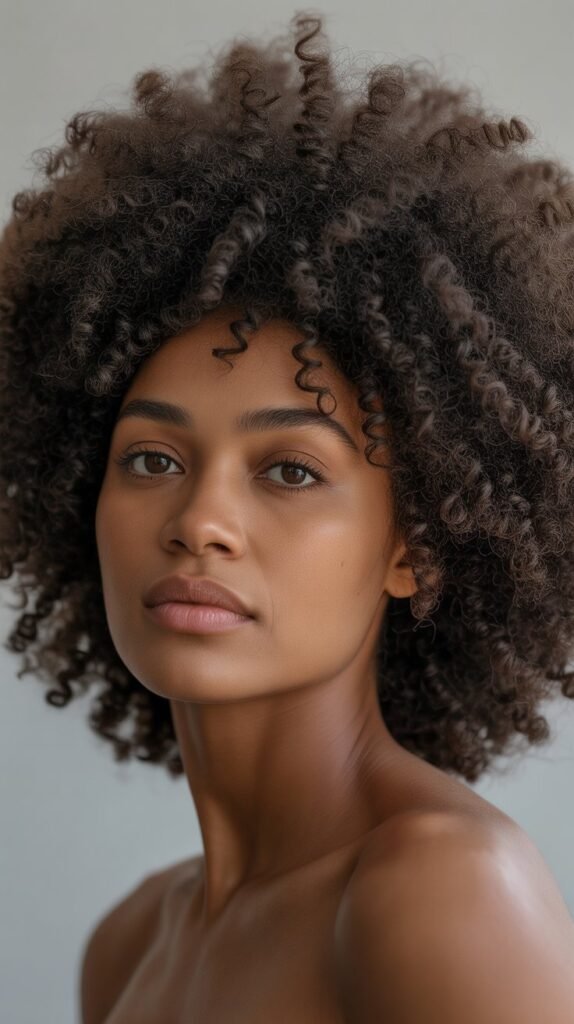
The natural afro celebrates 3C 4A hair in its purest, most voluminous form by allowing your coils to expand freely in all directions.
This iconic style makes a powerful statement while being relatively simple to achieve and maintain on short hair.
Achieving Maximum Volume:
- Start with freshly washed and conditioned hair, applying a leave-in conditioner and light oil while still damp.
- Allow your hair to air dry completely or use a diffuser on low heat to avoid disrupting your natural curl pattern.
- Once fully dry, use a pick or your fingers to lift your hair at the roots, working from the bottom up.
- Separate any clumped sections gently with your fingers to create an even, rounded shape all around your head.
Shape and Maintenance:
- Use a mirror to check your afro from all angles, ensuring it’s symmetrical and properly rounded.
- Trim any uneven areas or flyaway hairs that disrupt the overall silhouette of your afro.
- Moisturize daily by lightly misting your hair with water and applying a moisturizing cream or butter.
- Protect your afro at night with a satin bonnet large enough to accommodate the volume without crushing your shape.
21. Braided Crown
A braided crown creates an elegant halo effect by braiding hair around the perimeter of your head, showcasing both your scalp artistry and your natural texture.
This style works beautifully for short 3C 4A hair, especially for special occasions.
Creating the Crown:
- Part your hair into a circular pattern around the crown of your head, leaving the center section free.
- Create cornrows, flat twists, or individual braids that follow the circular pattern, working from one side around to meet the other.
- Secure the meeting point of your braids with bobby pins that match your hair color for an invisible hold.
- Style the center section by defining the curls, creating a puff, or adding decorative accessories for visual interest.
Design Variations:
- Create multiple rows of braids circling your head for a more intricate, layered crown effect.
- Incorporate hair jewelry, beads, or gold thread into the braids for a regal, ornate appearance.
- Leave the back section unbraided and defined for a half-up, half-down style with the crown accent.
- Add fresh or artificial flowers tucked into the crown for weddings, photoshoots, or other special events.
22. Defined Wash and Go with Clips
Using clips during the drying process of a wash and go creates lifted roots and enhanced volume that prevents your hair from drying flat against your scalp.
This technique is especially useful for short 3C 4A hair where every bit of volume matters.
Clipping Technique:
- Apply your styling products to soaking wet hair using your preferred method for curl definition and hold.
- Take small, single-prong clips or duck bill clips and place them at the roots throughout your head while hair is still wet.
- Position clips perpendicular to your scalp, lifting the hair upward to create space between your roots and scalp.
- Allow your hair to dry completely with the clips in place, either air drying or using a hooded dryer for faster results.
Clip Placement Strategy:
- Focus clips primarily at the crown and top of your head where flat roots are most noticeable and problematic.
- Space clips about 1-2 inches apart throughout the areas where you want maximum lift and volume.
- Angle clips in different directions to create multidirectional root lift rather than uniform vertical lift.
- Remove clips carefully once hair is completely dry, avoiding disturbing your curl pattern during the removal process.
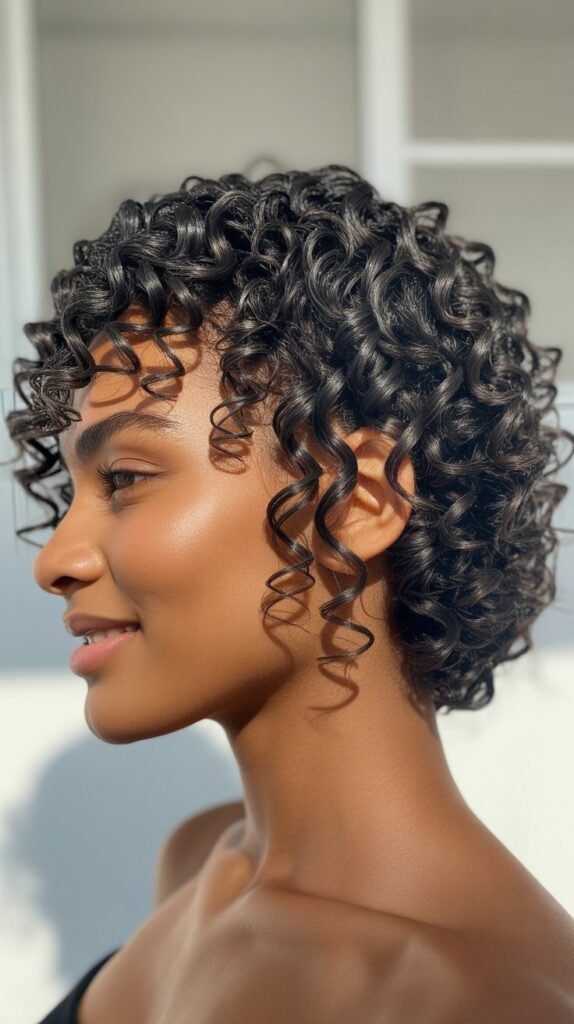
23. Straw Set Curls
A straw set creates uniform, springy curls by wrapping sections of hair around plastic drinking straws and allowing them to dry completely.
This vintage technique works wonderfully on short 3C 4A hair, producing tight, defined spirals with impressive longevity.
Setting the Straws:
- Work with damp, product-laden hair and section it into small parts about the width of a straw.
- Place a straw horizontally at the ends of a section and wrap the hair around it, rolling the straw upward toward your scalp.
- Secure each straw with a bobby pin or by bending the straw ends to hold it in place without tension on your scalp.
- Cover your entire head with straws, ensuring each section is evenly saturated with setting product for consistent results.
Drying and Styling:
- Allow your straw set to dry completely overnight or sit under a hooded dryer for 45-60 minutes for faster results.
- Remove the straws carefully by unwrapping in the opposite direction you rolled them, working gently to preserve the curl formation.
- Separate each curl into 2-3 sections to create volume while maintaining the tight spiral pattern throughout your hair.
- Seal with a light oil or shine spray to reduce frizz and add a glossy, finished appearance to your curls.
24. Half Up Half Down Style
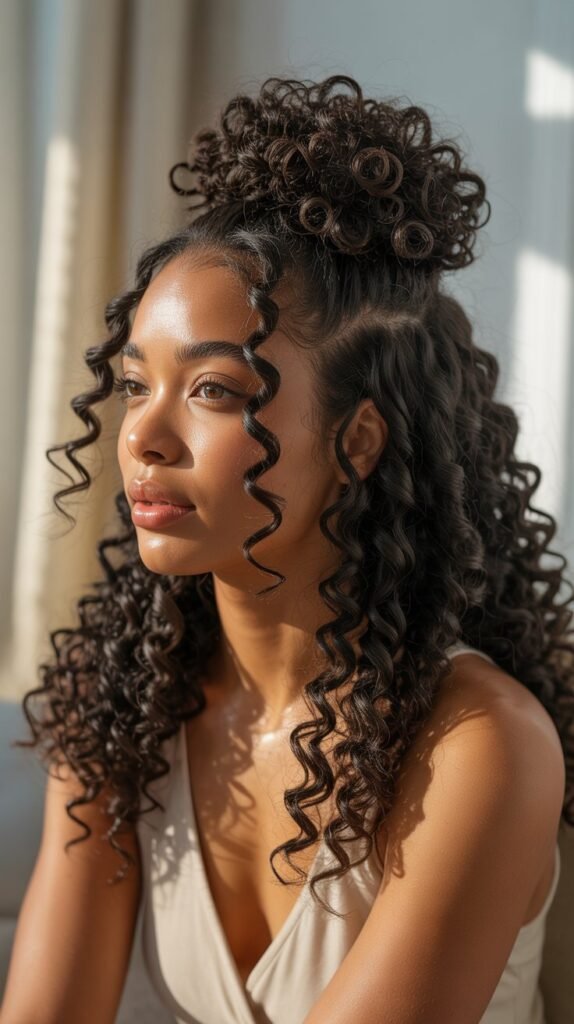
The half up half down style offers the perfect balance between showcasing your face and displaying the full beauty of your 3C 4A texture.
This versatile look works for virtually any occasion while keeping hair manageable and off your face.
Creating the Division:
- Section your hair horizontally from ear to ear, creating a clear division between the top and bottom portions.
- Gather the top section and secure it with a hair tie, scrunchie, or decorative clip at the crown of your head.
- Allow the secured section to fan out naturally, creating a puff or bun depending on your hair length and desired aesthetic.
- Define the bottom section with curl cream and fluffing to ensure it looks intentional and polished rather than neglected.
Styling Variations:
- Twist or braid the top section before securing it for added texture and visual interest in your half-up portion.
- Position the top section at different heights—high for a playful look or lower for a more sophisticated appearance.
- Create multiple smaller puffs in the top section instead of one large gathering for a unique, eye-catching variation.
- Add decorative elements like flowers, jeweled pins, or colorful scrunchies to the secured section for personality and flair.
25. Pin Curl Set
Pin curls create beautifully defined, vintage-inspired waves by wrapping sections of hair into flat coils against your scalp and securing them until dry.
This classic technique adapts wonderfully to short 3C 4A hair, offering a romantic, retro aesthetic.
Creating Pin Curls:
- Work with damp hair that has been treated with a strong-hold setting lotion or mousse for maximum definition and longevity.
- Take small sections about 1-2 inches wide and wrap them around your finger to form a flat coil.
- Pin each coil flat against your scalp using two bobby pins crossed in an X pattern for secure hold.
- Create pin curls in a uniform direction for smooth waves or alternate directions for a more textured, varied result.
Setting and Styling:
- Cover your pin curls with a silk or satin scarf and allow them to dry completely, preferably overnight or under a hooded dryer.
- Remove pins carefully once fully dry, gently releasing each curl without pulling or disrupting the formation.
- Brush through the curls lightly with a wide-toothed comb or paddle brush to create smooth, flowing waves rather than separated ringlets.
- Set the style with a light-hold hairspray and smooth down any flyaways with edge control or pomade for a polished finish.
26. Accessorized Afro

An accessorized afro transforms your natural 3C 4A texture into a statement-making style by incorporating bold accessories that complement and enhance your hair’s volume.
This approach allows endless creativity and personalization.
Accessory Options:
- Add a wide fabric headband in vibrant colors or bold patterns that sits across your forehead or further back on your crown.
- Insert decorative hair picks featuring Afrocentric designs, symbols, or meaningful imagery that represents your heritage and identity.
- Wrap a colorful scarf around your hairline, tying it in a bow or knot at the top or side for a playful touch.
- Pin fresh or silk flowers throughout your afro for romantic occasions like weddings, photoshoots, or garden parties.
Strategic Placement:
- Position accessories asymmetrically for a modern, fashion-forward look rather than perfectly centered placement.
- Layer multiple accessories of different types—combining a headband with hair jewelry or flowers for maximum impact.
- Match your accessories to your outfit colors or go for contrasting hues that make your hair the focal point.
- Consider the occasion when choosing accessories, opting for subtle pieces for professional settings and bold statements for social events.
27. Sponge Curl Technique

The sponge curl technique uses a specialized hair sponge with holes or grooves to create uniform, defined coils quickly and easily on short 3C 4A hair.
This method has gained popularity for its simplicity and the textured, modern look it produces.
Application Method:
- Start with damp hair that has been moisturized with a leave-in conditioner and curl-enhancing cream for pliability.
- Take your curl sponge and place it against your head, moving it in circular motions consistently in one direction.
- Apply moderate pressure while maintaining the circular movement, allowing your hair to catch in the sponge’s grooves and form coils.
- Work systematically around your entire head, ensuring all sections receive the same circular motion and pressure for uniformity.
Achieving Defined Results:
- Use the sponge on hair that’s between 0.5 to 2 inches long for optimal coil formation and tool effectiveness.
- Move the sponge in consistent clockwise or counterclockwise circles throughout your entire head rather than alternating directions randomly.
- Apply additional product to sections that aren’t coiling properly rather than over-working them with the sponge.
- Allow your hair to air dry completely after sponging, or use a diffuser on low heat to set the coils without causing frizz.
Maintenance Tips:
- Refresh your sponge curls daily or every other day by moisturizing and re-sponging only the sections that have lost definition.
- Sleep with a satin bonnet to preserve the coil formation and prevent the style from becoming matted overnight.
- Avoid touching your hair throughout the day as this disrupts the uniform coil pattern and introduces frizz.
- Deep condition weekly to maintain hair health since the sponge technique can be somewhat manipulative on your strands.
Styling Tips for 3C 4A Hair Success
Understanding your specific hair needs ensures every style you create looks its best and maintains your hair’s health. These universal tips apply across all the hairstyles featured in 27 Top 3C 4A Hairstyles for Short Hair You’ll Love.
Moisture is Essential:
- 3C 4A hair requires consistent hydration since the curl pattern prevents natural oils from traveling down the hair shaft efficiently.
- Use water-based leave-in conditioners daily or every other day to maintain proper moisture levels in your strands.
- Seal in moisture with oils like coconut, olive, or jojoba oil immediately after applying water-based products for maximum retention.
- Deep condition at least once weekly with a moisturizing treatment containing ingredients like shea butter, coconut oil, or avocado oil.
Protect Your Hair:
- Always sleep on satin or silk pillowcases, or wear a satin bonnet to reduce friction that causes breakage and frizz overnight.
- Avoid excessive heat styling which can damage your curl pattern and cause permanent texture changes over time.
- Limit manipulation by choosing styles that last multiple days rather than restyling your hair daily.
- Trim your ends every 8-12 weeks to remove split ends and maintain healthy hair growth.
Product Selection Matters:
- Choose products specifically formulated for coily hair textures that provide moisture without heavy buildup or greasiness.
- Avoid products containing drying alcohols (like isopropyl or ethanol) that strip moisture from your hair.
- Layer products from lightest to heaviest consistency: leave-in conditioner, curl cream, then gel for optimal definition and hold.
- Experiment with different brands and formulations to find what works uniquely for your hair’s porosity, density, and styling needs.
Conclusion
The journey through these 27 Top 3C 4A Hairstyles for Short Hair You’ll Love demonstrates the incredible versatility and beauty inherent in your natural texture.
From protective styles like passion twists and two-strand twists that promote healthy growth, to defined looks like finger coils and wash-and-gos that celebrate your curl pattern, every option offers unique benefits tailored to different lifestyles and preferences.
Short 3C 4A hair provides a canvas for creativity, whether you’re drawn to the bold statement of a curly mohawk, the elegant sophistication of a braided crown, or the effortless charm of mini afro puffs.
Each style showcased in this guide respects your hair’s natural characteristics while offering practical solutions for daily wear, special occasions, and everything in between.
Remember that healthy hair forms the foundation of every beautiful style, so maintaining consistent moisture, protecting your strands at night, and using appropriate products will ensure your hair thrives regardless of which look you choose.
Embrace experimentation and don’t hesitate to adapt these styles to reflect your personality, combining elements or adding your own creative touches through accessories, color, or unique part placements.
Your 3C 4A texture is a gift that deserves celebration, and with these styling options at your fingertips, you’re equipped to showcase its beauty confidently every single day.
The world of short natural hairstyles is vast and exciting, so explore these looks, find your favorites, and most importantly, enjoy the empowering journey of loving and styling your beautiful, natural hair.