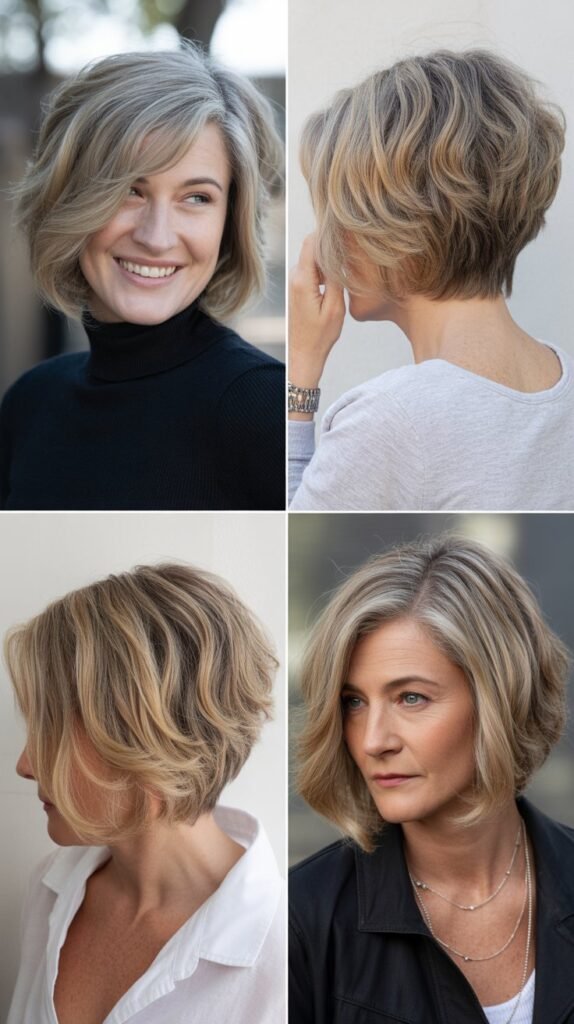
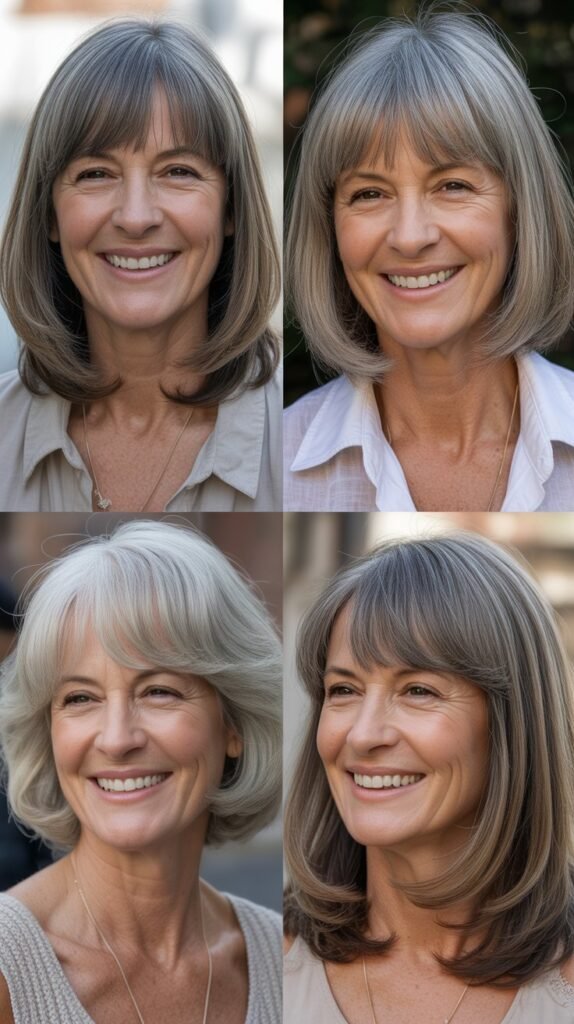
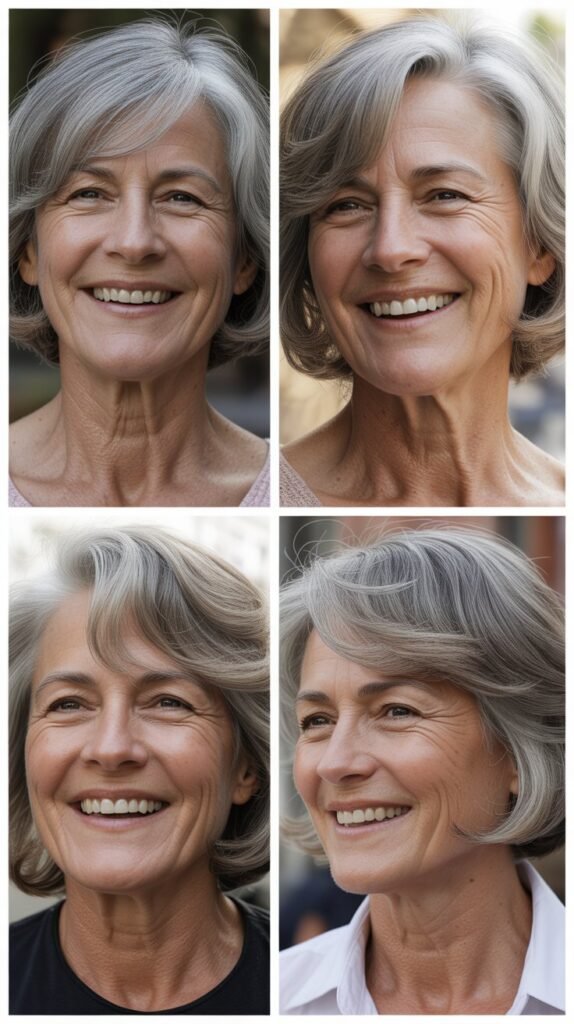
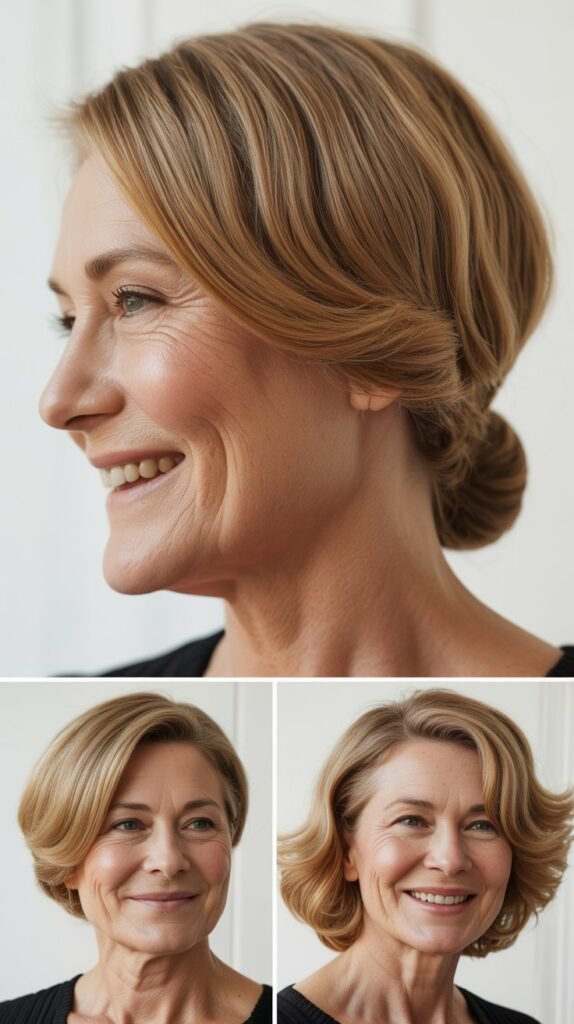
Finding the perfect hairstyle after 60 doesn’t mean compromising on style or sophistication.
If you have fine, medium-length straight hair, you’re actually working with one of the most versatile textures that can be transformed into elegant, modern looks that enhance your natural beauty.
The title “32 Sleek Hairstyles for Women Over 60 with Fine Medium-Length Straight Hair” represents a comprehensive collection of styles specifically designed to address the unique characteristics of aging hair while maintaining a polished, contemporary appearance.
Fine straight hair at this length offers countless possibilities for sleek, manageable styles that add volume, movement, and dimension without requiring hours of maintenance.
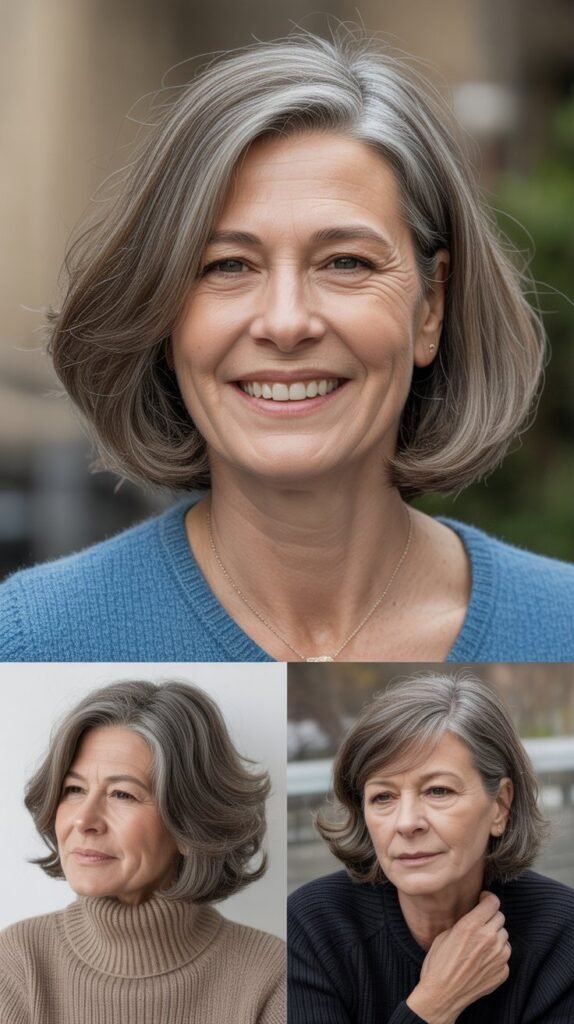
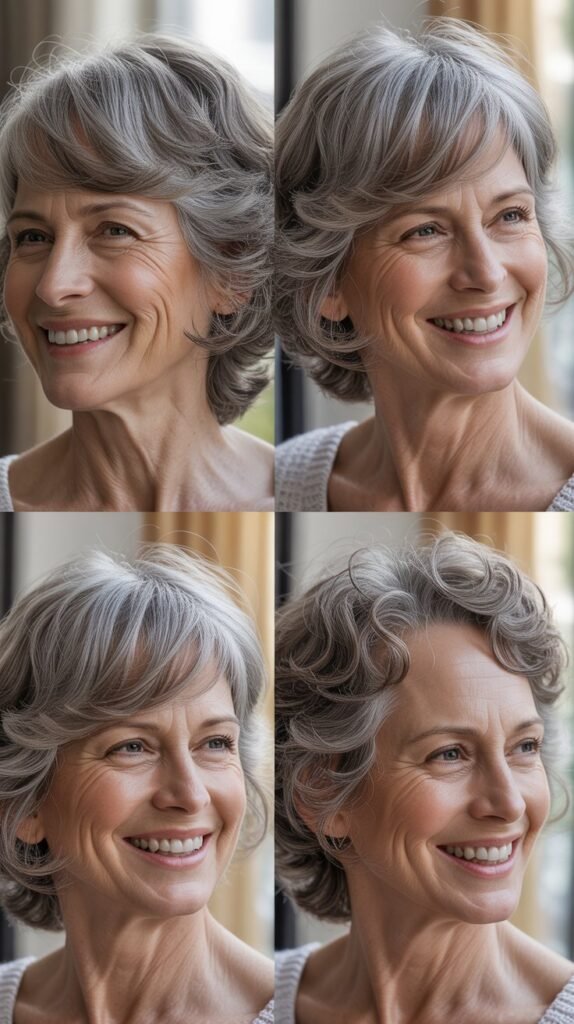
This article explores dozens of sophisticated cuts, styling techniques, and finishing touches that celebrate your hair’s natural texture while addressing common concerns like thinning, lack of volume, and changing hair quality.
Whether you prefer classic elegance or modern edge, these hairstyles will inspire you to embrace your hair with confidence and discover looks that make you feel absolutely stunning.
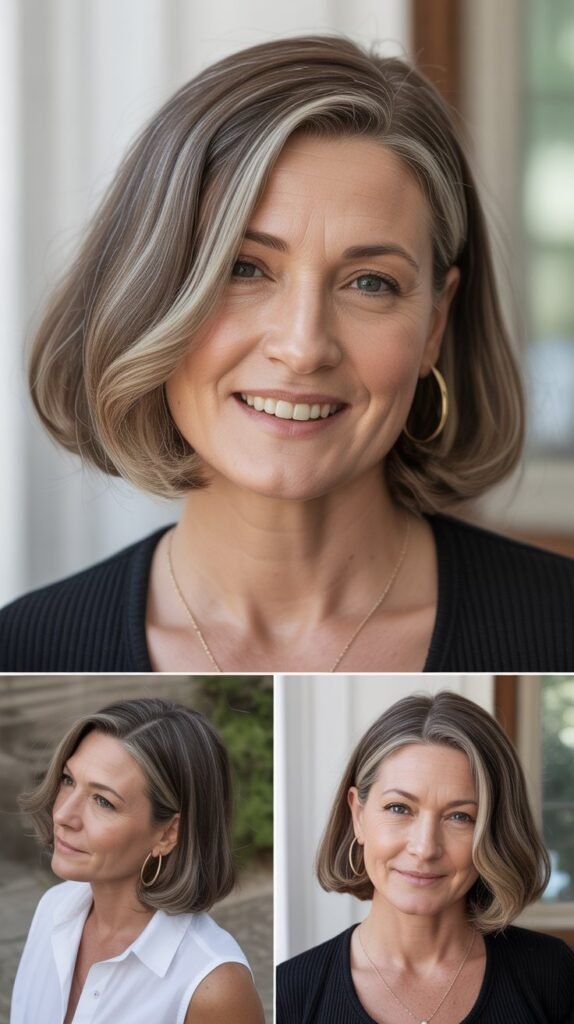
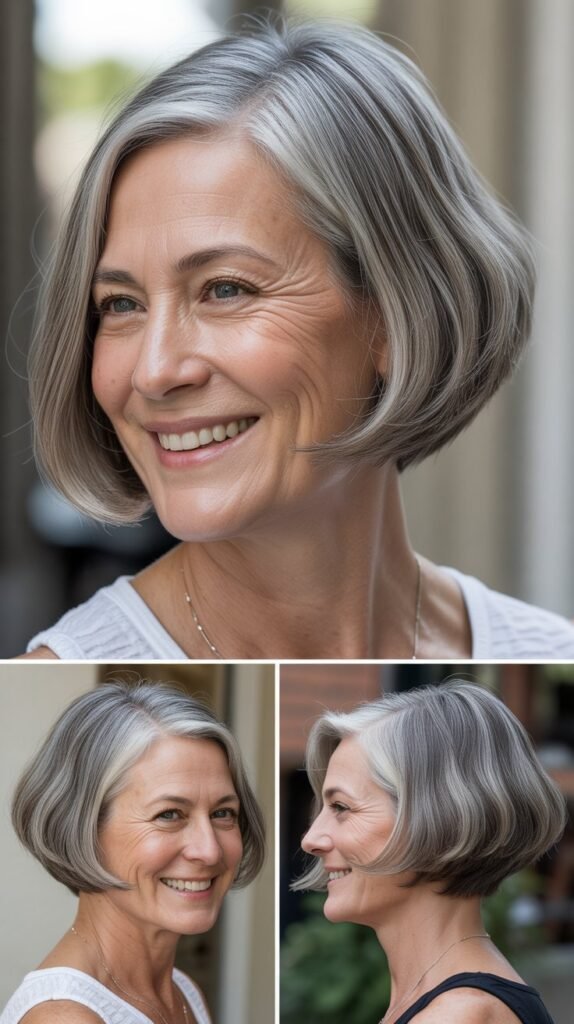
1. Classic Blunt Bob with Face-Framing Layers

The blunt bob remains timeless because it creates the illusion of density and thickness that fine hair desperately needs.
By cutting the ends in a straight, uniform line, this style makes hair appear fuller and healthier while maintaining a sophisticated, polished appearance.
Key Features
- Blunt cutting technique: Creates maximum density at the perimeter by removing any wispy, thin ends that make fine hair look sparse
- Strategic length: Falls between chin and shoulders to provide enough weight for sleekness without overwhelming delicate facial features
- Face-framing layers: Softens the severity of the blunt cut while directing attention to your best features
- Minimal styling requirement: Requires only a round brush blow-dry or simple flat iron pass for a polished finish
Styling Tips
- Use a volumizing mousse at the roots before blow-drying to create lift and body
- Direct the hairdryer downward along the hair shaft to seal the cuticle and enhance shine
- Finish with a lightweight serum on the ends only to prevent the blunt line from appearing dry
- Consider a root lift spray for added height at the crown area
2. Side-Swept Asymmetrical Lob
The asymmetrical long bob (lob) introduces visual interest through uneven lengths while maintaining the sleek sophistication that fine straight hair showcases beautifully.
This modern cut breaks away from symmetry to create a dynamic, fashion-forward appearance.
Design Elements
- Graduated lengths: One side falls slightly longer than the other, typically with a 1-2 inch difference creating subtle drama
- Diagonal cutting line: The asymmetry follows a diagonal path from shorter to longer, creating movement and flow
- Side part emphasis: Maximizes the asymmetrical effect while adding volume to the longer side
- Sleek finish: The straight texture highlights the architectural quality of the cut
Who Should Choose This Style
- Women seeking a youthful, contemporary edge without going too dramatic
- Those with oval or heart-shaped faces that can support asymmetrical lines
- Anyone wanting to minimize the appearance of a prominent jaw or balance facial proportions
- Individuals comfortable with regular maintenance to preserve the specific length differential
Styling Process
- Apply a heat protectant spray throughout damp hair to prevent damage
- Create a deep side part on the shorter side to maximize volume
- Blow-dry with a paddle brush, pulling hair taut for maximum sleekness
- Use a flat iron at medium-high temperature for a glass-like finish
- Apply a shine spray for a glossy, polished result
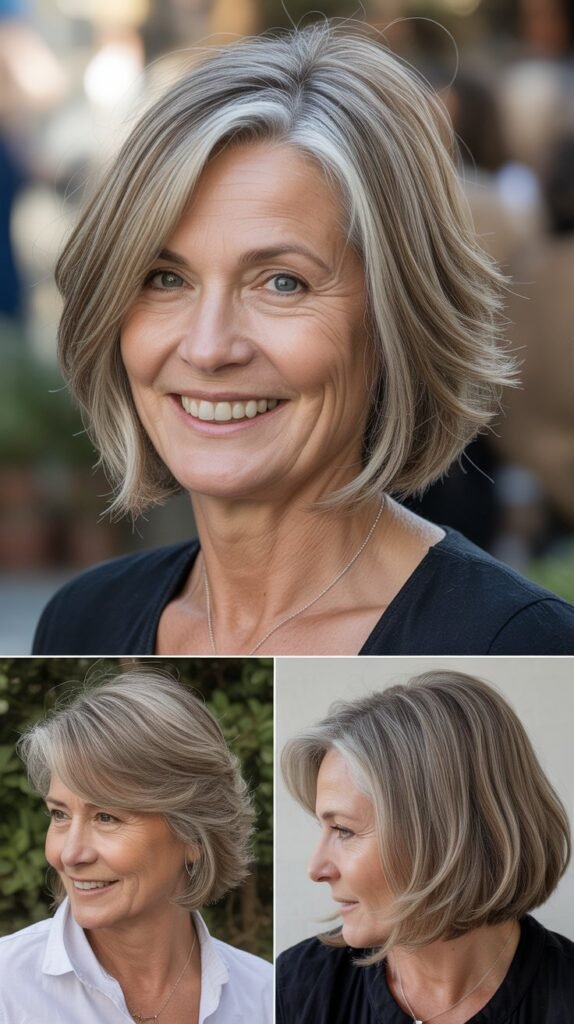
3. Sleek Center-Parted Shoulder-Length Cut
The center part creates perfect symmetry and opens up the face, making it an ideal choice for women with balanced facial features.
Combined with shoulder-length straight hair, this classic style exudes sophistication and timeless elegance.
Benefits for Fine Hair
- Even weight distribution: The center part distributes hair equally on both sides, preventing the flat appearance that can occur with side parts
- Face-framing symmetry: Creates a balanced frame that draws attention to your eyes and cheekbones
- Volume opportunity: Allows for root lifting products on both sides rather than concentrating on one area
- Versatile styling: Can easily transition from day to evening with simple adjustments
Creating the Perfect Center Part
- Use the tip of a rattail comb to create a precise line from the hairline to the crown
- Ensure the part is perfectly straight by using your nose as a guide for alignment
- Apply volumizing powder directly at the part line for lift
- Blow-dry sections away from the face on each side to create natural movement
- Set the part with a light-hold hairspray to prevent shifting throughout the day
Ideal Face Shapes
- Oval: The universally flattering shape works beautifully with center parts
- Round: Creates the illusion of length by dividing the face vertically
- Heart-shaped: Balances a wider forehead by drawing the eye downward
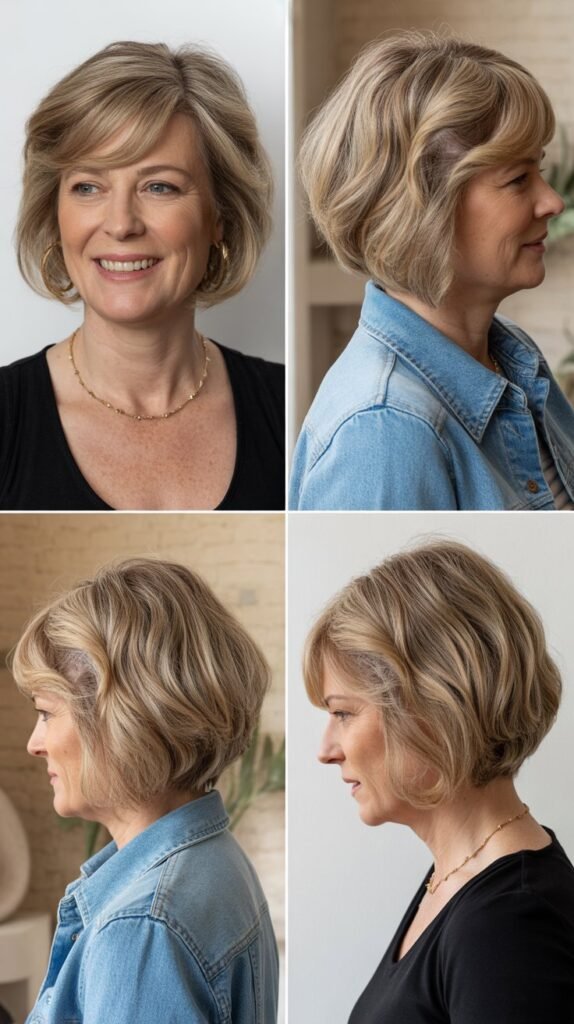
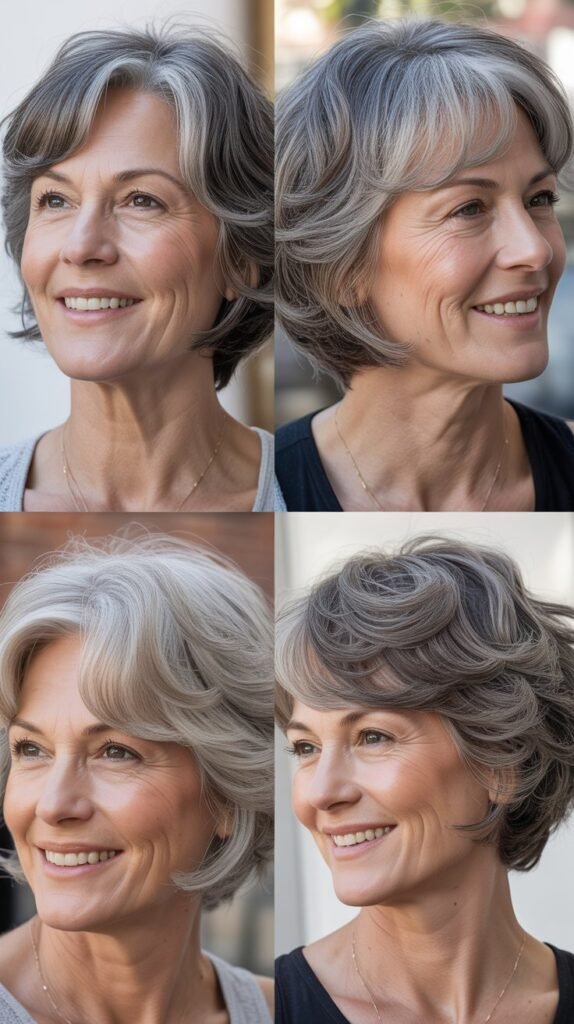
4. Layered Shag with Feathered Ends

The modern shag brings 70s-inspired cool into contemporary styling with choppy layers and textured ends that add life to fine straight hair.
This effortlessly chic style creates the illusion of volume through strategic layering techniques.
Layer Placement Strategy
- Crown layers: Start at the top of the head to create maximum lift and height where thinning is most noticeable
- Mid-length graduation: Continues the layering through the mid-sections for movement and dimension
- Feathered ends: Razor-cut or point-cut to create soft, wispy ends that prevent the blunt heaviness fine hair can’t support
- Face-framing pieces: Shorter sections around the face add youthful softness and draw attention to your features
Styling Techniques
- Apply a volumizing mousse to damp hair, concentrating at the roots
- Rough-dry hair with your fingers rather than a brush to enhance the piece-y texture
- Use a medium-barrel curling iron or wand to add slight bends in random sections
- Finish by scrunching a texturizing spray throughout for enhanced definition
- Use your fingers to separate and tousle the layers for a lived-in, effortless appearance
Color Considerations
- Highlights: Add dimension and make layers more visible, creating the illusion of depth
- Lowlights: Provide contrast that emphasizes the textured, feathered ends
- Balayage: Hand-painted color follows the natural fall of layers for a sun-kissed effect
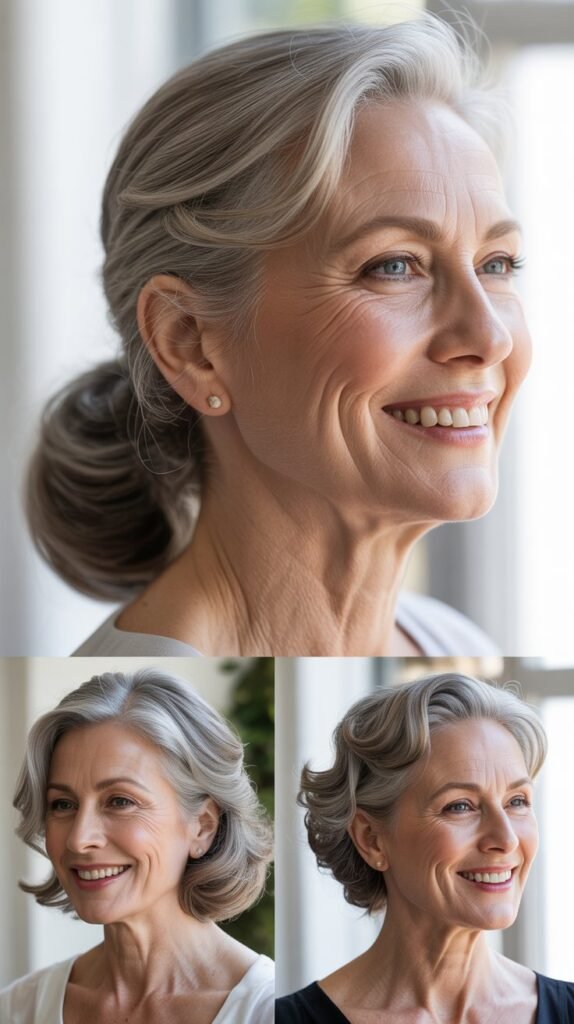
5. Sleek Low Ponytail with Face-Framing Strands
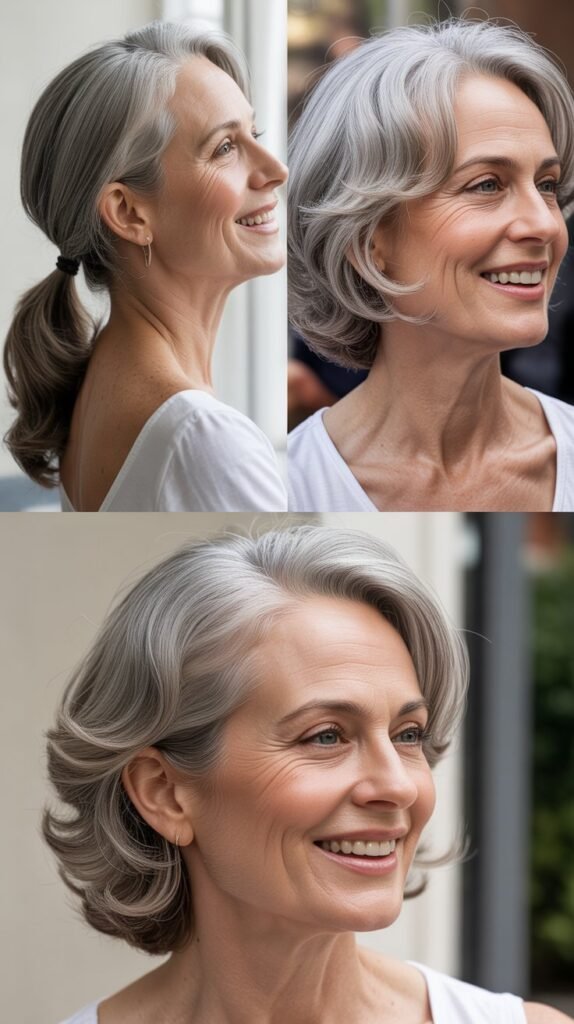
The sophisticated low ponytail offers a pulled-together look that’s perfect for both casual and formal occasions.
Leaving face-framing pieces softens the style and prevents the severe appearance that can age mature faces.
Creating the Perfect Sleek Ponytail
- Preparation: Start with freshly washed, blow-dried straight hair for maximum smoothness
- Product application: Apply a smoothing serum from mid-length to ends, avoiding roots to prevent greasiness
- Brushing technique: Use a boar bristle brush to smooth hair back, eliminating any bumps or flyaways
- Elastic selection: Choose a hair-friendly elastic in a color matching your hair to minimize damage and visibility
- Face-framing release: Pull out 1-2 inch sections on each side before securing the ponytail
Elevation and Positioning
- Position the ponytail at the nape of the neck, slightly off-center for modern appeal
- Ensure the height is comfortable and doesn’t create tension on the scalp
- Wrap a small section of hair around the elastic to conceal it and create polish
- Secure the wrapped section with a bobby pin hidden underneath
Variations to Try
- Add a slight bend to the face-framing pieces with a curling iron for softness
- Incorporate a decorative hair tie or barrette for special occasions
- Create a slight bump at the crown before smoothing back for added height
- Use a light-hold hairspray to tame flyaways without creating stiffness
6. Textured Pixie-to-Lob Transition
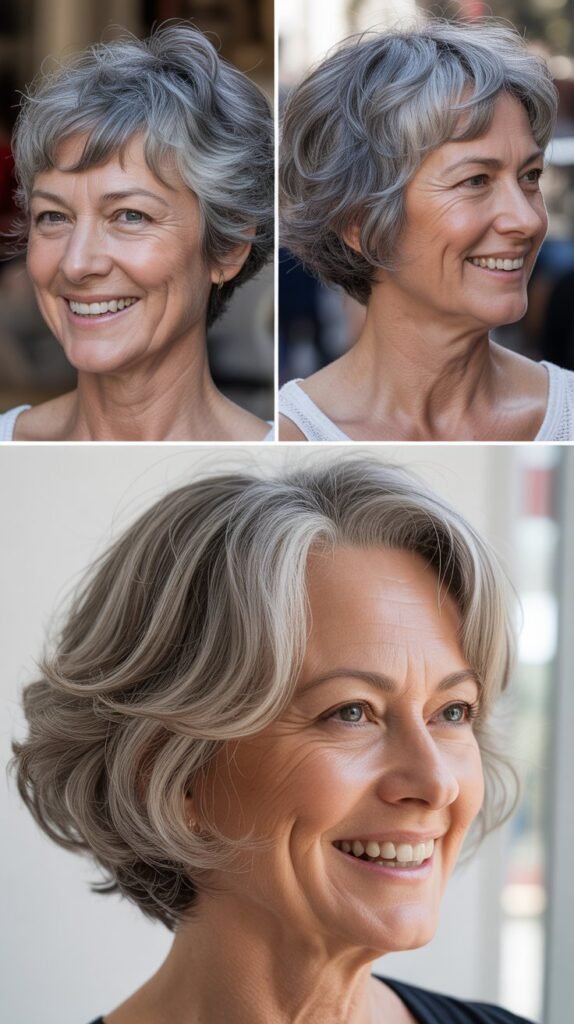
For women growing out a pixie cut, this transitional style embraces the awkward in-between length with intentional texturing and strategic styling.
The result is a modern, edgy look that celebrates the journey from short to medium length.
Managing the Transition
- Patience is essential: The grow-out phase takes approximately 8-12 months to reach true lob length
- Regular shaping: Visit your stylist every 6-8 weeks to maintain a styled appearance rather than an unkempt grow-out
- Embrace texture: Add layers and texture to prevent the mullet effect during awkward stages
- Accessorize strategically: Use headbands, clips, and scarves to manage difficult lengths
Styling for Each Growth Stage
Products for Success
- Texturizing paste to define piece-y sections during shorter stages
- Strong-hold bobby pins in your hair color to secure shorter layers
- Smoothing cream to blend different lengths as hair grows
- Lightweight hairspray to hold styles without weighing down fine hair
7. Precision Cut with Micro-Fringe

The micro-fringe (baby bangs) paired with precision-cut medium-length hair creates a bold, fashion-forward statement.
This daring style works surprisingly well for mature women who want to project confidence and contemporary awareness.
Micro-Fringe Specifications
- Length: Typically falls 1-2 inches above the eyebrows, creating dramatic eye emphasis
- Density: Should be relatively thin to avoid overwhelming fine hair’s natural texture
- Width: Extends from temple to temple without going too wide beyond the outer corners of eyes
- Cutting technique: Blunt-cut with slight point-cutting at the edges for softness
Is This Style Right for You?
- Best suited for women with strong, defined facial features that can handle bold styling
- Requires confidence and commitment to maintain the specific length
- Works exceptionally well with oval and heart-shaped faces
- May not suit those with high foreheads who prefer coverage rather than exposure
Maintenance Requirements
- Trim micro-fringe every 2-3 weeks to maintain the precise length
- Style daily with a small round brush and blow-dryer for a polished appearance
- Use a small amount of pomade or wax to create separation and definition
- Consider dry shampoo between washes as bangs can become oily quickly
8. Sleek Middle Part with Tucked-Behind-Ears Styling
This minimalist approach celebrates the natural elegance of straight fine hair by keeping it simple and sophisticated.
Tucking hair behind the ears creates an open, fresh face while maintaining a polished overall appearance.
Creating the Look
- Part perfection: Create a razor-sharp center part using a rattail comb for precision
- Root volume: Apply volumizing powder or spray at the roots along the part line
- Smoothing: Use a flat iron to create sleek, glass-like smoothness from roots to ends
- Tucking technique: Smooth hair behind ears, securing if necessary with small clear bobby pins
- Shine finish: Apply a lightweight shine serum to the lengths for a healthy glow
When to Wear This Style
- Professional settings where polished appearance is essential
- Hot weather when you want hair off your face and neck
- Showcasing statement earrings that might be hidden by loose hair
- Days when you want a fresh, youthful, open facial appearance
Keeping Hair in Place
- Use a small amount of hairspray on the sections before tucking behind ears
- Consider clear mini bobby pins placed vertically behind the ear for invisible security
- Apply anti-frizz cream to prevent wispy pieces from escaping
- Touch up throughout the day by re-smoothing and re-tucking as needed
9. Graduated Bob with Stacked Back
The graduated bob features shorter layers in the back that stack upon each other, creating height and volume in the crown area.
This architecturally interesting cut adds dimension that fine hair often lacks naturally.
Structural Components
- Back graduation: Hair progressively gets shorter from the front to the back, with the shortest point at the nape
- Stacking technique: Layers are cut at precise angles that sit on top of each other like shingles
- Front length: Falls anywhere from chin to shoulder, maintaining weight and sleekness
- Crown volume: The stacked back naturally creates lift at the crown without styling effort
Advantages for Fine Hair
- Built-in volume eliminates the need for constant teasing or volumizing products
- The weight distribution prevents flat, limp appearance at the crown
- Shorter back reduces overall hair weight, allowing roots to lift naturally
- Easy to style with minimal effort due to the cut’s inherent structure
Styling Instructions
- Apply root-lifting spray to the crown area while hair is damp
- Blow-dry the back sections forward and up to enhance the stacked effect
- Use a round brush on front sections to create sleek, smooth ends
- Finish with a light mist of flexible-hold hairspray to maintain structure
- Refresh the style between washes with dry shampoo at the roots
10. Straight Hair with Deep Side Part and Volume Boost

The deep side part creates dramatic asymmetry and allows for significant volume on one side, making it ideal for fine hair that needs a lift.
This classic Hollywood glamour technique remains eternally chic.
Creating Maximum Volume
- Part placement: Position the part approximately 2-3 inches from the center, aligned with the arch of one eyebrow
- Root lifting: Apply volumizing mousse specifically at the roots on the heavier side
- Blow-dry direction: Direct hair up and away from the scalp while drying for maximum lift
- Teasing technique: Gently backcomb at the roots underneath the top layer for hidden volume
- Smoothing overlay: Smooth the top layer over the teased sections for a polished finish
Product Recommendations
- Volumizing root spray for initial lift during blow-drying
- Texturizing powder applied directly at the roots for added grip and height
- Flexible-hold hairspray to maintain volume without creating stiffness
- Shine serum on the lengths to contrast the textured roots with sleek ends
Troubleshooting Common Issues
- Part keeps shifting: Apply a small amount of pomade along the part line to hold it in place
- Volume falls flat: Use more texturizing powder and stronger-hold hairspray at roots
- One side too heavy: Trim the heavier side slightly shorter to balance the volume
- Style doesn’t last: Set the look with a cool shot from your blow-dryer before hairspray
11. Sleek Tucked Bob with Invisible Layers

This sophisticated style appears to be a simple one-length bob from the front, but hidden internal layers provide movement and prevent the bottom-heavy appearance that fine hair can’t support.
Internal Layer Placement
- Invisible cutting: Layers are cut into the interior of the hair without disrupting the perimeter length
- Weight removal: Strategic thinning reduces bulk without sacrificing the appearance of density
- Movement creation: Internal layers allow hair to swing and move rather than hanging limply
- Density illusion: The solid perimeter maintains the appearance of thick, healthy ends
Benefits of This Approach
- Maintains the classic bob silhouette while addressing fine hair challenges
- Reduces styling time as hair naturally falls into place due to proper weight distribution
- Prevents the “triangle” shape that can occur when fine hair has too much length without layers
- Creates body and movement without visible layering that can make fine hair look sparse
Consultation Tips
- Bring reference photos showing the specific type of movement you want
- Discuss your daily styling routine to ensure the cut matches your maintenance commitment
- Request a demonstration of how to recreate the sleek finish at home
- Ask about product recommendations specific to maintaining the style between salon visits
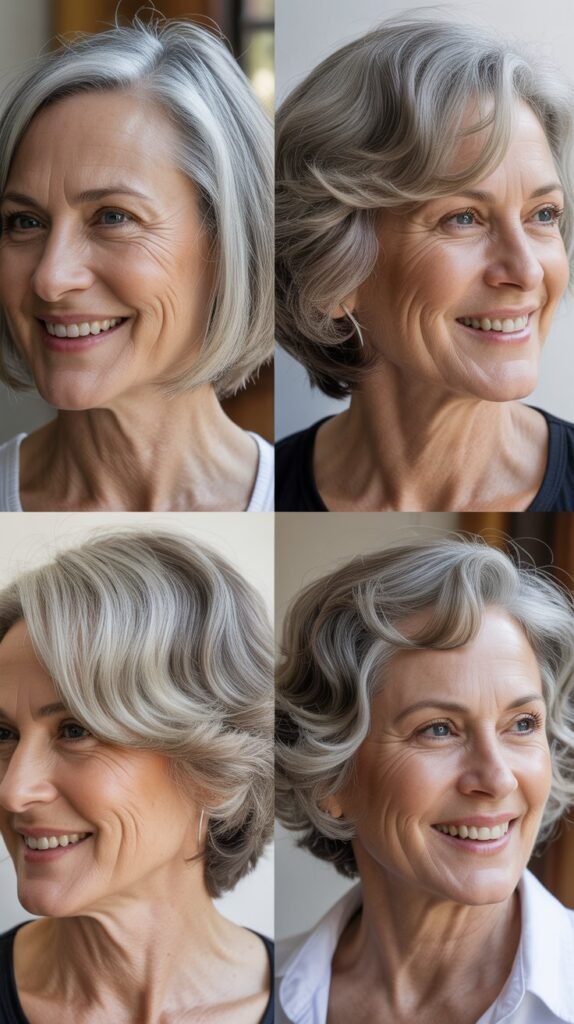
12. Middle-Length Straight Cut with Soft Wispy Ends
This approach softens the blunt bob by adding delicate, feathered texture to the ends through point-cutting or razor techniques.
The result is a feminine, approachable style that maintains sleekness with added softness.
Cutting Techniques for Wispy Ends
- Point cutting: Scissors are held vertically and pointed into the ends, creating soft, irregular texture
- Razor cutting: A razor blade removes weight and creates feathery, delicate ends
- Slide cutting: Scissors slide down the hair shaft, thinning and texturizing simultaneously
- Channeling: Vertical sections are carved out to create movement and reduce bulk
Styling for Maximum Softness
- Apply a lightweight leave-in conditioner to damp ends to enhance suppleness
- Blow-dry with a round brush, turning the ends under slightly for a polished finish
- Use a flat iron on low heat, gently bending the ends inward or outward for variation
- Finish with a small amount of smoothing oil on the ends only for separation and shine
- Avoid heavy products that will weigh down the delicate texture
Maintenance Considerations
- Trim every 6-8 weeks to maintain the wispy texture and prevent splitting
- Use a hydrating hair mask weekly to keep fine ends from becoming brittle
- Minimize heat styling to preserve the delicate texture of the ends
- Consider a protein treatment monthly to strengthen fine hair structure
13. Sleek One-Length Cut with Full Fringe

The combination of a one-length sleek cut with full, eye-grazing bangs creates a timeless, sophisticated look that’s been favored by style icons for decades.
This polished style works beautifully with fine straight hair.
Full Fringe Specifications
- Length: Typically grazes the eyebrows or sits just above them for a flattering finish
- Density: Should be full enough to create impact but not so heavy that it emphasizes thin hair
- Width: Extends from temple to temple, creating a strong horizontal line
- Texture: Can be blunt-cut for drama or slightly textured for softness
Fringe Styling Methods
- Blow-dry bangs with a small round brush, rolling them under for a smooth finish
- Use a flat iron on low heat to create sleek, straight bangs without bends
- Apply a tiny amount of smoothing serum to tame flyaways without greasiness
- Set with a light mist of hairspray, avoiding the roots to prevent greasiness
- Consider using velcro rollers while doing makeup to add slight lift and shape
Face Shape Compatibility
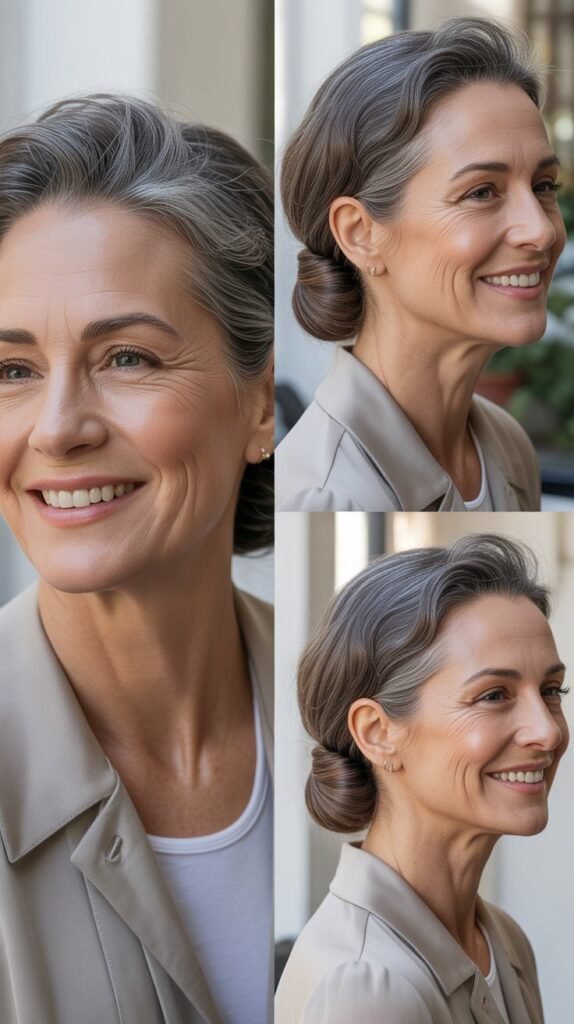
14. Sleek Low Bun with Smooth Finish
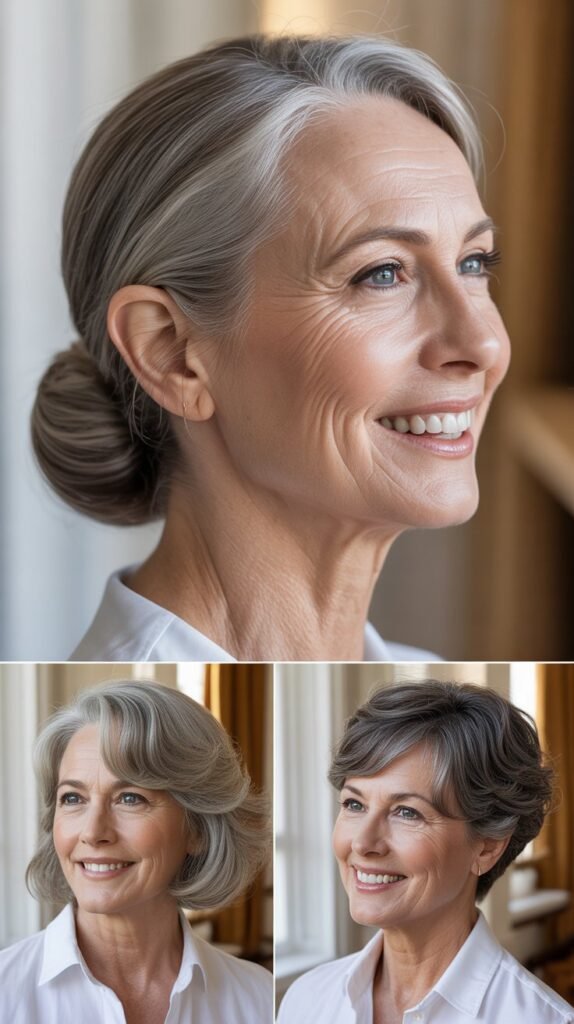
The classic low bun represents ultimate elegance and sophistication, perfect for special occasions or professional settings.
When executed with sleek precision on fine straight hair, it creates a timeless, refined appearance.
Creating the Perfect Sleek Bun
- Hair preparation: Start with clean, dry hair that’s been blow-dried smooth with a paddle brush
- Product application: Apply smoothing cream throughout, concentrating on areas prone to frizz
- Gathering technique: Use a boar bristle brush to smooth all hair back to the nape without bumps
- Securing method: Gather into a low ponytail with a color-matched elastic, ensuring tightness without discomfort
- Bun formation: Twist the ponytail and wrap it around the base, securing with bobby pins
Variations to Consider
- Classic ballet bun: Twisted tightly for a polished, formal appearance
- Loose, undone bun: Slightly messier for a more relaxed, contemporary feel
- Braided bun: Incorporate a braid into the ponytail before wrapping for added texture
- Side bun: Position at the nape but offset to one side for asymmetrical interest
Accessories to Enhance
- Decorative hairpins placed strategically for sparkle and visual interest
- Ribbon wrapped around the bun for a soft, feminine touch
- Pearl or jeweled bobby pins scattered throughout for subtle glamour
- Hair jewelry such as decorative combs inserted at the base of the bun
15. Straight Hair with Curtain Bangs
Curtain bangs part in the middle and frame the face on both sides, creating a soft, flattering look reminiscent of 1970s style icons.
This modern interpretation works beautifully with medium-length straight hair.
Curtain Bang Characteristics
- Center part: Bangs are divided down the middle, creating symmetry and balance
- Length graduation: Shortest at the center part, gradually lengthening as they extend outward
- Face-framing angle: Follow the natural curve of the face, typically ending at cheekbone level
- Texture: Can be smooth and sleek or slightly textured for a more casual appearance
Styling Your Curtain Bangs
- Apply a heat protectant spray to damp bangs before styling
- Use a small round brush to blow-dry bangs away from the face on each side
- Create a slight bend or curve outward using the round brush tension
- Finish with a flat iron if needed to perfect the smooth, curved shape
- Apply a tiny amount of styling wax to separate pieces and define the parted effect
Customizing for Your Face
- Round faces: Keep curtain bangs longer to create vertical lines
- Oval faces: Standard curtain bang length at cheekbones works perfectly
- Square faces: Add more texture and softness to counteract angular features
- Heart-shaped faces: Allow bangs to end at the widest part of the face for balance
16. Polished Sleek Half-Up Style
The half-up, half-down style offers the best of both worlds—face-framing openness at the top while maintaining length and coverage below.
This versatile style transitions seamlessly from day to evening.
Creating the Half-Up Look
- Section selection: Part hair horizontally from the top of one ear to the other, across the crown
- Volume creation: Gently backcomb the crown section before smoothing over for hidden lift
- Gathering method: Pull the top section back and secure at the crown or slightly below
- Securing options: Use a decorative clip, elastic covered with wrapped hair, or bobby pins
- Finishing touches: Ensure the bottom section is smooth and the transition is seamless
Securing Methods
- Classic clip: Use a barrette or claw clip for quick, secure styling
- Bobby pin cluster: Crisscross multiple pins for an invisible hold
- Wrapped elastic: Conceal the elastic by wrapping a small section of hair around it
- Twisted rope: Twist the gathered section before securing for added visual interest
Occasions for This Style
- Professional meetings where you want sophistication with approachability
- Daytime events requiring a polished but not overly formal appearance
- Transitional styling from work to evening social events
- Warm weather when you want hair off your face but not completely pulled back
17. Sleek Straight Cut with Diagonal Angles

Diagonal angles in the cutting line create dynamic visual interest and movement, transforming a simple straight cut into an architectural statement.
This contemporary approach adds edge to classic medium-length hair.
Understanding Diagonal Cutting
- Angle direction: Hair is cut on a diagonal plane rather than straight across, creating asymmetry
- Graduated lengths: One side typically sits slightly longer, with the cutting line traveling diagonally
- Face-framing impact: The angles naturally direct attention to facial features
- Movement creation: Diagonal lines create swing and motion as you move
Degrees of Angularity
- Subtle diagonal: Just 1-2 inches of difference for conservative styling
- Moderate diagonal: 2-3 inches of difference for noticeable but wearable asymmetry
- Dramatic diagonal: 3+ inches of difference for bold, fashion-forward statements
- Multi-angle cuts: Multiple diagonal sections at different angles for complex dimension
Styling to Emphasize Angles
- Use a flat iron to create perfectly straight hair that showcases the cutting lines
- Apply shine serum to enhance the sleek finish and make angles more visible
- Style with a deep side part to maximize the diagonal effect
- Consider tucking one side behind the ear to highlight the length difference
18. Precision Bob with Nape Undercut
The hidden undercut at the nape reduces bulk and creates a cooling effect while maintaining a conservative appearance from the front.
This modern technique is perfect for fine hair that needs weight removal.
Undercut Specifications
- Placement: Located at the nape of the neck, typically extending 2-4 inches up from the hairline
- Shape options: Can be straight across, triangular, or following the natural hairline curve
- Length variation: Can be buzzed very short or left at a longer tapered length
- Concealment: Completely hidden when hair is down, revealed when styled up or secured
Benefits for Fine Hair
- Removes weight at the heaviest point, allowing the rest of the hair to have more lift
- Creates a cooling effect at the neck, especially beneficial during hot weather
- Reduces drying time significantly by eliminating dense underlayers
- Adds an element of unexpected edge to an otherwise conservative style
Maintenance Requirements
- Trim the undercut every 3-4 weeks to maintain the clean lines
- Use clippers or scissors depending on desired length and effect
- Consider professional maintenance unless you’re comfortable with home clippers
- Apply sunscreen to exposed skin if the undercut is visible during summer months
19. Sleek Middle Part with Slight Inward Bend

This polished style combines the symmetry of a center part with a subtle inward curve at the ends, creating a sophisticated, controlled finish.
The gentle bend adds softness without sacrificing sleekness.
Creating the Inward Bend
- Heat tool selection: Use either a large round brush with a blow-dryer or a flat iron
- Round brush method: Roll ends under while applying heat and tension for a gradual curve
- Flat iron method: Rotate the flat iron inward as you reach the ends for a subtle bend
- Temperature control: Use medium heat to avoid damage while achieving the desired shape
- Cooling phase: Allow hair to cool completely while curved to set the shape
Styling Process Step-by-Step
- Start with clean, blow-dried straight hair with a precise center part
- Apply heat protectant throughout the lengths, focusing on ends
- Section hair into manageable 2-inch sections for even heat distribution
- Use your chosen method to create the inward bend on each section
- Allow each section to cool completely before moving to the next
- Finish with a light mist of flexible-hold hairspray for longevity
Achieving Symmetry
- Work methodically from one side to the other to ensure even bending
- Use a mirror system that allows you to see both sides simultaneously
- Measure the bend angle by eye, ensuring both sides curve equally
- If one side is tighter, re-straighten and re-curve with less rotation
20. Textured Lob with Piecey Definition
This modern approach to the long bob incorporates texture and separation, creating individual pieces that move independently.
The piecey effect adds dimension and interest to fine straight hair.
Creating Piecey Texture
- Product selection: Use texturizing paste, pomade, or dry texture spray for separation
- Application method: Apply to damp or dry hair, working through with fingers rather than a brush
- Separation technique: Pinch and twist small sections to create defined pieces
- Distribution: Concentrate on the ends and mid-lengths, avoiding roots to prevent greasiness
- Finish: Allow hair to air-dry or diffuse gently for natural, undone texture
Maintenance and Refresh
- Refresh the piecey texture on day two by applying dry texture spray and re-separating pieces with fingers
- Avoid brushing styled hair as this will eliminate the desired separation and texture
- Sleep with hair in a loose bun to maintain some texture overnight
- Use minimal product to prevent buildup that weighs down fine hair
21. Sleek Straight Hair with Side-Swept Volume

This glamorous style sweeps all hair to one side, creating dramatic asymmetry and old Hollywood elegance.
The concentrated volume on one side makes a sophisticated statement for special occasions.
Creating Side-Swept Drama
- Deep part creation: Create an extremely deep side part, positioning it almost at the ear
- Volume building: Apply volumizing mousse and root powder to the heavier side
- Blow-dry technique: Direct all hair to one side while drying, building volume at the roots
- Pin placement: Use bobby pins on the lighter side to secure hair behind the ear
- Finishing spray: Apply strong-hold hairspray to maintain the swept position
Securing the Style
- Place bobby pins in an X-pattern behind the ear for maximum hold
- Use pins that match your hair color for seamless blending
- Apply hairspray directly on the pins before securing for extra grip
- Consider using small jaw clips hidden under the surface layer for additional support
- Test the security by gently shaking your head before leaving home
Best Occasions
- Formal evening events and galas where dramatic styling is appropriate
- Special celebrations such as weddings, anniversaries, or milestone birthdays
- Professional photo shoots requiring elegant, polished styling
- Any occasion where you want to showcase statement earrings or necklaces
22. Blunt Cut with Soft Face-Framing Pieces
This style combines the density-creating benefits of a blunt cut with strategic face-framing sections that add softness and femininity.
The contrast between blunt ends and soft pieces creates beautiful dimension.
Face-Framing Section Placement
- Starting point: Begin the face-framing pieces at cheekbone level or slightly higher
- Angle trajectory: Cut these sections on a diagonal angle that follows the jawline
- Length variation: The face-framing pieces should be 1-2 inches shorter than the main length
- Blending technique: Softly connect the face-framing sections to the blunt perimeter without harsh lines
Styling the Face-Framing Pieces
- Use a small round brush to blow-dry these sections with a slight inward curve
- Apply a tiny amount of smoothing serum to eliminate frizz and add shine
- Consider using a flat iron to perfect the smooth, curved shape
- Allow these pieces to fall naturally forward rather than tucking them behind ears
- Refresh throughout the day with a quick pass of the flat iron if needed
Customizing for Your Features
- High cheekbones: Start pieces at cheekbone level to emphasize this feature
- Strong jawline: Angle pieces to graze the jaw and soften angular features
- Round face: Keep pieces slightly longer to create vertical lines and length
- Heart-shaped face: End pieces at the jaw to balance a narrower chin
23. Sleek Low Side Ponytail
The side ponytail offers asymmetrical elegance with a youthful, playful edge.
When styled sleek and polished, it transcends its casual origins to become sophisticated and age-appropriate.
Positioning the Side Ponytail
- Placement: Position at the nape on one side, approximately behind the ear
- Height consideration: Keep it low and close to the neck for sophistication
- Off-center appeal: The asymmetry creates visual interest and modern styling
- Securing method: Use a hair-friendly elastic followed by a wrapped hair section for polish
Achieving Maximum Sleekness
- Brush hair thoroughly with a boar bristle brush to eliminate any bumps or texture
- Apply smoothing cream throughout, concentrating on the top and sides
- Use a flat iron on the gathered ponytail itself to ensure sleek perfection
- Wrap a small section of hair around the elastic, securing the end with a pin underneath
- Apply shine spray to the entire style for a glossy, polished finish
Variations to Explore
- Add a slight bump at the crown before smoothing hair to the side for subtle volume
- Incorporate a small braid along the side before gathering into the ponytail
- Wrap the ponytail around a hair donut for a side bun variation
- Pull a few fine tendrils loose around the face for a softer, romantic effect
24. Precision-Cut Collarbone-Length Style
This specific length—ending exactly at the collarbone—creates a flattering line that elongates the neck while providing enough weight to keep fine hair looking full and healthy.
Why Collarbone Length Works
- Neck elongation: This length draws the eye vertically, making the neck appear longer and more graceful
- Weight balance: Provides enough weight to prevent flyaways while remaining manageable
- Versatile styling: Long enough to pull back but short enough to wear down comfortably
- Universally flattering: Works with virtually all face shapes and neck lengths
Precision Cutting Technique
- Measurement method: The stylist should measure carefully to ensure both sides hit the collarbone exactly
- Blunt finish: Cutting straight across maintains maximum density at the ends
- Dry cutting: For ultimate precision, the final trim should be done on dry, styled hair
- Regular maintenance: Requires trims every 6-8 weeks to maintain the specific length
Styling at Collarbone Length
- Use a large paddle brush while blow-drying to create sleek, smooth results
- Consider a slight inward bend at the ends to prevent them from flipping outward
- Apply smoothing oil to the ends to keep them healthy and polished-looking
- Style with a center or side part depending on your face shape and preference
- Use a flat iron for glass-like smoothness that showcases the precision cut
25. Soft A-Line Bob
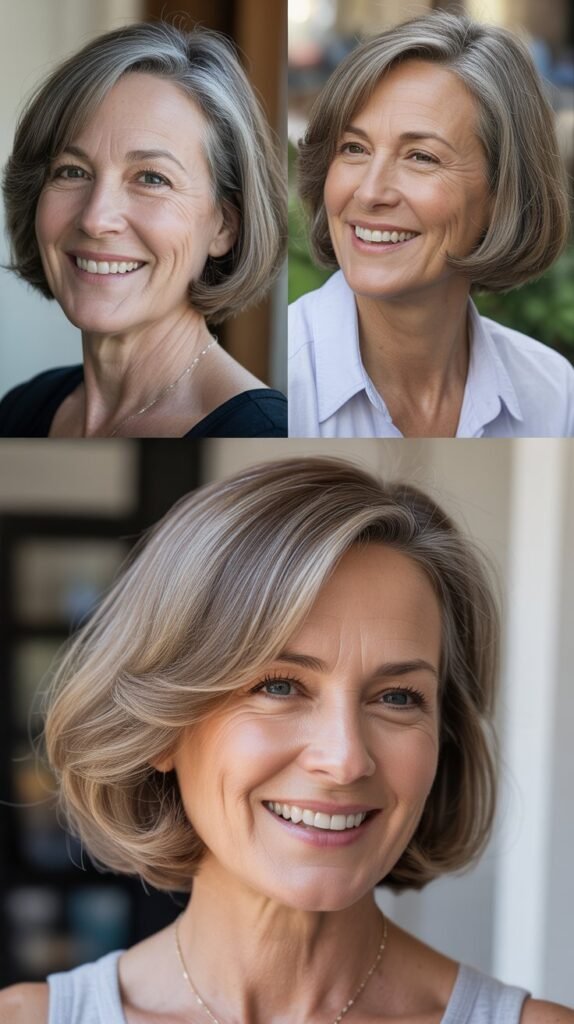
The A-line bob features hair that’s slightly longer in the front than in the back, creating a graceful forward angle that frames the face beautifully.
This classic cut adds dimension and movement to fine straight hair.
A-Line Angle Specifications
- Angle degree: The front can be anywhere from 1 to 4 inches longer than the back
- Gradual progression: The length increases gradually from back to front for smooth transition
- Front length: Typically falls between chin and collarbone for the most flattering effect
- Back length: Usually sits at or above the nape, creating lift and volume
Benefits of the A-Line
- Creates natural movement as the hair swings forward with motion
- Frames the face in a flattering, elongating manner
- Adds volume at the crown due to the shorter back sections
- Provides styling versatility—can be worn straight, slightly wavy, or tucked behind ears
- The angle creates visual interest without requiring additional styling effort
Maintenance and Upkeep
26. Sleek Straight Hair with Low Twist
This elegant style gathers hair into a low twisted section at the nape, creating a sophisticated alternative to the traditional bun or ponytail.
The twist adds texture while maintaining overall sleekness.
Creating the Low Twist
- Preparation: Brush hair smooth and gather at the nape into a low ponytail
- Division: Split the ponytail into two equal sections
- Twisting technique: Twist the two sections around each other, moving downward
- Securing method: Pin the twisted section against the head vertically using bobby pins
- Finishing touches: Tuck the ends under and secure, then apply hairspray for hold
Twist Variations
- Rope twist: Twist each section individually before twisting them together for more texture
- Loose twist: Create a relaxed, undone twist for a softer, romantic appearance
- Side twist: Position the twist off to one side rather than center for asymmetry
- Multiple twists: Create several smaller twists rather than one large twist for added dimension
Accessorizing the Twist
- Add decorative pins along the length of the twist for sparkle and visual interest
- Wrap a ribbon around the twist for a soft, feminine touch
- Place a decorative comb at the base where the twist begins
- Use jeweled bobby pins scattered throughout for subtle glamour
27. Precision Jaw-Length Bob

The jaw-length bob hits at the most flattering point of the face, emphasizing the jawline while providing enough length for styling versatility.
This classic length remains timelessly chic.
Jaw-Length Benefits
- Jawline definition: The precise length draws attention to and defines the jaw
- Face framing: Creates a perfect frame that highlights facial features
- Weight distribution: Provides enough weight to prevent flyaways while remaining light
- Styling options: Long enough to tuck behind ears or style forward over the face
Determining Your Jaw-Length
- Measure from the bottom of the earlobe to the corner of the jaw
- The hair should end precisely at this point when styled straight
- Consider your jaw shape—strong jaws may benefit from slightly longer lengths
- Account for any natural curl or wave that might shorten the apparent length
Styling Techniques
- Straight and sleek: Use a flat iron for a polished, professional appearance
- Slight inward curve: Add a subtle bend at the ends for softness
- Tucked behind ears: Show off earrings and create an open, fresh face
- Forward styling: Allow hair to frame the face fully for maximum softness
- Side part drama: Create volume on one side with a deep side part
28. Sleek Half-Up Twist

This style combines the openness of an updo with the coverage of wearing hair down.
A twisted section at the crown adds elegance while the remaining hair flows freely.
Creating the Half-Up Twist
- Section selection: Gather hair from temple to temple across the crown area
- Twist creation: Twist this section as you pull it back toward the crown
- Securing point: Pin the twist at the crown, allowing the ends to fall naturally
- Smoothing: Ensure the sides are smooth and sleek before twisting
- Volume addition: Gently pull at the twist to create width and dimension
Pin Placement Strategy
- Use bobby pins in an X-pattern for maximum security
- Place pins horizontally into the twist for invisible hold
- Choose pins that match your hair color exactly for seamless blending
- Use at least 4-6 pins to ensure the twist stays secure all day
- Apply hairspray to pins before inserting for extra grip
Occasions and Settings
- Professional environments where polish is important but formality isn’t required
- Daytime social events and luncheons
- Running errands when you want to look put-together but not overly styled
- Warm weather outings when you want hair off your face
- Transitional styling that works from day to evening
29. Blunt Midi-Length Cut with Concentrated Ends

This cut maintains all the hair at one uniform length, creating maximum density and thickness at the ends. The blunt finish makes fine hair appear fuller and healthier.
Midi-Length Specifications
- Length definition: Falls between the collarbone and the shoulders, typically mid-upper arm
- Blunt technique: All hair is cut to exactly the same length without graduation or layers
- End density: Creates the thickest possible perimeter by maintaining all hair length
- Weight line: The uniform length creates a strong, visible weight line at the bottom
Benefits for Fine Hair
- Concentrates all hair at the longest point, making ends appear thick and full
- Eliminates wispy, thin ends that can make fine hair look sparse
- Creates a strong, geometric shape that holds its form well
- Reduces styling time as the cut naturally falls into place
- Makes hair appear healthier and more substantial
Styling Considerations
- Use a large round brush while blow-drying to create slight movement at the ends
- Apply heat protectant before using hot tools to preserve the blunt line
- Finish with shine serum on the ends to emphasize the thick, healthy appearance
- Consider a slight inward bend to prevent ends from flipping outward
- Trim every 6-8 weeks religiously to maintain the precise blunt line
30. Sleek Straight Style with Low Side Chignon

The side chignon offers understated elegance positioned at the nape on one side.
This sophisticated updo works beautifully for special occasions while remaining appropriate for mature women.
Chignon Construction
- Side positioning: Gather hair to one side at the nape, behind and below the ear
- Twisting method: Twist the gathered hair into a rope or coil it around itself
- Pin placement: Secure the coiled section with bobby pins inserted from multiple angles
- Tucking ends: Hide all ends within the chignon structure for a polished finish
- Final securing: Use hairpins for decorative elements and additional hold
Achieving Smoothness
- Start with freshly washed and blow-dried straight hair for maximum sleekness
- Apply smoothing serum throughout before gathering to eliminate frizz
- Use a boar bristle brush to smooth hair to the side without bumps
- Apply strong-hold hairspray to the smoothed sections before coiling
- Set the finished chignon with a generous application of hairspray
Chignon Variations
- Low classic chignon: Positioned at center nape for traditional elegance
- Braided chignon: Incorporate a braid before coiling for added texture
- Twisted chignon: Create a rope twist before forming the coil
- Loose chignon: Allow some pieces to escape for a softer, romantic effect
31. Precision Cut with Textured Layers Throughout
This comprehensive layering approach adds dimension, movement, and body to fine straight hair by incorporating texture at multiple levels.
The precision cutting ensures a polished, intentional result.
Comprehensive Layer Placement
- Crown layers: Begin at the very top to create maximum lift and volume where needed most
- Mid-shaft layers: Continue layering through the middle sections for movement and body
- Face-framing layers: Add shorter pieces around the face for softness and dimension
- Perimeter texture: Maintain some weight at the bottom while adding subtle texture to ends
Texturizing Techniques
- Point cutting: Creates soft, irregular edges that add movement
- Slide cutting: Removes weight while maintaining length for a lighter feel
- Razor work: Adds feathery texture and softness to the ends
- Channel cutting: Removes interior bulk while maintaining perimeter density
Styling Layered Fine Hair
32. Sleek Straight Style with Modern Hair Accessories

This approach takes any sleek straight style and elevates it with contemporary hair accessories.
The right accessory can transform a simple style into a sophisticated statement.
Accessory Options
- Statement barrettes: Large, decorative clips that secure hair while adding visual interest
- Pearl pins: Scattered throughout for subtle elegance and refined glamour
- Velvet headbands: Wide bands that add color and texture while keeping hair in place
- Metallic clips: Modern geometric shapes in gold, silver, or rose gold finishes
- Jeweled combs: Decorative combs inserted at the sides or back for sparkle
Placement Strategies
- Side sweep with barrette: Pin hair to one side with a large decorative barrette at ear level
- Scattered pearl pins: Place 5-7 pearl pins throughout one side for delicate sparkle
- Headband enhancement: Push a padded headband back slightly from hairline for volume and style
- Half-up with comb: Secure half-up style with a decorative comb instead of elastic
- Low ponytail with wrap: Use a metallic hair cuff or wrap around a ponytail base
Choosing Age-Appropriate Accessories
- Select sophisticated materials like pearls, metals, and quality fabrics over plastic
- Choose refined designs rather than overly trendy or youthful styles
- Ensure accessories complement your overall aesthetic and wardrobe
- Consider the occasion—subtle for professional settings, statement-making for special events
- Match metal tones to your jewelry (gold, silver, rose gold) for cohesion
Maintaining Accessory Security
- Apply hairspray to the section where you’ll place clips before securing them
- Use bobby pins in addition to decorative clips for extra security if needed
- Choose accessories with proper grip mechanisms like combs or teeth
- Test the security before leaving home by gently shaking your head
- Bring backup pins or clips in your purse for quick fixes throughout the day
Conclusion
The versatility and elegance available to women over 60 with fine medium-length straight hair is truly remarkable.
“32 Sleek Hairstyles for Women Over 60 with Fine Medium-Length Straight Hair” demonstrates that age is no barrier to beautiful, contemporary styling that celebrates your natural texture while addressing the unique characteristics of mature hair.
From precision bobs that create the illusion of thickness to sophisticated updos perfect for special occasions, each style offers solutions to common concerns while maintaining an elegant, polished appearance.
The key to success lies in understanding your hair’s specific needs—regular trims to maintain shape, quality products that enhance rather than weigh down fine strands, and styling techniques that maximize volume and movement.
Remember that the right hairstyle should make you feel confident, comfortable, and authentically yourself.
Whether you prefer the classic elegance of a blunt cut, the modern edge of asymmetrical angles, or the versatility of layered styles, there’s a perfect option waiting for you.
Consult with a skilled stylist who understands mature hair, communicate your lifestyle and maintenance preferences clearly, and don’t be afraid to try something new.
Your hair is a beautiful expression of who you are, and with these 32 sleek hairstyles as inspiration, you’re equipped to find looks that enhance your natural beauty, complement your lifestyle, and make you feel absolutely radiant every single day.