Motherhood is a beautiful journey filled with countless responsibilities, endless to-do lists, and very little time for elaborate beauty routines.
Between packing lunches, managing school runs, attending playdates, and juggling work commitments, spending an hour styling your hair simply isn’t realistic.
But here’s the truth: being a busy mom doesn’t mean you have to sacrifice looking polished and put-together. The secret lies in mastering quick, practical hairstyles that take minutes to create yet look effortlessly chic throughout your hectic day.
In this comprehensive guide to 33 Cute and Easy Hairstyles for Moms Who Are Always on the Go, you’ll discover versatile styling options that work for every hair type, length, and texture.
From classic updos that keep hair off your face during playground adventures to trendy half-up styles perfect for school meetings, these hairstyles are specifically designed for the modern mom’s lifestyle.
You’ll learn step-by-step techniques, time-saving tips, and styling hacks that transform your morning routine from stressful to streamlined.
Whether you have five minutes before rushing out the door or can spare ten minutes for something slightly more polished, these hairstyles will become your go-to solutions for looking fabulous without the fuss.
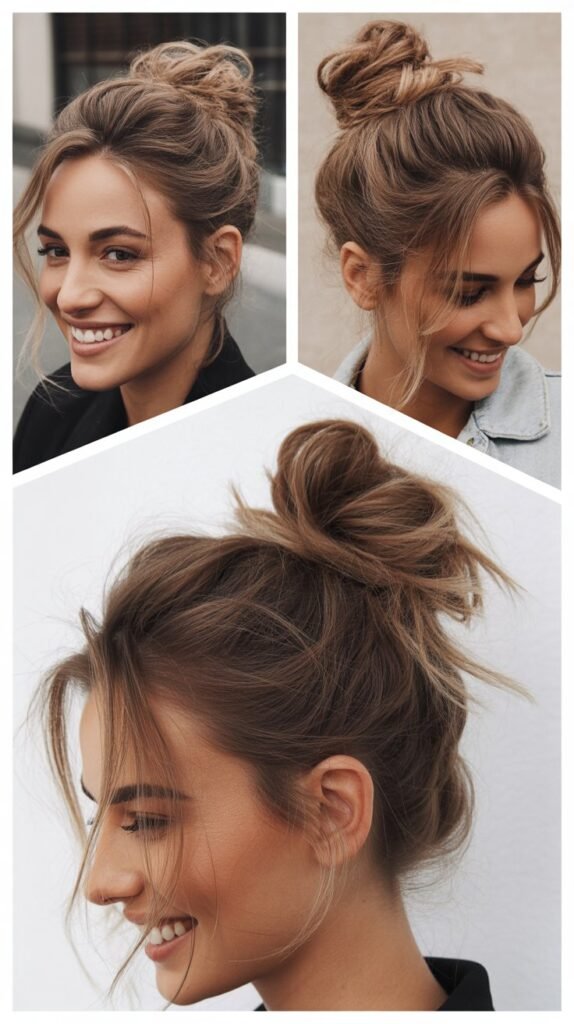
1. The Classic Messy Bun

The messy bun remains the ultimate lifesaver for busy moms everywhere, combining effortless style with maximum practicality in under two minutes.
This timeless look works beautifully for everything from grocery shopping to casual coffee dates, and the best part is that it actually looks better when it’s imperfect.
- Gather your hair into a high ponytail without worrying about bumps or flyaways, as these add to the relaxed charm.
- Twist the ponytail loosely around the base while holding the ends.
- Secure everything with a hair tie, allowing some pieces to fall naturally for that perfectly imperfect finish.
- Pull out a few face-framing strands to soften the look and add dimension.
- For extra volume, gently tug on sections of the bun to make it appear fuller and more textured.
- This style works exceptionally well on second or third-day hair when natural oils provide better grip and texture.
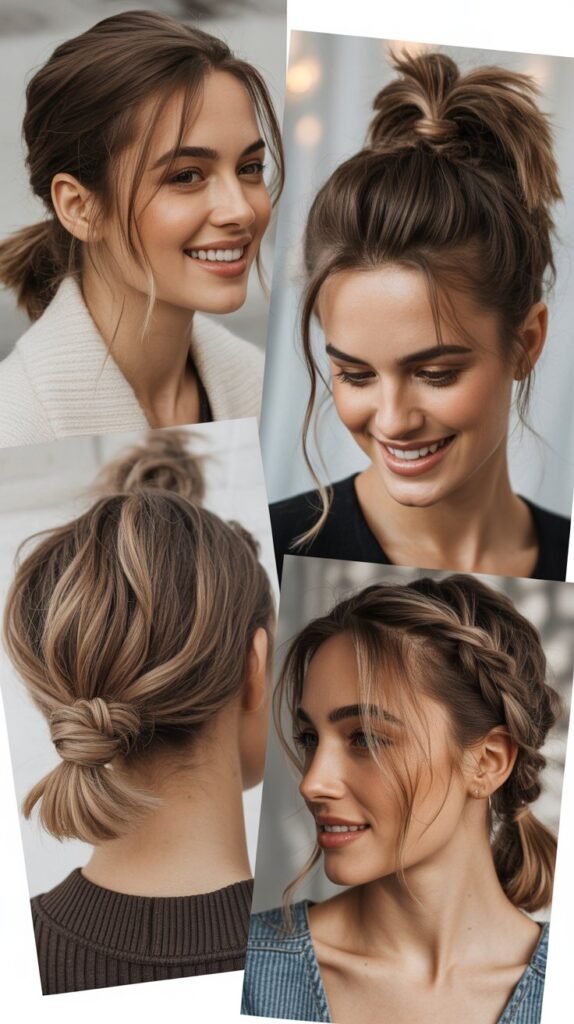
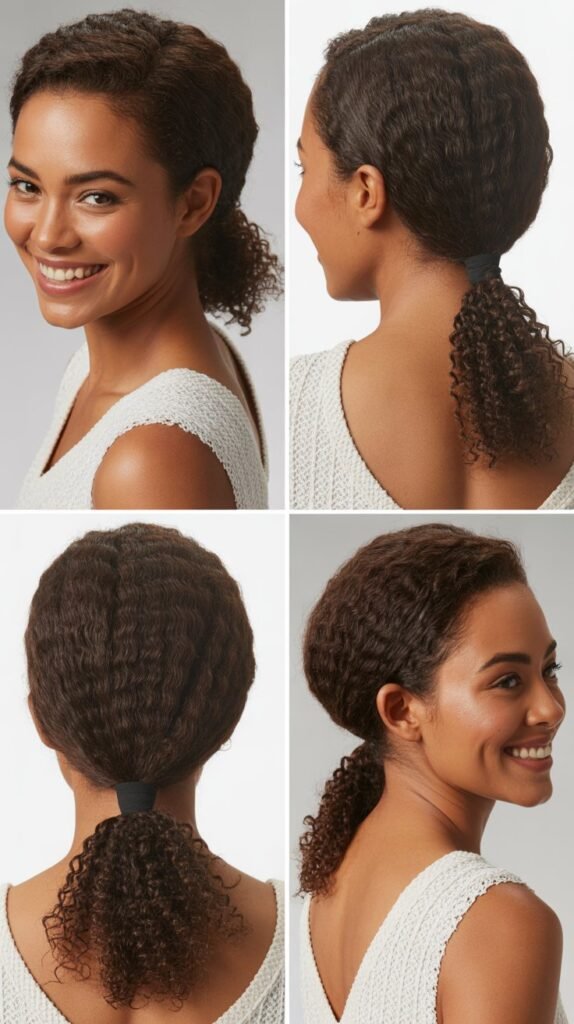
2. The Low Ponytail Twist
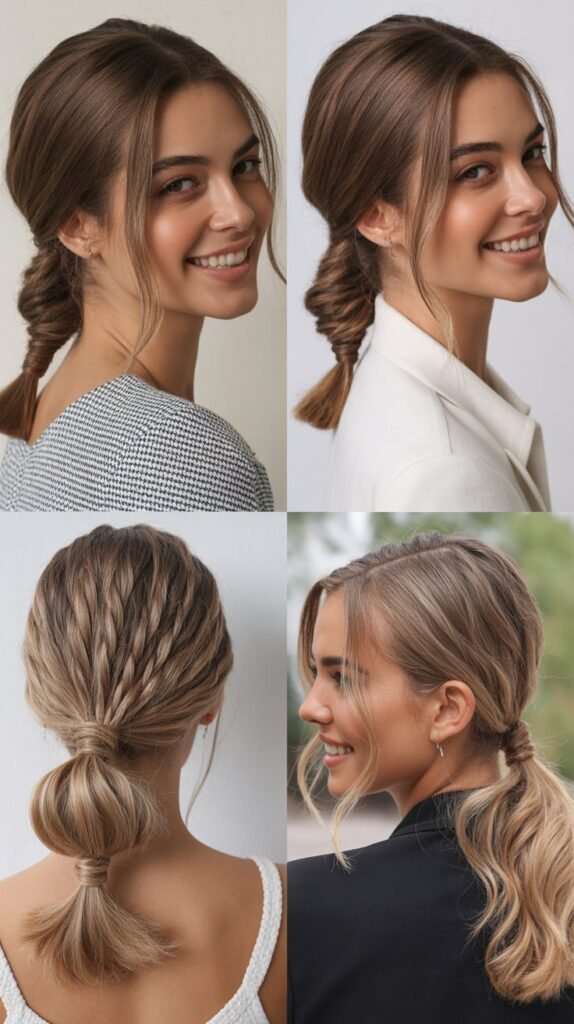
A sophisticated alternative to the basic ponytail, this twisted version adds elegance without requiring any special skills or extra time.
Perfect for moms who want to look polished during parent-teacher conferences or work meetings while keeping their hair completely under control.
- Create a low ponytail at the nape of your neck, securing it with an elastic band.
- Split the ponytail into two equal sections above the hair tie.
- Take the entire ponytail and thread it upward through the gap you created, flipping it inside out.
- Gently pull on the sides of the twist to create more volume and width.
- This technique instantly transforms an ordinary ponytail into something special that looks like it took much more effort.
- Add a decorative clip or hairpin at the base for an extra touch of sophistication when needed.
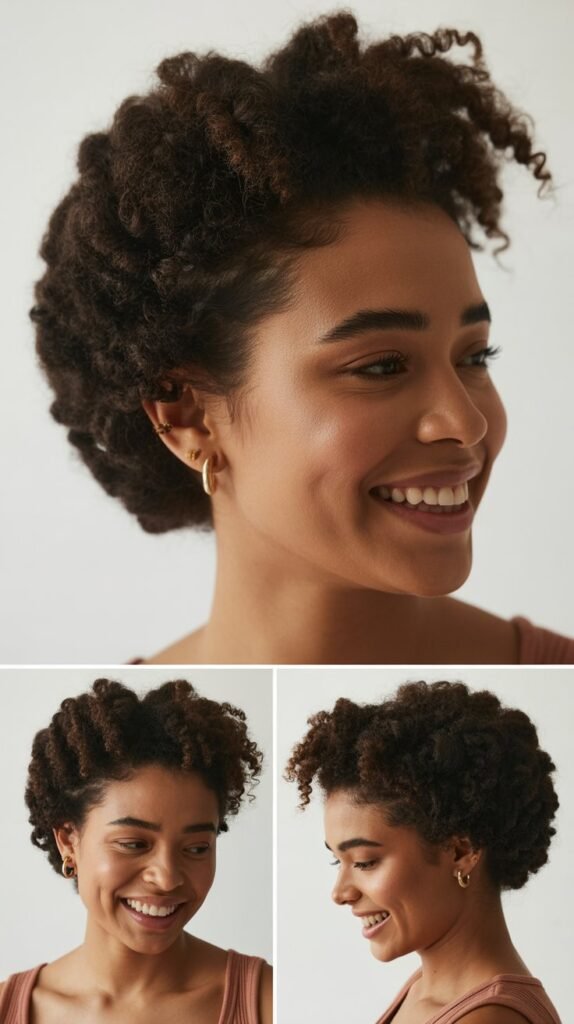
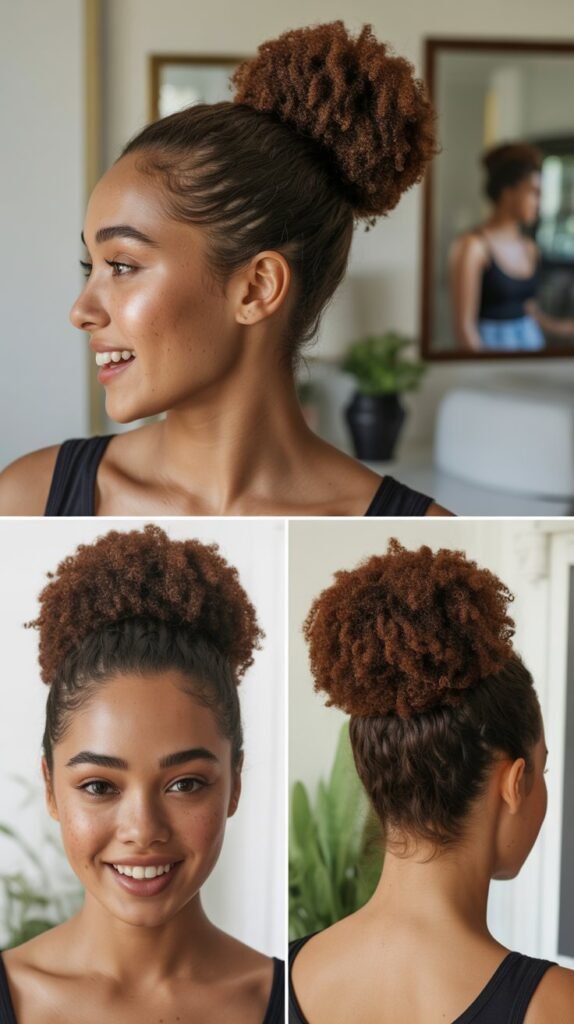
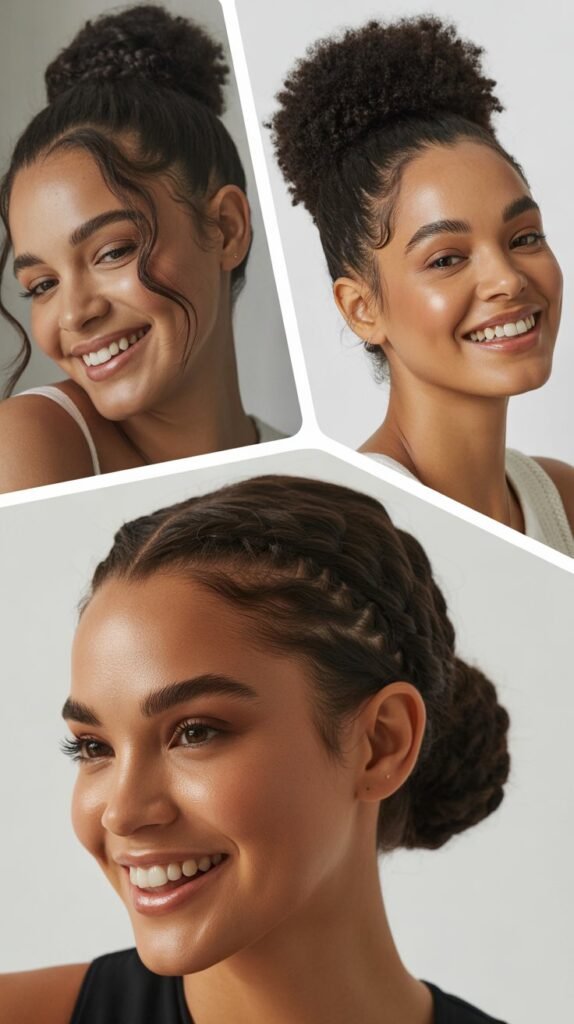
3. The Top Knot

The top knot delivers maximum impact with minimal effort, making it perfect for those mornings when you need to look intentional in less than three minutes.
This elevated style keeps hair completely off your face and neck, ideal for hot days or intense workout sessions at home.
- Flip your head upside down and gather all hair into a high ponytail at the crown of your head.
- Twist the ponytail tightly as you wrap it around the base in a circular motion.
- Secure the bun with another hair tie, tucking in loose ends as you go.
- For a sleeker finish, smooth down any bumps with a brush before creating the ponytail.
- Use bobby pins to secure any stubborn pieces that won’t stay in place.
- The height of this style naturally lifts your facial features and creates an instant facelift effect.
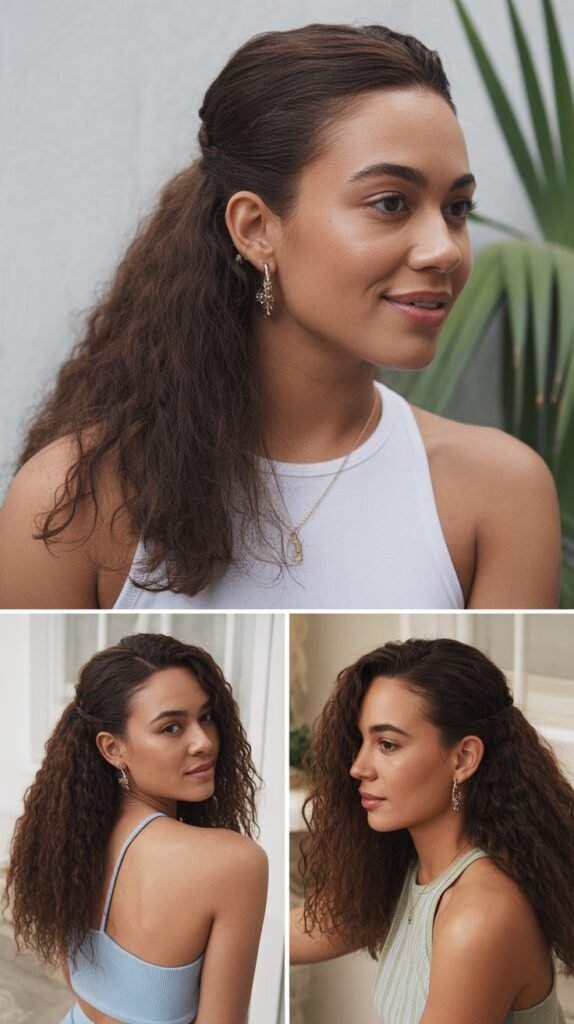
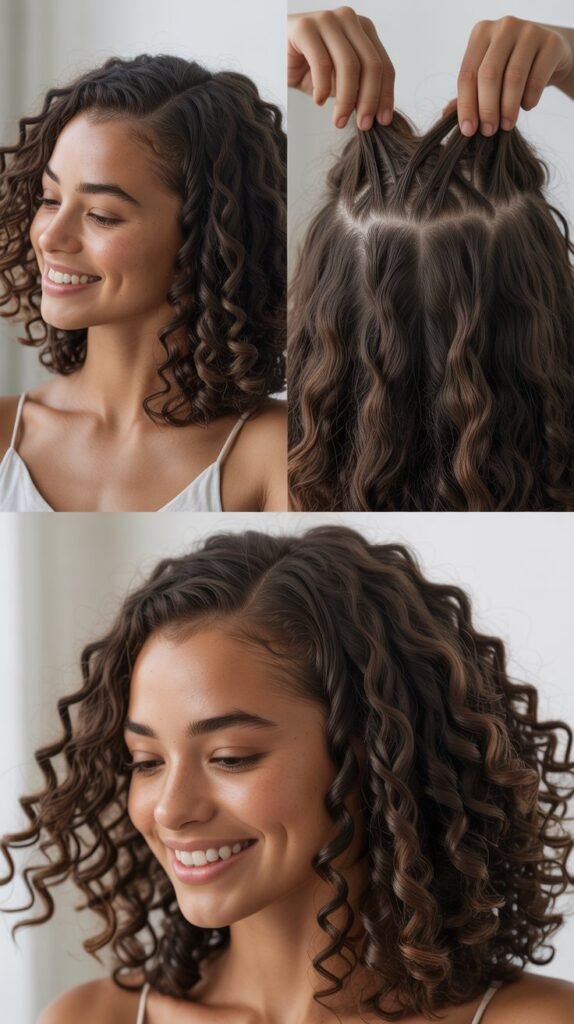
4. The Half-Up Half-Down
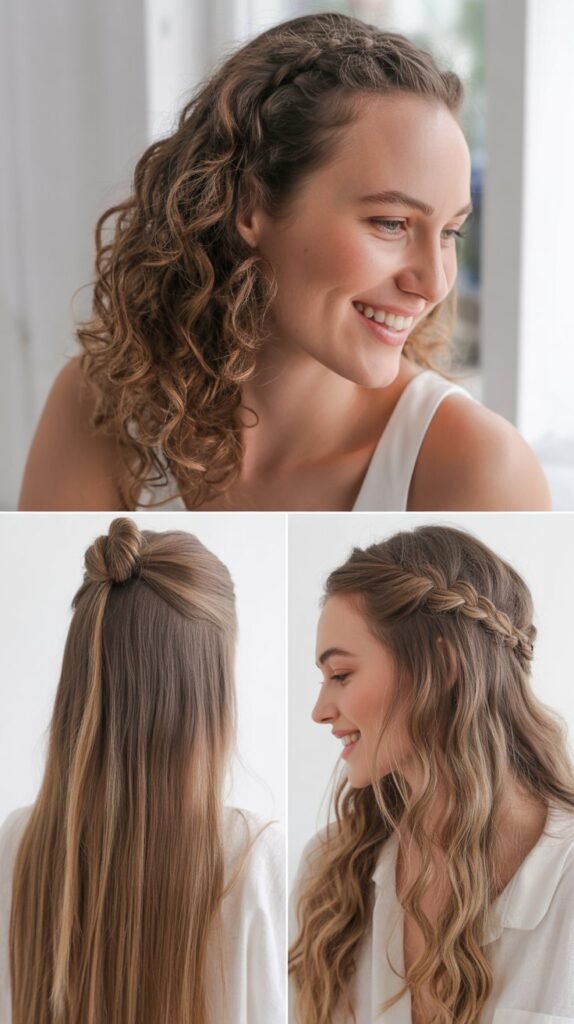
This versatile hairstyle strikes the perfect balance between keeping hair manageable and showing off your length, making it suitable for virtually any occasion.
It’s particularly flattering for moms with layered cuts or highlights they want to display.
- Section off the top portion of your hair from ear to ear, leaving the bottom half down.
- Gather the top section and secure it with a clip, elastic, or decorative barrette.
- For added texture, tease the crown area slightly before securing for more volume.
- Let face-framing pieces fall naturally around your temples for a softer appearance.
- This style works beautifully with both straight and wavy hair textures.
- You can dress it up with a elegant hair accessory or keep it casual with a simple elastic band.
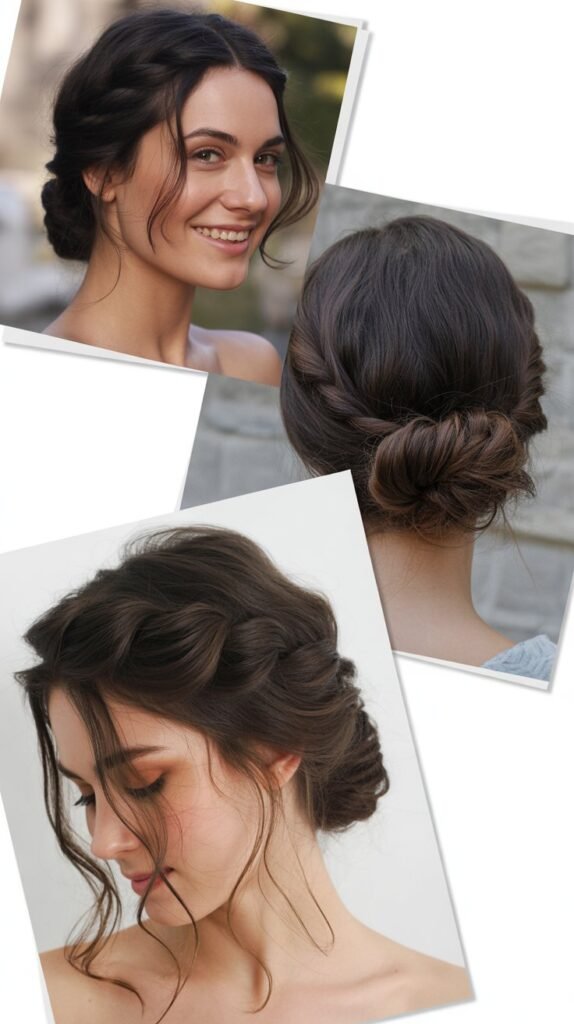
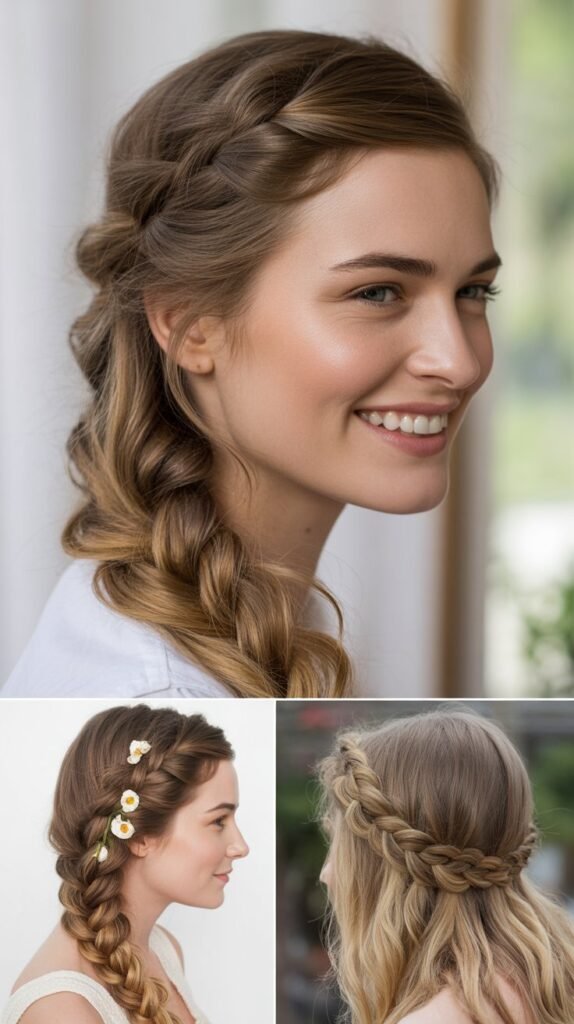
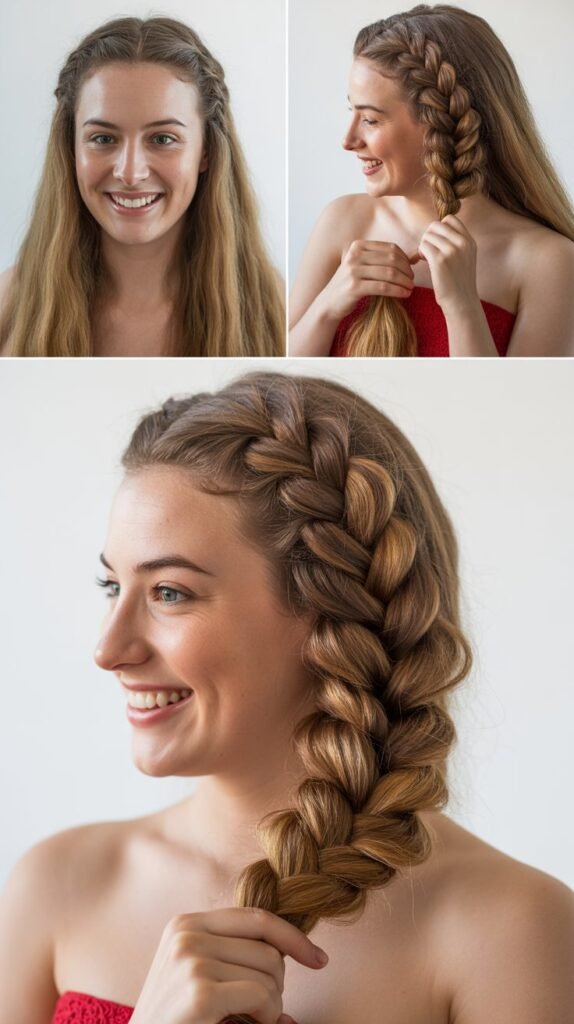
5. The Side Braid
A classic side braid offers a feminine, romantic look that keeps hair contained while still appearing effortless and pretty.
This style works wonderfully for moms who want something a bit more special for date nights or family photos without spending excessive time.
- Sweep all your hair to one side over your shoulder, brushing through any tangles first.
- Divide the hair into three equal sections and begin a traditional braid from just below your ear.
- Continue braiding down to the ends, keeping the tension consistent but not too tight.
- Secure the bottom with a small elastic that matches your hair color.
- Gently pull on the outer edges of the braid to loosen it and create a fuller, more voluminous appearance.
- This technique, called pancaking, transforms a simple braid into something that looks more intricate and dimensional.
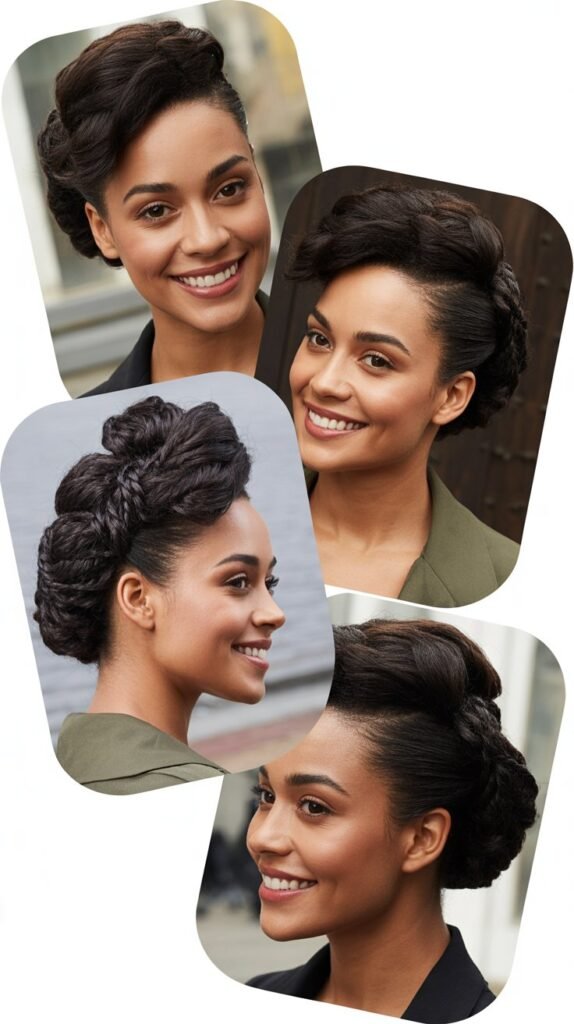
6. The Quick French Twist
Contrary to popular belief, the French twist doesn’t have to be complicated or time-consuming when you know the simplified version.
This elegant updo works beautifully for professional settings and special occasions while taking only about five minutes to perfect.
- Gather all hair at the nape and twist it upward along the back of your head.
- Continue twisting until the hair naturally forms a vertical roll against your head.
- Tuck the ends into the twist and secure everything with several bobby pins inserted vertically.
- Smooth any flyaways with a light mist of hairspray or a small amount of styling cream.
- For a more relaxed version, pull out a few wispy pieces around your face and hairline.
- This classic style instantly makes you look more polished and put-together than you might feel.
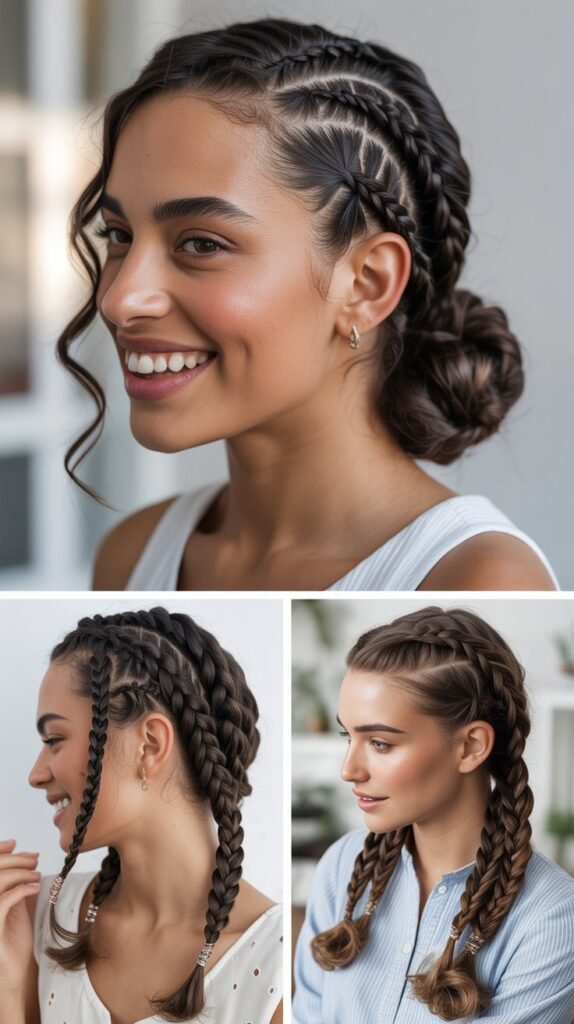
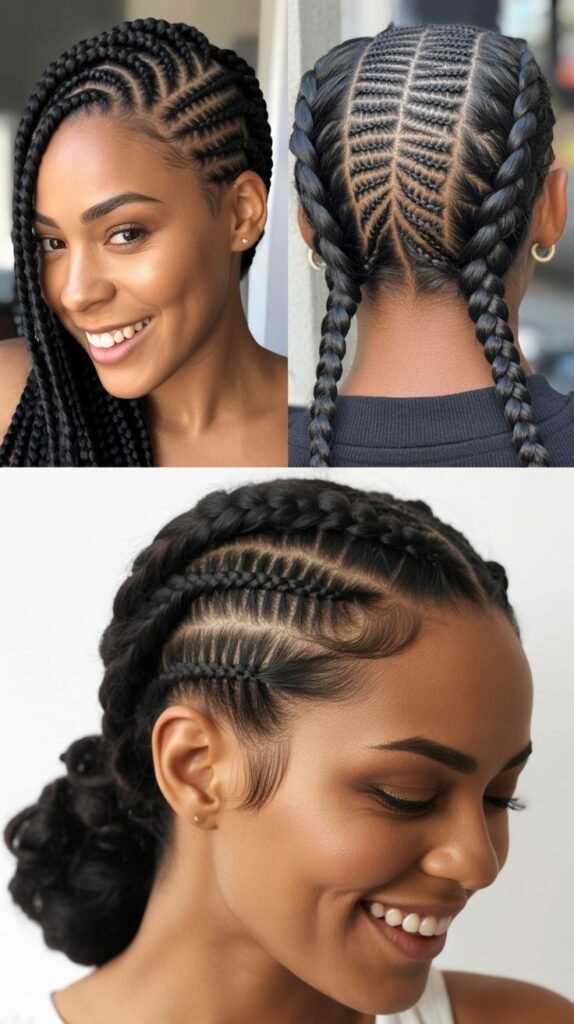
7. The Double Dutch Braids
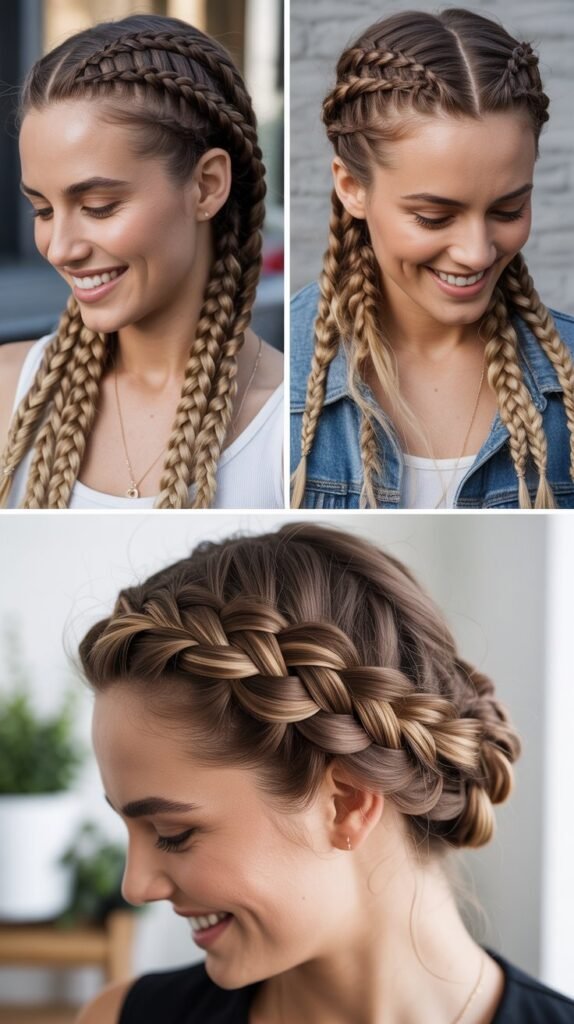
Double Dutch braids have become incredibly popular for active moms who need their hair completely secured during workouts or outdoor activities with kids.
These inside-out braids stay in place all day long and look sporty yet stylish.
- Part your hair straight down the middle from forehead to nape, creating two equal sections.
- Begin on one side by taking a section at the hairline and dividing it into three strands.
- Cross the outer strands under the middle strand instead of over, adding more hair with each crossing.
- Continue this technique down to the nape, then finish with a regular braid to the ends.
- Repeat the exact same process on the other side for symmetrical braids.
- Secure both ends with small elastics, and gently tug on the braid edges for added fullness if desired.
8. The Low Bun with a Twist
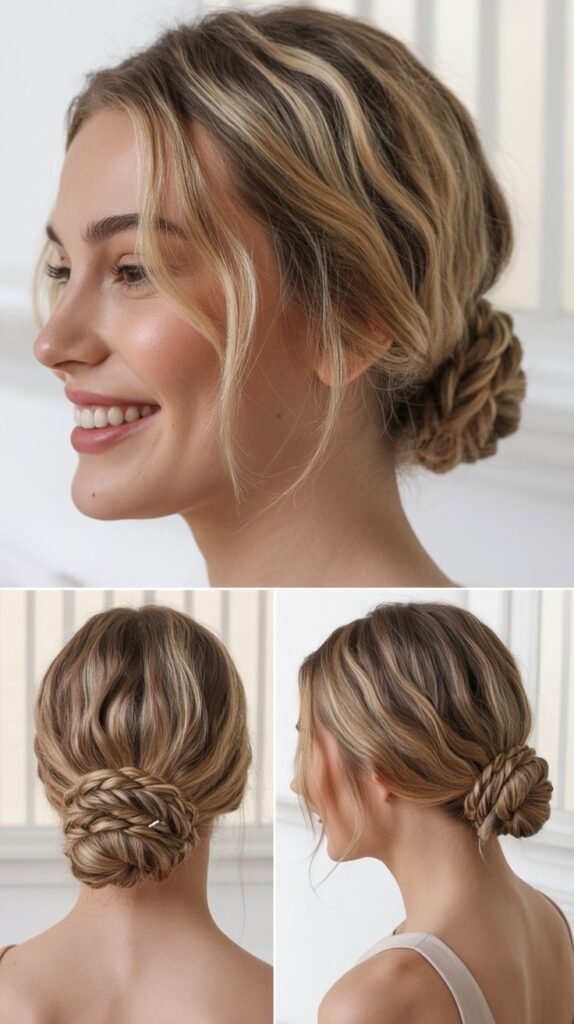
This refined low bun combines sophistication with simplicity, making it perfect for moms who want to appear professional without fussy styling.
The added twist detail elevates a basic bun into something more interesting and intentional.
- Create a low ponytail at the base of your neck and secure with an elastic.
- Divide the ponytail into two sections and twist them around each other like a rope.
- Wrap this twisted rope around the base of the ponytail in a circular motion.
- Secure the bun with bobby pins, making sure to hide the ends inside the twist.
- This technique creates beautiful texture and visual interest that looks far more complex than it actually is.
- Pull out a couple of strategically placed strands near your ears to frame your face softly.
9. The Sleek High Ponytail
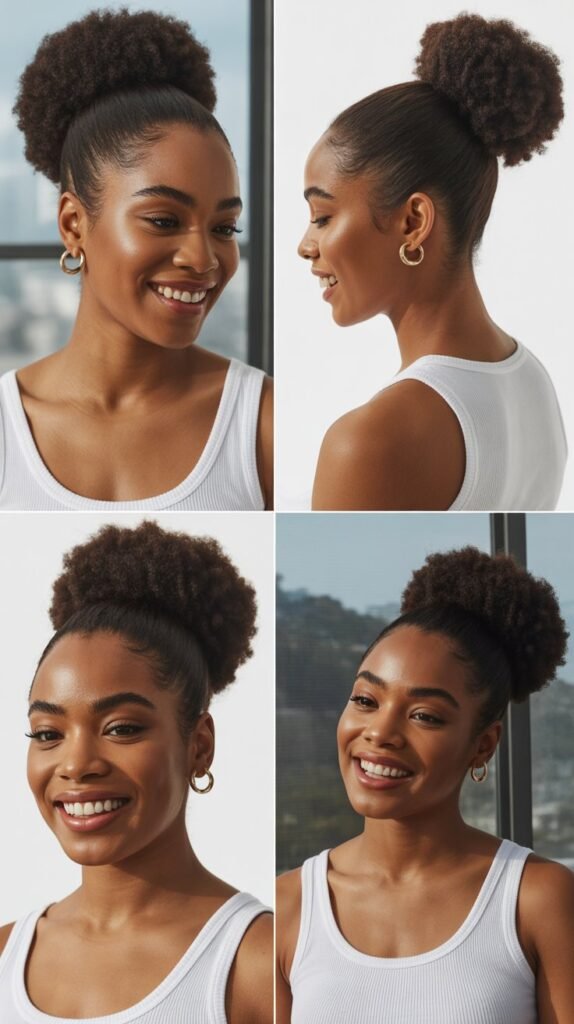
Nothing says confidence and polish quite like a perfectly sleek high ponytail that sits at the crown of your head.
This style works exceptionally well for moms who want to look sharp for business meetings or social events without complicated styling.
- Brush your hair thoroughly to remove all tangles and create a smooth surface.
- Apply a smoothing serum or gel to damp or dry hair for maximum sleekness.
- Gather all hair at the crown of your head, using a brush to smooth as you go.
- Secure with a strong elastic, then take a small section of hair from the ponytail and wrap it around the base to hide the elastic.
- Pin the wrapped section underneath the ponytail with a bobby pin for a seamless finish.
- Spray the entire style lightly with hairspray to maintain the sleek appearance throughout the day.
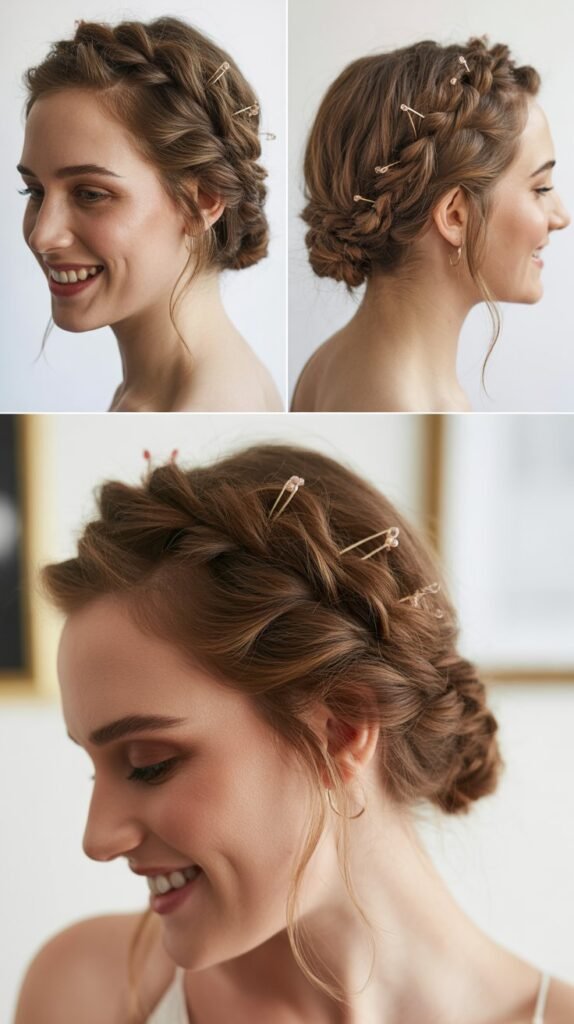
10. The Braided Crown
The braided crown creates a romantic, bohemian look that’s surprisingly simple once you understand the basic technique.
This style keeps hair off your face while looking absolutely beautiful for special occasions or when you want to feel extra feminine.
- Part your hair deeply to one side and begin a Dutch or French braid along your hairline.
- Continue braiding around your head like a crown, following the natural hairline curve.
- When you reach the opposite side, secure the braid temporarily and assess its placement.
- Continue braiding the remaining hair and wrap it around to meet the starting point.
- Secure all ends with bobby pins, tucking them underneath the crown for an invisible finish.
- Gently pull on the braid to create a fuller, more relaxed crown effect that looks effortlessly beautiful.
11. The Twisted Side Updo
This asymmetrical style offers an elegant solution for moms who want something different from their usual routine. The twisted side updo looks intricate but comes together quickly with just a few simple twists and pins.
- Create a deep side part and gather all hair to the opposite side of the part.
- Begin taking small sections from the front and twisting them backward toward the nape.
- Pin each twist in place as you work your way down the side of your head.
- Continue until all hair is incorporated into twisted sections pinned at the side.
- Tuck any remaining loose ends into the pinned area and secure with additional bobby pins.
- This style beautifully showcases one side of your face while keeping everything securely in place.
12. The Simple Chignon

The chignon represents timeless elegance and works perfectly for formal events or when you want to channel classic Hollywood glamour.
Despite its sophisticated appearance, this low bun style is remarkably easy to create in just minutes.
- Gather your hair into a low ponytail at the nape of your neck without making it too tight.
- Twist the ponytail loosely and begin wrapping it around the base in one direction.
- Tuck the ends under the chignon and secure everything with bobby pins inserted in an X pattern.
- Smooth any flyaways with your fingers or a light touch of pomade.
- For a more modern version, leave a few pieces undone around your face for softness.
- This versatile style transitions seamlessly from daytime professional to evening elegant with just a change of accessories.
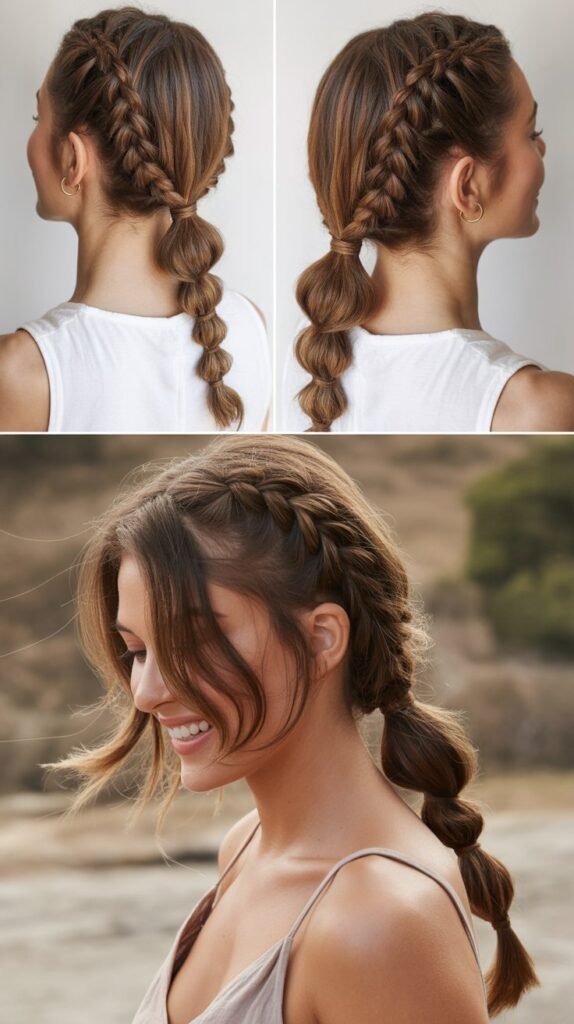
13. The Bubble Ponytail
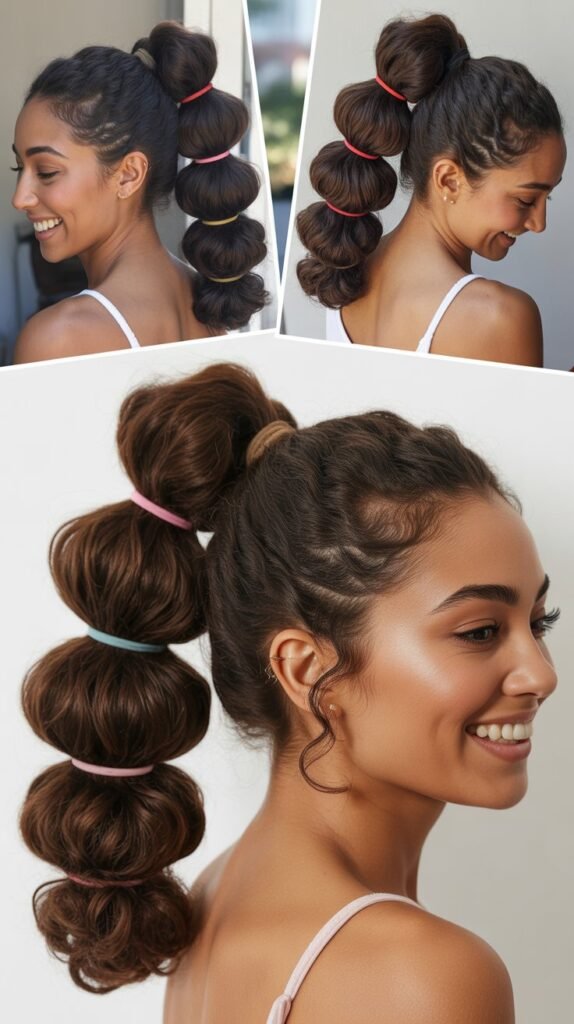
The bubble ponytail has taken social media by storm for good reason—it’s playful, modern, and incredibly easy to create. This fun style works beautifully for casual outings and adds visual interest to an otherwise simple ponytail.
- Start with a regular high or low ponytail secured with a hair tie.
- Add additional elastics down the length of the ponytail at even intervals, about two to three inches apart.
- Gently pull on the hair between each elastic to create rounded bubble sections.
- Continue this pattern down the entire length of your ponytail until you reach the ends.
- The bubbles should be roughly the same size for a polished look, or varied for a more whimsical effect.
- This style works on all hair types and lengths, making it universally flattering and age-appropriate.
14. The Knotted Ponytail
The knotted ponytail offers a unique twist on the traditional ponytail by replacing the elastic with an actual knot made from your own hair. This clever technique creates a sleek, modern look that’s perfect for work or social events.
- Divide your hair into two equal sections as if creating a middle part.
- Tie these two sections together in a simple overhand knot at the back of your head.
- Pull the knot tight to secure it in place, adjusting the height as desired.
- Take a small elastic and secure the hair just below the knot to keep everything in place.
- Smooth down any bumps or flyaways with a brush or your hands for a polished finish.
- This unexpected detail transforms an ordinary ponytail into something memorable and conversation-worthy.
15. The Fishtail Braid
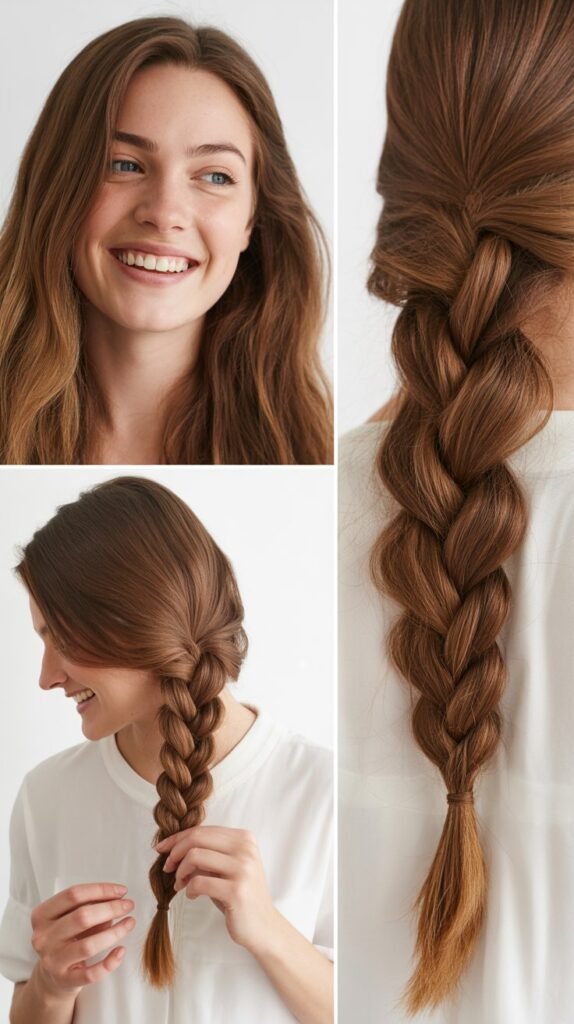
The fishtail braid looks incredibly intricate and impressive but is actually easier than a traditional three-strand braid once you learn the simple technique.
This textured style works beautifully for casual days and adds a bohemian touch to any outfit.
- Divide your hair into two large sections instead of the traditional three.
- Take a thin strand from the outer edge of the left section and cross it over to join the right section.
- Repeat on the opposite side, taking a thin strand from the outer right and crossing it to the left.
- Continue this alternating pattern all the way down to the ends of your hair.
- The thinner the strands you use, the more intricate and detailed your fishtail will appear.
- Secure the bottom with an elastic and gently pull on the braid edges to create a fuller, more relaxed finish.
16. The Headband Tuck
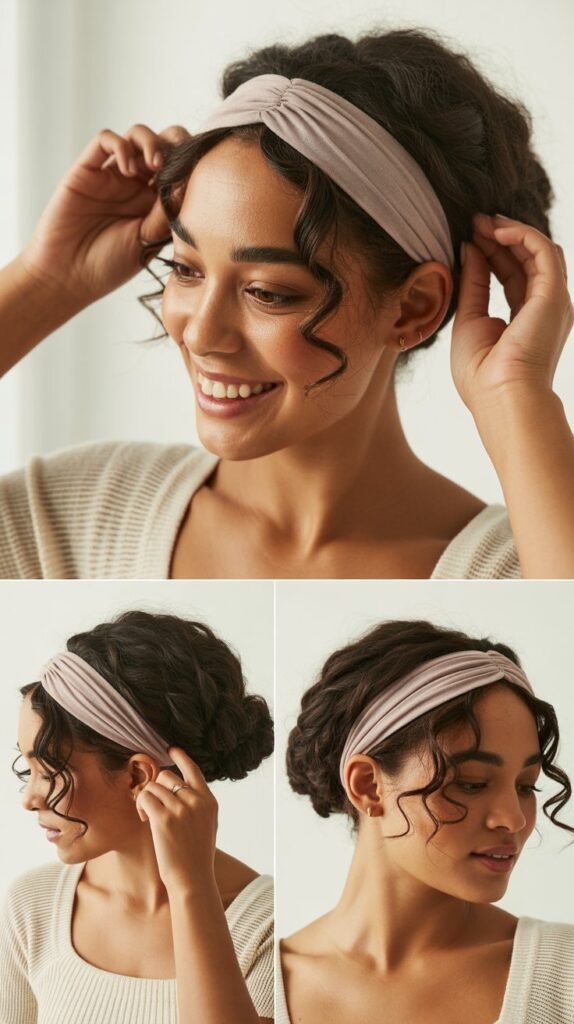
The headband tuck is a genius no-heat styling solution that creates beautiful waves while keeping hair completely off your face.
This vintage-inspired technique works perfectly for moms who want a polished look without using any hot tools.
- Place a stretchy headband over your head like a crown, positioned about an inch back from your hairline.
- Take sections of hair and tuck them over and under the headband, working your way around your head.
- Continue tucking until all hair is secured under the headband in a roll around your head.
- Leave this style in place for several hours or overnight for the best wave formation.
- When you remove the headband, you’ll have gorgeous, natural-looking waves without any heat damage.
- This method is particularly effective on slightly damp hair for enhanced wave definition.
17. The Side-Swept Waves
Side-swept waves deliver red carpet glamour with surprisingly minimal effort, making you look like you stepped out of a professional salon.
This elegant style works wonderfully for special events or when you want to feel extra beautiful and put-together.
- Create a deep side part on whichever side you prefer, typically where your hair naturally wants to fall.
- Use a large-barrel curling iron or wand to create loose waves throughout your hair.
- Brush through the curls gently with a paddle brush to soften them into waves.
- Sweep all your hair to one side over your shoulder, securing with bobby pins behind your ear on the opposite side.
- The pins should be hidden beneath the top layer of hair for an invisible hold.
- Finish with a light mist of flexible-hold hairspray to keep everything in place without stiffness.
18. The Quick Sock Bun
The sock bun technique creates a perfectly round, full bun that looks professionally styled in just a few minutes. This clever hack uses an actual sock to give your bun structure and volume that’s impossible to achieve otherwise.
- Cut the toe section off a clean sock and roll it into a donut shape.
- Create a high ponytail and pull it through the sock donut, positioning the sock at the end of your ponytail.
- Spread your hair evenly around the sock donut, covering it completely.
- Roll the sock and hair down toward your head, tucking the hair under as you roll.
- Secure the finished bun with bobby pins around the base if needed for extra hold.
- This method creates a bun that stays perfect all day without collapsing or losing its shape.
19. The Waterfall Braid
The waterfall braid creates a cascading effect that looks absolutely stunning and surprisingly romantic.
While it appears complex, this style becomes quite manageable once you understand the simple technique of dropping strands as you braid.
- Start with a small section at your temple and divide it into three strands for a regular braid.
- Cross the top strand over the middle, then cross the bottom strand over the middle.
- Here’s the key difference: drop the top strand completely and pick up a new section to replace it.
- Continue this pattern of braiding and dropping the top strand while picking up new sections along your hairline.
- The dropped strands create the beautiful waterfall effect that gives this braid its name.
- Secure the braid at the opposite side with a small elastic or continue it into a regular braid.
20. The Twisted Half-Up Bun

This hybrid style combines the best features of a half-up hairstyle with the security of a bun.
The twisted half-up bun keeps the top section of hair under control while allowing you to show off your length and natural texture below.
- Section off the top half of your hair from ear to ear, leaving the bottom half loose.
- Twist the top section as you gather it toward the crown of your head.
- Wrap the twisted section into a small bun and secure it with a hair tie.
- Use bobby pins to secure any loose pieces and keep the bun firmly in place.
- Leave the bottom section of your hair down to flow naturally, whether straight, wavy, or curly.
- This style works exceptionally well for medium to long hair and all texture types.
21. The Rope Braid Ponytail
The rope braid adds an interesting textured element to a basic ponytail, creating dimension and visual appeal.
This two-strand technique is actually simpler than traditional braiding and creates a unique spiral effect that looks impressive.
- Create a regular ponytail at whatever height you prefer, securing it with an elastic.
- Divide the ponytail into two equal sections.
- Twist each section individually in the same direction, typically clockwise.
- Then wrap these two twisted sections around each other in the opposite direction, counterclockwise.
- Secure the end with another elastic once you’ve twisted down the entire length.
- The opposing twists create a rope-like appearance that stays intact much better than a regular braid.
22. The Infinity Bun
The infinity bun creates a figure-eight shape that looks artistic and unusual while keeping hair completely secured. This modern updo works beautifully for both casual and dressier occasions, depending on how you style it.
- Create two ponytails side by side at the nape of your neck, positioned close together.
- Twist each ponytail and wrap them into small buns, one on each side.
- The two buns should sit next to each other, forming a figure-eight or infinity symbol shape.
- Secure each bun separately with bobby pins, making sure they’re positioned symmetrically.
- Smooth down any flyaways or loose pieces for a cleaner finish if desired.
- This unique shape creates visual interest that sets your hairstyle apart from typical single buns.
23. The Pull-Through Braid
The pull-through braid creates the illusion of an incredibly intricate braid without any actual braiding required.
This volumous style works perfectly for moms who struggle with traditional braiding techniques but want that detailed, complex look.
- Start with a half-up ponytail at the crown of your head, securing it with a small elastic.
- Create another ponytail directly below the first one, gathering hair from the sides.
- Split the top ponytail in half and bring both sections down around the second ponytail.
- Create a third ponytail below, incorporating the split sections from the first ponytail.
- Continue this pattern of splitting and incorporating down the length of your hair.
- Gently pull on each section to create volume and the characteristic puffy, braided appearance.
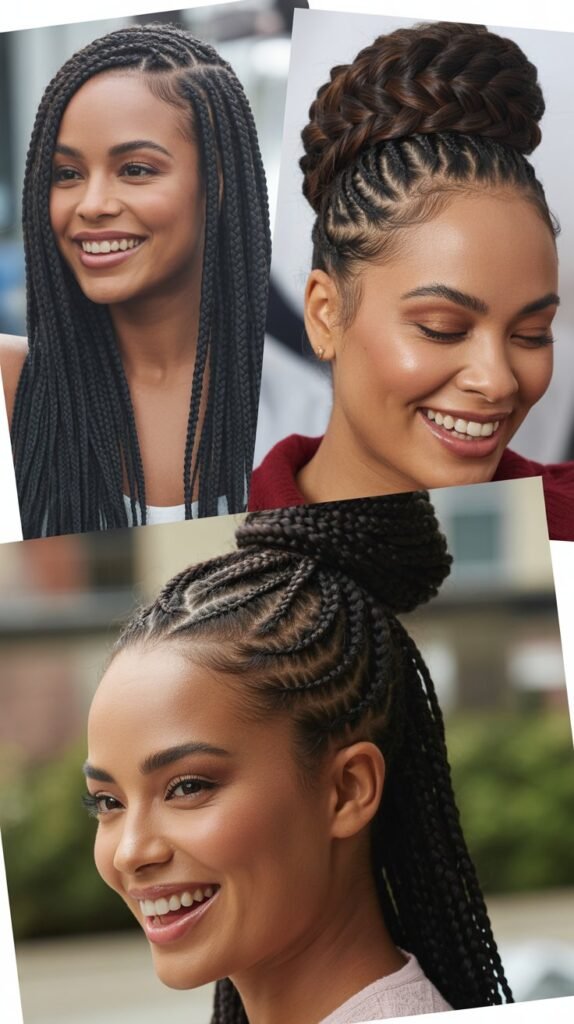
24. The Braided Low Bun

Combining braids with a low bun creates texture and interest while maintaining professional polish.
This elegant style works wonderfully for formal events, interviews, or any situation where you want to appear sophisticated and well-groomed.
- Create two regular three-strand braids on each side of your head, starting at your temples.
- Gather all your hair, including the braids, into a low ponytail at the nape of your neck.
- Twist the ponytail and wrap it into a classic low bun.
- Arrange the braids around the outside of the bun for added texture and detail.
- Secure everything with bobby pins, making sure the bun and braids are firmly attached.
- This combination of techniques creates a style that looks far more complex than the simple steps required.
25. The Topsy Tail Ponytail
The topsy tail technique instantly upgrades any basic ponytail with a twist that adds volume and sophistication.
This simple method can be repeated multiple times down a ponytail for even more dramatic effect and visual interest.
- Create a regular ponytail at your desired height, leaving the elastic slightly loose.
- Create a gap in the hair above the elastic by separating it into two sections.
- Take the entire ponytail and flip it up and through this gap, pulling it all the way through.
- Tighten the elastic once the ponytail has been flipped to secure the twist.
- For additional interest, create another ponytail below the first and repeat the topsy tail technique.
- Each repetition adds another twisted section that creates beautiful cascading dimension down your ponytail.
26. The Scarf Updo
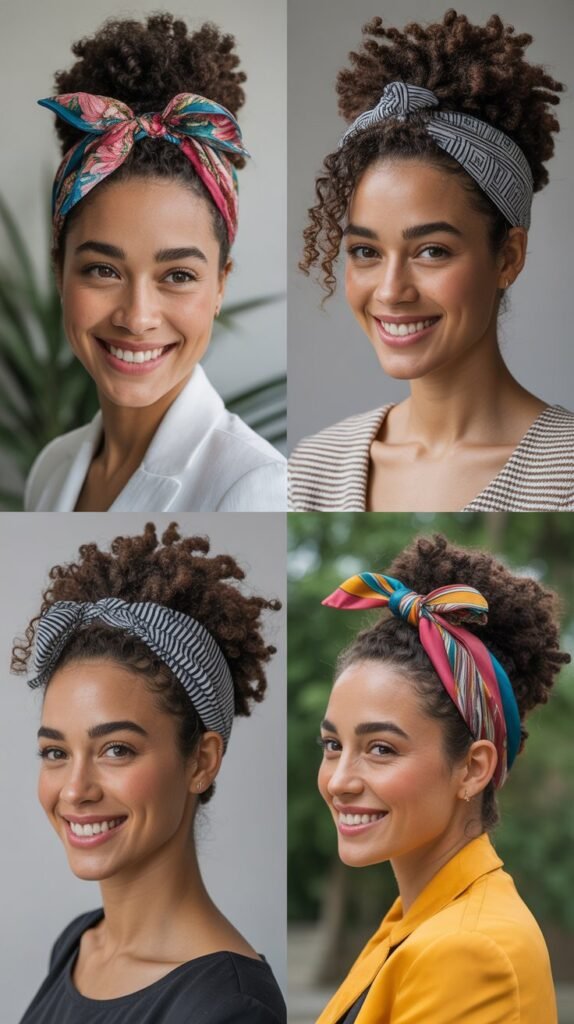
Incorporating a scarf into your hairstyle adds color, pattern, and vintage charm while serving the practical purpose of securing your updo.
This accessories-forward approach lets you coordinate your hair with your outfit for a polished, intentional look.
- Fold a square scarf into a long strip or use a pre-folded scarf headband.
- Position the scarf at the nape of your neck with equal lengths on both sides.
- Gather your hair into a low ponytail, incorporating the scarf into the gathering.
- Twist your hair and the scarf together as you wrap them into a bun.
- Tie the scarf ends around the bun and into a bow or knot on top or to the side.
- The scarf adds both security and decorative appeal, eliminating the need for bobby pins in many cases.
27. The Faux Hawk Braid
The faux hawk braid brings edgy style to a traditional braid, creating a bold look that’s surprisingly appropriate for everyday wear. This modern technique adds height and drama while keeping hair completely controlled and secure.
- Create a section down the center of your head from forehead to crown, about three inches wide.
- Begin a Dutch braid with this center section, braiding toward the back of your head.
- As you braid, gently pull on the outer edges to create width and height, forming the mohawk shape.
- Continue the braid down to the nape, then finish with a regular three-strand braid to the ends.
- The sides of your hair can be left down, pulled back, or styled separately depending on your preference.
- This style works particularly well with athletic wear or casual outfits where you want to add personality.
28. The Gibson Tuck
The Gibson tuck is a vintage-inspired updo that looks elegant and romantic without requiring advanced styling skills.
This classic technique has been popular for over a century because it flatters virtually everyone and works for numerous occasions.
- Create a low ponytail at the nape of your neck, leaving it relatively loose.
- Make a gap in the hair above the elastic by separating it with your fingers.
- Tuck the entire ponytail up and through this gap, rolling it under and into the space.
- Continue tucking and rolling the hair ends into the gap until everything is secured.
- Use bobby pins along the bottom and sides to secure the tuck firmly in place.
- Pull out a few face-framing pieces around your temples for a softer, more romantic finish.
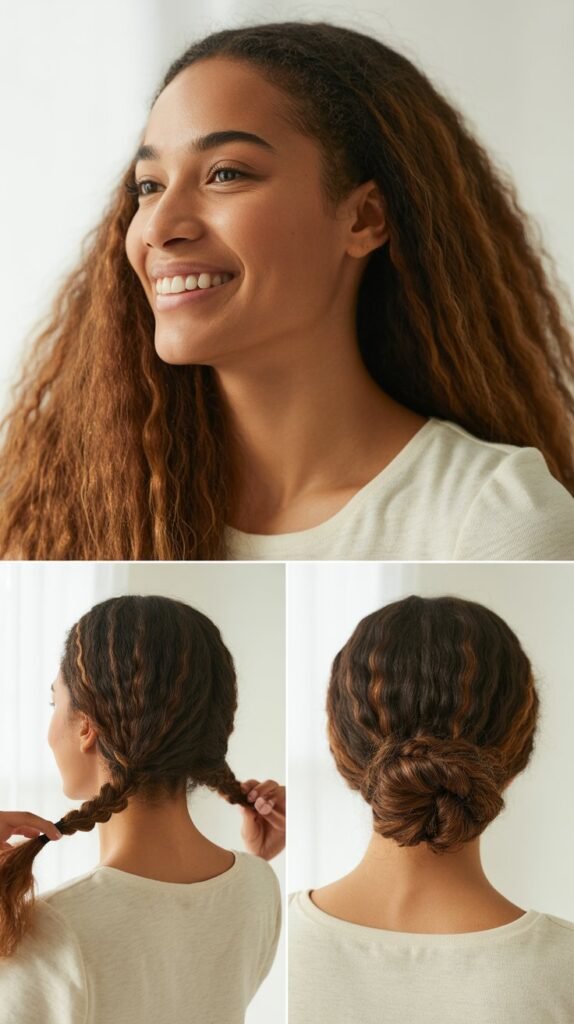
29. The Messy Side Bun
The messy side bun offers an intentionally undone look that’s both trendy and practical for busy days. This asymmetrical style keeps hair off your neck while looking effortlessly chic and perfectly imperfect in all the right ways.
- Gather all your hair to one side, either left or right depending on your preference.
- Create a loose ponytail at the side of your head, positioned behind your ear.
- Twist the ponytail loosely and wrap it around the base in a casual spiral.
- Secure with bobby pins, intentionally leaving some pieces loose and textured.
- Pull out random sections to create that perfectly messy appearance that looks spontaneous.
- A few well-placed face-framing pieces complete the effortlessly beautiful aesthetic.
30. The Criss-Cross Half-Up
The criss-cross half-up style adds an unexpected detail to a classic look, creating visual interest at the back of your head. This simple technique uses your own hair to create a woven pattern that replaces traditional elastics or clips.
- Take a small section of hair from one side of your head near your temple.
- Pull it across to the opposite side and secure it temporarily with a clip.
- Take a section from the opposite side and cross it over the first section.
- Continue alternating sections from each side, creating a criss-cross pattern across the back of your head.
- Secure all the crossed sections together at the center back with an elastic or bobby pins.
- The remaining hair flows down naturally below the criss-crossed sections for a beautiful contrast.
31. The Twisted Crown Updo
The twisted crown updo creates a regal appearance that’s perfect for formal events or when you want to feel extra special.
This elegant style keeps all hair secured while creating beautiful texture and dimension through simple twisting techniques.
- Divide your hair into four sections: two at the front and two at the back.
- Twist the front right section and pin it across the back of your head to the left side.
- Twist the front left section and pin it across to the right side, creating an X pattern.
- Gather the remaining back sections and twist them into a low bun at the nape.
- The twisted sections should frame the bun like a crown for added elegance.
- Secure all pieces with bobby pins and finish with hairspray for lasting hold throughout your event.
32. The Braided Headband
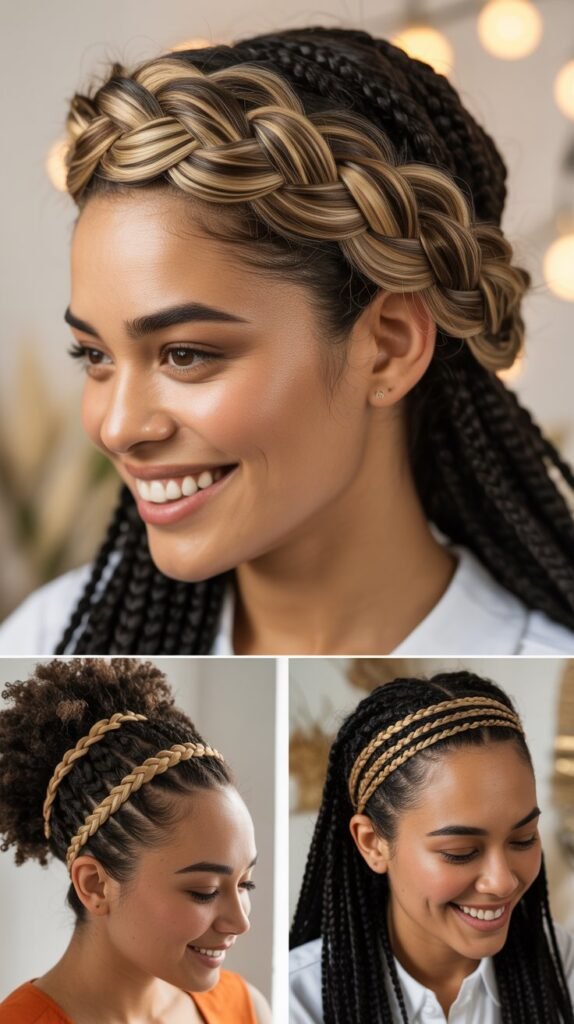
The braided headband uses your own hair to create a natural accessory that keeps hair off your face while adding bohemian charm.
This pretty style works beautifully for outdoor events, festivals, or casual summer days when you want to feel feminine and free.
- Take a section of hair from behind one ear and create a regular three-strand braid.
- Bring the braid across the top of your head like a headband, following your natural hairline.
- Secure the braid behind your opposite ear with bobby pins, hiding the ends beneath your hair.
- Leave the rest of your hair down to flow naturally, whether straight, wavy, or curly.
- For added security, create a matching braid on the opposite side for a double headband effect.
- This style keeps front pieces off your face while maintaining a soft, romantic appearance.
33. The Quick Upside-Down Braid Bun
The upside-down braid bun combines two techniques into one impressive hairstyle that looks complex but comes together surprisingly quickly.
This modern style keeps everything secured while creating beautiful texture and height that lasts all day.
- Flip your head upside down and begin a Dutch braid starting from the nape of your neck.
- Braid upward toward the crown of your head, pulling in sections as you go.
- When you reach the crown, secure the braid with an elastic, leaving the ends loose in a ponytail.
- Flip your head back up and twist the ponytail into a bun at the crown.
- Secure the bun with bobby pins, creating a style that combines the textured braid with a practical top bun.
Conclusion
“33 Cute and Easy Hairstyles for Moms Who Are Always on the Go” offers practical and stylish solutions for busy moms who want to look put-together without spending hours in front of the mirror.
From quick updos to effortless braids, these hairstyles combine convenience with charm, helping moms feel confident and chic every day.
Whether heading to work, running errands, or enjoying family time, these looks make busy days a little easier—and a lot more stylish.