Homecoming is one of those magical nights where every detail matters, and your hairstyle can make or break your entire look.
The half-up half-down hairstyle strikes the perfect balance between elegance and effortlessness, offering the sophistication of an updo while showcasing the beauty of flowing locks.
Whether you’re drawn to romantic curls, sleek straight styles, or bohemian braids, this versatile look adapts to every dress style and personal aesthetic.
In this comprehensive guide to 33 Stunning Half-Up Half-Down Hairstyles for Homecoming, you’ll discover an array of stunning options that range from classic and timeless to modern and trendy, each designed to make you feel like the star of the night.
Get ready to find your perfect hairstyle that will have heads turning as you walk into that homecoming dance.
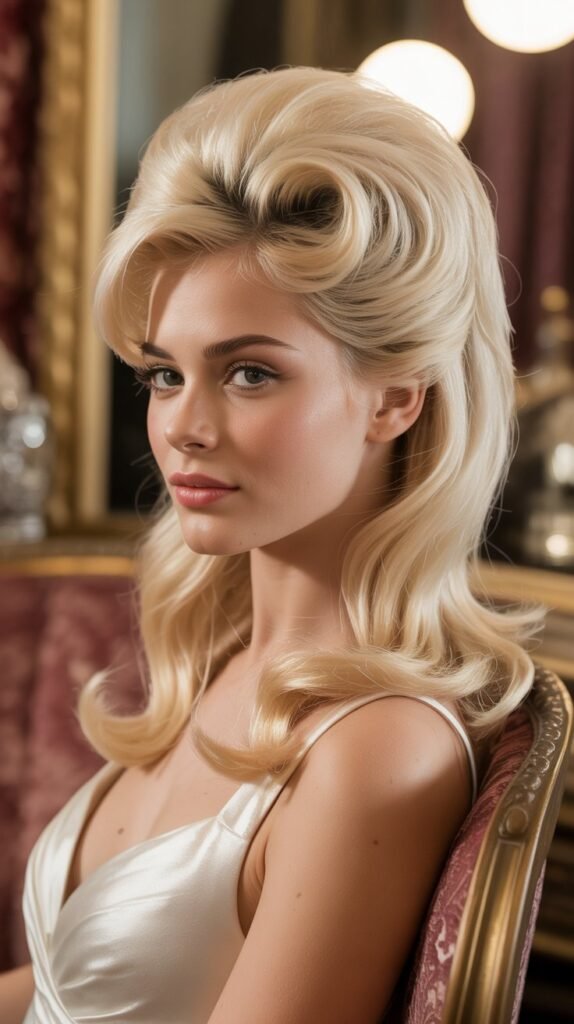
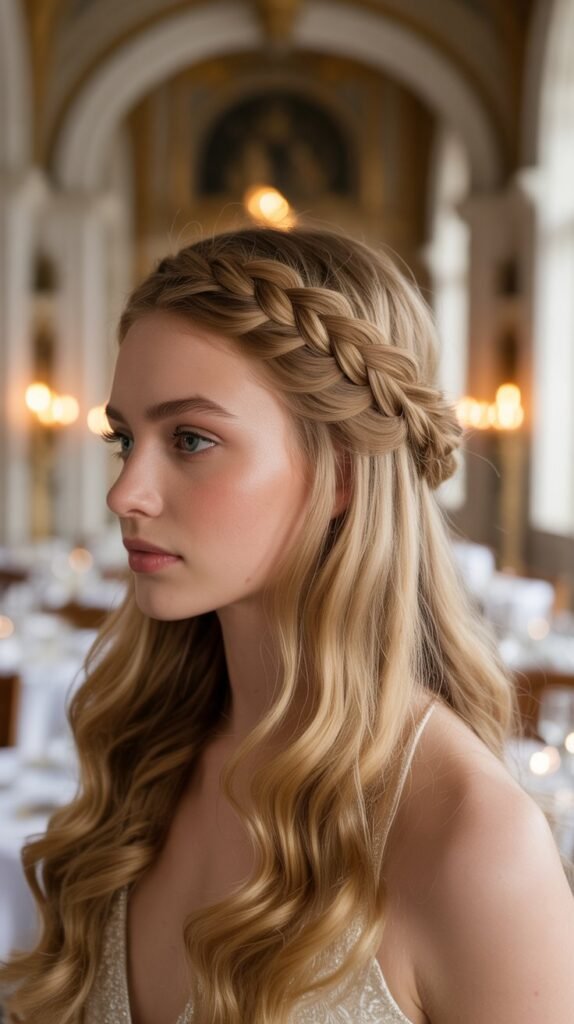
1. Classic Half-Up with Soft Curls
The classic half-up with soft curls remains a timeless choice that never goes out of style.
This elegant look combines the sophistication of pulled-back hair with the romantic appeal of cascading curls, creating a perfectly balanced aesthetic that complements virtually any homecoming dress.
Why This Style Works:
- The soft curls add volume and dimension to your overall look while maintaining a polished appearance.
- Pulling the top section back keeps hair away from your face, allowing your makeup and facial features to shine throughout the night.
- This versatile style works beautifully with both strapless and sleeved dresses, making it a fail-safe option.
- The curls can be customized in size from tight ringlets to loose waves depending on your preference.
Styling Steps:
- Start by curling all your hair with a 1.5-inch barrel curling iron, working in sections for uniform results.
- Take a horizontal section of hair from temple to temple, approximately 2-3 inches back from your hairline.
- Gently backcomb the crown section for added height and volume before smoothing the top layer.
- Secure the pulled-back section with bobby pins in a crisscross pattern for maximum hold.
- Finish with a light-hold hairspray to maintain the curls without creating stiffness.
2. Braided Crown Half-Up Style
The braided crown half-up style brings a touch of bohemian romance to your homecoming look.
This intricate yet surprisingly simple style creates a stunning focal point by wrapping braids around the crown of your head while allowing the remaining hair to flow freely.
Perfect Occasions for This Style:
- Garden-themed or outdoor homecoming events where a softer, romantic aesthetic is desired.
- Pairing with floral or nature-inspired dress designs that call for an organic hairstyle.
- When you want to showcase intricate styling skills that set you apart from simpler looks.
Creating the Look:
- Part your hair down the middle and separate the front sections from temple to temple.
- Create two Dutch braids starting from each temple, working backwards along the hairline.
- Secure both braids at the back of your head where they meet, hiding the ends beneath the crossing point.
- Curl or wave the remaining loose hair for added texture and visual interest.
- Pull gently on the braid sections to create a fuller, more voluminous crown effect.
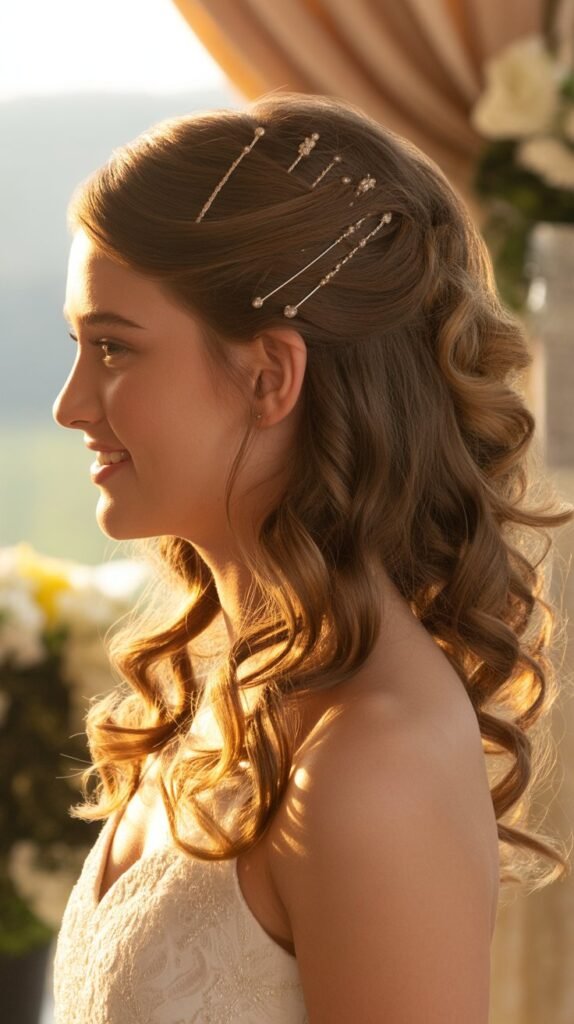
3. Twisted Half-Up with Pearl Accessories

Twisted half-up styles with pearl accessories offer an elegant and sophisticated approach perfect for formal homecoming celebrations.
The simple twists create clean lines while pearl embellishments add a luxurious touch that elevates the entire look.
Accessory Integration:
- Pearl bobby pins can be strategically placed along the twisted sections for subtle sparkle.
- A pearl-embellished hair comb serves as the perfect centerpiece where the twists meet.
- Individual pearl hair pins can be scattered throughout for a constellation effect.
- Mixing pearl sizes creates visual depth and prevents the look from appearing too uniform.
Step-by-Step Instructions:
- Straighten your hair completely for a sleek, polished foundation that showcases the twists.
- Take a 2-inch section of hair from one side, starting at the temple area.
- Twist the section tightly while moving backward, securing it temporarily with a clip.
- Repeat the process on the opposite side, ensuring both twists are symmetrical.
- Bring both twisted sections together at the center back and secure with bobby pins.
- Insert pearl accessories along the twists and at the joining point for added glamour.
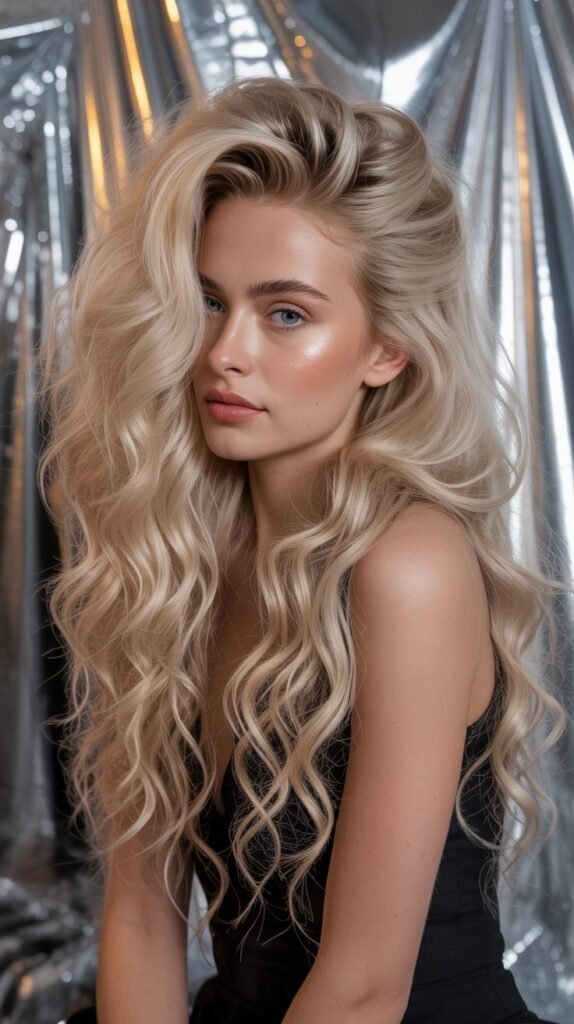
4. Voluminous Half-Up Top Knot
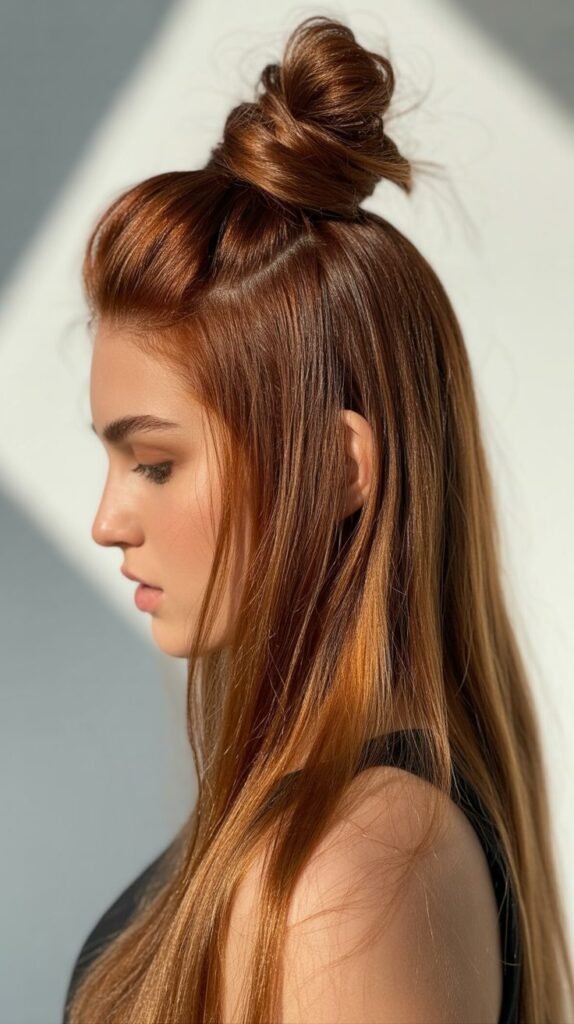
The voluminous half-up top knot brings a modern, fashion-forward edge to traditional homecoming hairstyles.
This bold style creates impressive height and drama while maintaining the flowing elegance of loose hair beneath.
Volume Creation Techniques:
- Backcombing the crown section before creating the top knot provides essential lift and fullness.
- Using a donut bun form inside the knot amplifies volume without requiring extremely thick hair.
- Texturizing spray applied before styling gives hair more grip and helps maintain the structure.
- Pulling sections of the finished knot slightly creates a deliberately messy, fuller appearance.
Building Your Top Knot:
- Gather hair from your temples to the crown, leaving the bottom two-thirds hanging free.
- Create a high ponytail with this section, positioning it where you want maximum height.
- Backcomb the ponytail thoroughly to create texture and volume throughout.
- Twist the backcombed ponytail loosely and wrap it around the base to form the knot.
- Secure with multiple bobby pins and finish with strong-hold hairspray for lasting power.
5. Waterfall Braid Half-Up

The waterfall braid half-up style creates a cascading effect that appears intricate but proves surprisingly wearable.
This romantic technique allows strands to fall through the braid like a waterfall, creating movement and visual interest.
Mastering the Waterfall Technique:
- The waterfall braid differs from regular braids by dropping sections instead of carrying them through.
- Starting the braid at your temple creates the most flattering face-framing effect.
- Working with slightly textured rather than freshly washed hair makes the process easier.
- Maintaining consistent tension throughout ensures the waterfall effect remains even and visible.
Creating This Cascading Look:
- Begin a regular three-strand braid starting at one temple, using a front section of hair.
- After the first stitch, drop the bottom strand and pick up a new section from the top.
- Continue this pattern of dropping and replacing the bottom strand as you work across.
- Secure the braid behind your ear on the opposite side with a small elastic.
- Curl the loose hair including the waterfall strands for a cohesive, flowing appearance.
6. Sleek Half-Up with Middle Part
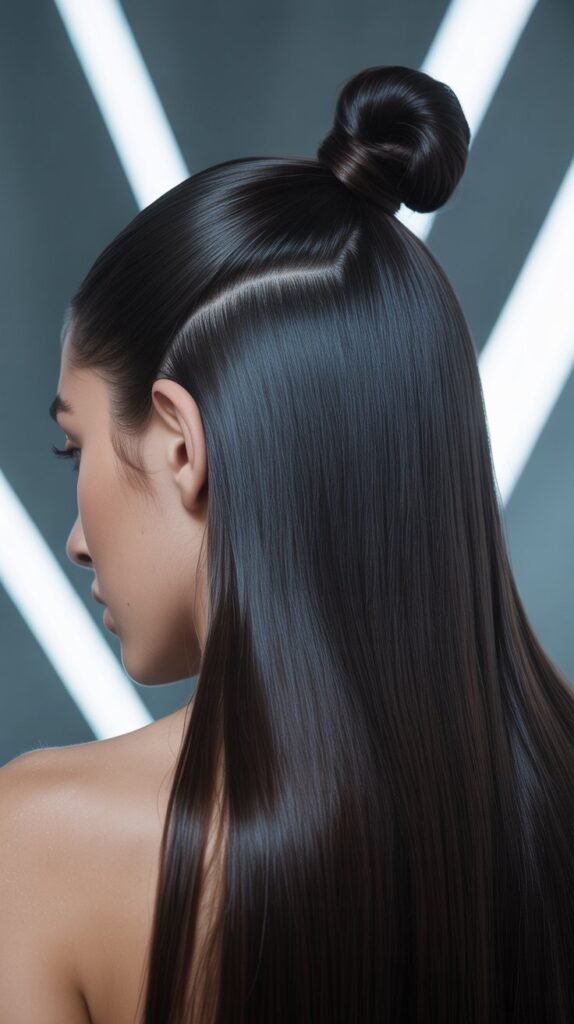
The sleek half-up with middle part delivers a minimalist, sophisticated look that emphasizes bone structure and natural beauty.
This contemporary style works exceptionally well for modern homecoming aesthetics and pairs perfectly with structured, minimalist dresses.
Achieving Perfect Sleekness:
- A flat iron is essential for creating the mirror-like shine that defines this style.
- Applying smoothing serum or oil before straightening helps eliminate frizz and adds gloss.
- The middle part must be razor-sharp and perfectly straight for the desired geometric effect.
- Using a fine-tooth comb while styling ensures no bumps or irregularities disrupt the smooth surface.
Styling for Maximum Impact:
- Wash and blow-dry hair using a paddle brush to pre-straighten and smooth the cuticle.
- Create a precise middle part using a rat-tail comb for laser-straight precision.
- Flat iron hair in small sections using slow, deliberate passes for maximum smoothness.
- Take the top section from the temples back and secure it low at the crown.
- Apply shine spray as a finishing touch to enhance the glossy, polished appearance.
7. Bubble Ponytail Half-Up

The bubble ponytail half-up style adds a playful, youthful twist to traditional homecoming hairstyles.
This trendy look creates interesting dimension through strategically placed elastics that form distinctive bubble segments.
Creating Defined Bubbles:
- Clear elastics work best as they remain invisible while providing secure hold between bubbles.
- Gently pulling on each bubble section after securing creates the signature rounded shape.
- The bubbles should be relatively uniform in size for the most polished appearance.
- Texturizing spray applied before styling helps the bubbles hold their shape throughout the evening.
Step-by-Step Bubble Creation:
- Pull the top half of your hair into a ponytail at the desired height.
- Add the first elastic approximately 2-3 inches down from the base of the ponytail.
- Gently pull the hair between the base and elastic outward to create the first bubble.
- Continue adding elastics every 2-3 inches down the ponytail, creating multiple bubble sections.
- Finish by pancaking each bubble section for maximum volume and definition.
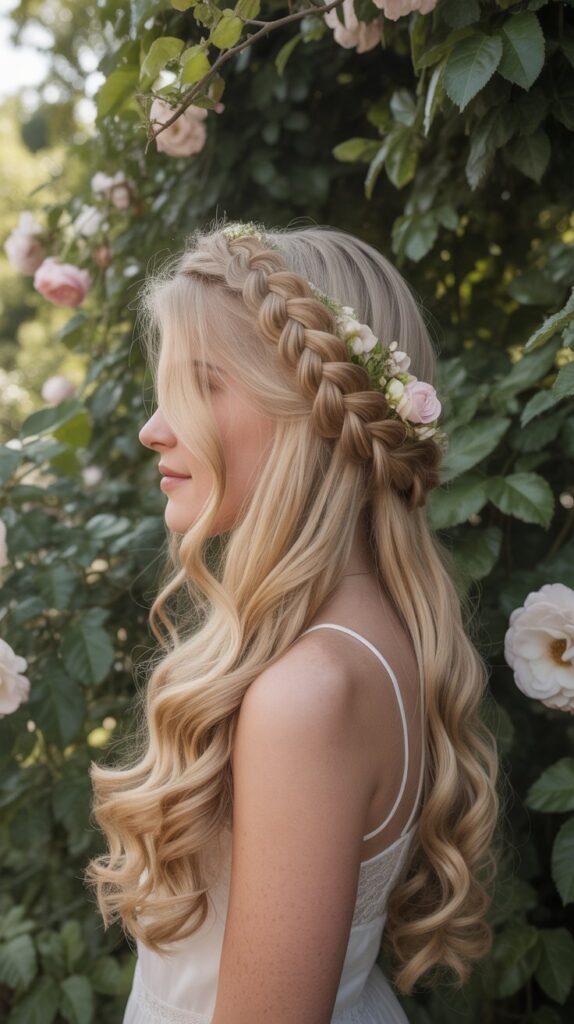
8. Floral Crowned Half-Up
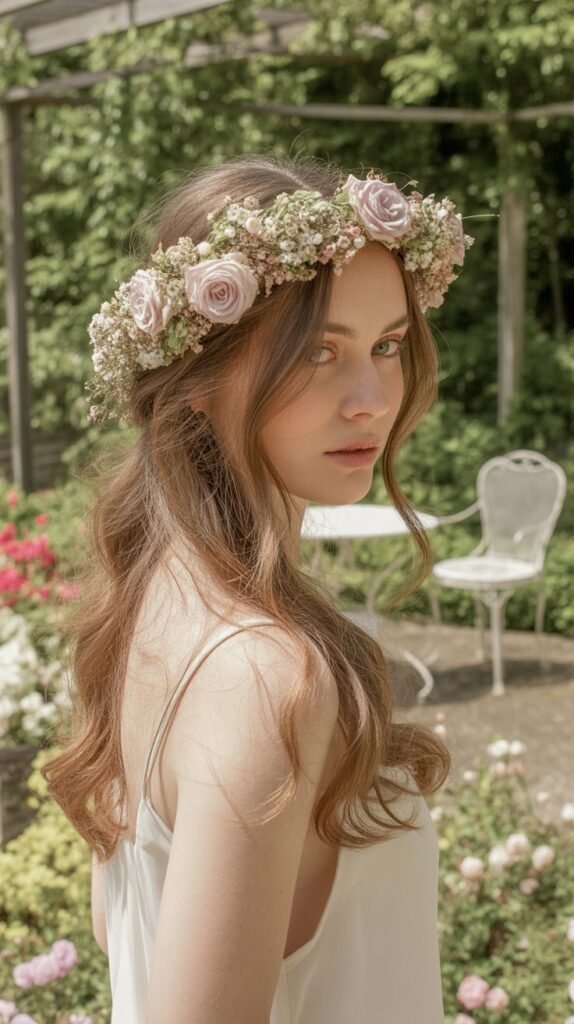
The floral crowned half-up style brings natural beauty and romantic charm to your homecoming look.
Fresh or artificial flowers woven into the hair create an enchanting, garden-party aesthetic that photographs beautifully.
Flower Selection and Placement:
- Smaller flowers like baby’s breath and spray roses work better than large statement blooms.
- Coordinating flower colors with your dress creates a cohesive, intentional appearance.
- Artificial flowers often hold up better throughout a long evening than fresh options.
- Wire-stemmed flowers are easiest to secure and manipulate into the desired positions.
Incorporating Florals Effectively:
- Create your basic half-up style first using the technique of your choice as a foundation.
- Insert flowers individually using bobby pins, starting at the center and working outward.
- Vary the flower sizes and types for visual interest rather than using identical blooms.
- Secure flowers at different angles and depths to create a natural, organic appearance.
- Finish with hairspray to secure both the hairstyle and the floral elements in place.
9. Crimped Half-Up with Volume
The crimped half-up with volume brings back retro texture with a modern twist.
This high-impact style creates incredible dimension and fullness, making a bold statement perfect for confident homecoming looks.
Crimping for Modern Appeal:
- Modern crimpers create finer, more sophisticated texture than vintage versions produced.
- Crimping only the underlayers while keeping the top layer smooth creates hidden volume.
- The style works best on hair that’s at least shoulder-length for full dramatic effect.
- Mixing crimped and smooth sections prevents the look from appearing costume-like.
Creating This Textured Style:
- Start with clean, completely dry hair as crimpers work only on dry strands.
- Section hair into layers and crimp the bottom and middle layers thoroughly.
- Leave the top layer smooth or lightly textured depending on your desired finish.
- Gather the top section back, allowing the crimped underlayers to provide natural volume.
- Secure the pulled-back section and arrange the crimped texture for maximum visual impact.
10. French Twist Half-Up

The French twist half-up combines classic elegance with contemporary styling.
This sophisticated option offers the refined look of a traditional French twist while maintaining the romantic appeal of loose, flowing hair.
Mastering the Twist Technique:
- The French twist requires smooth, slightly textured hair that has enough grip to hold.
- Creating the twist too tightly can result in an overly severe, dated appearance.
- Leaving some face-framing pieces loose softens the look and prevents it from appearing too formal.
- Strategic pin placement hidden within the twist ensures security without visible hardware.
Executing the French Twist:
- Gather the top section of hair from temples to crown, leaving the bottom half loose.
- Hold the gathered section at the center back and begin twisting it inward toward your head.
- As you twist, the hair naturally rolls upward creating the signature French twist shape.
- Secure the twist vertically with bobby pins inserted horizontally into the rolled section.
- Smooth any flyaways and adjust the tension to create your desired level of sleekness versus softness.
11. Half-Up with Ribbon Weave
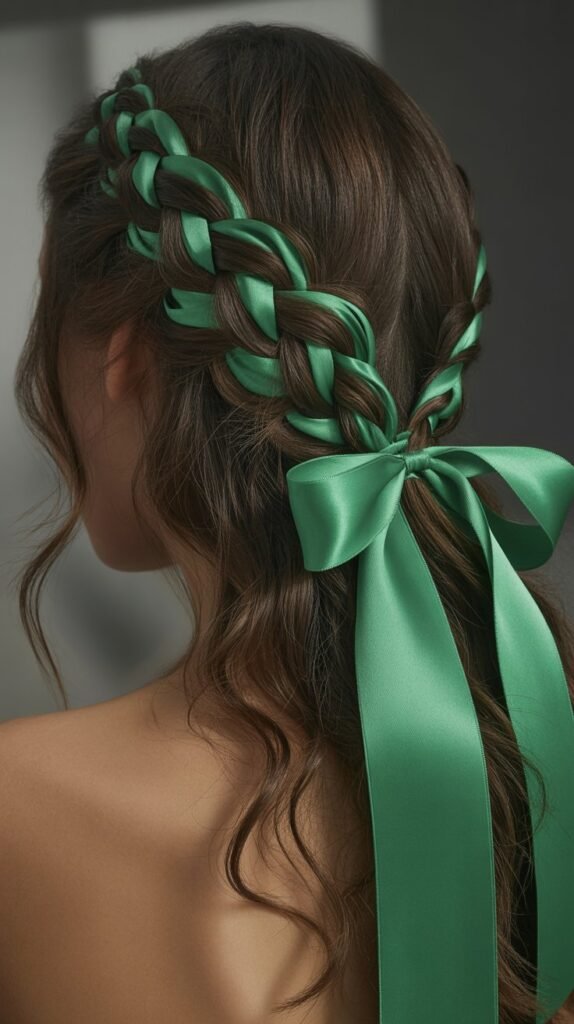
The half-up with ribbon weave introduces a unique, eye-catching element that sets your homecoming style apart.
Colorful ribbons woven through braids or twists add dimension, color, and personality to traditional styles.
Ribbon Selection Guidelines:
- Satin ribbons approximately 1/4 to 1/2 inch wide work best for weaving through hair.
- Coordinating ribbon color with your dress or accessories creates a pulled-together appearance.
- Metallic ribbons add extra shine and glamour for evening homecoming events.
- Having ribbon length at least three times your hair length ensures adequate material for weaving.
Weaving Technique:
- Create a Dutch or French braid in the top section where you’ll incorporate the ribbon.
- Fold the ribbon in half and secure the center point at the start of your braid.
- Weave one ribbon strand through each outer section of the braid as you work.
- The ribbon becomes part of the braid structure, adding color and texture throughout.
- Secure the finished braid and ribbon together, allowing excess ribbon to trail decoratively or tie into a bow.
12. Messy Textured Half-Up
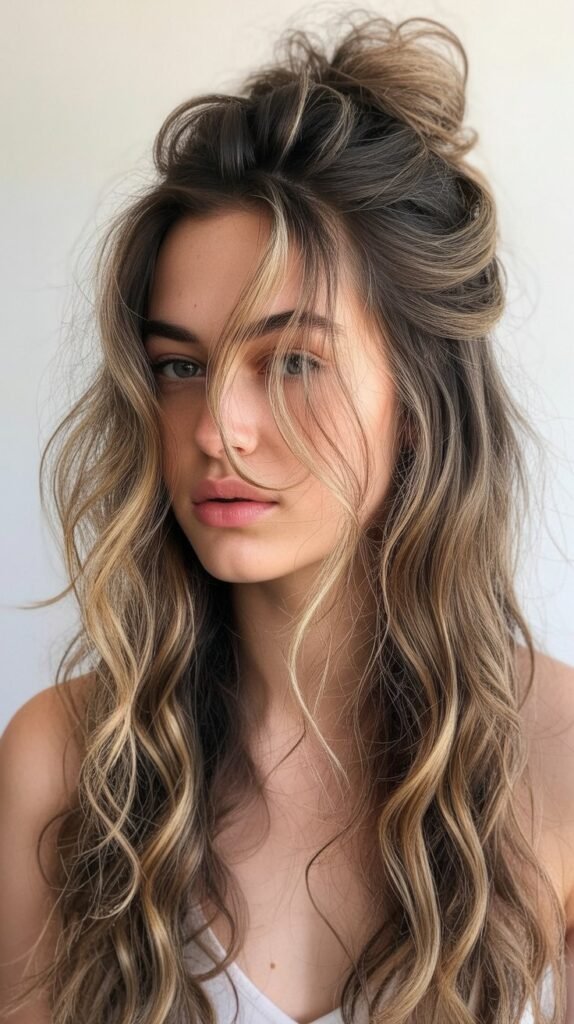
The messy textured half-up embraces effortless, undone beauty that appears casual yet carefully crafted.
This relaxed style works perfectly for laid-back homecoming themes or for achieving an enviably cool, non-trying-too-hard vibe.
Creating Intentional Messiness:
- The key is making the style appear effortless while ensuring it stays secure all night.
- Texture spray or dry shampoo provides the gritty texture that makes “messy” styles hold.
- Slightly irregular sections and asymmetrical elements contribute to the undone aesthetic.
- Strategic face-framing pieces left out soften the overall look and enhance the casual vibe.
Achieving the Perfect Undone Look:
- Start with second-day hair or add dry shampoo to clean hair for necessary texture.
- Loosely wave hair with a curling wand, alternating directions for natural-looking movement.
- Casually gather the top section back without worrying about perfect smoothness or symmetry.
- Secure with an elastic or pins, intentionally leaving some pieces loose and wispy.
- Pull small sections out around your face and roughen up the secured section for added texture.
13. Half-Up with Hair Jewelry

Half-up styles with hair jewelry transform simple looks into glamorous, red-carpet-worthy creations.
Metallic chains, jeweled clips, or decorative hair cuffs add instant sophistication and sparkle that catches the light beautifully.
Types of Hair Jewelry:
- Hair chains drape across the back of the head connecting two points for elegant detail.
- Jeweled barrettes serve as both functional fasteners and decorative focal points.
- Hair cuffs slide onto small sections of hair adding metallic accents without clips or pins.
- Hairpins with crystal or pearl ends can be clustered together for custom embellishment arrangements.
Incorporating Jewelry Effectively:
- Apply hair jewelry after completing the basic hairstyle structure to see exactly where pieces should go.
- Balance is crucial—avoid over-accessorizing which can make the style appear cluttered.
- Secure chain-style jewelry by pinning both ends to ensure it doesn’t shift during the evening.
- Match metal tones to your other accessories like earrings and bracelets for a cohesive look.
14. Bouffant Half-Up
The bouffant half-up brings vintage glamour with impressive height at the crown.
This retro-inspired style creates dramatic volume that elongates the face and adds old Hollywood sophistication to your homecoming look.
Building Volume:
- Backcombing is essential for creating the foundation that supports the bouffant height.
- Using a teasing brush specifically designed for backcombing prevents damage while maximizing volume.
- Smoothing only the outer layer over the backcombed section maintains height while appearing polished.
- Strong-hold products are non-negotiable for keeping the bouffant intact throughout the evening.
Creating the Bouffant:
- Section off the crown area from temple to temple, approximately 4-5 inches back from the hairline.
- Backcomb this section thoroughly at the roots, working from the ends toward the scalp.
- Smooth the top layer gently over the backcombed hair without flattening the volume underneath.
- Secure the section at the desired height with bobby pins arranged in an X pattern.
- Set the style with firm-hold hairspray, concentrating on the base for lasting height.
15. Side-Swept Half-Up
The side-swept half-up creates romantic asymmetry that flatters the face and adds movement.
This versatile style works beautifully for showcasing earrings and necklaces while maintaining visual interest through its off-center design.
Achieving the Perfect Sweep:
- Deep side parts create the most dramatic sweep and provide the necessary hair volume on one side.
- Securing the swept section behind the opposite ear creates clean lines and elegant exposure of the neck.
- Curling the loose hair on the heavier side adds volume that balances the asymmetrical design.
- Face-framing layers on the lighter side prevent that section from appearing too bare or flat.
Styling Steps:
- Create a deep side part positioned above one eyebrow for maximum asymmetrical impact.
- Take a section from the heavier side starting at the part and working back to the crown.
- Sweep this section across the back of the head toward the opposite side.
- Secure behind the ear on the lighter side using bobby pins that match your hair color.
- Curl the remaining loose hair with emphasis on the side with more volume for balance.
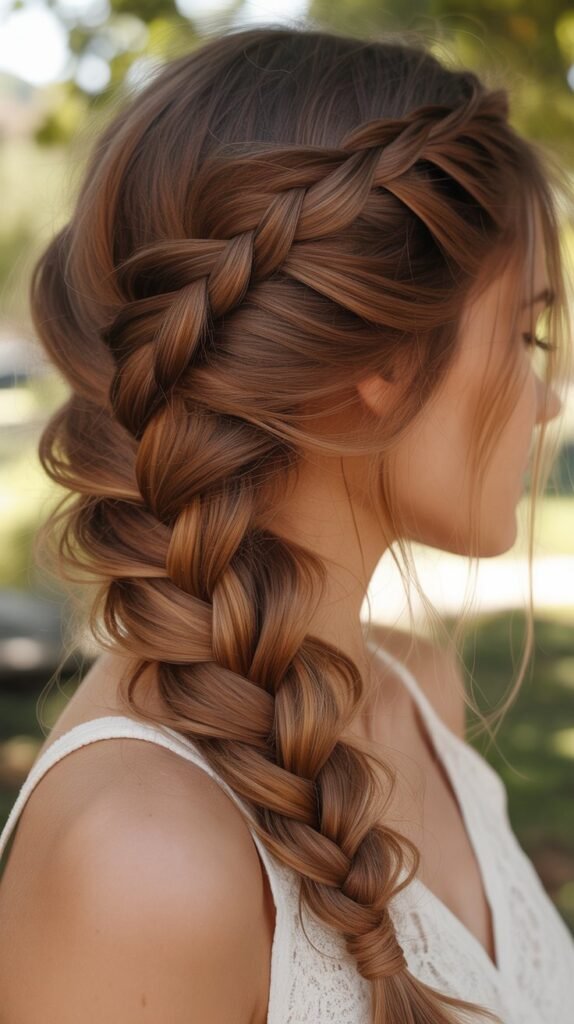
16. Rope Braid Half-Up
The rope braid half-up offers a simple yet striking alternative to traditional braiding techniques.
This twisted style creates a rope-like texture that adds visual interest without requiring advanced braiding skills.
Rope Braid Basics:
- Rope braids are created by twisting two sections of hair in the same direction then wrapping them around each other.
- The technique is actually simpler than traditional three-strand braiding once you understand the mechanics.
- Keeping consistent tension throughout prevents the rope from loosening or appearing uneven.
- Slightly textured hair holds the rope braid better than freshly washed, slippery hair.
Creating Your Rope Braid:
- Divide the top section of hair you’re pulling back into two equal parts.
- Twist each section clockwise (or counter-clockwise) several times to create tension.
- Wrap the two twisted sections around each other in the opposite direction of the individual twists.
- Continue twisting and wrapping until you reach the desired length then secure with an elastic.
- Gently pull on the rope sections to loosen and widen for a fuller appearance.
17. Half-Up with Vintage Scarf
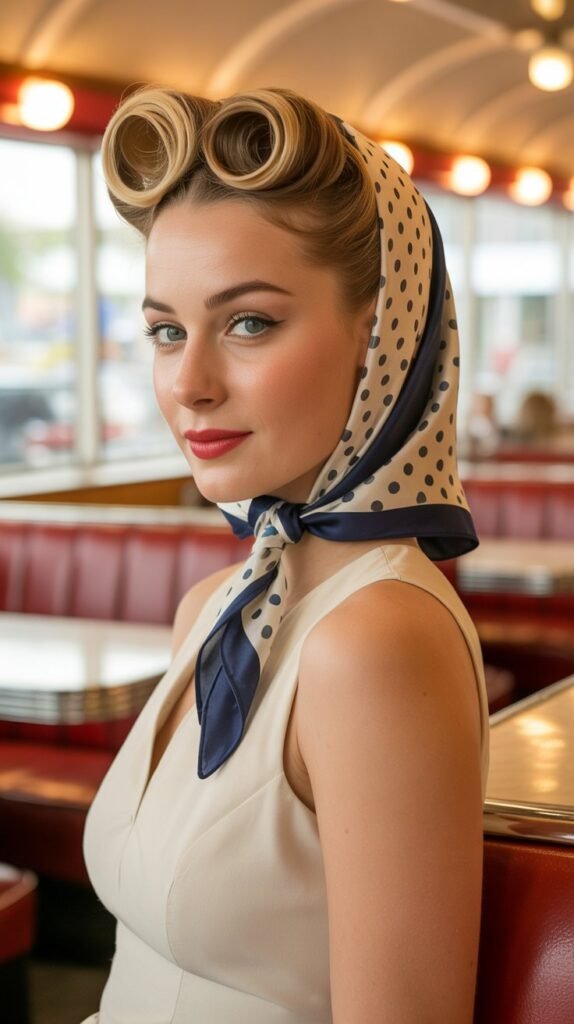
The half-up with vintage scarf combines retro charm with practical styling.
A silk or patterned scarf woven into the hairstyle adds color, personality, and a unique touch that references classic 1950s pin-up aesthetics.
Scarf Styling Options:
- Using the scarf as a headband base provides structure while adding vintage flair.
- Wrapping the scarf around the pulled-back section creates a colorful accent at the gathering point.
- Tying the scarf into a bow adds a playful, feminine finishing touch.
- Long scarf ends left trailing create movement and can incorporate your dress colors.
Incorporating the Scarf:
- Fold a square scarf into a long band approximately 2-3 inches wide.
- Position it as a headband or wrap it around the crown area where you’ll pull hair back.
- Gather the top section of hair over or through the scarf depending on your chosen style.
- Secure the hair and integrate the scarf ends by tying them or tucking them into the hairstyle.
- Adjust the scarf positioning and tie for the desired retro-modern balance.
18. Infinity Braid Half-Up

The infinity braid half-up creates an intricate figure-eight pattern that mesmerizes viewers.
This advanced technique produces a stunning woven effect that appears far more complex than the execution requires.
Understanding Infinity Braiding:
- The infinity braid uses a figure-eight weaving pattern rather than traditional over-under braiding.
- Four small sections of hair are needed to create the authentic infinity pattern.
- The technique requires practice but creates unmatched visual impact once mastered.
- Slightly curled or textured hair helps sections stay separated and visible throughout the braid.
Creating the Infinity Pattern:
- Divide the section you’re braiding into two equal parts, then split each part in half for four total sections.
- Create figure-eight patterns by bringing outer sections through the middle in an infinity shape.
- Maintain consistent tension and pattern repetition for uniform, recognizable results.
- Work slowly at first to ensure the pattern remains clear and doesn’t become muddled.
- Secure the finished infinity braid and gently loosen it to showcase the intricate weaving.
19. Half-Up with Zigzag Part

The half-up with zigzag part adds unexpected edge to traditional styling. This geometric part creates instant visual interest and shows attention to detail that elevates even the simplest half-up styles.
Creating the Perfect Zigzag:
- A rat-tail comb is essential for drawing precise zigzag lines in the hair.
- The zigzag should be visible but not so extreme that it appears costume-like.
- Sharp, angular zigzags create a modern edge while softer curves offer subtle interest.
- The part works best on sleek, straight hair where the geometric lines remain crisp.
Technique for Zigzag Parting:
- Start at the front hairline and use the pointed end of a rat-tail comb to draw your path.
- Create angular movements from side to side as you work backward toward the crown.
- Keep the zigzag angles relatively uniform in size and spacing for the most polished look.
- Once the part is established, smooth hair on both sides to enhance the geometric definition.
- Complete your half-up style, allowing the unique part to remain the focal point.
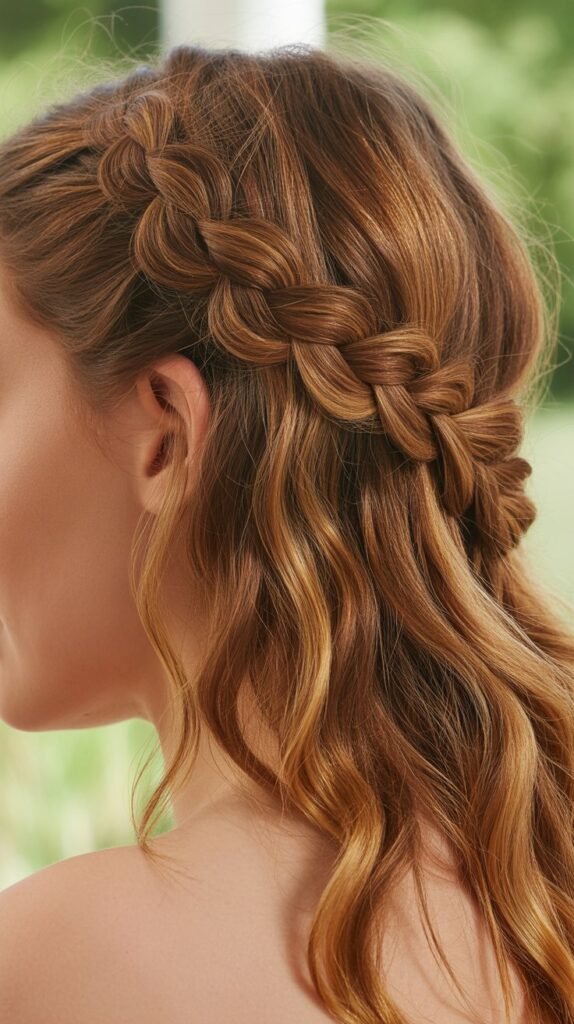
20. Crown Braid Half-Up
The crown braid half-up encircles the head with an elegant braid that creates a tiara effect.
This regal style combines the beauty of braiding with the practicality of keeping hair away from the face.
Crown Braid Variations:
- A single braid worked from one side to the other creates a halo across the top of the head.
- Two braids starting from each temple and meeting at back offer symmetry and doubled texture.
- Incorporating small sections from the hairline as you braid ensures the crown sits securely.
- Pancaking the crown braid after completion creates a fuller, more impressive appearance.
Building Your Crown:
- Part hair from temple to temple across the top of your head, leaving the bottom half loose.
- Start a Dutch braid at one temple, working across the crown toward the opposite side.
- Incorporate small sections from the hairline as you braid to keep the braid positioned high.
- Secure the braid end behind the opposite ear, tucking and pinning it for invisible finish.
- Pull gently on the braid sections along the crown to create width and prominence.
21. Half-Up with Sparkly Pins
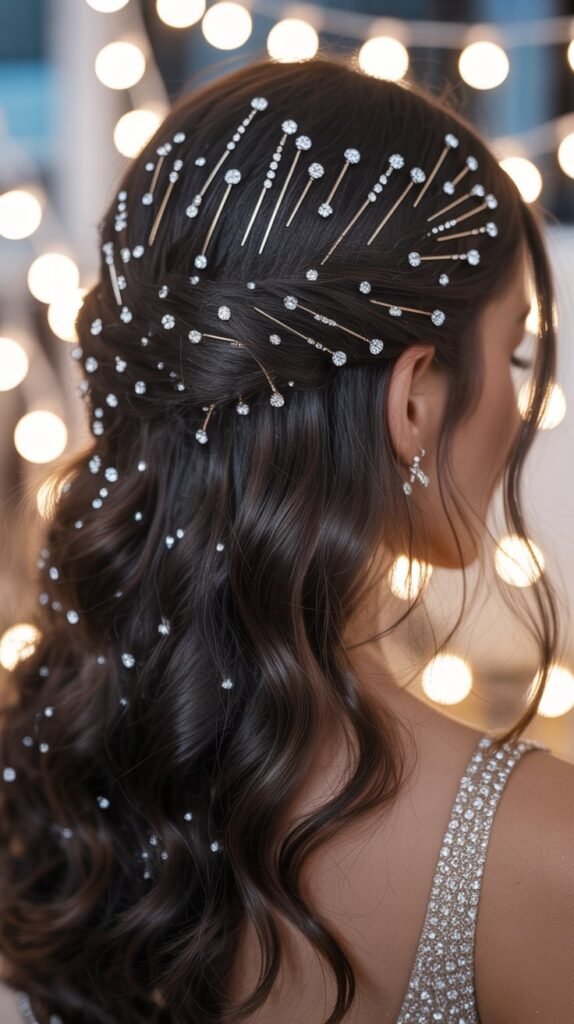
The half-up with sparkly pins adds effortless glamour through strategic accessory placement.
Crystal, rhinestone, or glitter-topped bobby pins create shimmer and catch the light with every movement.
Pin Placement Strategy:
- Clustering pins in groups of 3-5 creates intentional design rather than random scattered placement.
- Arranging pins in geometric patterns like triangles or lines adds modern sophistication.
- Mixing different sparkle types and sizes creates visual depth and interest.
- Strategic placement along the secured section draws attention to the pulled-back area.
Application Techniques:
- Complete your basic half-up style before adding decorative pins for best placement decisions.
- Insert sparkly pins at slight angles so the decorative tops face forward and catch light.
- Create deliberate patterns or designs rather than placing pins haphazardly throughout.
- Use regular bobby pins for structural security and sparkly pins purely for decoration.
- Consider your lighting environment—more pins work for evening events while fewer suit daytime.
22. Fishtail Braid Half-Up
The fishtail braid half-up offers intricate texture through a detailed braiding technique.
This woven style creates a herringbone pattern that appears complex and sophisticated while remaining surprisingly achievable.
Fishtail Fundamentals:
- Fishtail braids use only two sections of hair rather than the traditional three.
- Taking smaller pieces from each side creates tighter, more defined patterns.
- The braid naturally creates a flat, wide appearance that showcases the woven pattern beautifully.
- Pulling the finished braid apart significantly increases width and creates a fuller look.
Fishtail Creation Process:
- Divide the section you’re braiding into two equal parts held in separate hands.
- Take a small piece from the outer edge of one section and cross it to the opposite section.
- Repeat on the other side, taking a small piece from the outer edge and crossing it over.
- Continue this alternating pattern, maintaining consistent tension throughout.
- Secure with elastic and pancake the braid by pulling gently on the outer edges.
23. Half-Up with Crisscross Bobby Pins
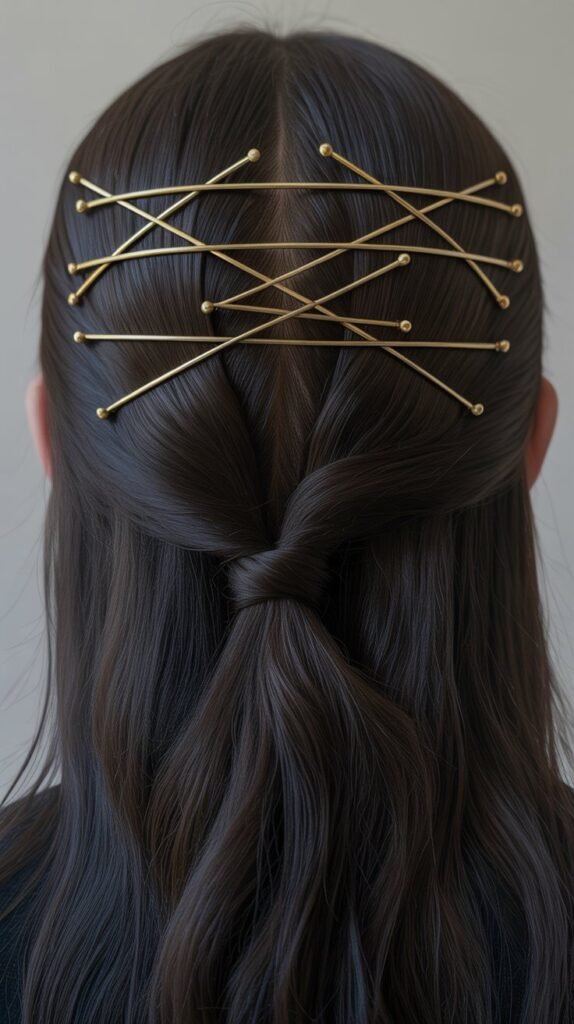
The half-up with crisscross bobby pins turns functional hardware into decorative design elements.
This minimalist style celebrates the beauty of simplicity while creating geometric interest through deliberate pin placement.
Creating Visible Pin Patterns:
- Using bobby pins in contrasting colors like gold, rose gold, or silver makes them stand out.
- Creating consistent X patterns across the pulled-back section establishes visual rhythm.
- Spacing the crisscross patterns evenly creates symmetry and intentional design.
- Combining different metallic tones adds dimension and modern mixed-metal appeal.
Pattern Application:
- Secure your basic half-up style with hidden pins first for structural integrity.
- Choose decorative bobby pins that contrast with your hair color for maximum visibility.
- Create X or crisscross patterns by overlapping two pins at their centers.
- Space the patterns evenly across the visible secured section for balanced design.
- Ensure all decorative pins are firmly pressed against the scalp despite their aesthetic purpose.
24. Mohawk-Inspired Half-Up
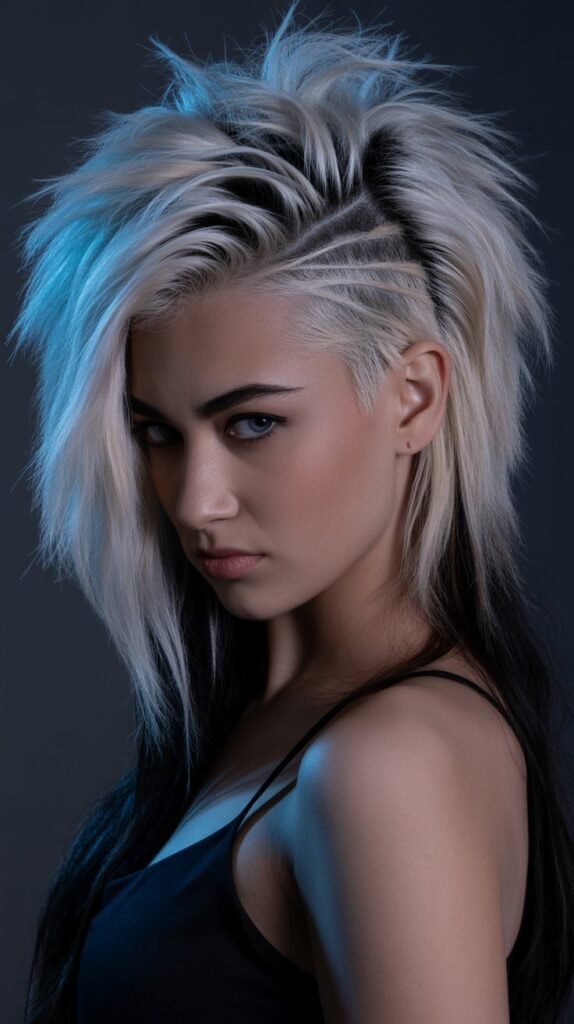
The mohawk-inspired half-up brings punk edge to formal styling.
This bold look creates height and drama down the center of the head while maintaining softer elements through the loose hair beneath.
Achieving Mohawk Structure:
- Building height requires substantial backcombing at the roots along the center section.
- The style works best on hair with some natural texture rather than completely straight hair.
- Using strong-hold products is essential to maintain the vertical structure throughout the evening.
- The mohawk section should be clearly defined and separated from the loose sides.
Construction Method:
- Section hair into three parts: one center strip and two side sections left hanging loose.
- Backcomb the center strip heavily from roots to ends to create dense texture.
- Smooth the top layer of the center section while maintaining the volume underneath.
- Pin the center strip upward and slightly forward to create the signature mohawk shape.
- Finish with maximum-hold hairspray and arrange the spiky texture for desired effect.
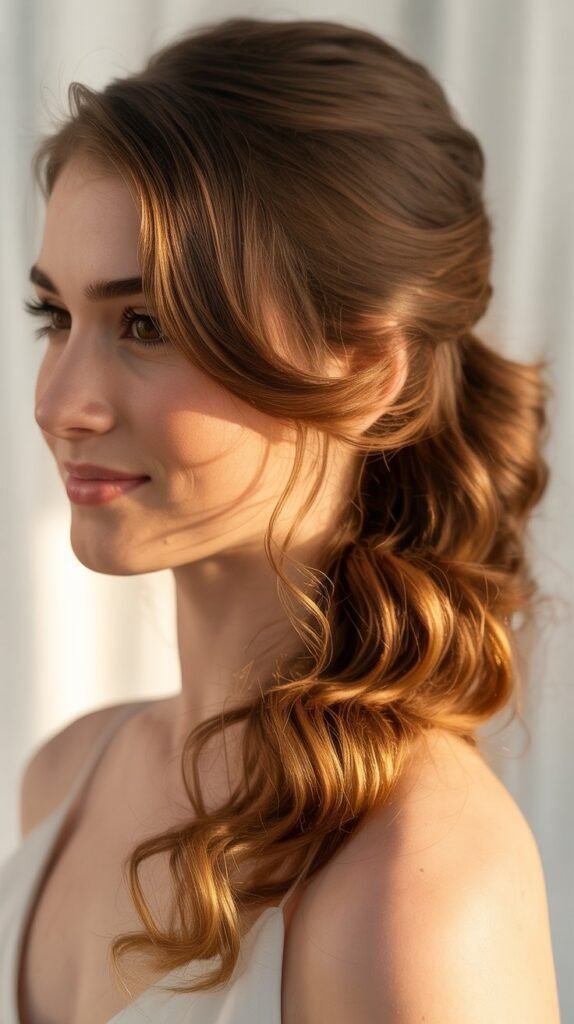
25. Half-Up with Low Twisted Bun
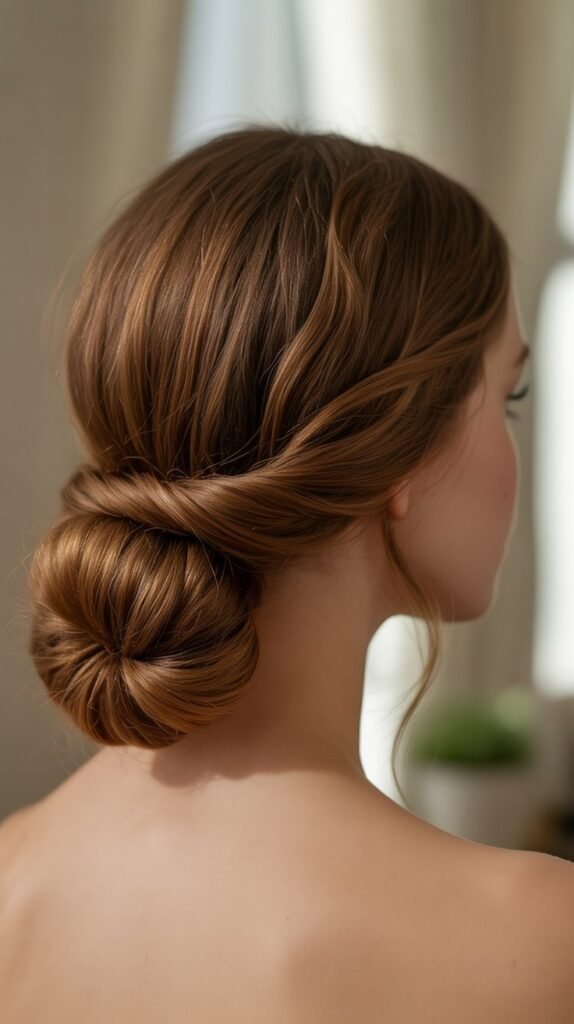
The half-up with low twisted bun combines casual elegance with secure styling.
This hybrid approach offers the polish of an updo while maintaining the softness of flowing hair below.
Bun Positioning Benefits:
- Low buns sit at the nape creating elegant neck exposure without excessive height.
- The low position remains secure and comfortable even during active dancing.
- Twisted texture adds visual interest without requiring intricate braiding skills.
- The style works beautifully with both strapless dresses and those with detailed back designs.
Creating the Low Twisted Bun:
- Gather the top half of your hair and secure it at the nape of your neck.
- Divide this ponytail into two sections and twist each section individually.
- Wrap the twisted sections around each other while coiling them into a bun shape.
- Secure the bun with bobby pins inserted at various angles for maximum hold.
- Pull small sections of the bun outward to create texture and a fuller appearance.
- Finish by curling or waving the loose hair beneath for a cohesive, romantic overall look.
26. Half-Up with Feather Extensions

The half-up with feather extensions adds bohemian flair and unexpected color through decorative feather accents.
This festival-inspired style brings whimsy and personality to traditional homecoming looks while creating unique visual interest.
Feather Selection and Placement:
- Natural feather colors like browns and creams create subtle, earthy appeal.
- Brightly colored or peacock feathers make bold statements and add vibrant pops of color.
- Mixing feather lengths creates dynamic movement and prevents uniform, stiff appearance.
- Positioning feathers at the point where hair is secured creates the most natural integration.
Integration Techniques:
- Clip-in feather extensions offer the easiest application and removal without commitment.
- Individual feathers can be tied into small hair sections with clear micro-elastics.
- Tucking feather stems into the secured section and pinning them hides attachment points.
- Arranging feathers at varying heights and angles creates organic, flowing movement.
- Consider dress colors when selecting feather tones for coordinated or complementary effects.
27. Victory Roll Half-Up

The victory roll half-up brings authentic vintage glamour with iconic 1940s styling.
These distinctive rolled sections create instant retro appeal while maintaining modern wearability through loose hair beneath.
Victory Roll Essentials:
- The rolls should be tight and smooth with clearly defined cylindrical shapes.
- Positioning rolls symmetrically on each side of a center part creates classic balance.
- Setting lotion or strong-hold mousse applied before rolling provides essential structure.
- Bobby pins must be strategically hidden inside the rolls for invisible security.
Creating Perfect Victory Rolls:
- Work with smooth, brushed-out hair for the sleekest vintage appearance.
- Take a front section from the part to the temple on one side.
- Roll this section backward toward the scalp, creating a tight cylindrical shape.
- Pin the roll securely at the base where it meets the scalp, tucking pins inside.
- Repeat on the opposite side, ensuring both rolls are symmetrical in size and position.
- Secure the remaining hair at the back and style the loose ends in period-appropriate waves or curls.
28. Half-Up with Glitter Roots
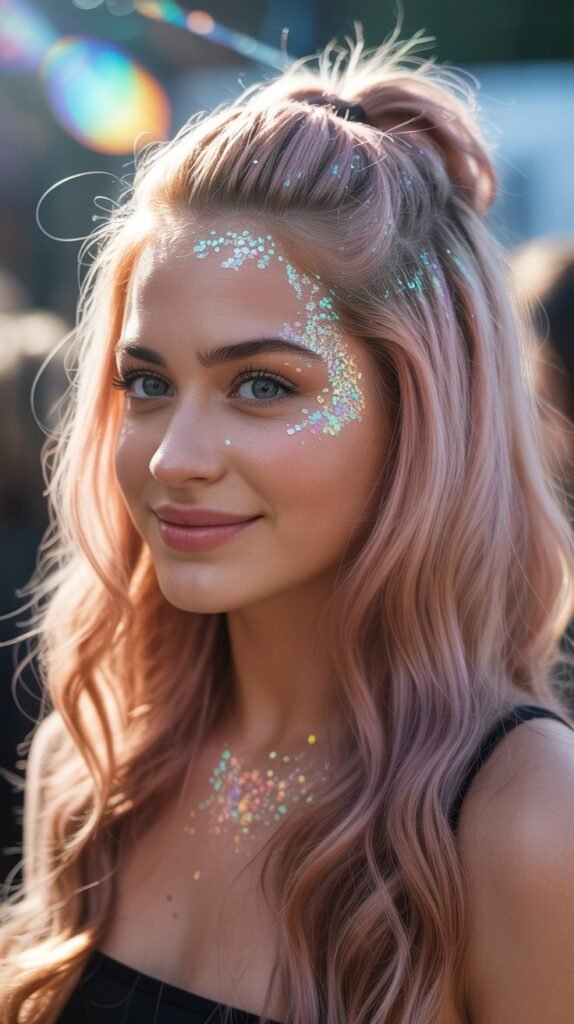
The half-up with glitter roots adds festival sparkle and contemporary edge.
This trendy style applies cosmetic glitter to the part and roots, creating shimmer that catches light beautifully throughout the evening.
Glitter Application Best Practices:
- Cosmetic-grade glitter specifically designed for hair and skin ensures safety and easy removal.
- Aloe vera gel or specialized glitter adhesive provides hold without damaging hair.
- Applying glitter to the part line and root area creates maximum visibility.
- Coordinating glitter colors with dress or accessories creates intentional, cohesive styling.
Application Process:
- Complete your half-up hairstyle before applying glitter for accurate placement visualization.
- Use a small brush or cotton swab to apply adhesive gel along the part and exposed roots.
- Tap or sprinkle cosmetic glitter onto the gel while it’s still wet.
- Press the glitter gently with your finger to ensure maximum adhesion.
- Seal with a light mist of hairspray to lock glitter in place throughout the event.
- Keep makeup remover wipes handy for any glitter that strays onto skin during application.
29. Asymmetrical Braided Half-Up
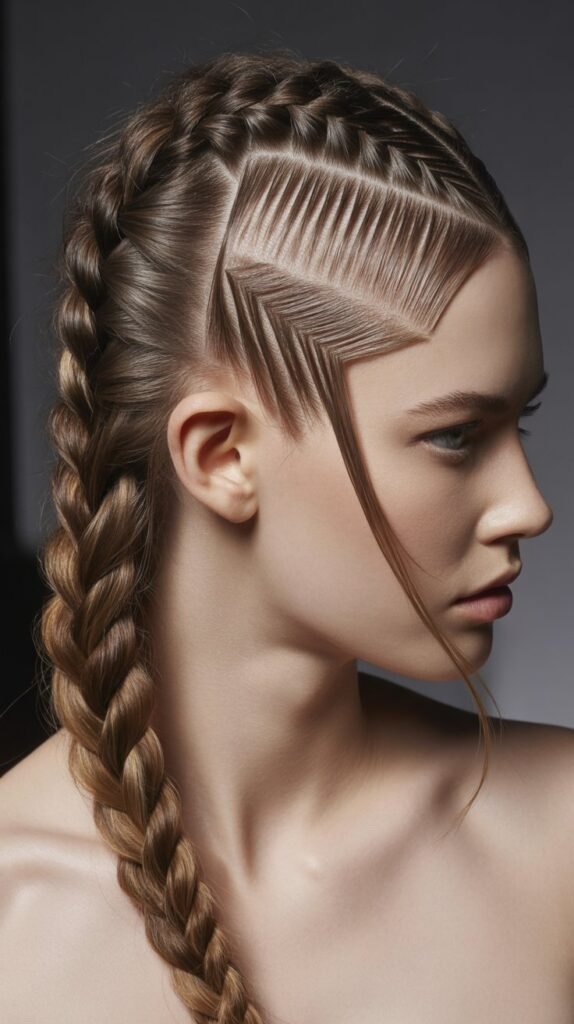
The asymmetrical braided half-up embraces off-center design for modern, fashion-forward appeal.
This style combines braiding techniques with deliberate imbalance that creates visual interest and contemporary edge.
Asymmetrical Design Elements:
- Placing a single braid on one side while leaving the other smooth creates striking contrast.
- Starting the braid at an unexpected angle adds additional asymmetry and interest.
- The style works particularly well for showcasing statement earrings on the smoother side.
- Balancing the visual weight requires careful consideration of braid thickness and placement.
Creating Asymmetrical Braids:
- Create a deep side part to establish the foundation for asymmetrical styling.
- Choose one side to feature the braid while planning to keep the opposite side sleek.
- Execute a Dutch or French braid starting from the front and working back along one side.
- Secure the braid at the back while keeping the opposite side smooth and unbraided.
- Ensure the loose hair beneath is styled to complement the asymmetrical upper section.
30. Half-Up with Colored Hair Extensions

The half-up with colored hair extensions introduces temporary color creativity without commitment.
Clip-in extensions in bold or pastel shades add dimension, length, and personality to your homecoming hairstyle.
Extension Selection Guide:
- Clip-in extensions offer easy application and removal perfect for special occasions.
- Matching extension texture to your natural hair creates seamless blending.
- Contrasting colors create bold statements while tonal variations add subtle dimension.
- Multiple shorter extension pieces blend more naturally than single long sections.
Integration and Blending:
- Clip extensions into the bottom half of your hair before creating the half-up style.
- Tease the roots where clips attach to create texture that helps hide the clips.
- Layer natural hair over the clip attachment points to conceal the hardware.
- Curl or style both natural hair and extensions together for unified texture.
- Position the half-up section to draw attention upward while extensions add volume below.
31. Knotted Half-Up

The knotted half-up replaces traditional pins and elastics with actual hair knots.
This creative technique creates textural interest through tied sections that serve as both structural and decorative elements.
Knotting Techniques:
- Simple overhand knots work for most knotting applications in hair styling.
- The knots must be tight enough to hold but not so tight they create uncomfortable tension.
- Slightly textured or day-old hair holds knots better than freshly washed, slippery strands.
- Creating multiple small knots distributes holding power better than relying on single large knots.
Building the Knotted Style:
- Divide the top section into two equal parts that you’ll tie together.
- Create a simple overhand knot with these sections at your desired positioning.
- Pull the knot tight enough to secure but maintain some looseness for texture.
- Create additional knots with surrounding sections if extra security is needed.
- Style the loose ends from the knots alongside the flowing hair beneath.
32. Half-Up with Wrapped Ponytail Base
The half-up with wrapped ponytail base conceals elastic bands through elegant hair wrapping.
This polished technique eliminates visible hardware while creating a sleek, professional finish to the gathered section.
Wrapping Technique Benefits:
- Concealing the elastic creates a more polished, finished appearance than exposed bands.
- The wrapped section adds subtle texture and interest at the gathering point.
- This technique works across all hair types and textures with equal effectiveness.
- The wrap provides additional security beyond the elastic alone.
Creating the Wrapped Base:
- Secure your half-up section with a clear or matching elastic as usual.
- Take a small section from underneath the ponytail approximately half an inch wide.
- Wrap this section around the elastic base, covering it completely.
- Tuck the end of the wrapping section under itself and secure with a bobby pin.
- Ensure the pin is hidden beneath the wrap for an invisible, polished finish.
33. Textured Half-Up with Hair Rings

The textured half-up with hair rings incorporates metallic rings or cuffs for modern, edgy embellishment.
These sliding accessories add geometric interest and reflective elements that create contemporary styling.
Hair Ring Styling:
- Small sections of hair are threaded through rings that slide to desired positions.
- Multiple rings in varying sizes create more visual impact than single statement pieces.
- Mixing metallic finishes like silver, gold, and rose gold adds dimensional interest.
- Positioning rings at different heights creates dynamic, non-uniform appeal.
Application Method:
- Complete your textured half-up base style before adding rings for clear section access.
- Select small vertical sections approximately quarter-inch wide to thread through rings.
- Slide open-ended rings onto sections or thread closed rings before gathering hair.
- Position rings at varying heights rather than aligning them uniformly.
- Ensure rings are secure enough not to slide but loose enough not to pull uncomfortably.
- Balance ring placement across the pulled-back section for visual harmony.
Conclusion
From classic romantic curls to edgy modern accessories, these 33 Stunning Half-Up Half-Down Hairstyles for Homecoming offer something for every personal style, hair type, and comfort level.
The beauty of the half-up half-down style lies in its incredible versatility—it can be as simple or as elaborate as you desire, adapting seamlessly to complement your dress, showcase your personality, and withstand hours of dancing and celebration.
Whether you gravitate toward timeless elegance with soft curls and pearl accessories, embrace bohemian romance through braids and florals, or make bold statements with geometric parts and glitter roots, you now have a comprehensive collection of ideas to inspire your homecoming look.
Remember that the best hairstyle is one that makes you feel confident, comfortable, and authentically yourself, so choose the style that resonates with your personal aesthetic and get ready to create unforgettable memories at your homecoming celebration.