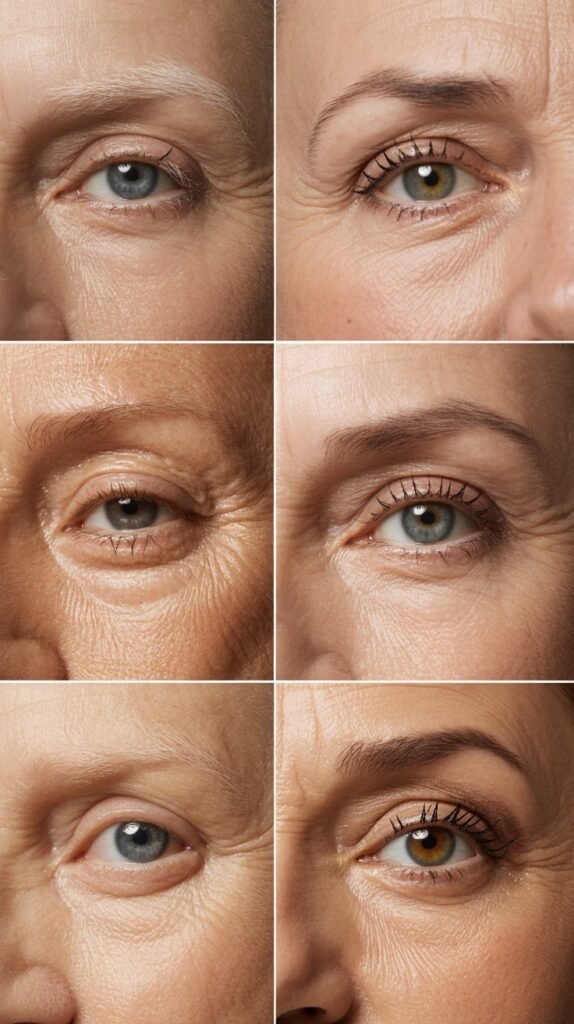
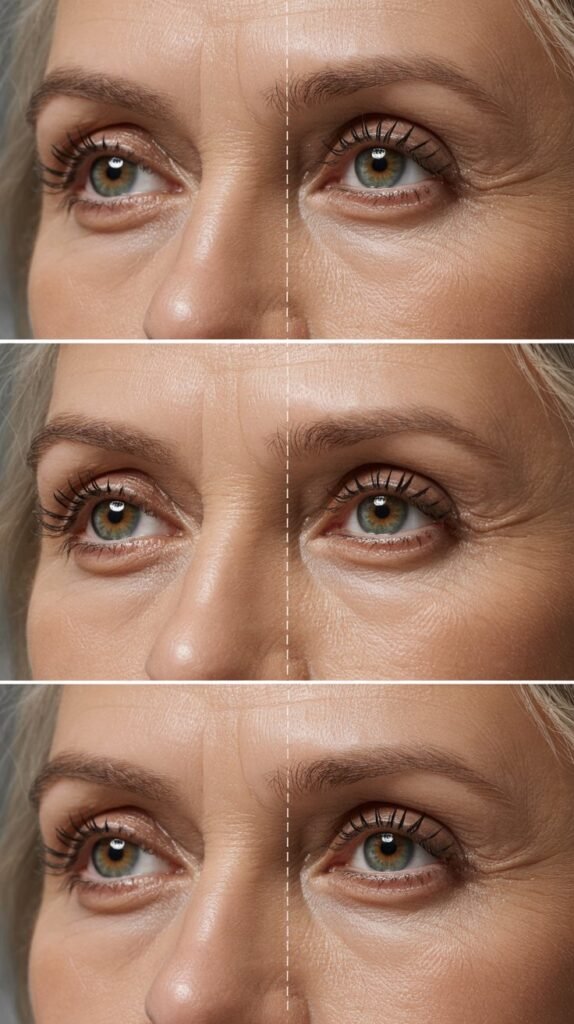
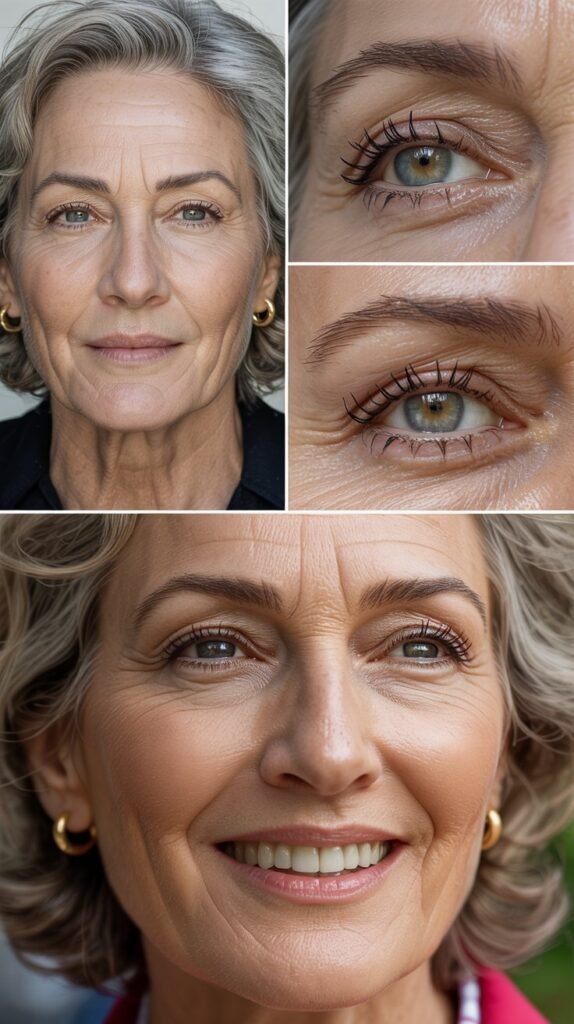
As we embrace the beauty of aging, our eyes deserve special attention to maintain their natural radiance and vitality.
The article “32 Best Makeup Tips for Women Over 50 to Brighten the Eyes” is designed to transform your approach to eye makeup with professional techniques that enhance rather than hide your natural features.
This comprehensive guide explores everything from proper preparation and primer application to advanced color selection and application methods that work specifically with mature skin.
Whether you’re dealing with hooded lids, fine lines, or simply want to create a more lifted and youthful appearance, these expert tips will help you achieve brighter, more vibrant eyes that reflect your inner confidence.
You’ll discover the secrets to choosing the right formulas, mastering eyeliner techniques, and creating dimension that flatters your unique eye shape while addressing common concerns that come with aging gracefully.
1. Start with Proper Eye Care
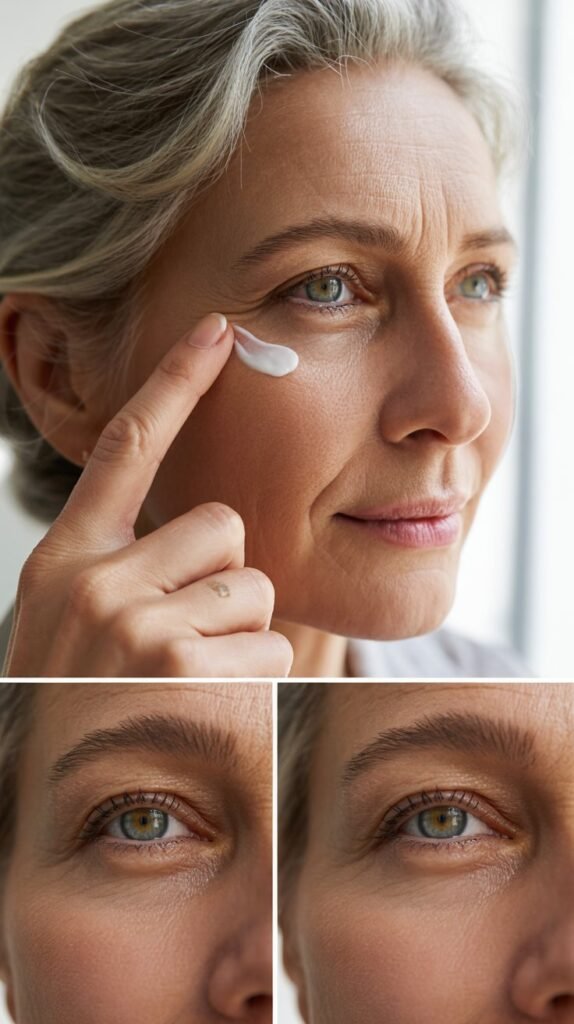
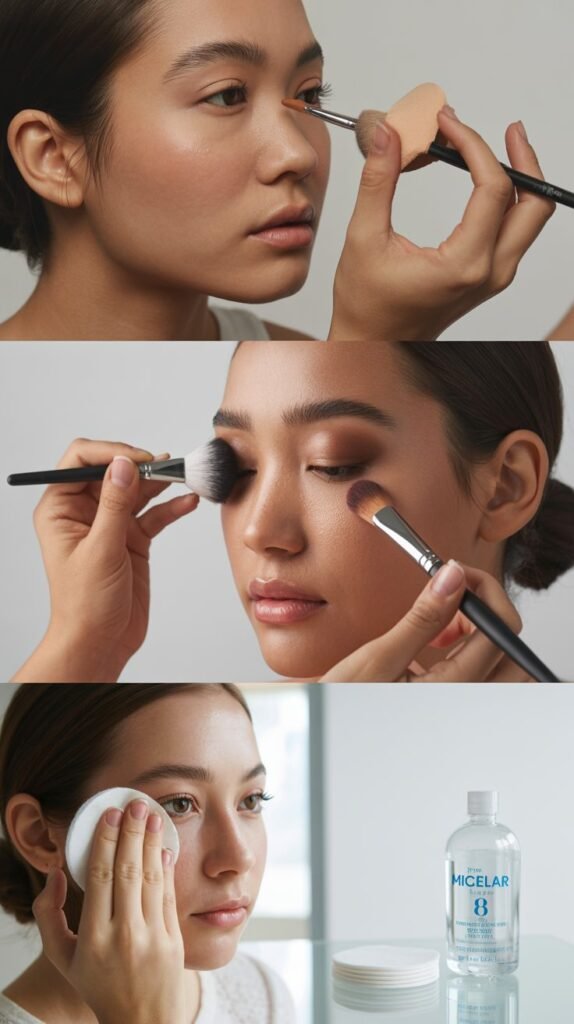
Healthy skin is the foundation of beautiful makeup application. Before applying any cosmetics, your eye area needs adequate hydration and nourishment to ensure smooth application and lasting results.
- Moisturize the eye area with a hydrating eye cream at least 15 minutes before applying makeup to allow complete absorption
- Use products containing hyaluronic acid or peptides to plump fine lines and create a smoother canvas
- Gently pat the product around the orbital bone rather than rubbing to avoid stretching delicate skin
- Choose eye creams with light-reflecting particles that naturally brighten the under-eye area
- Allow sufficient time for products to set before moving to primer application
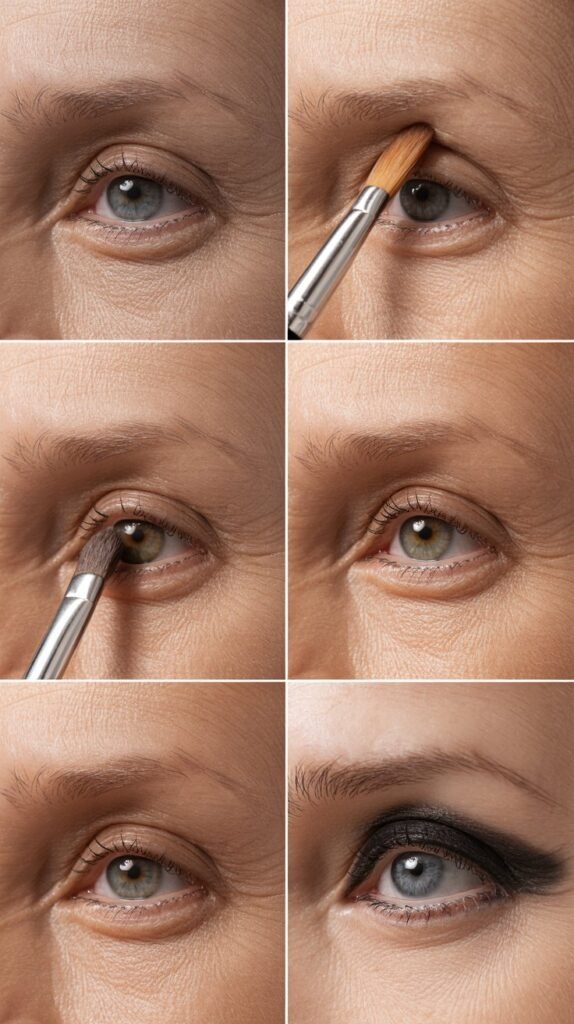
2. Always Use an Eye Primer
Eye primer is non-negotiable for mature eyelids as it prevents creasing and extends makeup wear time significantly.
- Apply a small amount of primer to the entire eyelid from lash line to brow bone
- Choose primers specifically formulated for mature skin with added hydrating ingredients
- Let the primer set for 60 seconds before applying any eyeshadow
- Use your ring finger to gently tap the primer into place rather than dragging it across the skin
- Consider color-correcting primers in peach tones to neutralize purple or blue undertones on the lids
3. Choose Cream-Based Formulas
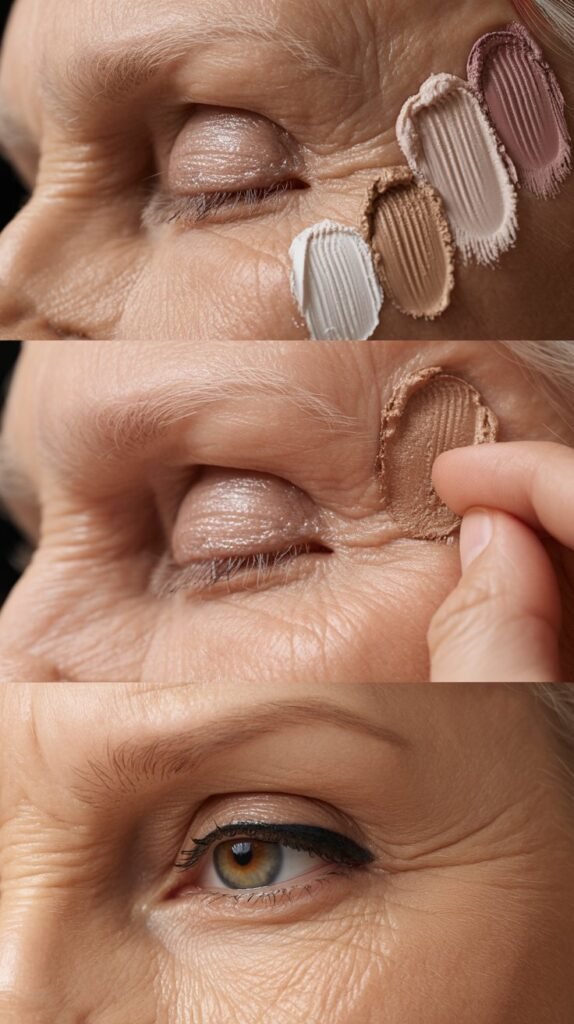
Powder formulas can settle into fine lines and emphasize texture, while cream formulas offer a more forgiving finish.
- Cream eyeshadows glide smoothly over mature skin without dragging or pulling
- These formulas provide better color payoff with less product needed
- Cream products add a natural luminosity that makes eyes appear more youthful
- Apply with fingertips for the most seamless blending and natural finish
- Layer cream formulas under powder shadows for enhanced longevity and vibrancy
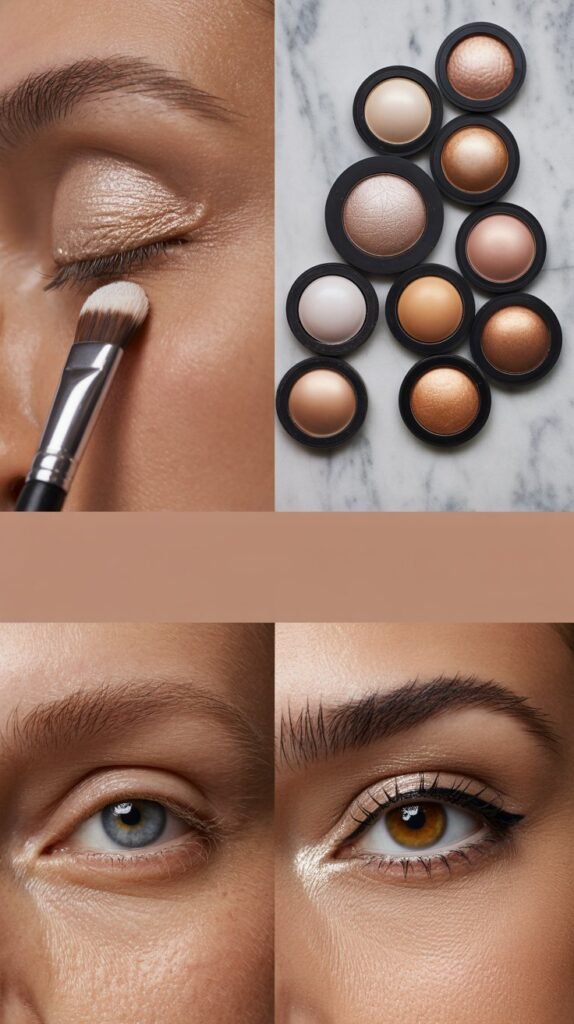
4. Brighten with Light Eyeshadow Shades
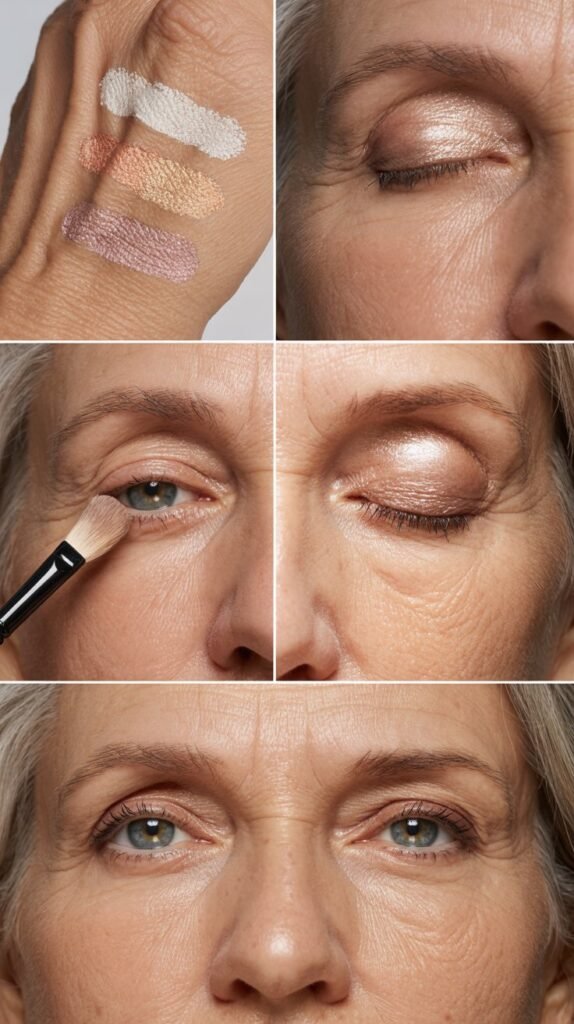
Light, luminous shades open up the eyes and create the illusion of larger, more awake-looking eyes.
- Champagne, soft gold, and light peach shades work beautifully on mature eyelids
- Apply lighter shades to the inner corner and center of the lid to catch light
- Avoid stark white shadows which can appear chalky on mature skin
- Choose shadows with subtle shimmer rather than chunky glitter
- Cream or beige shades with a slight sheen create natural-looking brightness
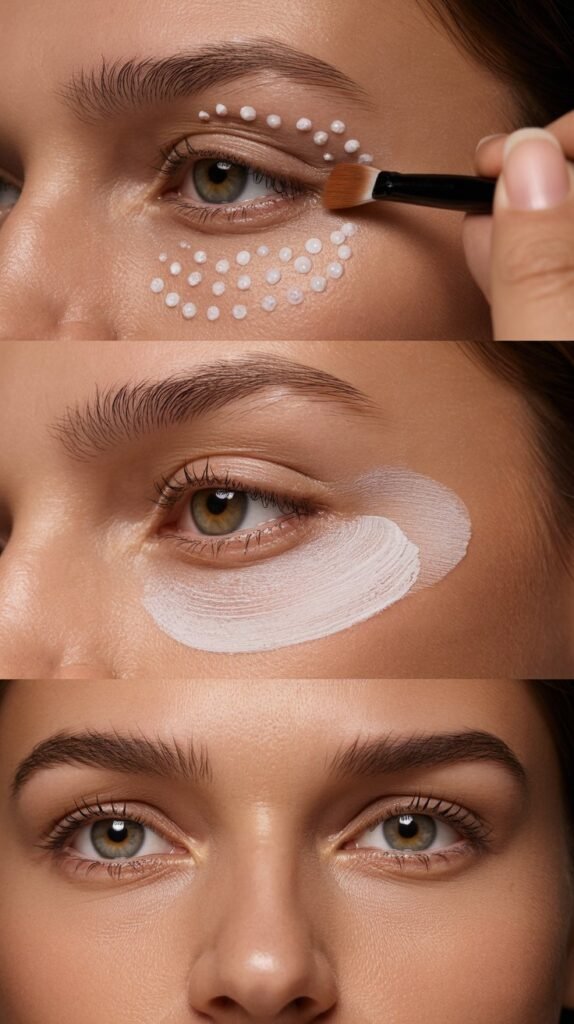
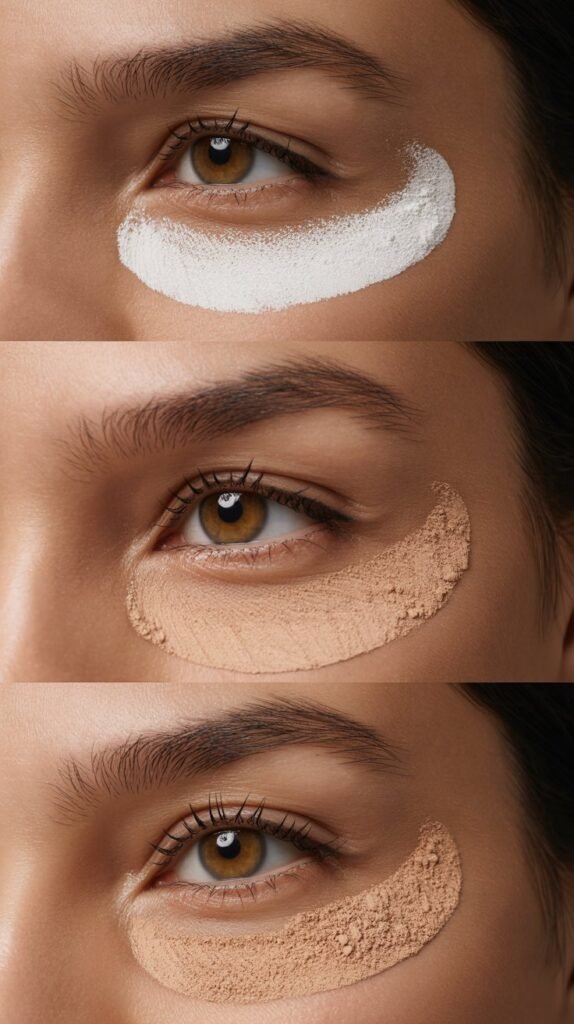
5. Apply Concealer Correctly
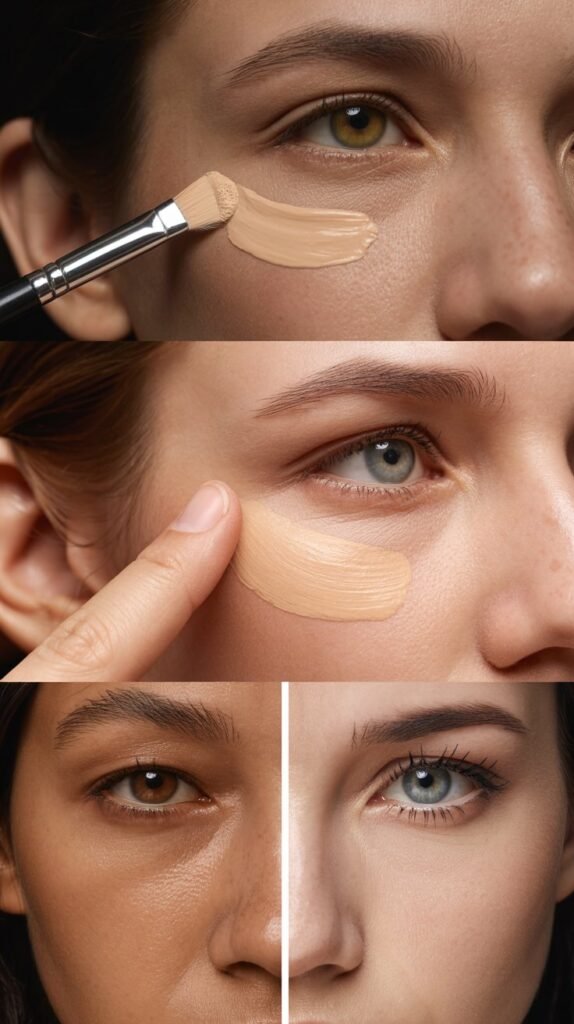
Strategic concealer application can instantly brighten tired-looking eyes and create a lifted appearance.
- Choose a concealer one to two shades lighter than your skin tone for the under-eye area
- Apply concealer in an inverted triangle shape under the eye to maximize brightening effect
- Use a damp beauty sponge to blend for a natural, seamless finish
- Set with a light dusting of translucent powder only where needed to prevent creasing
- Opt for hydrating, light-reflecting formulas rather than heavy, matte concealers
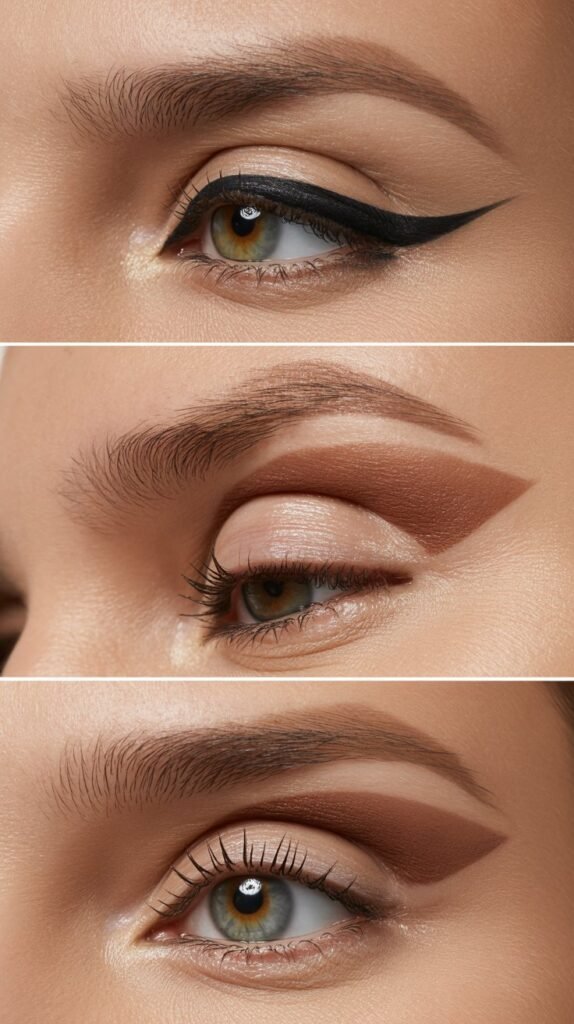
6. Define the Crease Gently
Proper crease definition adds dimension and creates the appearance of larger, more lifted eyes.
- Use a matte shadow only slightly deeper than your skin tone to define the crease
- Apply the darker shade just above the natural crease line rather than in it to create a lifting effect
- Blend thoroughly using windshield wiper motions to avoid harsh lines
- Keep the deepest color concentrated in the outer third of the eye
- Use a fluffy blending brush to soften edges and create seamless transitions
7. Highlight the Brow Bone
A light touch of highlighter on the brow bone creates lift and draws attention upward.
- Apply a matte or satin highlight shade directly under the arch of the brow
- Choose shades with a slight warmth to avoid looking ashy
- Blend the highlight seamlessly into the crease color for a natural transition
- Use this technique to make hooded eyes appear more open
- Avoid shimmer that’s too intense which can emphasize skin texture
8. Master the Inner Corner Highlight

The inner corner highlight is one of the most effective tricks for brightening and opening the eyes.
- Use a light, shimmery shade or highlighter in the inner corner of the eye
- Apply with a small, precise brush or your fingertip for controlled placement
- Choose champagne or light gold tones for warm undertones and icy pink or silver for cool undertones
- Extend the highlight slightly onto the inner portion of the lower lash line
- This technique instantly makes eyes appear wider and more awake
9. Skip Heavy Eyeliner on the Lower Lash Line
Heavy lower liner can make eyes appear smaller and drag down the overall look.
- Avoid dark eyeliner completely on the lower lash line or use it very sparingly
- If you must line the lower lash line, use a soft brown or taupe shade instead of black
- Apply liner only to the outer third of the lower lash line for subtle definition
- Smudge any lower liner with a brush to soften the appearance
- Leave the lower lash line bare or use only eyeshadow for a softer effect
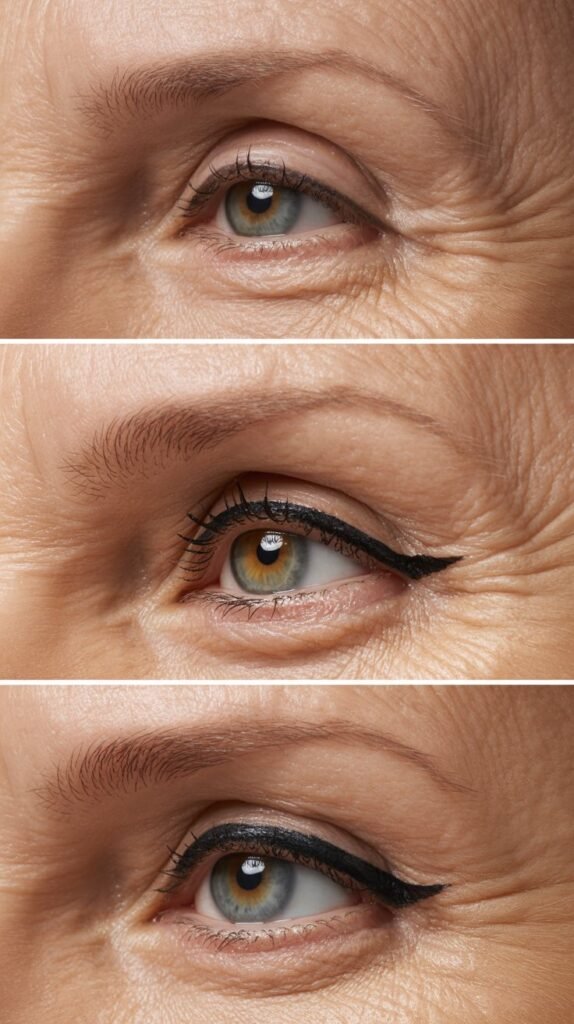
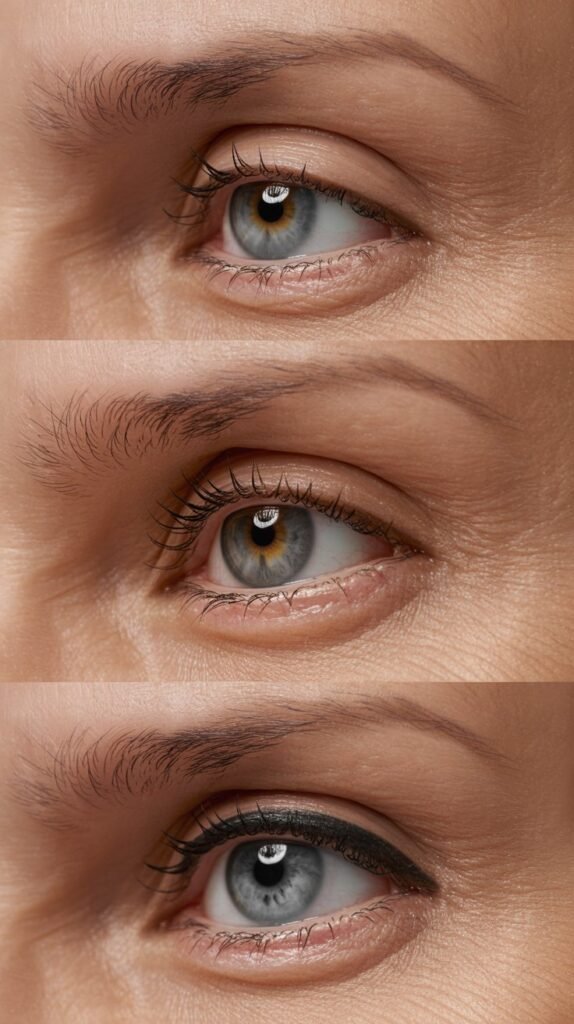
10. Tight-Line the Upper Lash Line
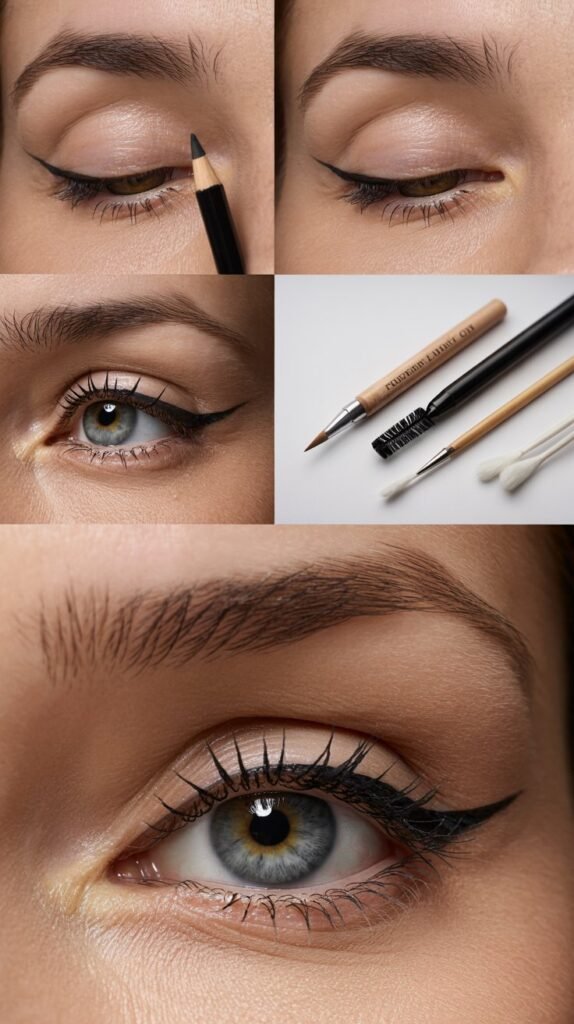
Tight-lining creates the illusion of fuller lashes without the harshness of traditional eyeliner.
- Apply eyeliner directly to the upper waterline between the lashes
- Use a waterproof gel or pencil liner for this technique
- Gently lift the eyelid and carefully place the liner between the lashes
- This method adds definition without taking up visible lid space
- Creates the appearance of naturally dense lashes that brighten the entire eye area
11. Use Brown Eyeliner Instead of Black
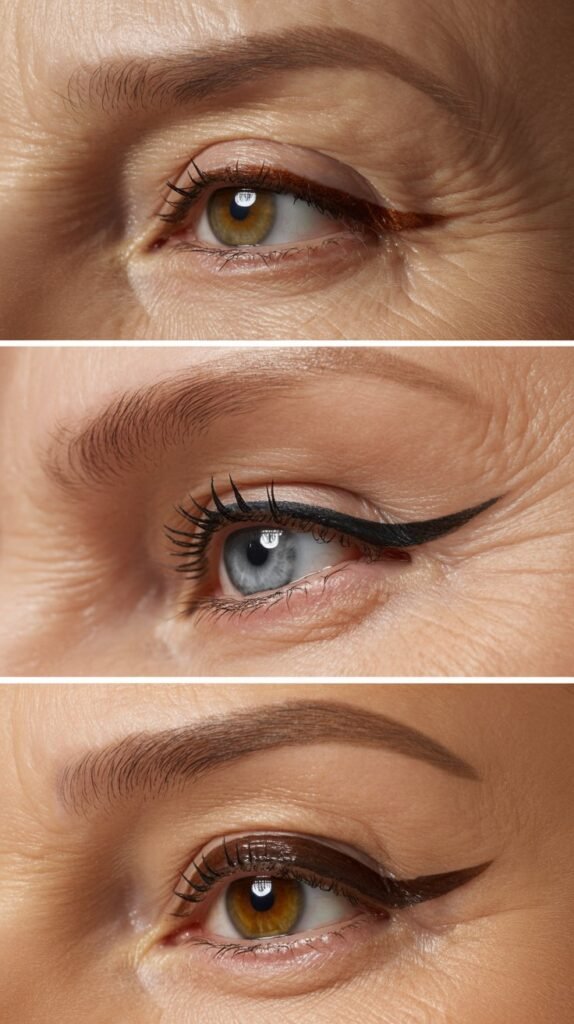
Brown eyeliner offers definition without the harsh, aging effect of black liner.
- Choose chocolate brown, espresso, or warm brown shades for softer definition
- Brown liner complements most skin tones and eye colors naturally
- This shade provides definition while maintaining a softer, more approachable appearance
- Apply brown liner along the upper lash line in a thin, controlled line
- Brown liner is particularly flattering for daytime looks and mature eyes
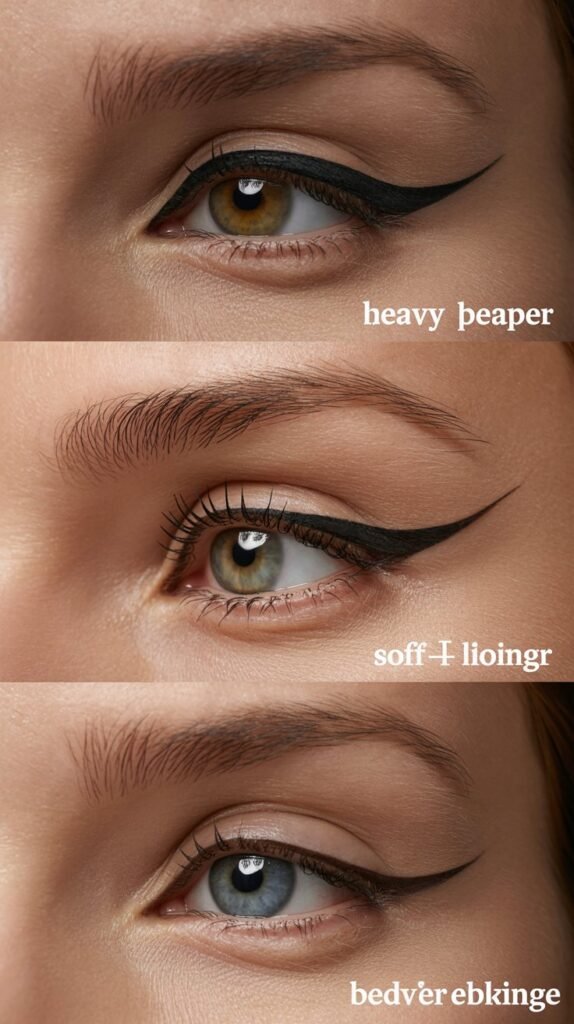
12. Create a Subtle Wing
A modified wing can lift the eyes without requiring perfect precision.
- Extend the liner slightly past the outer corner following the natural lash line
- Angle the wing upward toward the tail of your eyebrow
- Keep the wing short and subtle rather than dramatic
- Use a gel or liquid liner for the cleanest line
- This technique creates a lifted appearance that opens and brightens the eyes
13. Curl Your Lashes
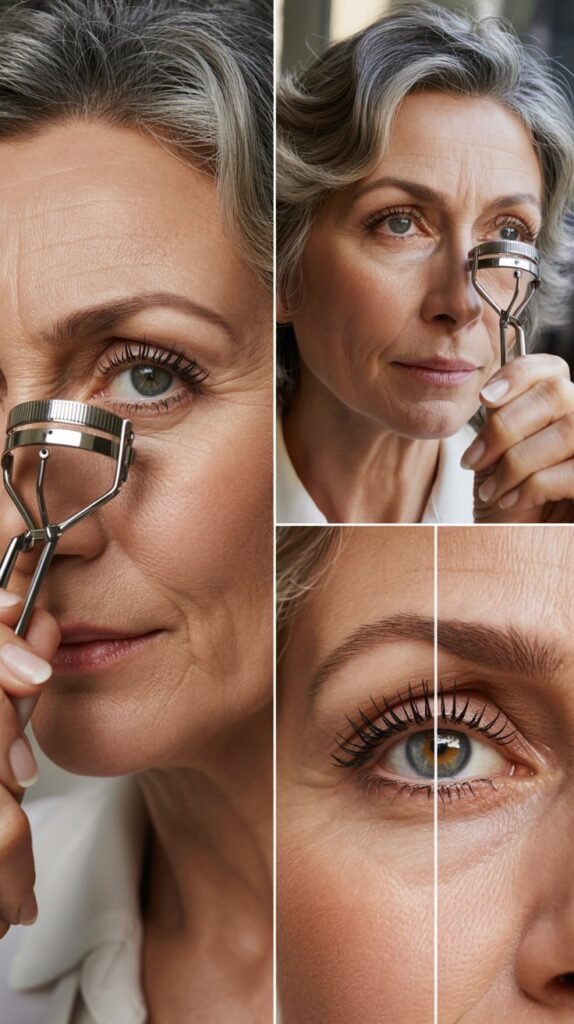
Curled lashes instantly open the eyes and create a more youthful, bright-eyed appearance.
- Use a quality eyelash curler before applying mascara
- Warm the curler with a hair dryer for a few seconds for better hold
- Curl lashes in sections from base to tip for natural-looking lift
- Hold the curl for 10-15 seconds at each section
- Curled lashes prevent drooping and create the illusion of larger, brighter eyes
14. Choose the Right Mascara Formula
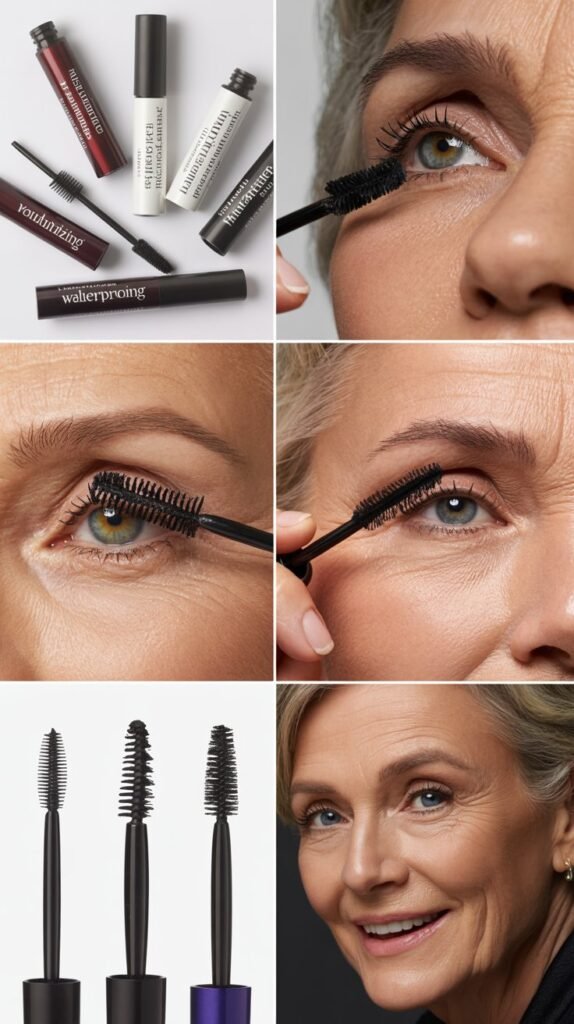
The right mascara formula can make or break your eye makeup look, especially for mature lashes.
- Select lengthening and volumizing formulas rather than waterproof which can be drying
- Look for mascaras with conditioning ingredients like vitamin E or panthenol
- Choose brown or brown-black mascara for a softer, more natural appearance
- Avoid formulas that clump or flake as they can settle in fine lines
- Replace mascara every three months to ensure optimal performance and hygiene
15. Apply Mascara Strategically
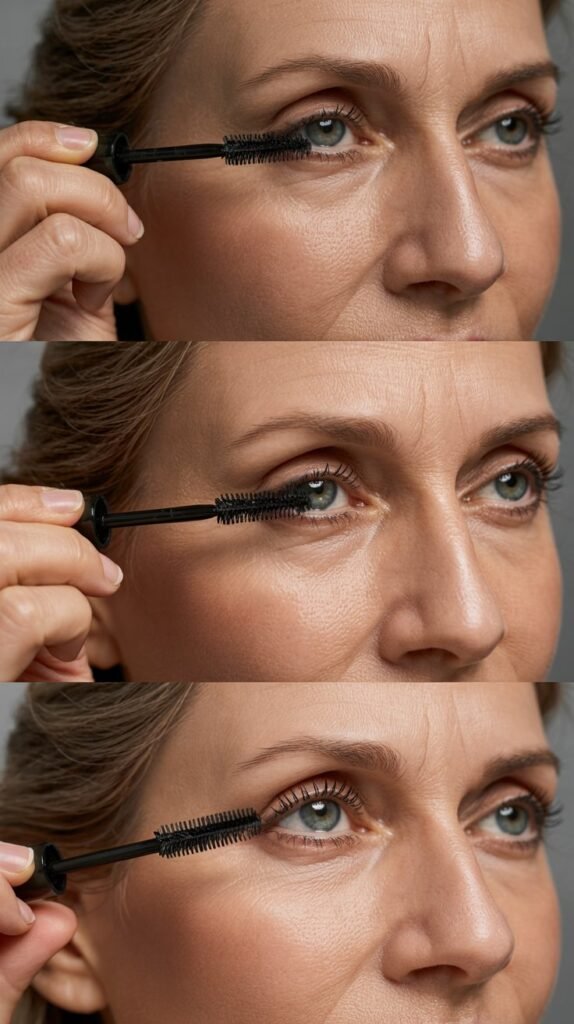
Proper mascara application technique maximizes definition while maintaining a natural look.
- Wiggle the mascara wand at the base of the lashes before pulling through
- Apply multiple thin coats rather than one heavy coat to prevent clumping
- Focus application on the outer corner lashes to create a lifting effect
- Use a lash comb to separate lashes if any clumping occurs
- Apply mascara to upper lashes only or very lightly on lower lashes to avoid a heavy look
16. Consider Individual or Strip Lashes
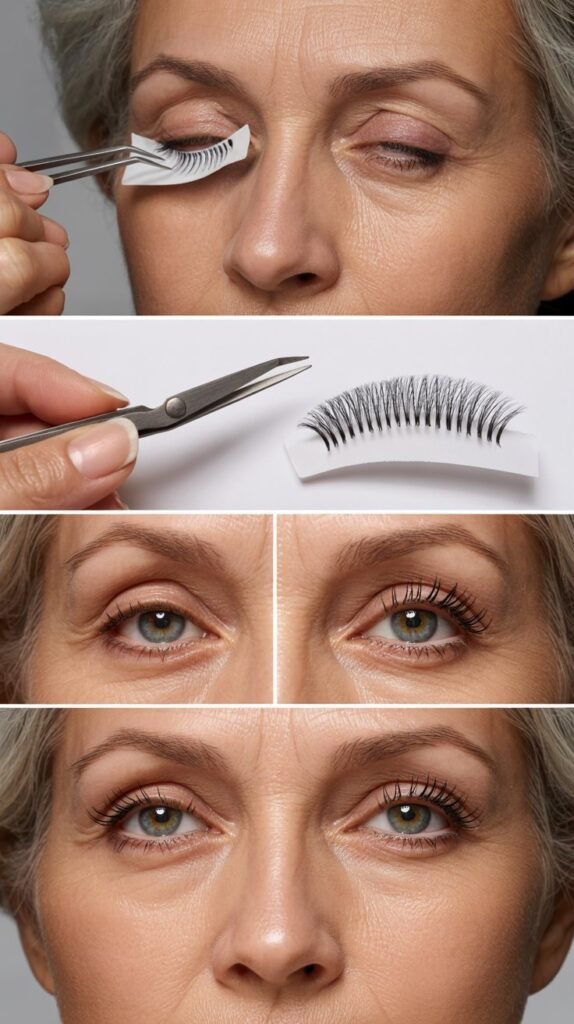
False lashes can add drama and fullness that brightens the entire eye area when applied correctly.
- Choose individual lashes for the outer corners for subtle lift and definition
- Opt for wispy, natural-looking strip lashes rather than dense, dramatic styles
- Apply lashes to the outer half of the lash line only for a more natural effect
- Use black or brown lash glue depending on your eyeliner color
- Trim strip lashes to fit your eye shape perfectly before application
17. Groom and Fill Brows
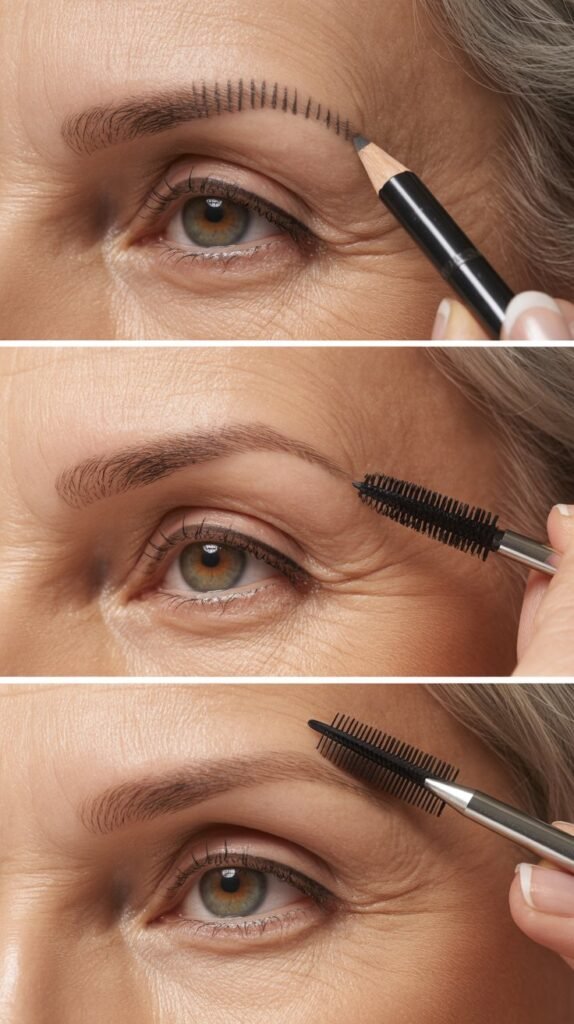
Well-groomed brows frame the eyes and create an overall lifted, polished appearance.
- Fill sparse brows with a pencil or powder one shade lighter than your natural brow color
- Use short, hair-like strokes to mimic natural brow hairs
- Focus filling on the arch and tail of the brow to create lift
- Set brows with a clear or tinted brow gel to keep them in place
- Avoid harsh, drawn-on brows which can appear severe and aging
18. Avoid Shimmer Overload
While shimmer can brighten, too much can emphasize texture and create an unflattering effect.
- Choose satin finishes with subtle sheen over heavily glittery or metallic shadows
- Limit shimmer to the center of the lid and inner corner only
- Use matte shadows in the crease and outer corner for dimension
- Opt for finely milled shimmer particles rather than chunky glitter
- Balance shimmer with matte shades to create depth and prevent looking one-dimensional
19. Use Transition Shades
Transition shades create seamless blending and professional-looking dimension.
- Apply a shade close to your natural skin tone in the crease before adding deeper colors
- This creates a buffer that makes blending subsequent shades easier
- Use a fluffy brush to apply transition shades in windshield wiper motions
- Transition shades prevent harsh lines and create gradient effects
- Choose warm neutrals like soft taupe, beige, or light brown for most skin tones
20. Blend, Blend, Blend
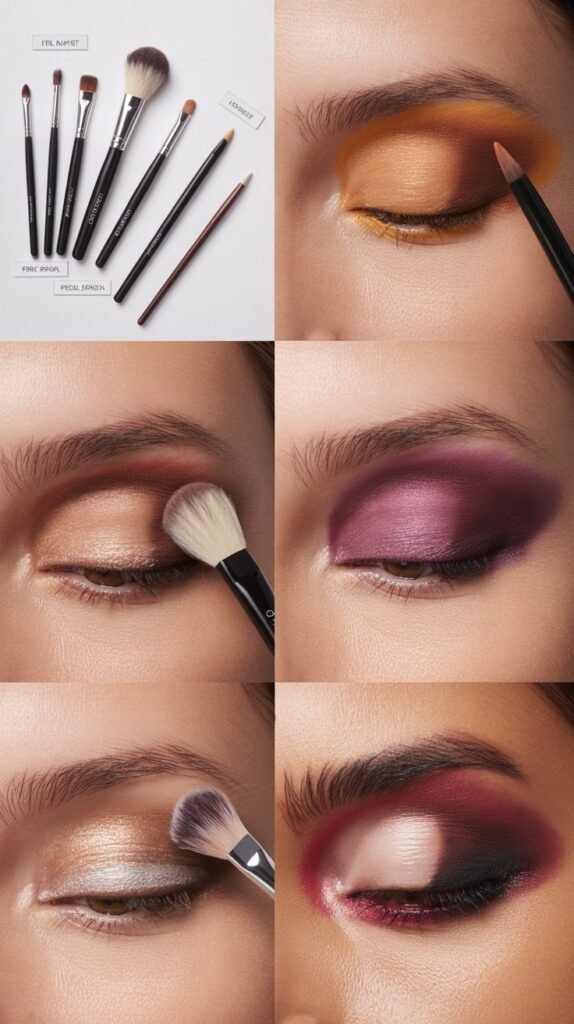
Thorough blending is the key to professional-looking eye makeup that flatters mature eyes.
- Use clean blending brushes to soften all edges and transitions
- Blend in circular and windshield wiper motions for seamless results
- Take time to blend each color thoroughly before adding the next
- Check your work in natural lighting to ensure no harsh lines remain
- Proper blending creates dimension while maintaining a soft, youthful appearance
21. Warm Up Your Color Palette
Warm tones naturally brighten the eyes and complement mature skin tones beautifully.
- Choose peach, copper, bronze, warm brown, and golden shades
- Warm colors counteract any redness or blue undertones around the eyes
- These shades create a healthy, radiant appearance
- Mix warm and cool tones strategically based on your natural coloring
- Warm metallics reflect light and make eyes appear more open and bright
22. Adapt Colors to Your Eye Color
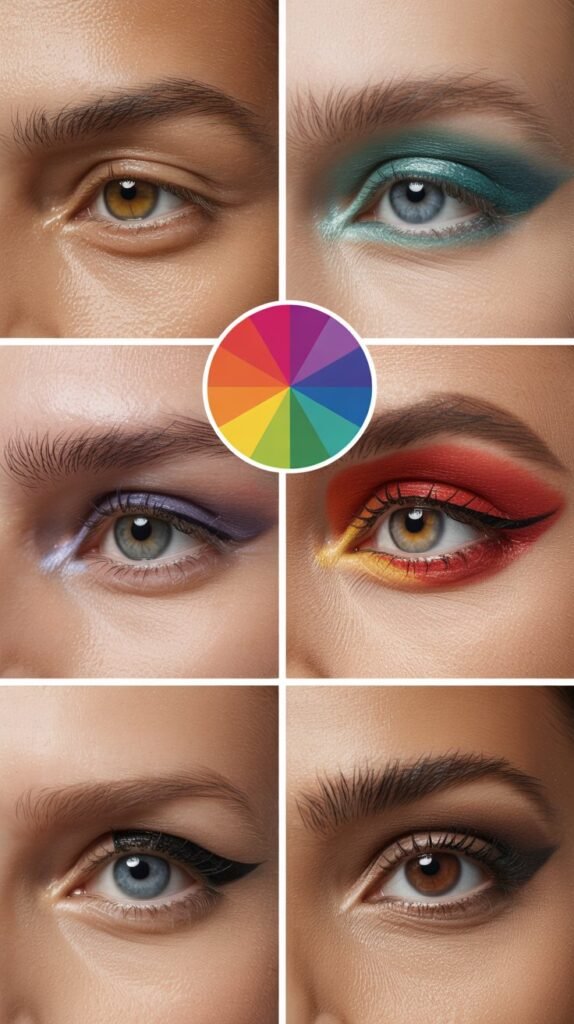
Choosing complementary shades makes your natural eye color pop and appear brighter.
| Eye Color | Best Shades | Colors to Avoid |
|---|---|---|
| Blue Eyes | Bronze, copper, peach, warm browns, gold | Matching blue shades |
| Green Eyes | Plum, burgundy, copper, warm browns, rose gold | Matching green shades |
| Brown Eyes | Purple, navy, teal, emerald, gold, bronze | Muddy browns close to eye color |
| Hazel Eyes | Purple, green, gold, burgundy, bronze | No specific restrictions |
- Use color theory to select shades that make your eye color appear more vibrant
- Complementary colors on the color wheel create the most striking contrast
- Experiment with different shade families to find what works best for you
- Remember that lighter versions of complementary colors work better for daytime
23. Set Your Under-Eye Area Properly
Strategic setting prevents creasing and maintains brightness throughout the day.
- Use only a small amount of finely milled translucent powder under the eyes
- Apply powder with a damp beauty sponge for a natural, non-cakey finish
- Set only where concealer tends to crease, typically the inner corner area
- Avoid over-powdering which can emphasize fine lines and texture
- Consider using a setting spray instead of powder for a more natural finish
24. Try the “Halo Eye” Technique
The halo eye technique creates dimension and makes eyes appear larger and more prominent.
- Place a lighter shade in the center of the lid
- Apply a deeper shade to both the inner and outer corners
- Blend the shades where they meet for seamless transitions
- This technique draws attention to the center of the eye making them appear brighter
- The dimensional effect creates the illusion of rounder, more youthful eyes
25. Use White or Nude on the Waterline
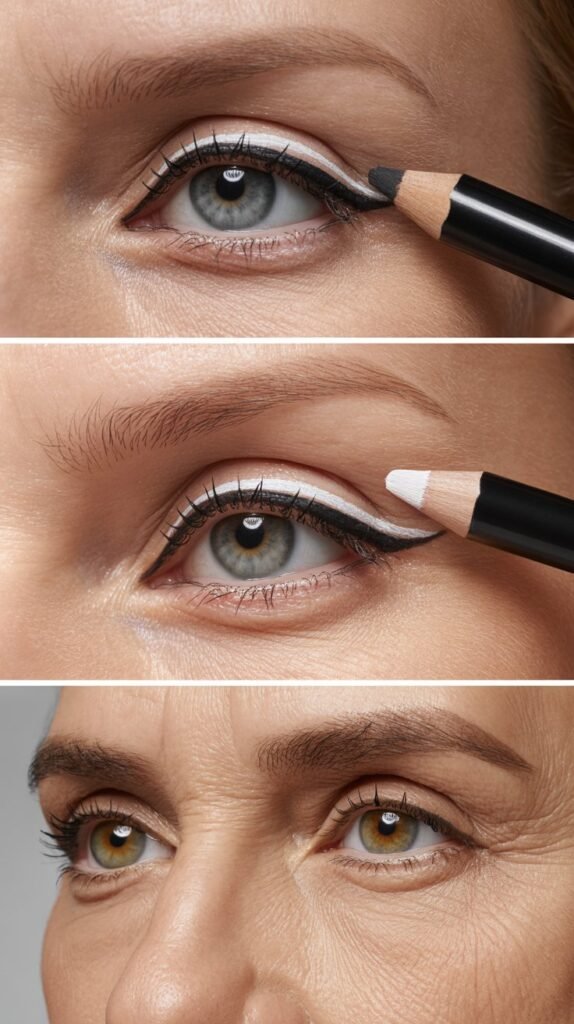
Lining the lower waterline with a light shade instantly opens and brightens the eyes.
- Apply a white or nude eyeliner pencil to the lower waterline
- Choose a waterproof formula to prevent fading throughout the day
- This technique counteracts redness and makes the whites of eyes appear brighter
- Nude shades look more natural while still providing the brightening effect
- Reapply throughout the day as needed for continuous brightening
26. Avoid Pulling or Tugging
Gentle application preserves the delicate eye area and prevents premature aging.
- Always use a light touch when applying eye makeup
- Support the outer corner with one hand while applying product with the other
- Use quality brushes that glide smoothly without requiring pressure
- Pat and press cream products into place rather than dragging them across skin
- Remove makeup gently with oil-based remover to avoid unnecessary friction
27. Work with Hooded Eyes
Special techniques for hooded eyes ensure that makeup is visible and flattering when eyes are open.
- Apply crease color above the natural crease where it will be visible
- Focus color and definition on the outer third of the eye
- Use lighter shades on the center of the lid to bring it forward
- Extend shadow slightly above the hood for a lifted appearance
- Skip thick eyeliner on the lid as it can disappear when eyes are open
28. Invest in Quality Tools
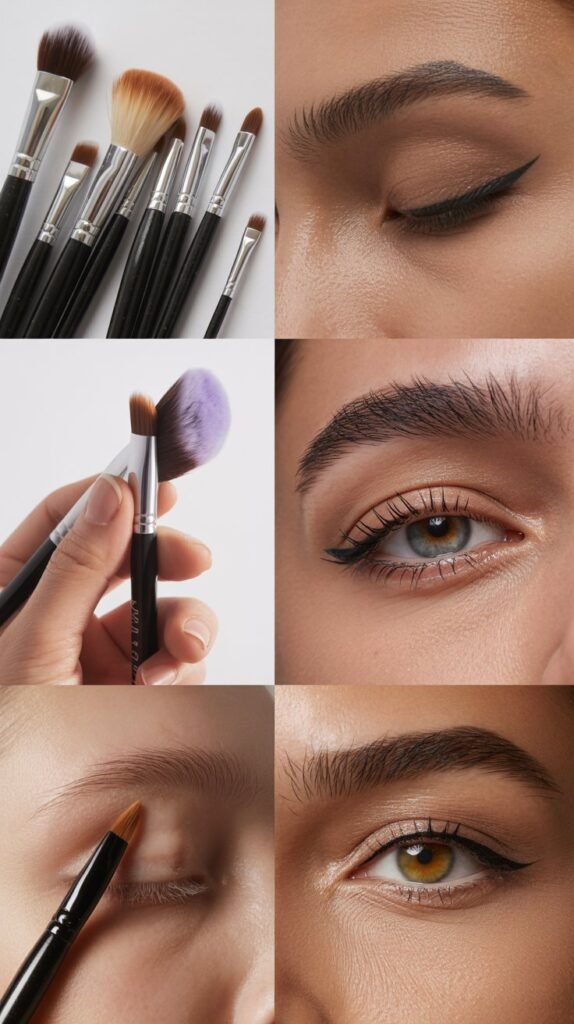
Professional tools make application easier and results more polished and long-lasting.
- Purchase a set of quality eye makeup brushes in various shapes and sizes
- Include at least one fluffy blending brush, a flat shader brush, and a small detail brush
- Clean brushes weekly to maintain performance and prevent bacteria buildup
- Quality tools last longer and provide better control during application
- Consider a magnifying mirror for precise application
29. Practice Good Lighting

Proper lighting ensures accurate color selection and precise application.
- Apply makeup in natural daylight whenever possible
- Use a well-lit magnifying mirror for detailed work
- Avoid yellow-toned bathroom lighting which can distort colors
- Check your makeup in multiple lighting conditions before leaving home
- Natural lighting reveals any blending imperfections that need correction
30. Stay Hydrated
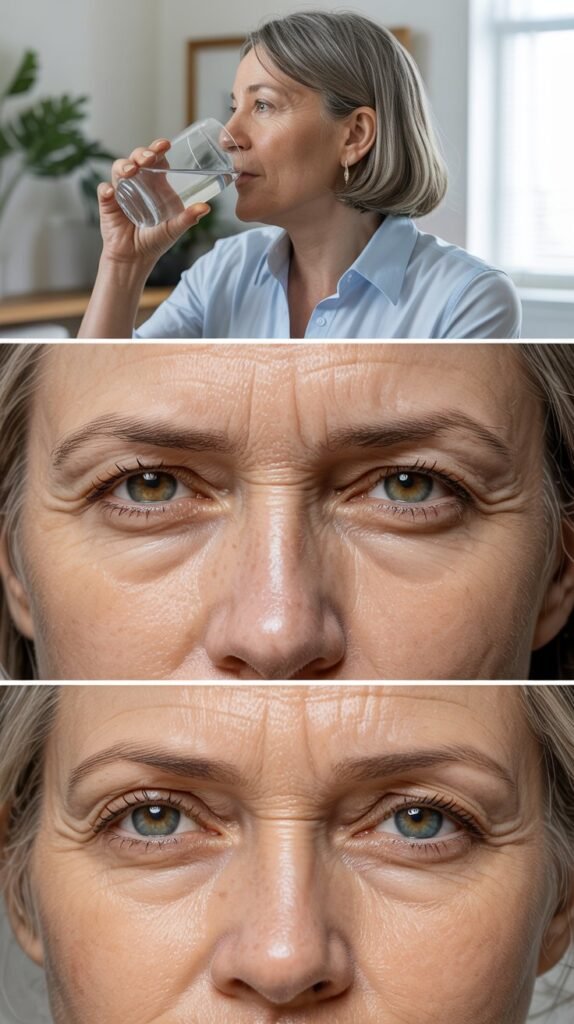
Internal hydration reflects in the appearance of your skin and overall eye brightness.
- Drink adequate water throughout the day to maintain skin elasticity
- Well-hydrated skin holds makeup better and appears more luminous
- Hydration reduces puffiness and dark circles that can dull eyes
- Combine proper hydration with topical products for optimal results
- Your overall complexion appears brighter when properly hydrated from within
31. Remove Makeup Thoroughly

Proper makeup removal prevents irritation and maintains the health of the delicate eye area.
- Use a gentle, oil-based eye makeup remover every evening
- Hold a soaked cotton pad over closed eyes for a few seconds to dissolve makeup
- Wipe gently without rubbing or pulling the skin
- Follow with a gentle cleanser to remove any residue
- Apply eye cream after cleansing to replenish moisture
32. Embrace Your Natural Beauty
Confidence and self-acceptance are the most powerful beauty enhancers.
- Use makeup to enhance rather than hide your natural features
- Remember that aging is a privilege and your eyes tell your unique story
- Adjust your routine as needed but don’t feel pressured to cover everything
- Your confidence and joy are more brightening than any makeup technique
- Experiment with these tips to find what makes you feel most beautiful and comfortable
Conclusion
Mastering the “32 Best Makeup Tips for Women Over 50 to Brighten the Eyes” empowers you to enhance your natural beauty with confidence and skill.
These techniques are designed to work with your mature features rather than against them, creating bright, lifted, and youthful-looking eyes that radiate vitality.
Remember that the goal is not to erase your age but to highlight your best features while addressing common concerns through strategic application methods.
By incorporating proper skin preparation, choosing the right formulas and colors, and mastering essential techniques like proper blending and strategic placement, you can achieve stunning results that make your eyes the focal point of your face.
Experiment with these tips to discover which methods work best for your unique eye shape, skin tone, and personal style, and don’t be afraid to adapt them to suit your needs.
With practice and patience, these makeup strategies will become second nature, allowing you to face each day with bright, beautiful eyes that reflect your inner confidence and timeless elegance.