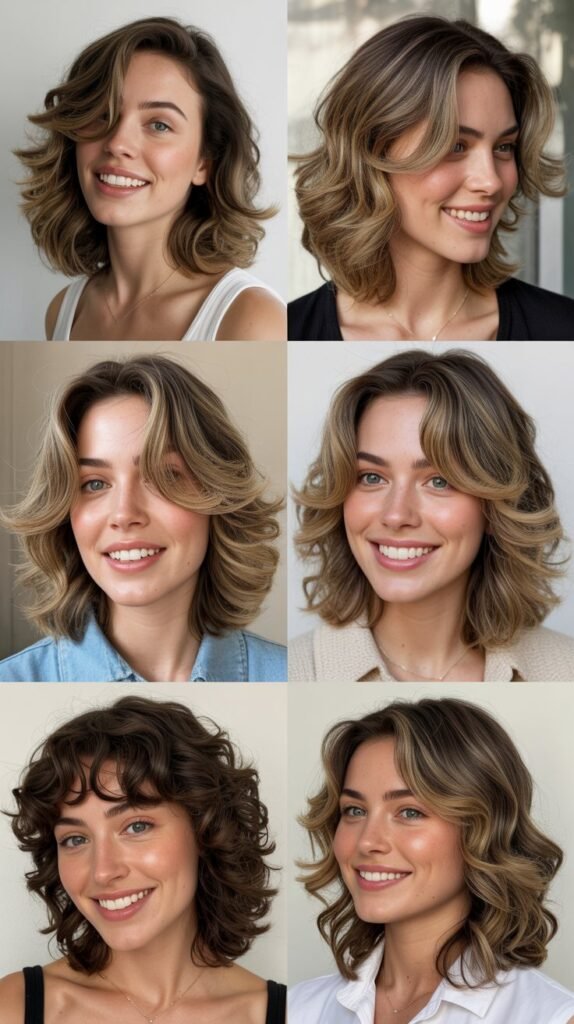
Long hair doesn’t have to mean shapeless, heavy locks that weigh you down.
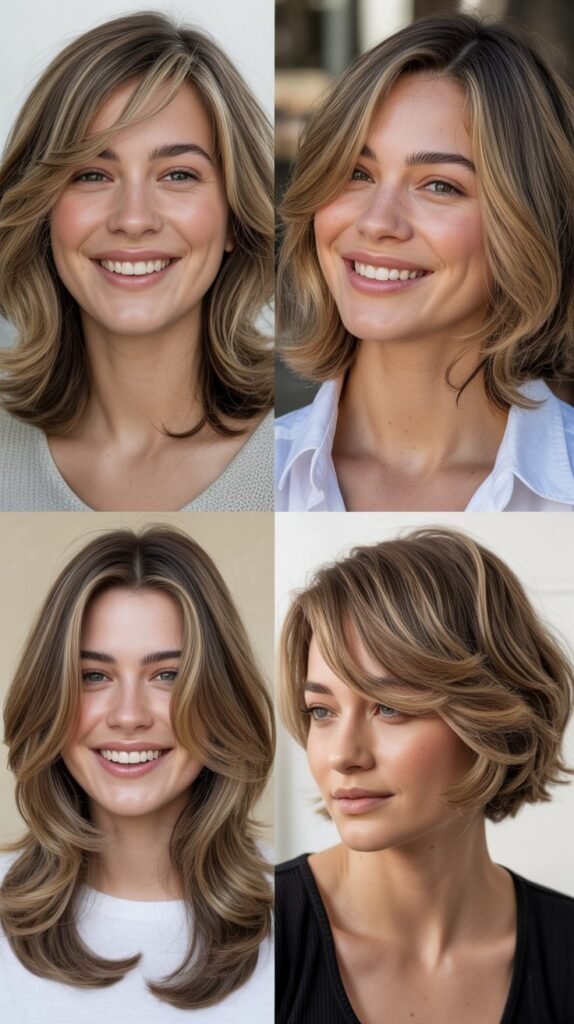
37 Long Haircuts With Shorter Front Layers for Instant Shape introduces a transformative approach to long hairstyles that brings dimension, movement, and face-framing elegance to your look.
Shorter front layers create an optical illusion that lifts your features, adds bounce to otherwise flat hair, and gives you the versatility to style your hair in countless ways.
Whether you’re looking to soften angular features, add volume around your face, or simply refresh your long locks without sacrificing length, this comprehensive guide explores 37 stunning variations that prove you can have both length and shape.
From subtle face-framing pieces to dramatic cascading layers, from bohemian textures to sleek modern cuts, you’ll discover how strategic layering at the front can completely revolutionize your long hair.
This article walks you through classic styles, trendy variations, maintenance tips, styling techniques, and expert insights that will help you choose the perfect layered long haircut for your face shape, hair texture, and lifestyle needs.
1. Understanding the Power of Front Layers on Long Hair
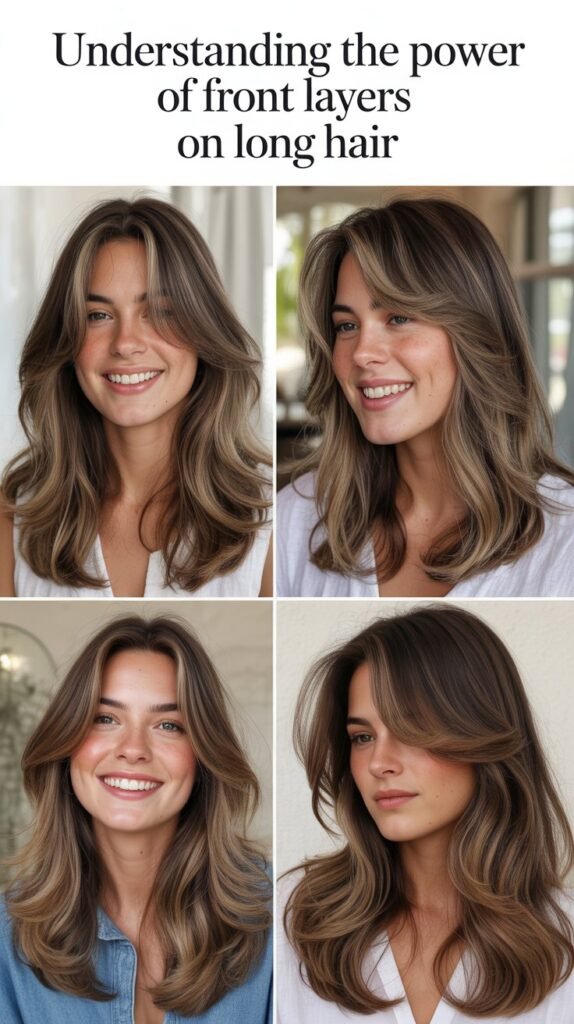
Front layers on long hair represent one of the most versatile cutting techniques that hairstylists use to create instant dimension and frame the face beautifully.
- The concept involves cutting shorter sections of hair near the front while maintaining length at the back, creating a graduated effect that adds movement and shape.
- Front layers work by drawing attention to your best facial features, whether that’s highlighting your cheekbones, softening a strong jawline, or creating the illusion of length in a round face.
- Unlike blunt cuts that can appear heavy and one-dimensional, front layers introduce multiple lengths that catch light differently and create visual interest.
- This cutting technique has roots in classic feathered styles of the 1970s but has evolved into countless modern interpretations that suit today’s diverse aesthetic preferences.
- The beauty of front layers lies in their adaptability—they can be customized to work with straight, wavy, curly, or coily hair textures.
- When executed properly, front layers can reduce the weight of thick hair, add the appearance of fullness to fine hair, and provide styling versatility for all hair types.
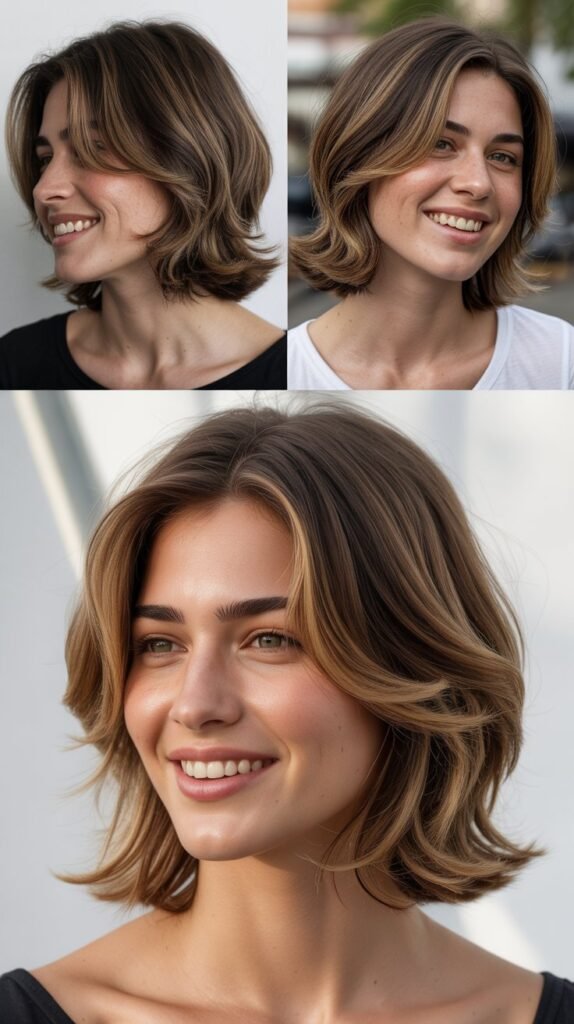
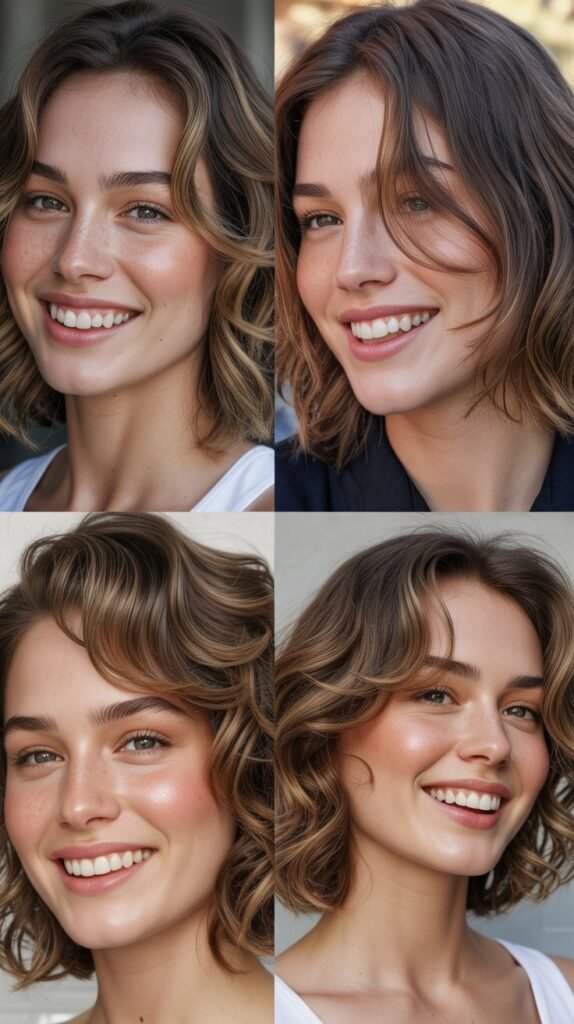
2. Classic Face-Framing Layers Starting at Cheekbone Length
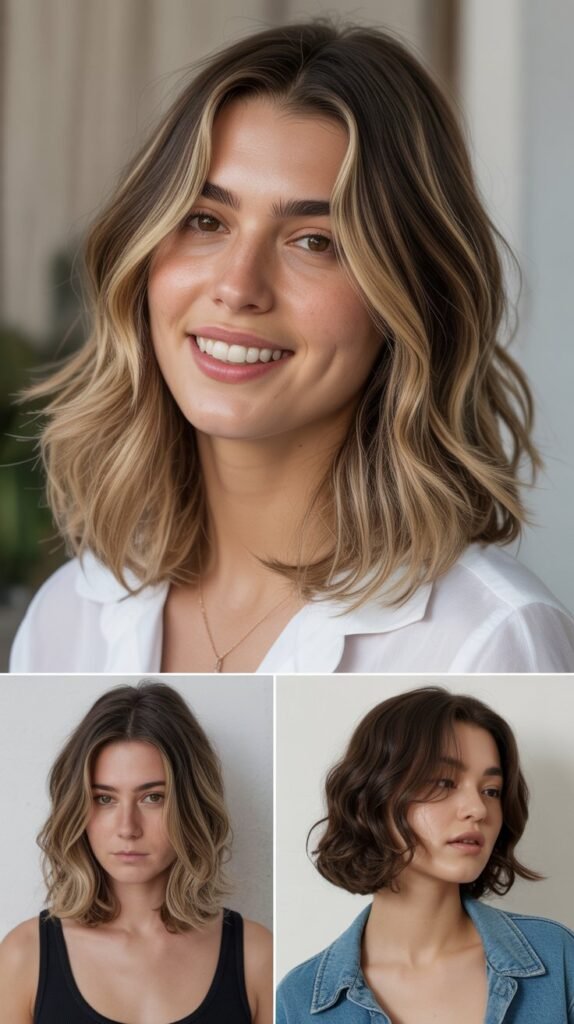
Face-framing layers that begin at cheekbone length represent the most universally flattering variation of front-layered long haircuts.
- These layers typically start at the bottom of the cheekbone and gradually blend downward into the remaining length of the hair.
- The cheekbone-length starting point creates a natural lift that draws the eye upward, making this style particularly effective for those wanting to emphasize their eyes and upper face.
- This classic approach works exceptionally well for heart-shaped and oval faces, as it balances proportions and adds softness around the face perimeter.
- The layers can be cut with either blunt ends for a more structured look or with point-cutting techniques for softer, feathered edges.
- Styling these layers is straightforward—they naturally fall into place with minimal effort and can be enhanced with a round brush during blow-drying.
- For those with naturally straight hair, these layers create gentle movement, while curly-haired individuals will find they enhance natural texture patterns.
- Maintenance is relatively low compared to more dramatic layer placements, requiring trims every 8-12 weeks to maintain the shape.
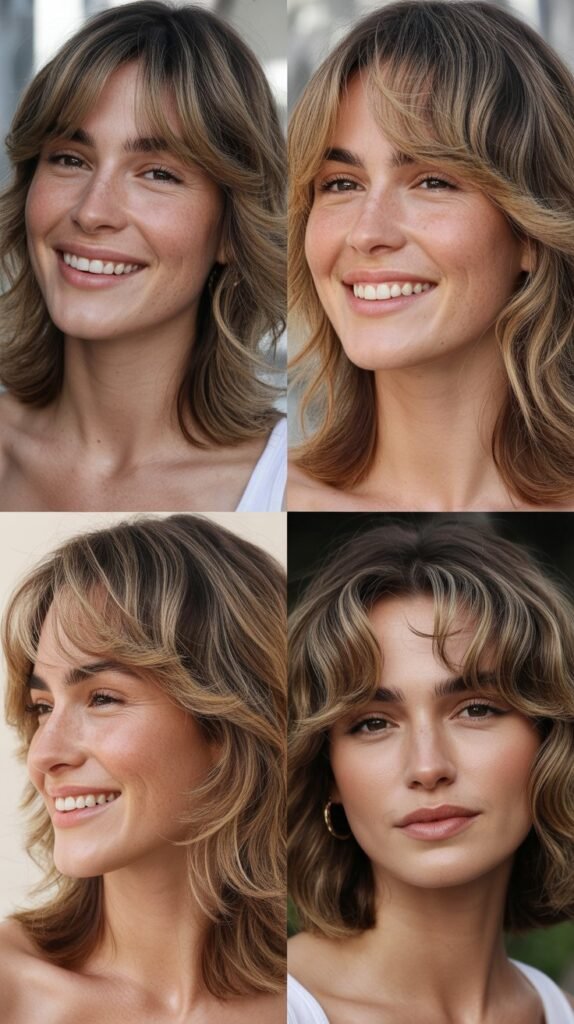
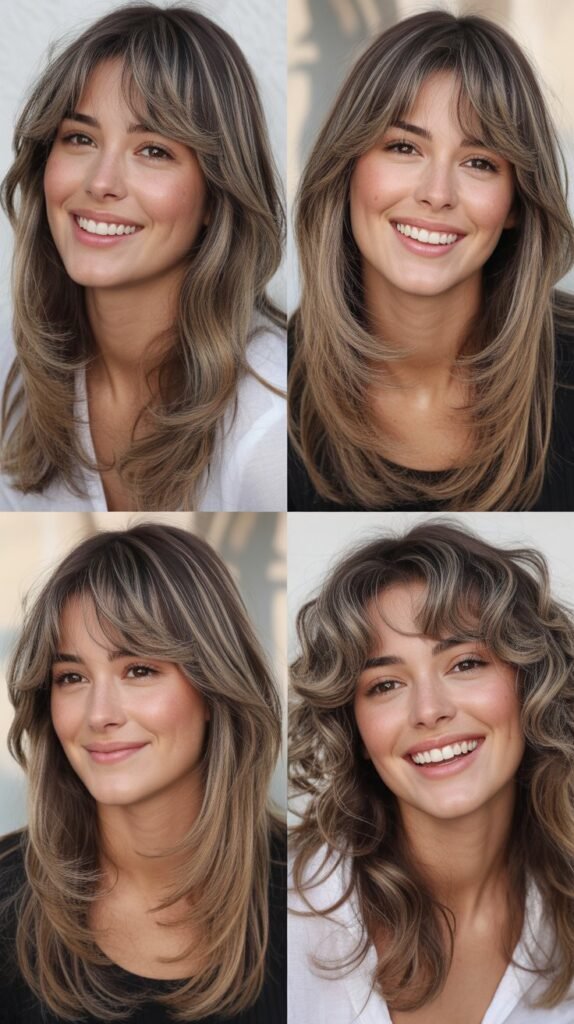
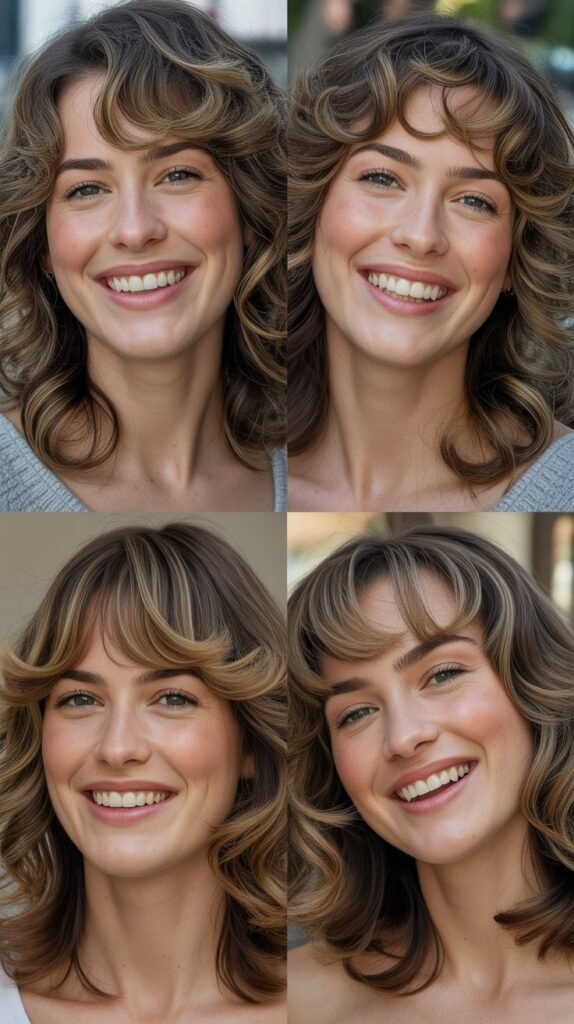
3. Curtain Bangs With Long Layered Hair
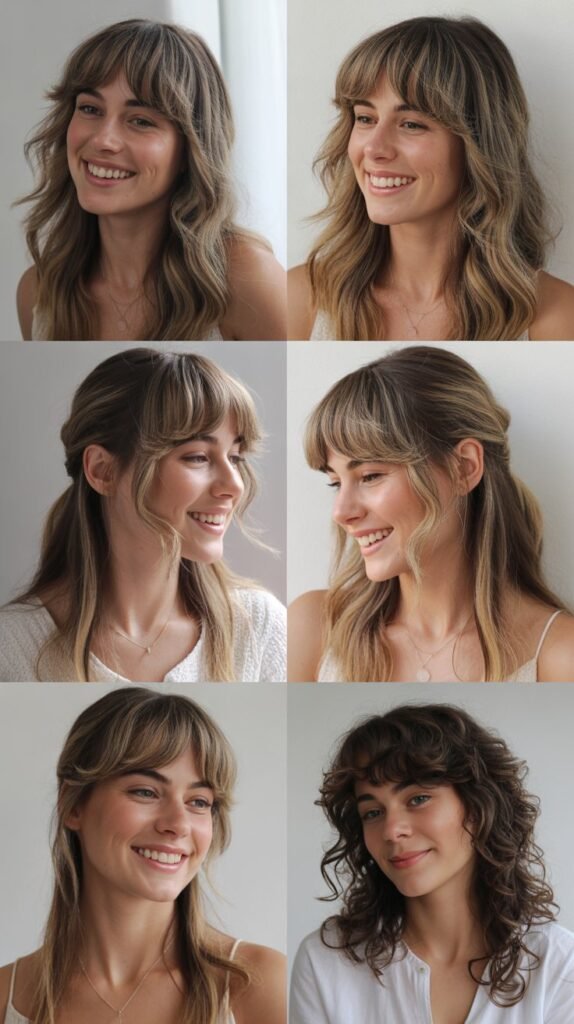
Curtain bangs combined with long layered hair create a romantic, effortlessly cool aesthetic that has dominated hair trends in recent years.
- Curtain bangs are characterized by a center part with bangs that sweep to each side of the face, resembling curtains framing a window.
- These bangs typically start shorter at the center (around eyebrow or bridge-of-nose length) and gradually lengthen toward the temples where they blend into face-framing layers.
- The style gained popularity in the 1960s and 1970s but has been modernized with softer cutting techniques and more natural styling approaches.
- Curtain bangs work particularly well with long hair because they create a cohesive flow from the shortest front pieces through the longer lengths.
- This style is incredibly versatile for styling—you can wear them swept back, pinned to the side, or styled forward depending on the occasion.
- The combination flatters most face shapes, but it’s especially effective for elongating round or square faces while softening angular features.
- Growing out curtain bangs is more graceful than traditional straight-across bangs since they naturally transition into face-framing layers.
- Styling typically requires blow-drying with a round brush to create the characteristic outward sweep, though those with natural wave can often air-dry with beautiful results.
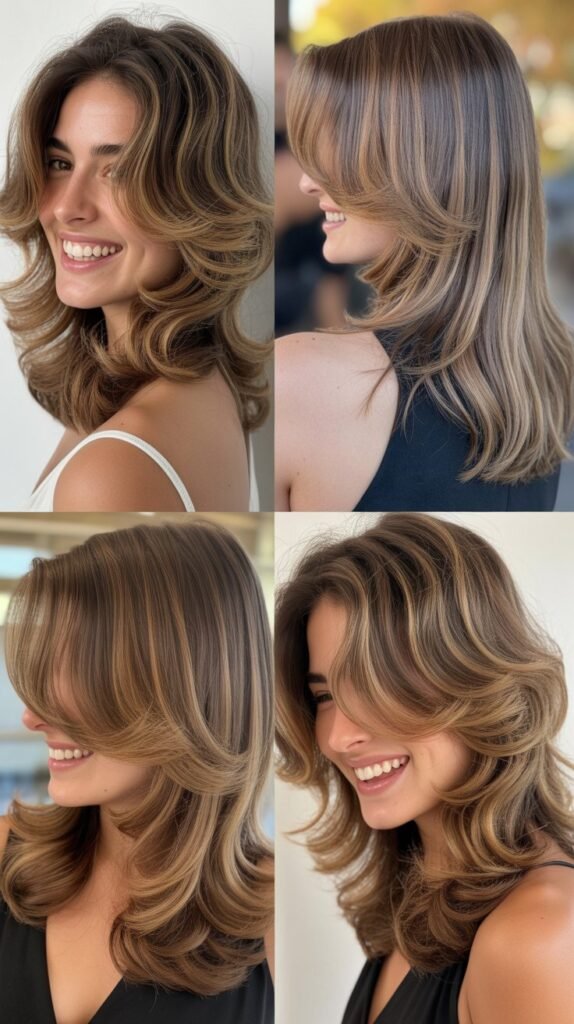
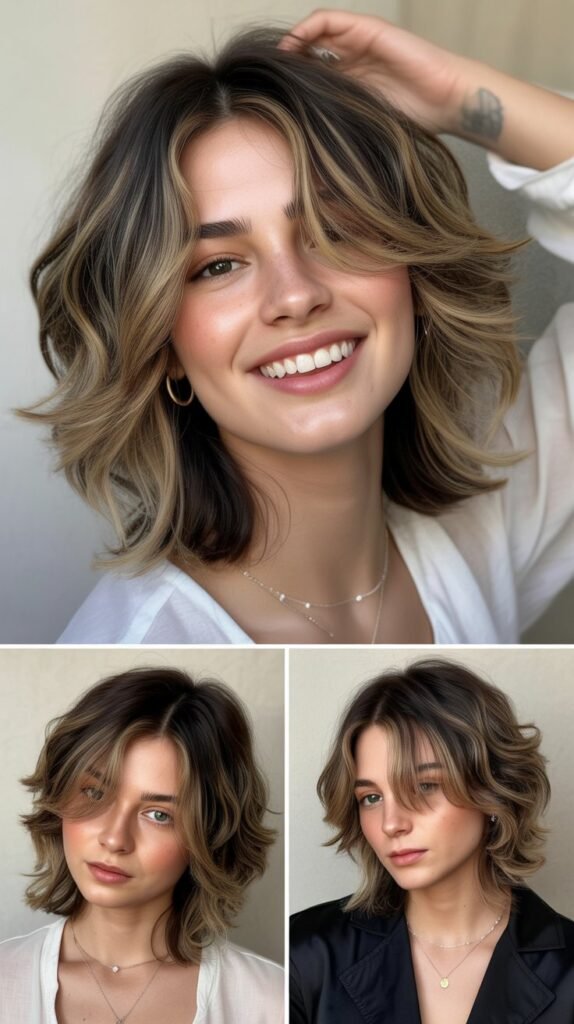
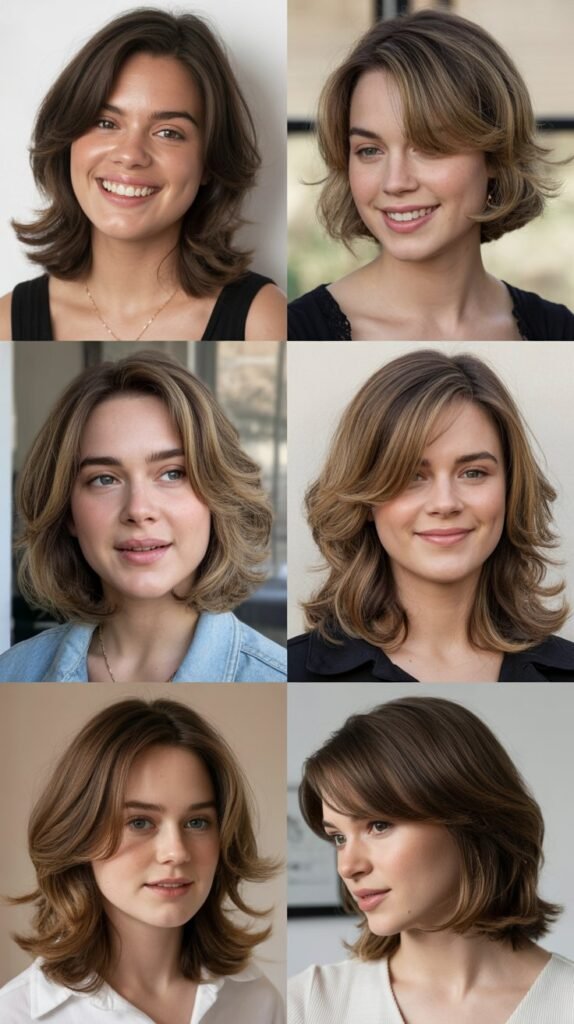
4. Butterfly Layers for Volume and Movement
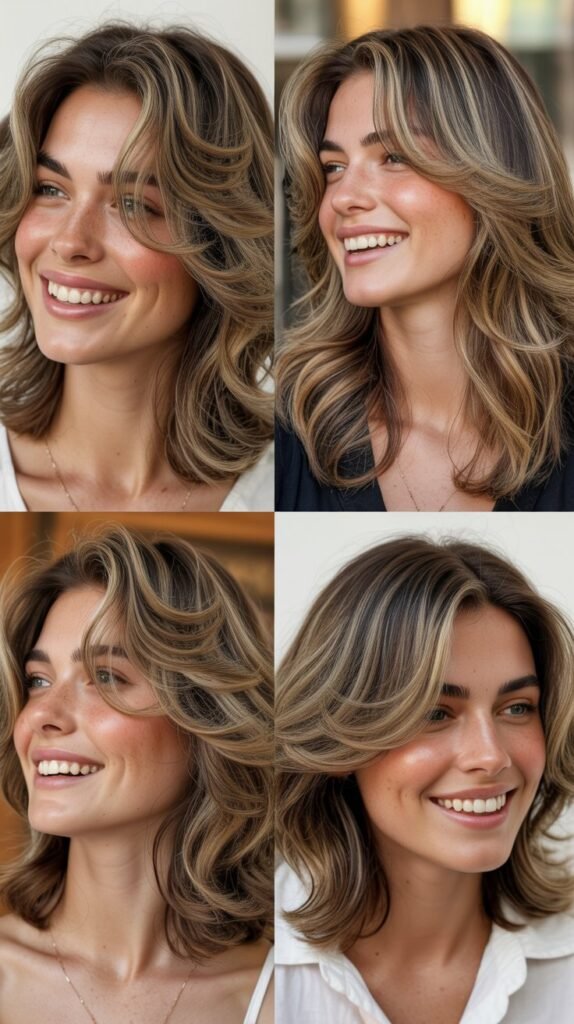
Butterfly layers represent a more dramatic approach to front layering, with shorter pieces concentrated around the crown and face that create a cascading, voluminous effect.
- The name comes from the silhouette these layers create when viewed from the front—shorter upper layers fan out like butterfly wings while longer bottom layers provide a foundation.
- This cutting technique involves creating significant graduation between the shortest front layers (often starting at chin length) and the longest back sections.
- Butterfly layers became viral on social media platforms due to their transformative effect, instantly adding volume and dimension to flat, lifeless long hair.
- The style works best on medium to thick hair textures that can support the dramatic layering without appearing sparse at the ends.
- Those with fine hair can also benefit from butterfly layers, as the shorter upper sections create the illusion of fullness and body.
- Styling butterfly layers typically involves blow-drying with volumizing products and using a round brush to lift the crown area and curl the shorter front sections.
- The maintenance commitment is moderate—the dramatic layering requires regular trims every 6-8 weeks to prevent the shortest layers from becoming disconnected from the length.
- This style offers excellent versatility, looking beautiful when worn straight, wavy, or with full curls that emphasize the layered structure.
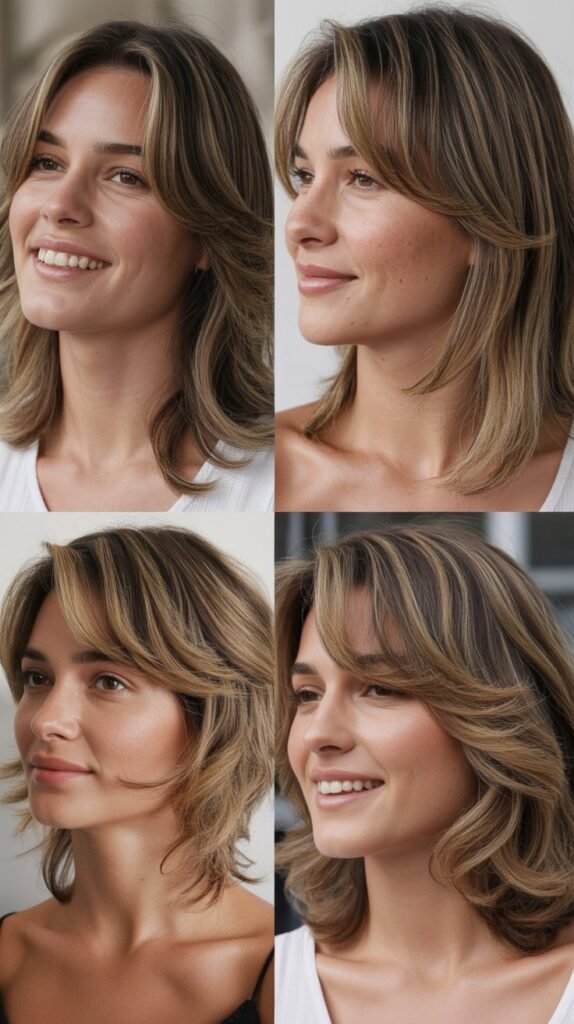
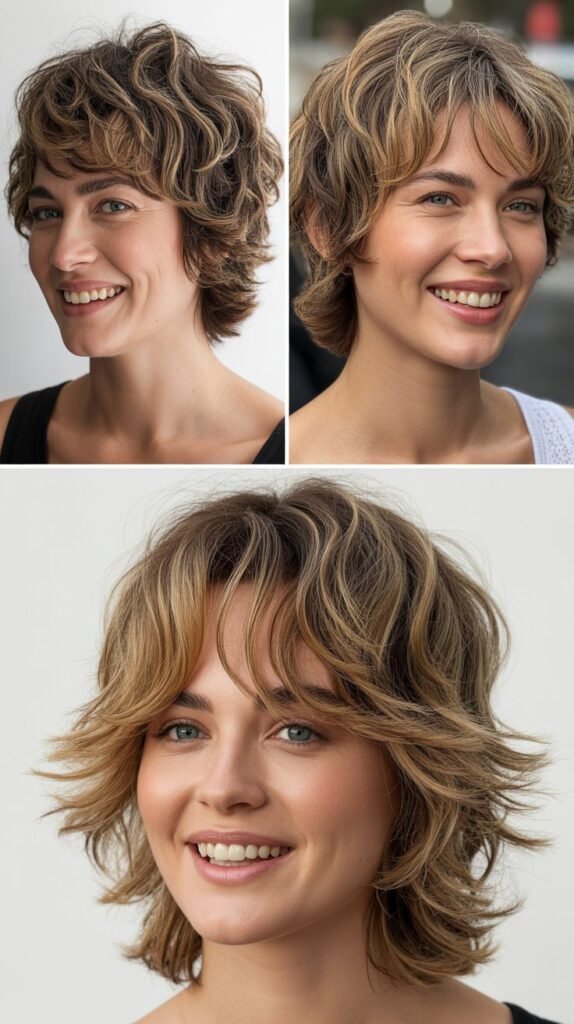
5. Long Shag With Shorter Front Pieces
The long shag haircut combines rock-and-roll attitude with bohemian ease, featuring choppy layers throughout with particularly short pieces framing the face.
- Shag haircuts originated in the 1970s and have experienced multiple revivals, with the current iteration emphasizing texture and effortless styling.
- The defining characteristic of a long shag is the heavily layered structure with varying lengths that create a deliberately undone, tousled appearance.
- Front pieces in a long shag typically start anywhere from eyebrow to chin length and feature choppy, piece-y ends rather than blunt lines.
- This style works exceptionally well for those with naturally wavy or slightly curly hair, as the texture enhances the shag’s inherent movement.
- Those with straight hair can achieve a beautiful shag but may need to add styling products and techniques to create the characteristic texture and separation.
- The long shag is ideal for individuals wanting a low-maintenance cut that looks intentionally messy rather than polished and precise.
- Styling can be as simple as air-drying with sea salt spray for texture or using a diffuser attachment to enhance natural wave patterns.
- The shag requires commitment to its textured aesthetic—attempting to style it too sleek works against its fundamental character.
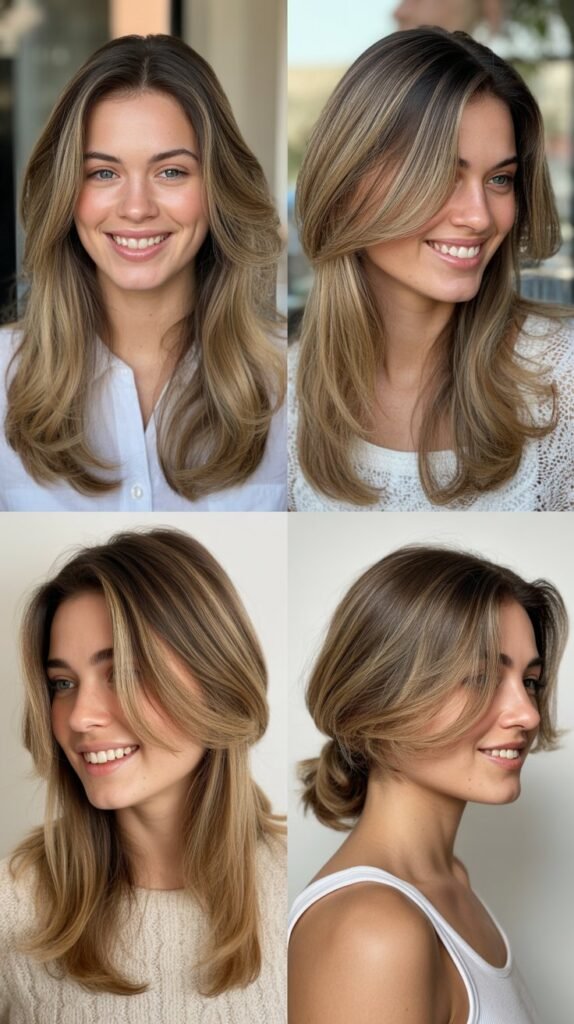
6. Side-Swept Layers Starting Below the Chin
Side-swept layers that begin below the chin create an elegant, sophisticated look that’s perfect for those wanting subtle shaping without dramatic commitment.
- This conservative layering approach maintains significant length while introducing just enough graduation to add movement and frame the face.
- The layers typically start at or just below chin length on one side (depending on your part) and gradually blend into the overall length.
- This style is particularly flattering for professionals who want dimension in their hair while maintaining a polished, corporate-appropriate appearance.
- The longer starting point of these layers makes them easier to incorporate into updos and ponytails compared to shorter front layers.
- Side-swept layers work beautifully with a deep side part, which enhances the sweeping motion and creates an asymmetrical, fashion-forward aesthetic.
- For those with naturally straight hair, these layers add just enough movement to prevent a flat, heavy appearance without requiring extensive styling.
- The maintenance is minimal—trims every 10-12 weeks are typically sufficient to maintain the shape and prevent split ends.
- This option is excellent for those growing out shorter layers or bangs, as it provides a flattering interim style during the growing-out process.
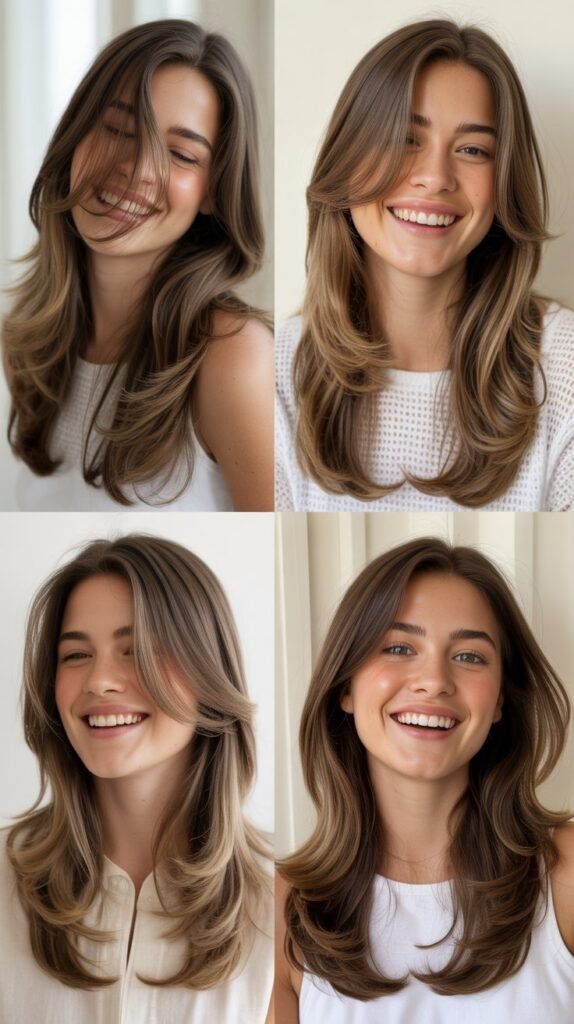
7. Graduated Layers From Collarbone to Long Ends
Graduated layers that begin at collarbone length and extend to long ends create a balanced, harmonious shape that works with virtually any face shape or hair texture.
- This moderate layering approach provides more dimension than a one-length cut while avoiding the drama of very short front pieces.
- The graduation creates a gentle A-line effect when viewed from the side, with the hair gradually getting longer from front to back.
- Collarbone-length starting layers are long enough to tuck behind ears or incorporate into braids and updos, offering excellent versatility.
- This cut is ideal for those with thick, heavy hair who want to remove bulk without sacrificing length or creating excessive volume at the crown.
- The gradual transition between the shortest and longest sections creates a seamless, blended appearance that looks natural and effortless.
- Styling can be adapted to any aesthetic—blow-dry smooth for sleek sophistication, add waves for romantic texture, or enhance curls for bohemian volume.
- Maintenance requirements fall in the middle range, with trims needed every 8-10 weeks to maintain the graduated shape and layer definition.
- This style photographs beautifully because the layering creates dimension and prevents the flat, one-dimensional appearance that can occur with blunt cuts.
8. Wispy Front Layers for Softness and Femininity
Wispy front layers create an ultra-feminine, delicate frame around the face through fine, feathered cutting techniques that produce soft, airy pieces.
- The wispy effect is achieved through point-cutting or razor-cutting techniques that thin out the ends of the layers rather than creating blunt lines.
- These layers work particularly well for those with naturally fine or thin hair, as the wispy ends don’t appear sparse or stringy.
- The softness of wispy layers makes them especially flattering for softening strong features, including prominent jawlines, high cheekbones, or angular face shapes.
- Styling wispy layers requires a light touch—heavy products can weigh them down and eliminate the airy, feathered effect that defines the style.
- This approach creates a romantic, ethereal aesthetic that works beautifully for special occasions, editorial shoots, or everyday wear for those with a feminine style preference.
- The layers can start at various lengths depending on preference, but they typically begin somewhere between cheekbone and collarbone length.
- Maintenance involves regular trims every 6-8 weeks to prevent the wispy ends from becoming damaged or losing their feathered texture.
- Air-drying often works beautifully with wispy layers, though a quick blow-dry with fingers (rather than a brush) can enhance the soft, piece-y effect.
9. Asymmetrical Front Layers for Edgy Style
Asymmetrical front layers create visual interest and modern edge through intentionally uneven lengths that challenge traditional symmetry.
- This bold approach involves cutting layers on one side significantly shorter than the other, creating an asymmetrical frame around the face.
- The asymmetry can be subtle (a few inches of difference) or dramatic (one side at chin length while the other reaches the collarbone or beyond).
- This style works particularly well with side parts, as the asymmetry is most visible when hair is worn swept to one side.
- Asymmetrical layers suit confident individuals who want a distinctive look that stands out from conventional, balanced haircuts.
- The style can soften harsh asymmetry in facial features by creating a balancing counterpoint, or it can intentionally play up natural asymmetry for artistic effect.
- Styling asymmetrical layers often involves emphasizing the shorter side by curling it under or away from the face while keeping the longer side sleek or gently waved.
- This cut requires commitment—maintaining the intentional asymmetry means regular trims every 6-8 weeks with a skilled stylist who understands the original design.
- Those with naturally straight or slightly wavy hair will find that asymmetrical layers are most visible and impactful, though the cut can also work with curly textures.
10. Layered Long Hair With Micro Bangs
Combining micro bangs with layered long hair creates a high-fashion, editorial look that’s simultaneously retro and contemporary.
- Micro bangs (also called baby bangs) are cut significantly shorter than traditional bangs, typically ending above the eyebrows or at the mid-forehead.
- When paired with long layered hair, micro bangs create dramatic contrast and draw immediate attention to the eyes and upper face.
- This bold style has roots in 1950s and 1960s fashion but has been revived by fashion-forward celebrities and editorial stylists seeking distinctive looks.
- The combination works best for those with smaller, delicate facial features, as micro bangs can overwhelm larger faces.
- Front layers that begin just below the micro bangs (around temple length) help transition from the ultra-short fringe to the longer lengths.
- Styling micro bangs requires daily attention—they must be trimmed frequently and styled to lay flat, as even slight growth is immediately noticeable.
- This style represents a significant commitment and isn’t easily reversible—micro bangs take considerable time to grow out and will go through awkward phases.
- The look pairs beautifully with both sleek, straight styling and textured, wavy long lengths, offering versatility in the overall aesthetic.
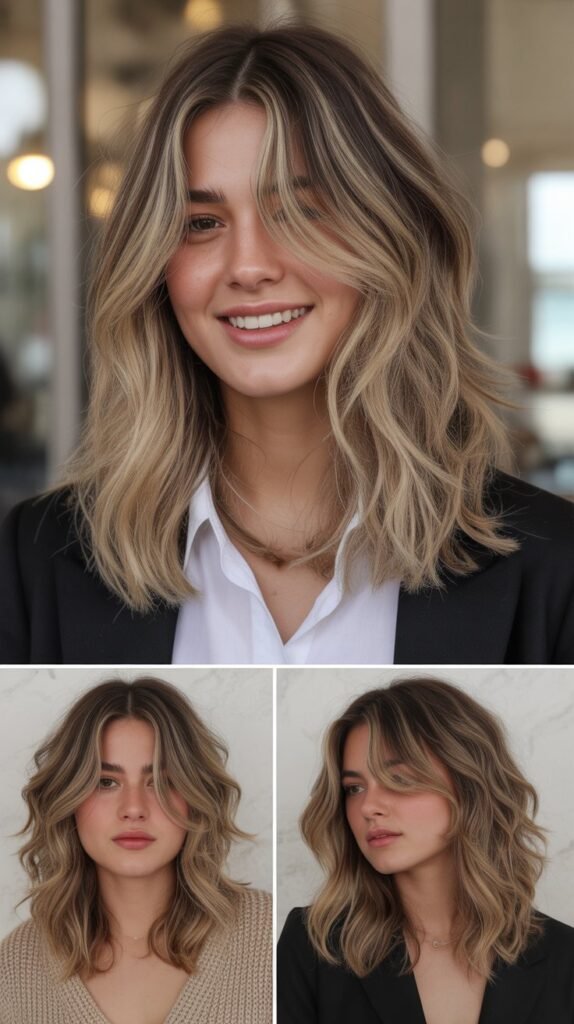
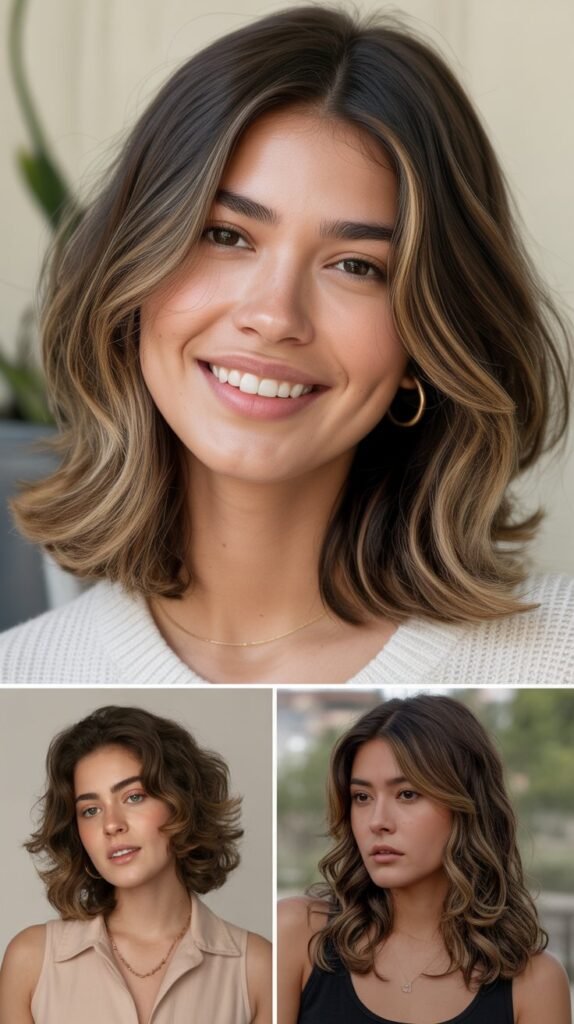
11. Face-Framing Layers With Balayage Highlights
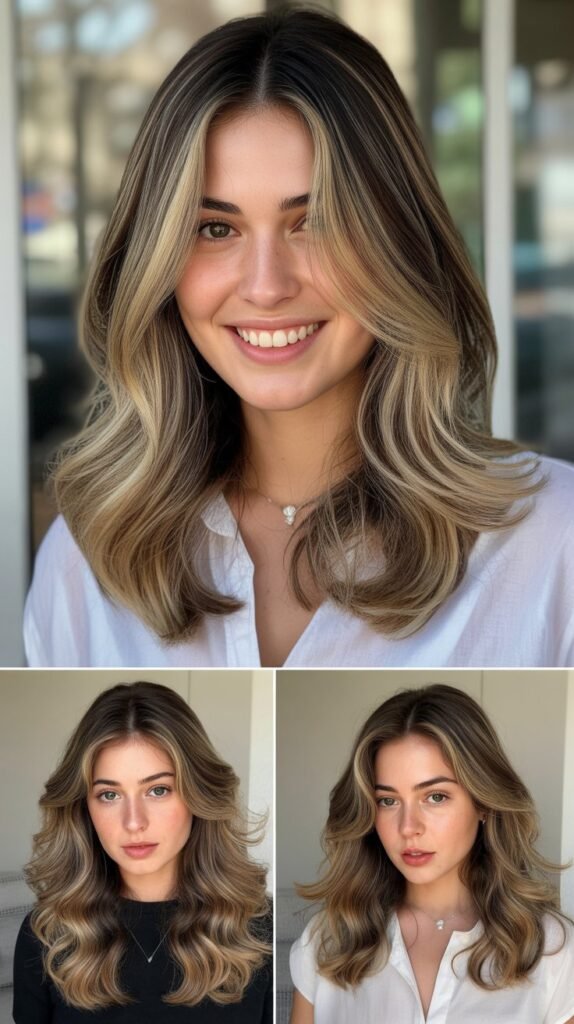
Face-framing layers combined with strategically placed balayage highlights create dimension through both cut and color, maximizing the shapely effect.
- Balayage is a freehand highlighting technique that creates natural-looking, sun-kissed color with softer, less noticeable regrowth lines than traditional foil highlights.
- When balayage highlights are concentrated around the face-framing layers, they catch light and emphasize the dimensional cutting, making the layers appear even more prominent.
- Lighter pieces around the face naturally brighten the complexion and draw attention to facial features, working synergistically with the layering effect.
- This combination approach is particularly effective for those with darker base colors who want to add brightness without committing to all-over color.
- The layered cut ensures that the highlighted sections are distributed throughout multiple lengths, preventing the highlights from looking flat or one-dimensional.
- Styling these combined techniques involves using products that enhance both the color (like glosses or purple shampoos for blonde tones) and the cut’s texture.
- Maintenance includes both haircuts every 8-10 weeks and color touch-ups every 12-16 weeks, depending on how quickly your natural color grows and how dramatic the contrast is.
- The investment in both cutting and coloring creates a high-impact look that appears salon-fresh for extended periods due to the forgiving nature of both techniques.
12. Long Layers With Shorter Temple Fringe
Temple fringe refers to short, piece-y sections at the temples that create a subtle frame without the commitment of full bangs or face-framing layers.
- These shorter pieces typically range from ear-length to chin-length and are concentrated specifically at the temple area rather than extending down along the cheeks.
- Temple fringe works exceptionally well for softening the hairline around the face and creating a more oval appearance for square or rectangular face shapes.
- This minimal approach to front layering suits those who want just a hint of face-framing without the styling commitment of more dramatic layers.
- The short temple pieces can be styled forward for a fringe effect, tucked behind the ears for a cleaner look, or incorporated into updos and ponytails.
- This cut is ideal for individuals growing out bangs, as the temple pieces provide shape during the awkward growing-out stages.
- Styling is minimal—temple fringe typically falls naturally into place and can be quickly smoothed with a flat iron or left to air-dry with natural texture.
- The maintenance is low-impact since the pieces are concentrated in a small area, requiring trims only when they grow past the desired length (typically every 10-12 weeks).
- Temple fringe pairs beautifully with otherwise one-length long hair, adding just enough interest without disrupting a minimalist aesthetic.
13. Feathered Front Layers for Retro Volume
Feathered front layers bring back the volume and movement of 1970s and 1980s hairstyles while adapting the technique for contemporary aesthetics.
- Feathering involves cutting layers with a razor or scissors held at an angle to create tapered ends that flip outward, creating a feather-like appearance.
- Modern feathered layers are typically softer and more blended than the dramatic feathering of past decades, offering retro inspiration with current sensibility.
- The technique works exceptionally well for creating volume at the crown and around the face, making it ideal for those with flat or fine hair.
- Feathered front layers require blow-drying with a round brush, rolling the layers back away from the face to achieve the characteristic outward flip.
- This style works best on straight to slightly wavy hair, as very curly textures don’t show the feathered effect as clearly.
- The cut creates significant movement and is perfect for those who want their hair to have a windblown, dynamic appearance rather than sleek stillness.
- Maintenance includes regular trims every 6-8 weeks to maintain the feathered ends and prevent them from becoming blunt or damaged.
- Modern interpretations often combine feathered front layers with smoother, straighter lengths in back, creating an interesting textural contrast.
14. Choppy Layers Around the Face
Choppy layers create an intentionally textured, piece-y effect around the face that’s edgy, modern, and full of movement.
- The choppy technique involves cutting layers with deliberate separation and irregularity rather than smooth blending, creating distinct pieces.
- These layers typically feature varying lengths cut with point-cutting or slide-cutting techniques that remove weight and create texture simultaneously.
- Choppy front layers work particularly well for thick hair that can support the dramatic texturizing without appearing thin or sparse.
- The style has a rock-and-roll, slightly undone aesthetic that appeals to those wanting a low-maintenance yet stylish appearance.
- Styling choppy layers involves embracing their natural texture—using texturizing products like dry shampoo, sea salt spray, or matte paste to enhance separation.
- The cut looks beautiful both air-dried with natural texture and styled with heat tools for more controlled, piece-y definition.
- Choppy layers around the face create excellent movement that catches light and prevents hair from looking flat or lifeless.
- Maintenance requires trims every 6-8 weeks to prevent the choppy pieces from growing out and losing their distinct, separated character.
15. Long Hair With Short Choppy Bangs
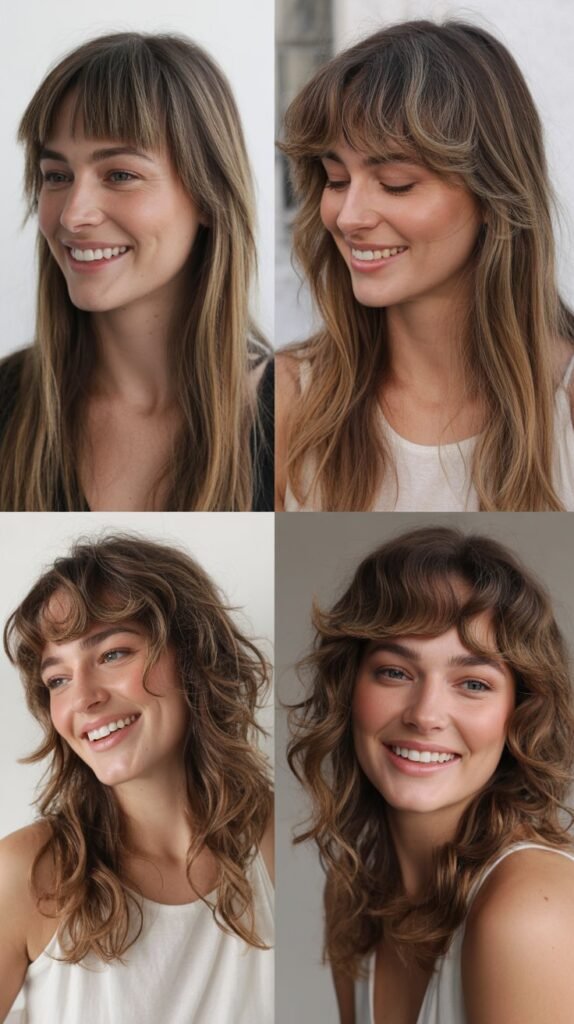
Short choppy bangs paired with long hair create an unexpected combination that’s simultaneously soft and edgy, delicate and bold.
- Choppy bangs are cut with irregular, piece-y ends rather than a straight line, creating a textured fringe that falls loosely across the forehead.
- These bangs typically end just above or at eyebrow length, with some pieces slightly shorter and others longer for an intentionally uneven effect.
- The contrast between short, textured bangs and long, flowing lengths creates visual interest and allows you to enjoy both short and long hair simultaneously.
- This style works well for those wanting to try bangs without committing to a precise, high-maintenance fringe—the choppy nature is more forgiving.
- Face-framing layers that begin just below the bangs help transition from the short fringe to the longer lengths, creating cohesion.
- Styling choppy bangs is relatively simple—they can be worn straight down, swept to the side, or even pinned back when you want a bangless look.
- The low-maintenance nature of choppy bangs makes them appealing for busy individuals, as slight growth or imperfect styling actually enhances their textured character.
- Growing out choppy bangs is more graceful than growing out blunt bangs since the irregular lengths blend more naturally into face-framing layers.
16. V-Shaped Layers With Shorter Front Sections
V-shaped layering creates a distinctive silhouette when viewed from behind, with the shortest layers at the front gradually extending to a point at the center back.
- This cutting technique maintains maximum length at the center back while creating shorter, face-framing pieces that form a V shape when all hair is pulled forward.
- The V-shape is particularly flattering for those wanting to emphasize length while still having dimensional layers for movement and shape.
- Front sections in a V-shaped cut typically start at collarbone to chest length, creating a moderate frame that’s not too dramatic.
- This style works beautifully for individuals with naturally straight or wavy hair, as the V-shape is most visible and pronounced with these textures.
- The cut creates natural movement when hair is worn down, with layers falling in a cascading effect that’s elegant and feminine.
- V-shaped layers are excellent for thick hair, as they remove weight at the perimeter while maintaining fullness and density through the interior.
- Styling can be as simple as blow-drying smooth or adding loose waves, with the V-shape naturally falling into place.
- Maintenance involves trims every 8-12 weeks to maintain the pointed shape and prevent the front layers from growing too long and losing definition.
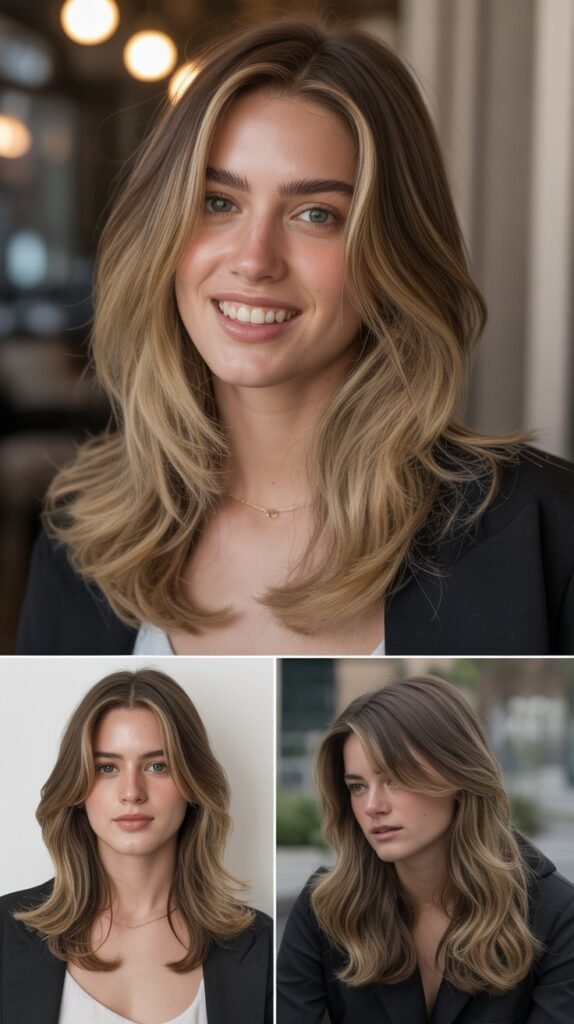
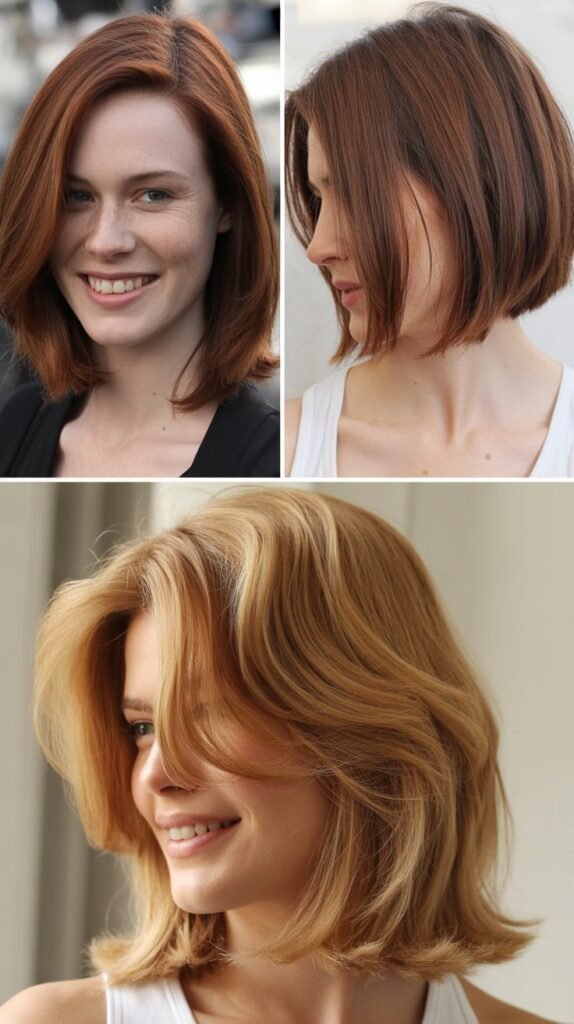
17. Soft Graduated Layers Starting at Jawline

Soft graduated layers that begin at the jawline create a gentle, flattering frame that works harmoniously with most face shapes and personal styles.
- Jawline-length starting layers are particularly effective for highlighting and defining the jawline itself, creating a slimming effect on the face.
- The softness comes from subtle point-cutting or texturizing techniques that create feathered rather than blunt ends on the layers.
- This moderate approach provides more shaping than minimal layering but less drama than very short face-framing pieces, offering a balanced middle ground.
- Soft graduated layers work exceptionally well for professional environments where polished appearance matters but personality in styling is still welcome.
- The layers can be styled to emphasize their shape (blown out with a round brush) or worn more casually with natural texture showing through.
- This cut is particularly flattering for round face shapes, as the jawline-length layers create vertical lines that elongate the face.
- The graduation should be subtle enough that the layers blend seamlessly into the overall length without creating obvious steps or disconnection.
- Maintenance is moderate—trims every 8-10 weeks keep the layers at the optimal length and prevent the graduated effect from growing out.
18. Boho Layers With Textured Front Pieces
Boho layers embrace a free-spirited, natural aesthetic with heavily textured front pieces that create an effortlessly undone appearance.
- Bohemian-style layering typically features multiple varying lengths throughout the hair with particular emphasis on piece-y, textured layers around the face.
- The front pieces often start at various points—some at cheekbone length, others at chin or collarbone length—creating an intentionally irregular, organic frame.
- This style celebrates natural texture, whether that’s waves, curls, or even enhanced texture on straighter hair types.
- Boho layers work best for individuals with relaxed personal style who embrace imperfection and prefer low-maintenance, wash-and-go styling.
- The heavily layered nature helps reduce weight in thick hair while adding body and movement to finer textures through the varying lengths.
- Styling products for boho layers typically include sea salt spray, texturizing mist, or light oils that enhance natural texture without adding stiffness.
- The cut looks beautiful with messy braids, half-up styles, and loose updos where textured pieces naturally fall out to frame the face.
- Maintenance is relatively low—the intentionally imperfect nature means you can go 10-12 weeks between trims without the cut looking overgrown.
19. Disconnected Layers for Modern Edge
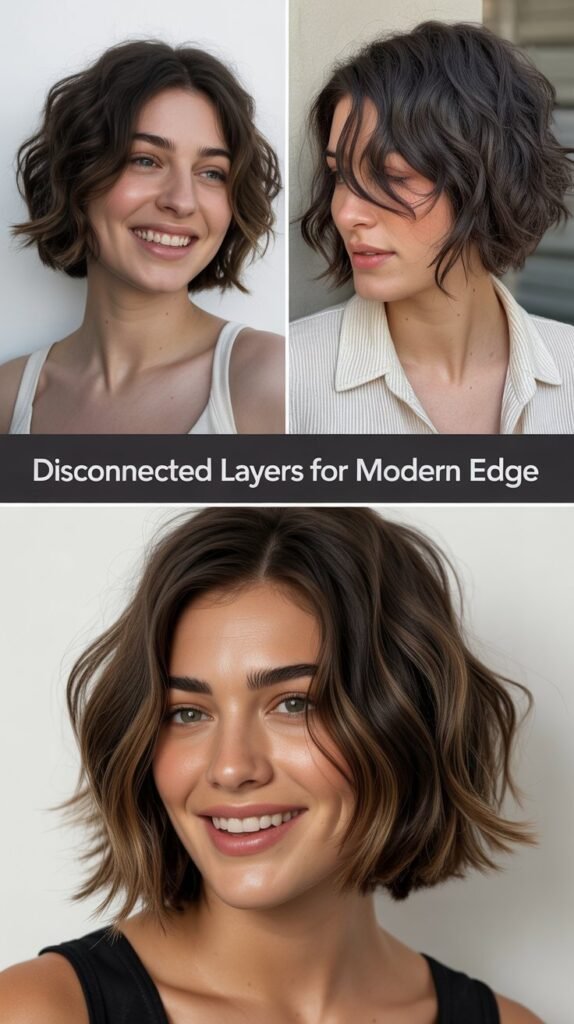
Disconnected layers feature intentional gaps between layer lengths, creating a modern, editorial effect rather than smoothly blended traditional layering.
- This contemporary technique involves cutting layers that don’t graduate seamlessly but instead have visible separation between different sections.
- The disconnection is most obvious around the face, where shorter front pieces appear distinctly separate from the longer lengths beneath them.
- This cutting approach creates a fashion-forward, intentionally styled appearance that stands out from conventional, blended haircuts.
- Disconnected layers work best for those with a strong personal style who want hair that makes a statement and appears deliberately constructed.
- The technique can be applied subtly (slight disconnection that’s barely visible) or dramatically (obvious gaps between layer sections for maximum impact).
- Styling disconnected layers often involves emphasizing the separation through straightening or defined waves that show where one layer ends and another begins.
- This cut requires a skilled stylist who understands how to create disconnection that’s flattering rather than accidental-looking or poorly executed.
- Maintenance includes regular trims every 6-8 weeks to maintain the intentional disconnection and prevent the layers from growing together and losing the effect.
20. Long Hair With Tapered Front Layers
Tapered front layers feature ends that gradually thin out rather than remaining blunt, creating a soft, natural appearance with reduced weight.
- Tapering is achieved through point-cutting, slide-cutting, or razor techniques that remove bulk from the hair strand ends while maintaining length.
- These layers start at varying lengths depending on preference but feature ends that are noticeably thinner and lighter than blunt-cut layers.
- Tapered layers are particularly beneficial for thick, coarse hair that can appear heavy and overwhelming when cut bluntly.
- The thinned ends move more freely and create softer movement compared to the solid, weighty appearance of untapered layers.
- This technique works beautifully across all hair textures, from straight to curly, as it reduces bulk without sacrificing fullness at the root area.
- Styling tapered layers requires less effort than blunt layers since the lightened ends naturally fall into place and move with your head movement.
- The tapered effect creates a lived-in, natural appearance that doesn’t look freshly cut even when it is, offering a soft rather than severe aesthetic.
- Maintenance involves trims every 8-10 weeks, with the tapering technique repeated to maintain the light, airy ends and prevent bluntness.
21. Face-Framing Layers for Heart-Shaped Faces
Heart-shaped faces benefit from specific face-framing layer placement that balances a wider forehead and narrower chin for harmonious proportions.
- The ideal approach for heart-shaped faces involves layers that start at or below the cheekbones, adding width at the narrow lower portion of the face.
- Avoiding very short layers at the temples is important, as this can emphasize the wider forehead rather than creating balance.
- Layers that curve gently inward toward the chin help create the illusion of width in the jawline area where heart-shaped faces tend to be narrower.
- This face shape looks particularly beautiful with soft, swooping layers rather than choppy or piece-y textures that can create unwanted angles.
- Side-swept styles work wonderfully for heart-shaped faces, as they minimize the broad forehead while the layers add dimension to the lower face.
- The layers should feature soft, blended edges rather than harsh lines that might draw attention to the face shape contrast.
- Styling these layers with a slight inward curl or wave at the ends helps create the widening effect in the chin area.
- Those with heart-shaped faces should request their stylist focus layer placement lower on the face rather than at the temples or upper cheeks.
22. Face-Framing Layers for Round Faces
Round faces benefit from strategically placed face-framing layers that create the illusion of length and angles, visually elongating the facial structure.
- The most flattering layers for round faces start at or below the chin, avoiding shorter layers that end at the widest part of the face (typically the cheeks).
- Longer layers that extend past the jawline create vertical lines that draw the eye downward, making the face appear longer and more oval.
- Angled layers that slope downward are more flattering than layers cut straight across, as angles create the illusion of sharpness and definition.
- Side parts work better than center parts for round faces, as they create asymmetry that breaks up the circular shape.
- Layers should be cut to curve away from the face slightly rather than curving inward, preventing the addition of width at the cheeks.
- Avoid too much volume at the sides of the hair, which can make a round face appear wider; instead, focus volume at the crown for height.
- Styling these layers with a slight outward flip or wave helps emphasize the elongating effect and prevent the hair from clinging to the round face contours.
- Those with round faces should communicate their face shape goals to their stylist to ensure layer placement serves the elongating purpose.
23. Face-Framing Layers for Square Faces
Square faces are characterized by strong jawlines and angular features that soften beautifully with properly placed face-framing layers.
- The goal for square faces is to soften the angular corners of the face, particularly the prominent jawline, through curved, feminine layers.
- Layers that begin at cheekbone level and curve around the face work exceptionally well, as they create softness that contrasts with angular features.
- Avoiding blunt, straight-across layers is important, as harsh lines echo and emphasize the square face’s existing angularity.
- Soft, wavy styling on the layers enhances the softening effect, adding curves where the face structure is naturally angular.
- Side-swept bangs or longer curtain bangs work beautifully with square faces, drawing attention away from the prominent jaw corners.
- Layers with texture and movement are more flattering than sleek, straight layers that can appear too severe against strong facial features.
- The layers should be longest at the jawline area (where the face is widest) to avoid adding bulk at the most prominent points.
- Styling products that add soft texture and wave—like mousse or curl cream—enhance the face-softening effect of the layers.
24. Face-Framing Layers for Oval Faces
Oval faces are considered the most versatile face shape and can successfully wear virtually any style of face-framing layers.
- The balanced proportions of an oval face mean there are no specific areas to minimize or emphasize, offering complete freedom in layer placement.
- Layers can start anywhere from very short (eyebrow-length bangs) to longer (collarbone-length) and will create flattering results.
- Those with oval faces can experiment with trends like micro bangs, curtain bangs, or dramatic butterfly layers without worrying about unflattering proportions.
- The styling options are equally unlimited—sleek and straight, wavy and romantic, or textured and piece-y all work beautifully.
- Oval-faced individuals should choose layers based on personal style preference, hair texture, and lifestyle rather than face-shape requirements.
- This face shape handles both symmetrical and asymmetrical layer placement well, opening the door to creative, fashion-forward cuts.
- The versatility of oval faces makes them ideal for trying bold layering experiments that other face shapes might avoid.
- Working with a stylist, those with oval faces should focus discussion on their hair goals, texture management, and maintenance commitment rather than face-shape flattery.
25. Layered Long Hair With Minimal Styling
Minimal styling for layered long hair appeals to those seeking low-maintenance beauty that looks polished without extensive daily effort.
- The key to minimal styling success is choosing a layer placement that works with your natural hair texture rather than requiring transformation through heat tools.
- Air-drying layered long hair creates the most natural, effortless result, especially when layers are cut to enhance your hair’s inherent wave or curl pattern.
- Products for minimal styling include leave-in conditioner for moisture, light oils for shine, and perhaps a small amount of texturizing spray for definition.
- The “wash and go” approach works best when layers are cut to reduce bulk in thick hair or add shape to fine hair without requiring blow-drying.
- Embracing your natural texture—whether straight, wavy, or curly—is fundamental to successful minimal styling of layered hair.
- Overnight braiding or twisting damp hair creates soft texture by morning with zero active styling time required.
- The right layer placement eliminates the need for round brushes and extensive blow-drying, with hair falling naturally into an attractive shape.
- Regular trims every 8-10 weeks maintain the cut’s ability to look good with minimal intervention, preventing the need for excessive styling to manage grown-out layers.
26. Best Products for Styling Front Layers
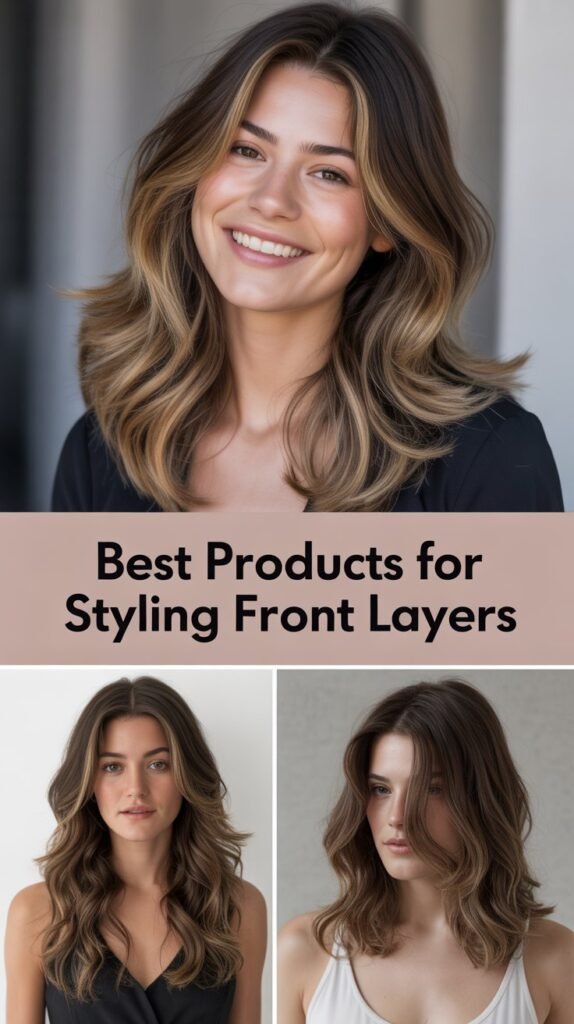
Product selection significantly impacts how well front layers hold their shape, move naturally, and enhance your overall hairstyle.
- Heat protectant sprays are essential when using blow dryers, straighteners, or curling tools on layers, preventing damage that can make layers appear frizzy or dull.
- Volumizing mousses applied to damp layers before blow-drying create lift and body, particularly beneficial for fine hair that tends to fall flat around the face.
- Texturizing sprays or dry shampoos add grip and separation to layers, creating the piece-y, defined look that’s popular in modern hairstyling.
- Light-hold hairsprays help maintain styled layers throughout the day without creating stiffness or visible product buildup.
- Smoothing serums or oils tame flyaways on layers and add shine, particularly important for layers that frame the face where every detail is visible.
- Round brushes in various sizes help style layers during blow-drying—smaller brushes create tighter curves while larger brushes create soft bends.
- Curling wands in multiple barrel sizes allow for versatile layer styling, from tight ringlets in short front pieces to loose waves in longer sections.
- Anti-frizz products specifically designed for layered hair help maintain the sleek appearance of styled layers in humid conditions.
27. How to Blow-Dry Front Layers for Maximum Volume
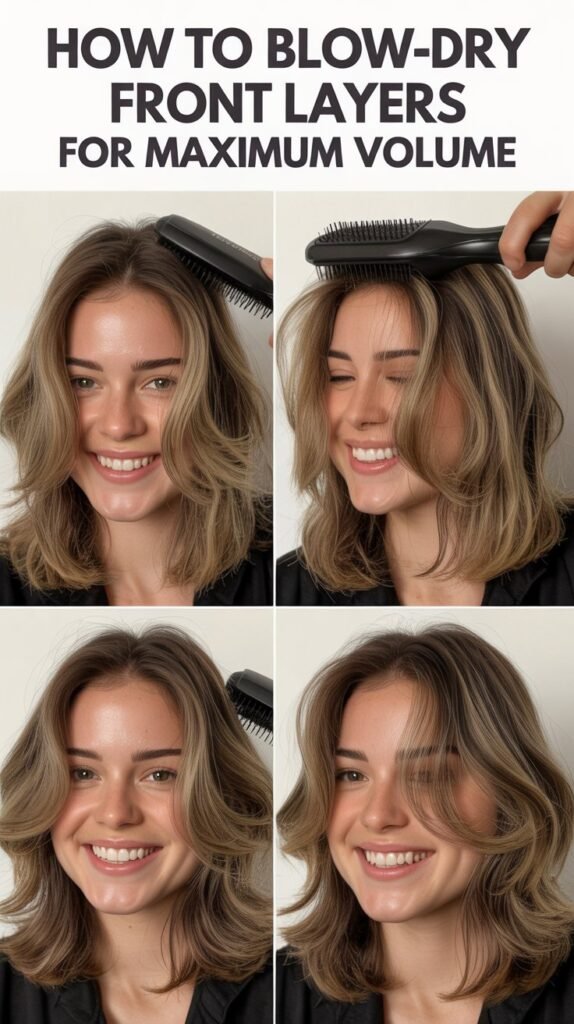
Proper blow-drying technique for front layers can transform flat, lifeless hair into voluminous, beautifully shaped locks that frame the face perfectly.
- Begin with damp (not soaking wet) hair, as extremely wet hair takes much longer to dry and can be damaged by excessive heat exposure.
- Apply volumizing products to the roots of front layers while hair is still damp, focusing on the areas where you want maximum lift.
- Use a round brush sized appropriately for your layer length—smaller brushes (1-1.5 inch diameter) for shorter layers, larger brushes (2-3 inch diameter) for longer layers.
- The technique involves placing the brush underneath a section of layers, rolling it toward your scalp, then directing heat from the blow dryer over the brush while pulling it through the hair.
- For volume, the key is to dry layers while directing them away from the face and pulling them upward rather than letting them fall naturally.
- Focus the dryer nozzle on the roots first to create lift at the foundation, then work down the length of the layers.
- Allow each styled section to cool completely while still wrapped around the brush before releasing it, as this helps set the shape and volume.
- Finish with a blast of cool air to seal the hair cuticle and lock in the style, ensuring volume lasts throughout the day.
28. Maintaining Front Layers Between Salon Visits
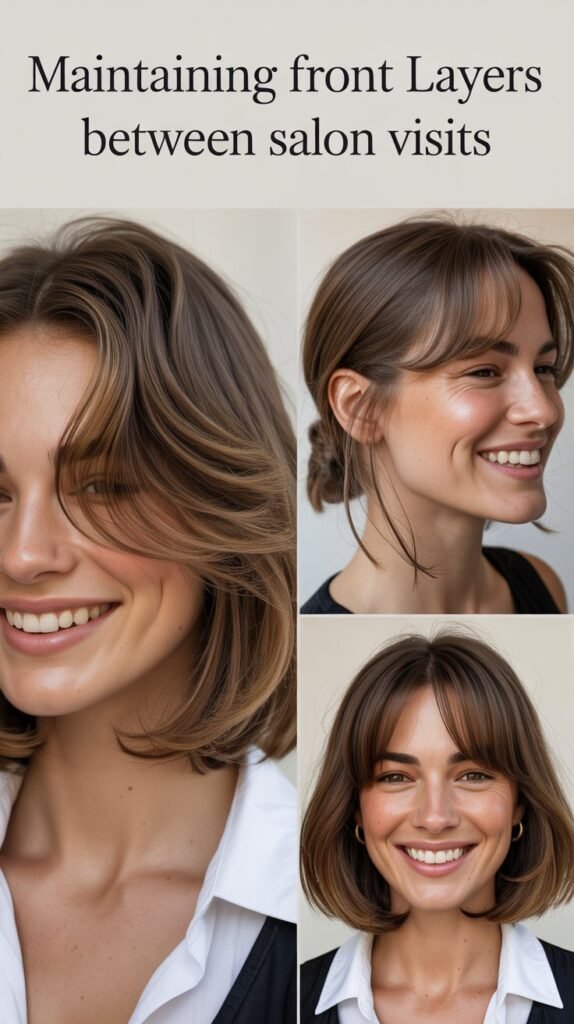
Proper maintenance between professional cuts ensures your front layers continue looking fresh and intentional rather than overgrown or shapeless.
- Establish a regular trimming schedule every 6-10 weeks depending on how quickly your hair grows and how dramatically your layers change as they lengthen.
- Use hair masks or deep conditioning treatments weekly to maintain layer ends, preventing dryness and split ends that make layers appear ragged.
- Trim split ends yourself between salon visits if necessary, carefully cutting individual split hairs with sharp hair scissors (never kitchen or craft scissors).
- Adjust your styling routine as layers grow—what worked for freshly cut layers may need modification as they lengthen and change position on your face.
- Sleep on silk or satin pillowcases to reduce friction that can cause breakage and frizz in the delicate front layers that frame your face.
- Avoid excessive heat styling, which can damage layer ends faster than less-styled portions of your hair, creating an unkempt appearance.
- Touch up layer shape at home using face-framing techniques with a straightener or curling tool to revive the style between professional cuts.
- Communicate with your stylist about your styling habits and maintenance challenges so they can adjust the cut to work better for your lifestyle.
29. Front Layers on Straight Hair
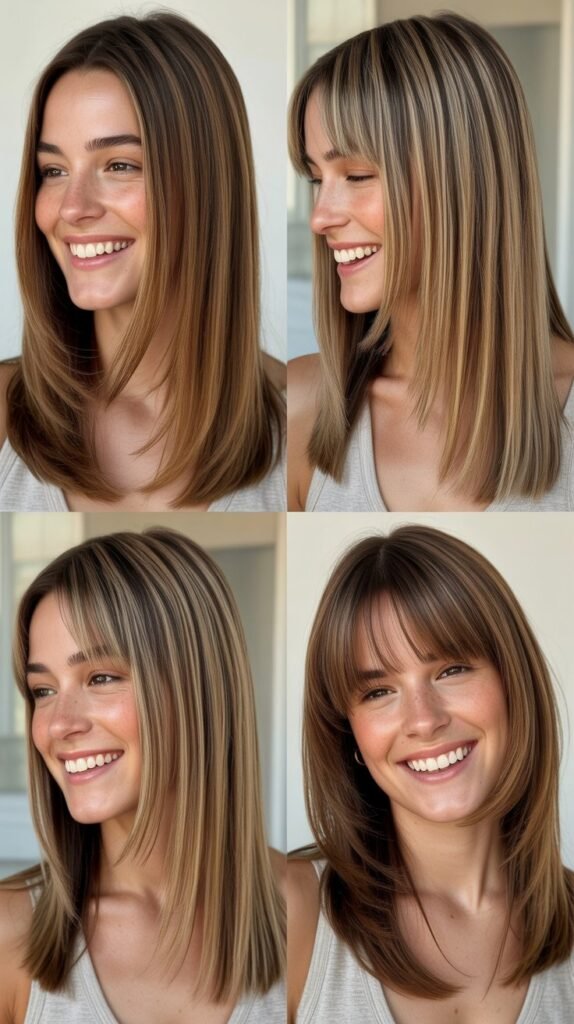
Straight hair showcases front layers in their clearest, most defined form, with every angle and graduation visible in the sleek texture.
- The advantage of straight hair with front layers is the precision and sharpness of the cut shows beautifully, creating clean lines and obvious dimension.
- Straight hair tends to emphasize blunt lines, so layers should be cut with soft, blended techniques to avoid harsh demarcations between lengths.
- Those with naturally straight hair can achieve multiple looks with front layers—pin-straight and sleek, bent under with a flat iron, or curled with heat tools.
- The challenge with straight hair is that lack of natural texture means layers can fall flat against the face unless styled with volume techniques.
- Straight-haired individuals should request long layers if they want movement without a lot of daily styling, as dramatic short layers require more maintenance on straight textures.
- Products for straight hair with layers include volumizing sprays, texturizing products to create separation, and anti-frizz serums to maintain sleekness.
- Blow-drying with a round brush is particularly effective on straight hair, as the hair readily takes the shape you create without fighting against natural texture.
- The precision required for beautiful layers on straight hair means choosing an experienced stylist is especially important—mistakes are immediately obvious.
30. Front Layers on Wavy Hair
Wavy hair and front layers create a naturally romantic, effortlessly beautiful combination that enhances natural texture while adding face-framing dimension.
- Wavy hair texture disguises the precise lines of layering, creating a softer, more organic appearance than the same layers would create on straight hair.
- The natural movement in wavy hair means layers require less styling effort—they often fall beautifully with simple air-drying and minimal product.
- Layers help manage bulk in thick wavy hair by removing weight where the waves would otherwise create excessive fullness.
- For fine wavy hair, layers create the appearance of more volume and body by allowing the natural wave pattern to show at varying lengths.
- The key to successful layers on wavy hair is cutting them while dry or mostly dry so the stylist can see how the natural texture will affect the layer placement.
- Products for wavy hair with layers include curl-enhancing creams, anti-frizz serums, and light-hold gels that define waves without weighing them down.
- Diffusing wavy hair after scrunching in products creates enhanced definition in the layers while maintaining the soft, romantic wave pattern.
- Wavy-haired individuals can embrace their natural texture or straighten for a different look, giving them significant styling versatility with layered cuts.
31. Front Layers on Curly Hair

Curly hair with front layers requires specialized cutting techniques that account for how curls spring up when dry, creating beautiful dimension and reducing bulk.
- Layers on curly hair should always be cut while hair is dry and in its natural curl pattern so the stylist can accurately assess length and shape.
- The “spring factor” means curly hair appears much shorter when dry than when wet, making it essential to cut conservatively to avoid overly short layers.
- Face-framing layers help distribute the volume in curly hair, preventing the triangular shape that can occur when all curly hair is one length.
- Layers remove weight from the ends of curly hair, allowing curls to form more defined patterns rather than being pulled down by excessive heaviness.
- The curly cutting technique typically involves cutting curl by curl rather than in straight lines, respecting each curl’s natural pattern.
- Products for curly hair with layers include leave-in conditioners, curl-defining creams, and gels that provide moisture and hold without crunchiness.
- The “plopping” technique—wrapping curls in a t-shirt after product application—helps curly layers dry in clumped, defined curls rather than frizzy separation.
- Curly-haired individuals should seek stylists specifically trained in curly cutting techniques like DevaCut or Rezo Cut for best results with layered styles.
32. Common Mistakes to Avoid With Front Layers

Understanding and avoiding common layering mistakes ensures you achieve the beautiful, flattering results you desire rather than disappointing outcomes.
- Cutting layers too short is the most frequent mistake—once cut, there’s no undoing it, and growing out very short layers requires patience through awkward stages.
- Failing to communicate clearly with your stylist about desired layer placement leads to results that don’t match your expectations.
- Attempting to cut your own front layers at home rarely produces professional results and can create unflattering, uneven cuts that are difficult to repair.
- Over-layering creates thin, sparse-looking ends and removes too much weight, making hair appear damaged or unhealthy.
- Cutting layers on very damaged hair emphasizes the damage and creates wispy, broken-looking results rather than the intended shaped beauty.
- Choosing layers that work against your face shape rather than flattering it can emphasize features you’d prefer to minimize.
- Inconsistent maintenance leads to layers growing out and losing their shape, eventually looking like unintentional length variations rather than stylish layering.
- Using the wrong products or styling techniques can cause layers to fall flat, frizz excessively, or fail to hold their intended shape.
33. Growing Out Front Layers Gracefully
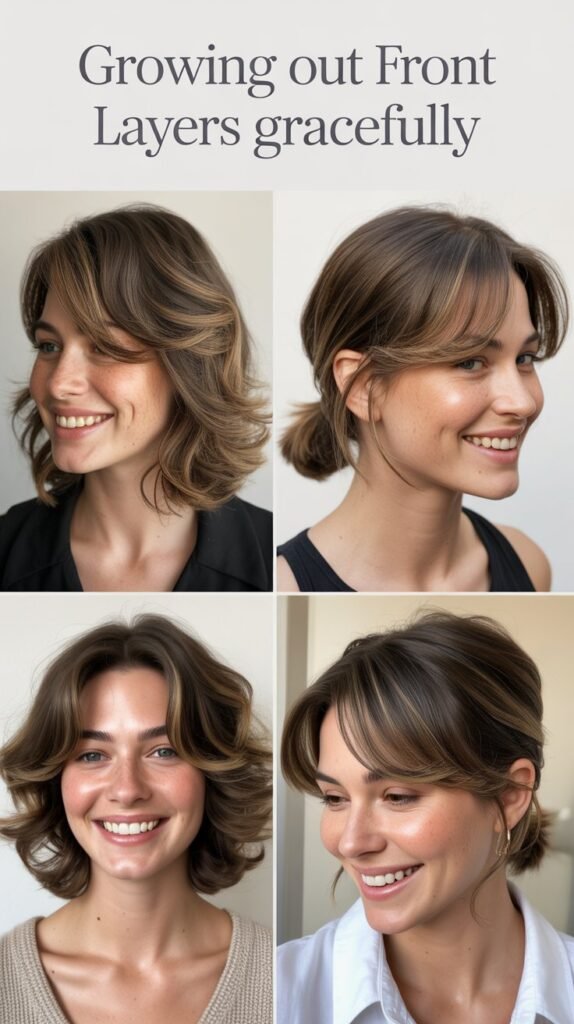
Growing out front layers requires strategy and patience, but with the right approach, you can navigate the transition without frustrating awkward phases.
- Accept that growing out layers takes time—hair typically grows about half an inch per month, meaning significant length changes require months of patience.
- Continue getting regular trims every 8-10 weeks, having your stylist gradually blend the layers into your hair rather than attempting to cut them out all at once.
- Use strategic styling techniques to manage awkward-length layers—bobby pins, small clips, or tucking behind ears can temporarily manage pieces that won’t cooperate.
- Consider transitioning through intermediate styles rather than going straight to one-length hair—longer layers, subtle face-framing, or side-swept styles can serve as attractive interim looks.
- Hair accessories become valuable allies during the grow-out process—headbands, scarves, and decorative pins can manage and disguise transitional lengths.
- Adjust your part periodically, as changing where your hair divides can make growing layers less obvious and provide variety during the process.
- Deep conditioning treatments and hair health maintenance become even more important during the grow-out, ensuring the longer layers look healthy and intentional.
- Embrace styles that work with the in-between length—messy buns, braids, and half-up styles can look deliberately casual rather than like you’re hiding growing layers.
34. Celebrity Inspiration for Long Hair With Front Layers
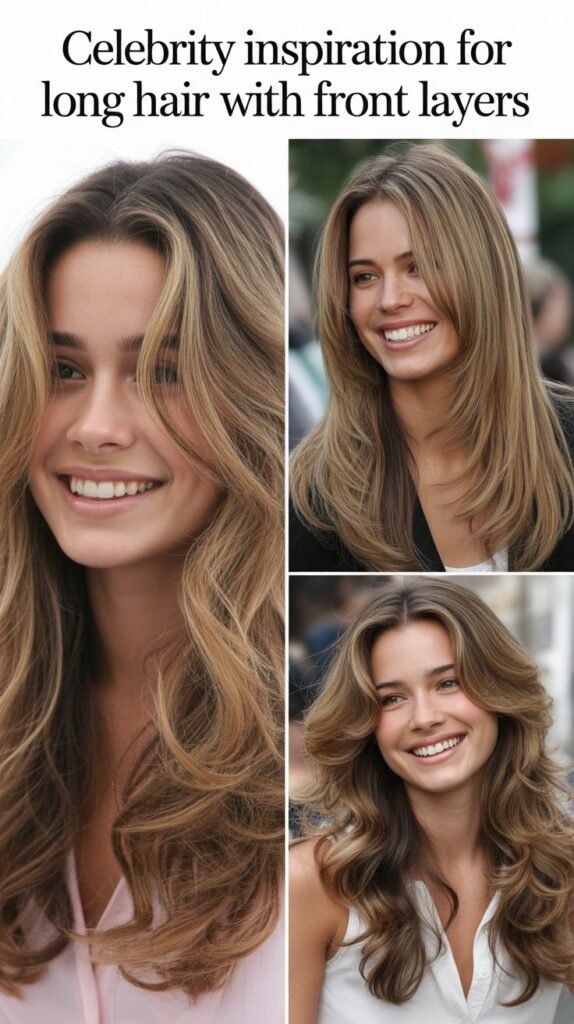
Celebrity hairstyles provide endless inspiration for various approaches to front layers on long hair, showcasing what’s possible across different hair types and personal styles.
- Many celebrities favor face-framing layers starting at cheekbone or jawline length, as this classic approach photographs beautifully and flatters most face shapes on camera.
- Red carpet looks often feature long hair with subtle front layers styled in loose waves or curls, creating dimension that shows beautifully in photographs from all angles.
- Some celebrities embrace dramatic butterfly layers or heavy shag-style layering for a more distinctive, statement-making appearance that sets them apart.
- Natural, air-dried styles with front layers have become increasingly popular among celebrities promoting effortless beauty and embracing natural texture.
- Celebrity hairstylists often combine face-framing layers with balayage or highlights to maximize dimension and create multi-faceted, attention-grabbing looks.
- The “lived-in” layer aesthetic embraced by many celebrities features intentionally undone styling that looks effortlessly chic rather than overly polished.
- Bringing celebrity photos to your stylist can provide excellent visual communication about the layer placement, styling, and overall aesthetic you’re hoping to achieve.
- Remember that celebrity hair often involves extensive styling, professional products, and sometimes extensions or enhancements, so set realistic expectations for achievable results with your own hair.
35. Seasonal Styling Ideas for Layered Long Hair
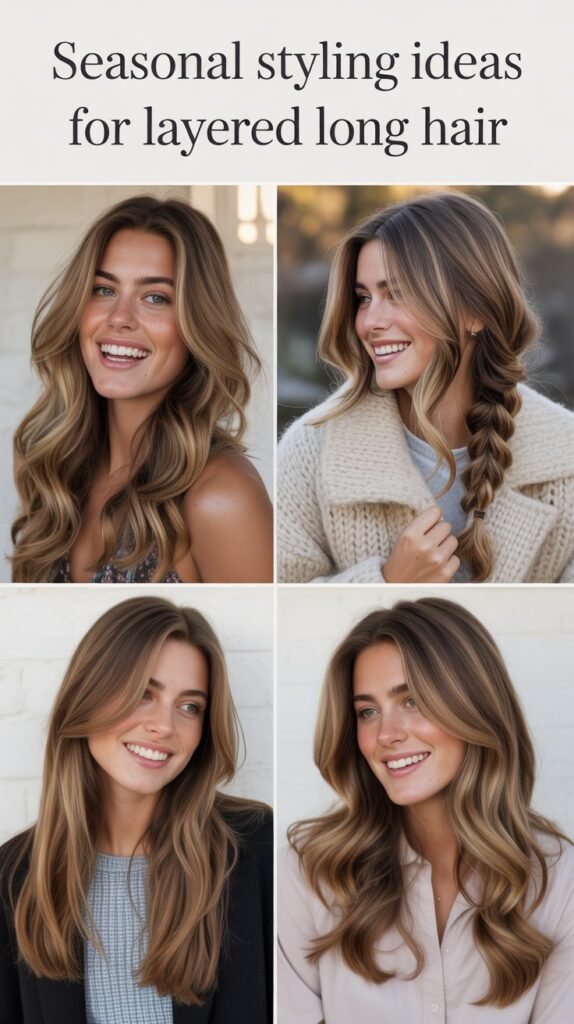
Adapting your front layer styling to different seasons keeps your look fresh while addressing season-specific hair challenges and opportunities.
- Spring styling might embrace enhanced texture with light layers framing the face, styled with soft waves that mirror the season’s romantic, fresh aesthetic.
- Summer layers can be enhanced with beach-wave textures using salt sprays, with front pieces styled to stay off the face in hot weather through braids or clips.
- Fall invites deeper, richer styling approaches—smooth, polished layers that look sophisticated and complement autumn’s crisp, structured fashion.
- Winter layered styling often focuses on protective techniques to combat dry, static-prone hair while maintaining dimension through strategic product use.
- Seasonal color changes can refresh front layers—lighter pieces in summer, richer tones in fall—creating visual interest without changing the cut itself.
- Holiday seasons provide opportunities for glamorous styling of front layers with curls, updos that allow layers to frame the face, or accessory-enhanced looks.
- Spring and summer may call for updos and ponytails where front layers provide a soft frame, while fall and winter styling often features layers worn down and sleek.
- Adjusting products seasonally addresses environmental challenges—anti-humidity formulas in summer, extra moisture in winter, UV protection in spring and summer.
36. Consultation Tips: Communicating With Your Stylist
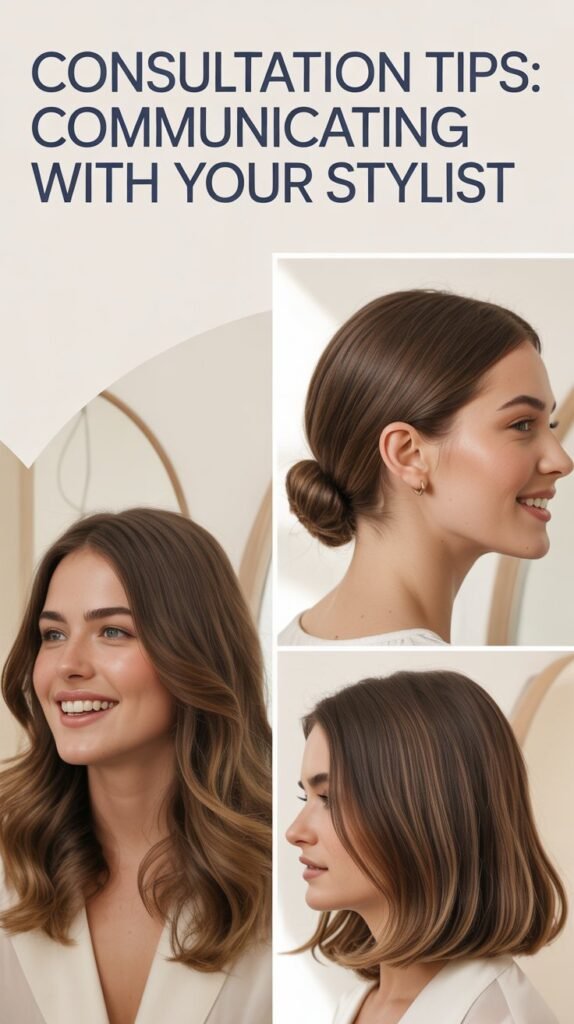
Effective communication with your hairstylist ensures you receive the front-layered long haircut you envision rather than experiencing miscommunication disappointment.
- Bring multiple reference photos showing the exact layer placement, styling, and overall aesthetic you’re hoping to achieve from various angles.
- Be specific about your styling commitment—whether you’ll invest time in daily styling or need a wash-and-go cut—as this affects what layer placement will work for you.
- Discuss your face shape concerns and which features you’d like to emphasize or minimize, allowing your stylist to recommend optimal layer placement.
- Explain your hair texture honestly, including how it behaves when air-dried, how much natural volume or flatness you experience, and any problematic areas.
- Ask questions about maintenance requirements, grow-out process, recommended products, and styling techniques before committing to a dramatic layer change.
- Request that your stylist cut conservatively at first—you can always cut more length off, but you cannot add it back if layers are cut too short.
- Schedule adequate time for your appointment so neither you nor your stylist feels rushed, allowing for thorough consultation and careful execution.
- Establish realistic expectations by discussing what’s achievable with your specific hair type, density, and texture rather than assuming any cut is universally possible.
37. Layered Long Hair Care and Maintenance Routine
A comprehensive care routine ensures your front-layered long hair remains healthy, shiny, and beautiful between salon visits and through daily styling.
- Wash hair 2-3 times per week rather than daily, as overwashing strips natural oils that protect hair and can make layers appear dry and dull.
- Use sulfate-free shampoos that cleanse gently without removing excessive moisture, focusing cleaning efforts on the scalp rather than the lengths.
- Apply conditioner from mid-length to ends, concentrating on the layer ends which are older hair more prone to dryness and damage.
- Deep condition weekly or bi-weekly with intensive treatments that restore moisture, protein, or both depending on your hair’s specific needs.
- Detangle gently starting from the ends and working upward, using a wide-tooth comb or wet brush to minimize breakage in delicate layer ends.
- Apply heat protectant before any thermal styling to prevent damage that accumulates particularly quickly on frequently styled front layers.
- Trim regularly every 6-10 weeks to remove split ends before they travel up the hair shaft and maintain the shaped appearance of your layers.
- Sleep with hair in a loose braid or protective style on silk or satin pillowcases to reduce friction, tangles, and breakage overnight.
- Monitor the health of your layer ends specifically, as these older, more styled sections often need extra attention and care.
Conclusion
37 Long Haircuts With Shorter Front Layers for Instant Shape offers a transformative solution for anyone seeking to add dimension, movement, and face-framing beauty to their long locks.
Throughout this comprehensive guide, we’ve explored everything from classic face-framing layers to modern butterfly cuts, from face shape considerations to seasonal styling variations, from maintenance requirements to celebrity-inspired looks.
The power of front layers lies in their remarkable versatility—they can be subtle or dramatic, conservative or edgy, high-maintenance or wash-and-go, depending entirely on your personal preferences and lifestyle needs.
Whether you’ve found inspiration in the soft romanticism of wispy layers, the bold statement of asymmetrical cuts, the retro appeal of feathered styles, or the contemporary edge of disconnected layering, you now have the knowledge to communicate effectively with your stylist and achieve your ideal look.
The journey to beautifully layered long hair involves thoughtful consultation, appropriate layer placement for your unique features and hair texture, consistent maintenance, and a care routine that keeps your hair healthy and vibrant.
By understanding the nuances of different layering techniques, face shape flattery principles, styling methods, and maintenance requirements detailed in this article, you’re equipped to make informed decisions that will result in a long-layered haircut that not only looks stunning but also works seamlessly with your daily life.
Remember that the best hairstyle is one that makes you feel confident, beautiful, and authentically yourself—and with 37 Long Haircuts With Shorter Front Layers for Instant Shape, you have countless options to discover that perfect expression of your personal style.