When you have long curly hair and a wedding on the horizon, the styling possibilities are genuinely endless and utterly breathtaking.
Your natural curls are already a statement, but with the right hairstyle, they can transform into a masterpiece that photographs beautifully and makes you feel like absolute royalty on your special day.
This comprehensive guide explores 42 elegant fancy wedding hairstyles specifically designed for long curly hair, each one carefully selected to showcase your texture while adding that extra touch of sophistication and glamour.
Whether you’re dreaming of a romantic updo, cascading waves, or something uniquely creative, you’ll discover styles that range from timeless classics to modern showstoppers, all designed to make your wedding day hair as unforgettable as the vows you’ll exchange.
Get ready to find the perfect hairstyle that not only wows your guests but makes you feel confident, beautiful, and completely yourself.
Overview of the Article
This article presents a curated collection of 42 stunning wedding hairstyles tailored specifically for brides with long curly hair.
You’ll explore various categories including romantic updos, half-up half-down styles, side-swept elegance, braided masterpieces, and vintage-inspired looks.
Each section provides detailed descriptions, styling tips, and practical advice on how to achieve these looks while maintaining the health and integrity of your curls.
The guide also includes recommendations for accessories that complement curly hair, maintenance tips for your wedding day, and expert insights on working with professional stylists.
Additionally, you’ll find helpful tables comparing different styling techniques, hold levels, and time requirements to help you make the most informed decision for your big day.
1. Romantic Cascading Curls with Floral Crown
This timeless style lets your natural curls flow freely down your back while a delicate floral crown adds an ethereal, garden-party elegance.
The combination of untamed beauty and structured floral elements creates a balanced look that’s both bohemian and sophisticated.
This hairstyle works exceptionally well for outdoor weddings and pairs beautifully with flowing, romantic wedding gown styles.
Key Features:
- The curls are enhanced with a curl-defining cream and allowed to cascade naturally over the shoulders
- Fresh or silk flowers are woven into a crown that sits comfortably on the head without pulling or causing discomfort
- Strategic placement of flowers can help frame the face and draw attention to your best features
- This style requires minimal pins and allows for natural movement throughout the day
- Works beautifully with both thick and fine curly textures when properly prepared
Styling Tips:
- Start with well-moisturized curls the day before your wedding using a deep conditioning treatment
- Use a diffuser on low heat to enhance curl definition without creating frizz
- Apply a light-hold hairspray that won’t make your curls crunchy or stiff
- Choose flowers that complement your bouquet and overall wedding color scheme
- Consider adding small pearl or crystal pins throughout the crown for extra sparkle
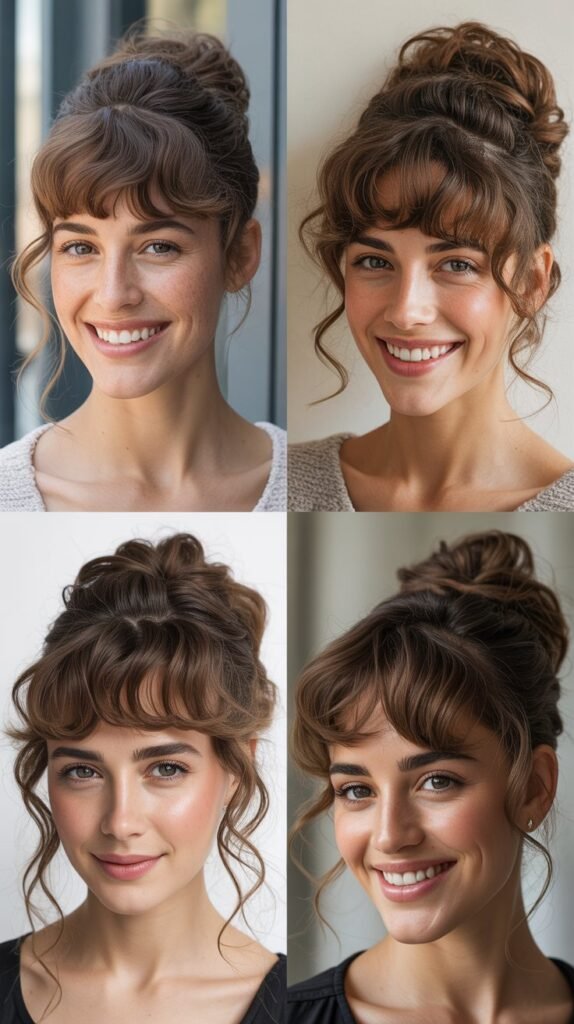
2. Voluminous High Curly Bun with Face-Framing Tendrils
The high curly bun is a classic wedding hairstyle that showcases elegance while keeping your hair securely styled throughout the ceremony and reception.
By leaving face-framing tendrils loose, you maintain a soft, romantic appearance that prevents the style from looking too severe.
This sophisticated updo works exceptionally well with statement earrings and allows your dress neckline to truly shine.
Construction Method:
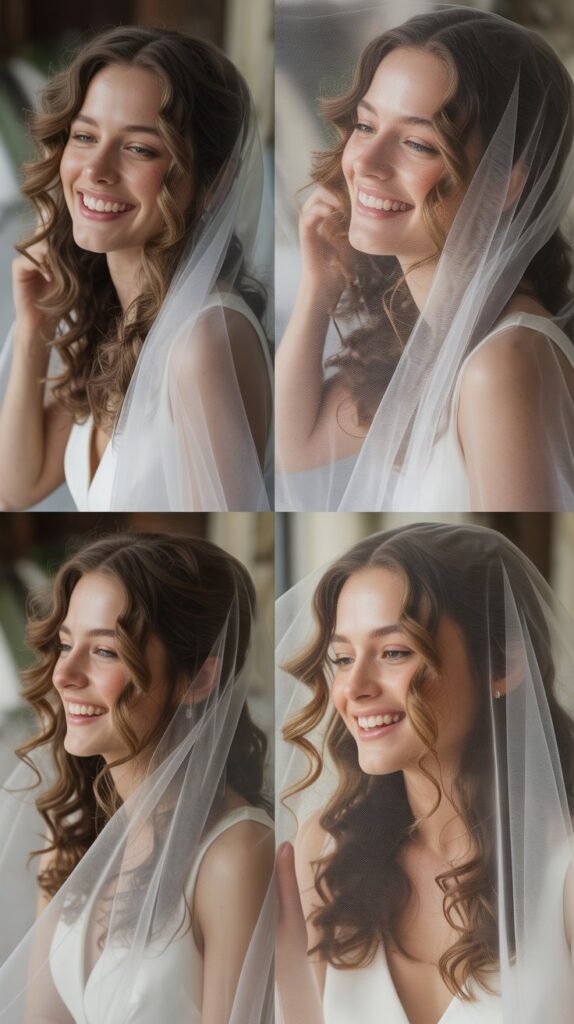
- Gather all hair at the crown of the head, leaving out carefully selected face-framing pieces
- Create a voluminous bun by not pulling curls too tight, maintaining their natural texture and body
- Secure with multiple bobby pins placed in an X-pattern for maximum hold
- The face-framing tendrils should be intentionally curled and shaped to complement your face shape
- Add texture spray to the bun itself to create dimension and prevent it from looking flat
Best Practices:
- This style works best on second or third-day hair when natural oils provide better grip
- Use a hair donut or padding underneath if you want extra volume and height
- Ensure the bun is positioned at the crown rather than too high or too low for optimal elegance
- Face-framing pieces should be no wider than one inch to maintain a delicate appearance
- Consider the veil placement when positioning the bun to ensure both elements work harmoniously together
3. Side-Swept Curly Cascade with Crystal Hairpiece

This glamorous style sweeps all your gorgeous curls to one side, creating an asymmetrical look that’s both dramatic and incredibly photogenic.
The addition of a crystal or jeweled hairpiece elevates the style from beautiful to absolutely stunning.
This hairstyle is perfect for brides who want to make a statement while still showcasing the natural beauty of their curls.
Design Elements:
- All hair is swept dramatically to one side, typically the left or right shoulder depending on your preference
- Curls are arranged in loose, flowing sections that cascade over the shoulder and down the chest
- A substantial crystal or jeweled hairpiece is positioned at the point where hair is gathered
- The opposite side of the head remains smooth and sleek, creating beautiful contrast
- Strategic pinning on the swept side ensures the style stays secure without looking overly constructed
Accessory Selection:
- Choose a hairpiece that complements your jewelry and wedding dress embellishments
- Larger hairpieces work better with this style as they have more hair to anchor into
- Crystal, pearl, or rhinestone pieces catch light beautifully in wedding photography
- The hairpiece should be substantial enough to make a statement but not so heavy it causes discomfort
- Consider whether you want a comb-style piece or individual pins for more flexible placement
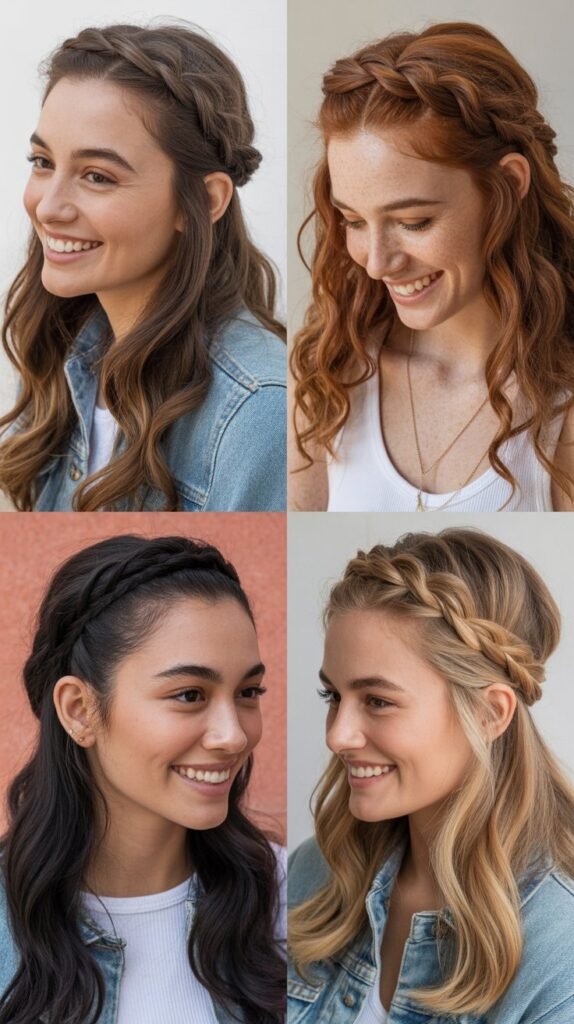
4. Braided Crown with Loose Curly Ends
This style combines the structured beauty of braiding with the free-flowing nature of loose curls, creating a perfect balance between bohemian and polished.
The braided crown wraps around the head like a halo while the remaining curls flow freely down the back.
This versatile style works beautifully for both formal and casual wedding themes.
Braiding Technique:
- Create two Dutch or French braids starting from above each ear and working around the head
- The braids should incorporate hair gradually as they wrap around, creating a fuller crown effect
- Secure the braids at the back where they meet, hiding the ends within the loose curls below
- Gently pull apart braid sections to create a fuller, more textured appearance
- The remaining curls should be left loose and natural, enhanced with curl cream for definition
Styling Considerations:
- This style works best when braids are created with slightly damp hair for better control
- Use clear elastic bands to secure braid ends so they remain invisible within the finished style
- The crown should sit comfortably without being too tight, which can cause headaches during long events
- Consider weaving small flowers or pearls into the braids for additional decoration
- This style holds up exceptionally well throughout the day and into evening dancing
5. Low Curly Chignon with Pearl Accessories
The low chignon is the epitome of timeless elegance and sophistication, and when executed with curly hair, it takes on a beautifully textured, romantic quality.
Positioned at the nape of the neck, this style is perfect for showcasing a detailed back neckline or a dramatic veil.
Pearl accessories add classic bridal glamour that never goes out of style.
Construction Details:
- Gather all hair at the nape of the neck, maintaining curl texture rather than smoothing it completely
- Twist or loosely coil the hair into a rounded bun shape that sits low and secure
- Unlike sleek chignons, the curly version embraces texture and maintains visible curl definition
- Multiple bobby pins are strategically placed throughout to ensure all-day hold
- Small sections of curls can be artfully pulled loose to create a softer, more romantic appearance
Pearl Embellishment:
- Pearl pins can be scattered throughout the chignon for subtle sparkle and elegance
- A pearl comb or larger pearl cluster can be placed at the base or side of the chignon as a statement piece
- Real or high-quality faux pearls both photograph beautifully and add timeless sophistication
- Consider pearl accessories that match other bridal jewelry for a cohesive look
- The placement of pearls should enhance the chignon’s shape rather than overwhelm it
6. Half-Up Half-Down with Twisted Crown
This popular wedding hairstyle offers the best of both worlds by securing the top portion of hair while allowing the bottom half to cascade freely.
The twisted crown adds structure and detail to the upper section while maintaining the romantic, flowing nature of loose curls.
This versatile style flatters virtually every face shape and wedding dress style.
Upper Section Styling:
- Take hair from the temples and crown area, leaving the lower half completely free
- Create twists on each side that work their way back toward the center of the head
- The twists can be simple rope twists or more intricate multi-strand versions depending on desired complexity
- Secure where the twists meet with decorative pins or a small hair accessory
- The twisted section should feel secure but not tight, maintaining comfort throughout the day
Lower Section Treatment:
- The remaining curls should be enhanced with curl-defining products for maximum bounce and definition
- Consider creating looser curls in the bottom section for a cohesive look with the styled top portion
- The length of the lower section can be left as-is or trimmed slightly to create a more uniform appearance
- Add shine serum or oil to the ends for a healthy, glossy finish
- This section provides beautiful movement during dancing and photographs exceptionally well from all angles
7. Voluminous Curly Ponytail with Wrapped Base

A voluminous curly ponytail proves that simple doesn’t mean boring when executed with intention and style.
The wrapped base adds a polished, sophisticated touch that elevates this everyday style into something truly wedding-worthy.
This option is perfect for brides who want a youthful, fresh look that’s still elegant and refined.
Ponytail Construction:
- Position the ponytail at the desired height, with mid-to-high placement being most popular for weddings
- Use a strong elastic band that can handle the weight of long curly hair without slipping
- Tease the hair at the crown before securing to create extra height and volume
- Take a small section of hair from the ponytail and wrap it around the elastic base to conceal it completely
- Secure the wrapped section with bobby pins hidden underneath, creating a seamless, polished appearance
Volume Enhancement:
- Use a volumizing mousse on damp hair before drying to create maximum body
- Consider adding clip-in extensions to the ponytail for even more dramatic volume and length
- Gently separate curls in the ponytail with your fingers to create a fuller, more voluminous appearance
- Avoid brushing the ponytail as this can cause frizz and destroy curl definition
- Set the style with a flexible-hold hairspray that allows natural movement while preventing flyaways
8. Messy Curly Updo with Loose Pieces

The intentionally messy updo embraces the naturally undone aesthetic that’s incredibly popular in modern bridal styling.
This style looks effortlessly beautiful while actually requiring significant skill to execute properly.
By leaving strategic pieces loose and not over-perfecting the placement, you achieve a romantic, lived-in look that’s both current and timeless.
Creating Intentional Messiness:
- Begin by not worrying about perfect parting or smooth sections as you work
- Randomly pin sections of curls at varying heights and angles rather than creating uniform placement
- Pull some pieces loose after pinning to create that sought-after “undone” appearance
- The goal is controlled chaos that looks natural yet beautiful from all angles
- Allow some curls to escape naturally rather than forcing every piece into place
Strategic Loose Pieces:
- Face-framing pieces should be left out intentionally to soften the overall look
- A few tendrils at the nape create a romantic, vintage-inspired appearance
- These loose pieces should be enhanced with curl cream and shaped with your fingers or a small curling iron
- The loose pieces shouldn’t be an afterthought but rather an intentional design element
- Balance is key so the style looks intentionally messy rather than simply messy
9. Grecian-Inspired Curly Updo with Headband
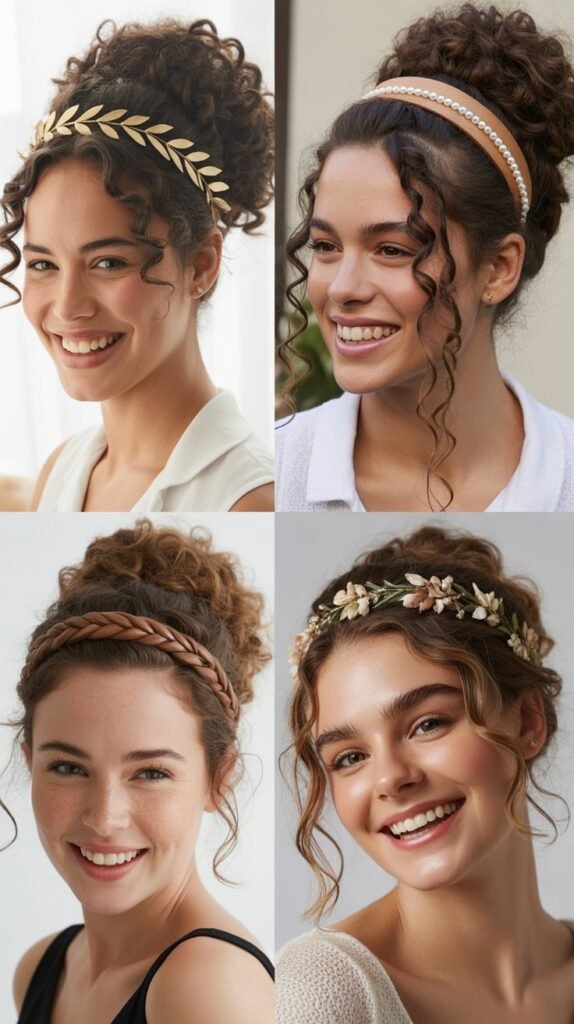
Drawing inspiration from ancient Greek aesthetics, this style combines classical elegance with the modern beauty of natural curls.
A decorative headband or ribbon becomes an integral part of the hairstyle rather than just an accessory.
This look is particularly stunning for destination weddings or ceremonies with a mythological or historical theme.
Grecian Construction:
- Place a decorative headband approximately one to two inches back from the hairline
- Gather sections of hair and tuck them into and around the headband, creating a rolled effect
- Continue this process all around the head, creating a crown-like appearance
- The back section can be formed into a low, textured bun or left in loose, tucked sections
- Curls should maintain their texture throughout the style rather than being smoothed or straightened
Headband Selection:
- Choose a headband with Grecian-inspired details like gold metalwork, pearls, or crystals
- The headband should be comfortable enough to wear for extended periods without causing pressure
- Consider whether you want a simple band or one with dangling elements that move as you do
- Metallic headbands in gold, rose gold, or silver work particularly well with this style
- Ensure the headband is substantial enough to hold the tucked hair securely
10. Asymmetrical Curly Updo with Side Detail
Asymmetry creates visual interest and modern sophistication, making this style perfect for fashion-forward brides.
By concentrating decorative elements and styling focus on one side, you create a hairstyle that photographs beautifully and looks intentionally artistic.
This style works particularly well with dresses that have asymmetrical necklines or one-shoulder designs.
Asymmetrical Design:
- Create a deep side part that immediately establishes the asymmetrical foundation
- One side of the head should feature most of the visual interest, whether through pinned curls, accessories, or both
- The opposite side can be smooth and simple or feature subtle detailing that doesn’t compete
- The updo itself can be positioned off-center to enhance the asymmetrical effect
- Balance is achieved through intentional imbalance, creating a modern artistic statement
Side Detailing Options:
- Cluster several small curls along one side and secure with decorative pins
- Add a dramatic hair accessory like a large crystal piece or fresh flowers to one side
- Create a braided or twisted element that travels from one side into the main updo
- Consider leaving one side slightly looser with more texture than the other
- The detailed side should be the side that faces most guests during the ceremony for maximum impact
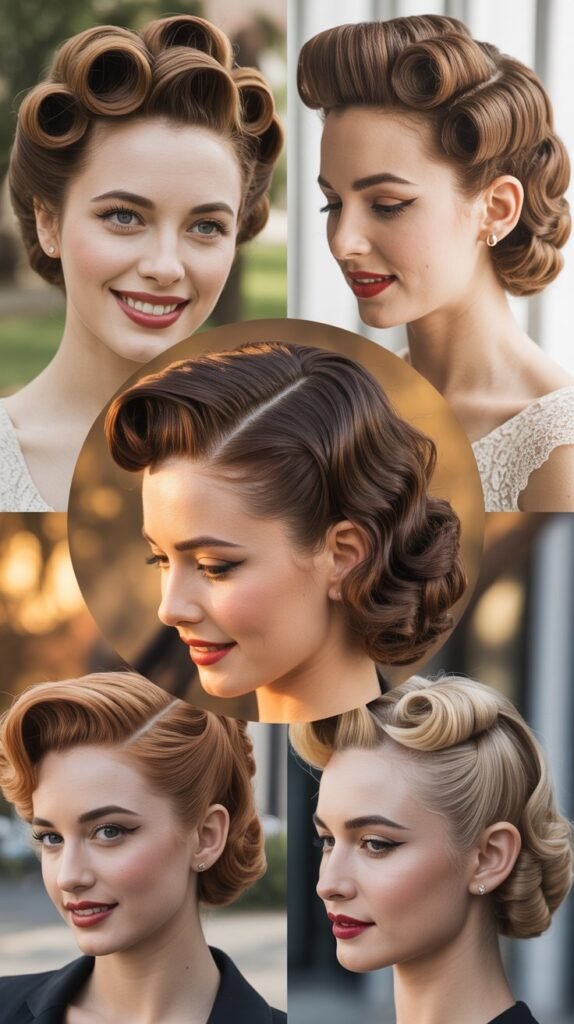
11. Vintage Victory Rolls with Curly Back
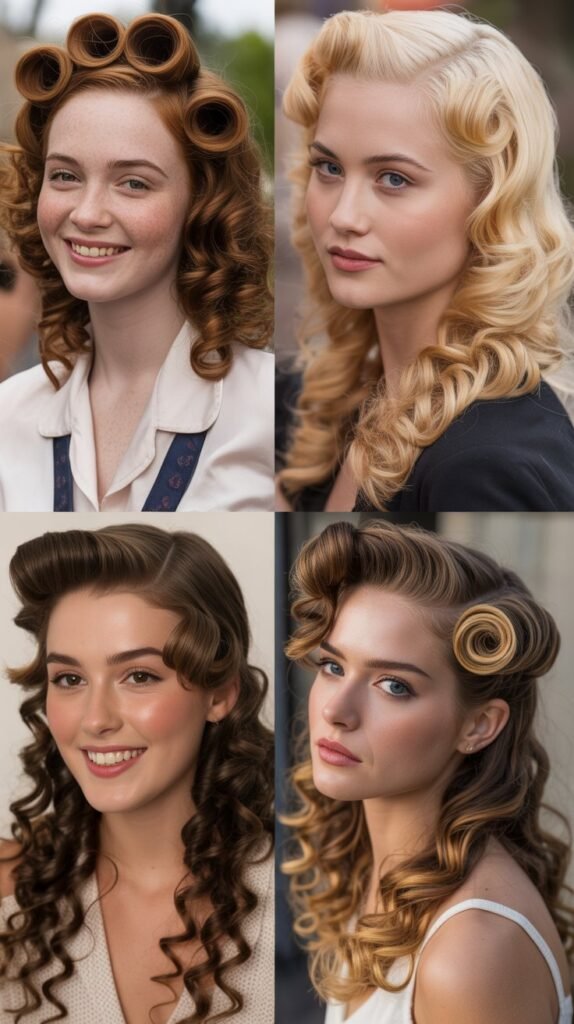
Victory rolls evoke the glamour of the 1940s and create an instantly recognizable vintage aesthetic.
When combined with long curly hair left flowing in the back, this style bridges eras beautifully.
This look is perfect for themed weddings or brides who love vintage fashion and want their hair to reflect that passion.
Victory Roll Creation:
- Section off the front portions of hair from above each temple
- Roll each section upward and toward the center of the head, creating the characteristic roll shape
- Secure each roll with multiple bobby pins placed inside the roll for invisible hold
- The rolls should be full and rounded, creating impressive height and volume
- Use setting spray on each roll as you create it to ensure it holds its shape all day
Back Section Integration:
- The remaining curly hair should be left loose and flowing or styled into soft waves
- Create a seamless transition between the structured rolls and the natural curls behind them
- Consider adding a decorative comb or flowers at the point where rolls meet the back section
- The back curls can be enhanced with hot rollers for a more uniform vintage wave pattern
- This combination creates beautiful dimension between the structured front and romantic back
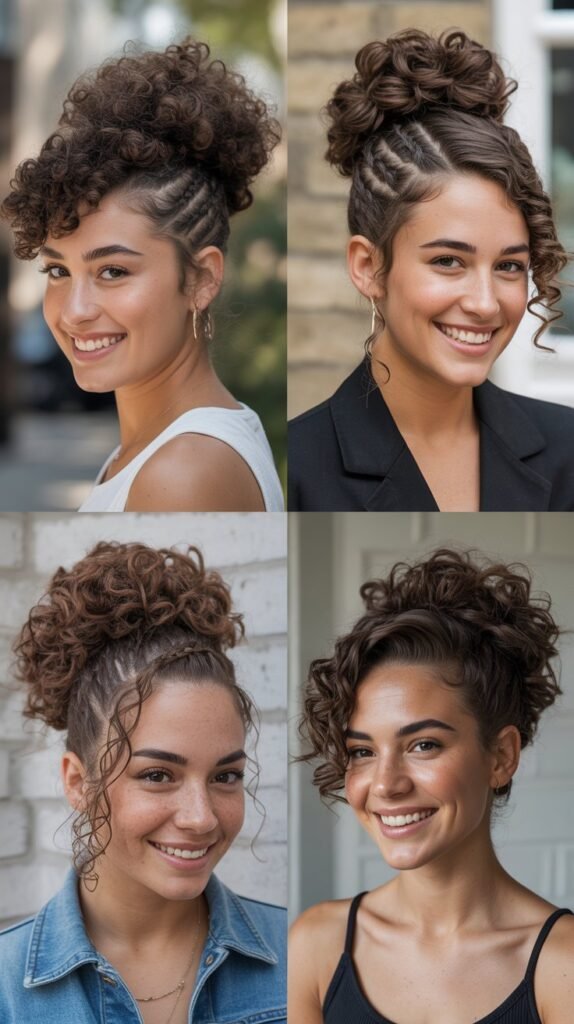
12. Braided Curly Mohawk Updo
This bold, contemporary style makes a serious statement while remaining elegant enough for a wedding.
The mohawk shape is created entirely with braids and pinned curls rather than anything edgy or severe.
This style is perfect for confident brides who want something unique and memorable that still photographs beautifully and suits formal settings.
Mohawk Construction:
- Create a center section running from the hairline to the crown where the mohawk will be positioned
- Braid this center section using a Dutch braid technique so it stands up prominently
- The sides should be smoothed down and back, secured with gel or pomade for contrast
- Pin curls from the remaining length along the braided center line, creating height and texture
- The result should be dramatic yet controlled, creative yet elegant
Styling Specifications:
- The contrast between smooth sides and textured center is crucial to the style’s impact
- Use strong-hold products on the smoothed sides to prevent any frizz or flyaways
- The pinned curls should be arranged artfully to create the impression of a mohawk shape
- Consider your wedding dress style to ensure this bold hair choice complements rather than overwhelms
- This style holds exceptionally well and looks just as good at the end of the night as at the beginning
13. Romantic Curly Low Side Bun
The low side bun positioned at one side of the nape combines elegance with a soft, romantic sensibility.
This style is versatile enough to work with virtually any wedding theme while being particularly stunning for evening ceremonies.
The positioning allows for beautiful visibility of the hairstyle from multiple angles during photos.
Bun Positioning:
- Gather all hair to one side at the nape, typically just behind and below the ear
- The exact position should be determined by your face shape and dress details
- Create a loose, textured bun that maintains visible curl definition rather than smooth uniformity
- Secure with multiple pins placed at various angles for maximum stability
- A few curls can be left loose from the bun to trail down the neck or shoulder romantically
Texture Enhancement:
- Use your fingers rather than a brush to gather hair, preserving natural texture
- Don’t twist the hair too tightly as you form the bun; looser is more romantic
- Gently pull sections of the bun apart after securing to create a fuller, more dimensional appearance
- Add texture powder or dry shampoo to the bun for additional grip and volume
- The finished bun should look substantial but soft, elegant but not severe
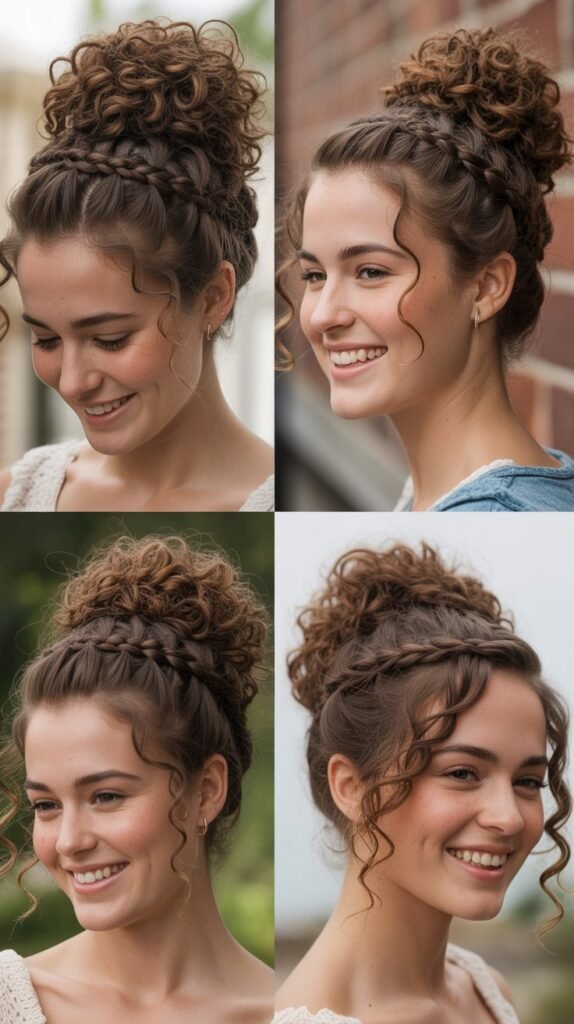
14. Crown Braid with Cascading Curls

The crown braid frames the face beautifully while keeping hair away from the face during ceremony and photos, and the cascading curls in back provide movement and romance.
This style offers security and structure where you need it while maintaining the free-flowing beauty of natural curls.
It’s particularly photogenic and works well with both simple and ornate veils.
Crown Braid Technique:
- Create a Dutch or French braid that follows the hairline from one ear, across the forehead, to the other ear
- The braid should be positioned like a crown, sitting about one to two inches back from the hairline
- Incorporate small sections of hair gradually as you braid to create fullness
- Secure the ends behind one ear or integrate them into the loose curls
- Gently pull sections of the braid to create a fuller, more romantic appearance
Cascading Curl Styling:
- The unbraided curls should be enhanced with curl cream and diffused for maximum definition
- Consider creating larger, looser curls in this section to complement the structured braid
- Add shine serum for a glossy, healthy finish that catches light beautifully
- The length should flow freely over shoulders or down the back depending on preference
- This section provides beautiful movement and dimension in photographs and during the reception
15. Twisted Curly Top Knot
The top knot receives an elegant upgrade when created with curly hair, as the natural texture adds dimension and interest that smooth hair simply cannot achieve.
This style is perfect for brides who want a contemporary, fashion-forward look that’s still refined enough for a formal wedding.
The height of the top knot creates a flattering elongating effect.
Top Knot Construction:
- Gather all hair at the crown or slightly behind it, creating a high ponytail first
- Instead of wrapping the hair smoothly, allow curls to maintain their texture as you coil them
- The knot should be full and rounded, showcasing the beauty of the curl texture
- Secure with an elastic and multiple pins placed strategically throughout
- A few face-framing pieces can be left loose for a softer, less severe appearance
Height and Volume:
- The top knot should have significant height and presence without looking disproportionate
- Use teasing at the base before creating the ponytail to ensure the knot sits up prominently
- Consider your height and body proportions when determining the final size of the knot
- The curlier your hair, the more naturally voluminous the top knot will be
- Ensure the style feels balanced rather than top-heavy, which can cause discomfort
16. Curly Hair with Jeweled Headband Accent

Sometimes the most elegant approach is to let your natural curls shine while adding a single stunning accessory.
A jeweled headband provides just enough embellishment without overwhelming your natural beauty.
This style is perfect for brides who want to showcase their curls while adding a touch of sparkle and formality.
Headband Placement:
- Position the headband one to two inches back from the hairline for a classic look
- Alternatively, place it closer to the hairline for a more bohemian, festival-inspired appearance
- Ensure the headband sits comfortably without creating pressure points that will cause headaches
- The headband should feel secure but not too tight, as it needs to last through the entire event
- Consider how the headband interacts with your veil if you’re wearing one for the ceremony
Curl Preparation:
- Start with well-defined, healthy curls that have been properly moisturized and styled
- Use a curl-enhancing product that provides hold without stiffness
- Diffuse on low heat or air dry to prevent frizz
- Add a light finishing spray that provides shine and frizz control
- The curls should look effortless yet polished, natural yet intentionally styled
17. Pinned Curly Updo with Floral Backdrop

This updo creates a canvas for stunning floral arrangements, with curls pinned in various directions to create texture and dimension.
The flowers become an integral part of the hairstyle rather than simply an addition.
This style is breathtaking for garden weddings and pairs beautifully with natural, organic wedding themes.
Pin Placement Technique:
- Pin individual curls and small sections at varying angles rather than creating uniform rows
- The randomness creates natural-looking texture that appears effortless
- Use enough pins to ensure security but not so many that the hair feels heavy
- Focus on creating height at the crown and fullness throughout the updo
- Leave the back of the updo slightly open to accommodate floral arrangements
Floral Integration:
- Work with your florist to create hairpieces that match or complement your bouquet
- Fresh flowers should be added as close to the ceremony as possible to ensure freshness
- Consider a mix of blooms and greenery for dimension and visual interest
- The flowers should be wired or pinned securely so they don’t shift during the event
- Choose hardy flowers that can withstand being worn for several hours
18. Waterfall Braid with Curly Layers

The waterfall braid creates a cascading effect where strands of hair fall through the braid like a waterfall, creating a romantic and intricate appearance.
When combined with curly hair, this technique looks especially stunning as the curls add volume and dimension to the falling strands.
This style is perfect for bohemian or romantic wedding themes.
Waterfall Braid Method:
- Begin with a standard braid near the temple on one side
- Instead of continuing with all three sections, drop the bottom section and pick up a new piece from above
- Continue this pattern across the head, creating the waterfall effect
- The dropped sections should be defined curls that cascade beautifully
- Secure the braid at the opposite side or continue it into a regular braid
Styling the Cascade:
- The dropped sections should be individually curled or enhanced to ensure they look intentional
- Use a small curling iron to define any pieces that aren’t naturally curling as desired
- The cascading curls should graduate naturally into the loose hair below
- Consider creating multiple waterfall braids for a more elaborate effect
- This style requires practice but creates an stunning, intricate result
19. Textured Curly French Twist
The French twist receives a modern update when created with curly hair, as the texture adds contemporary appeal to this classic style.
Rather than smooth and sleek, this version embraces the natural curl pattern while still achieving the sophisticated silhouette of a traditional French twist.
This style is perfect for formal weddings and pairs beautifully with structured gowns.
French Twist Construction:
- Gather hair at the nape and twist upward along the back of the head
- Instead of creating a tight, smooth roll, allow curls to show through and create texture
- Pin along the twist with bobby pins inserted horizontally for maximum hold
- The top of the twist should have visible curl texture rather than being completely smooth
- Secure the top with additional pins and hairspray for all-day hold
Texture Management:
- Use a light gel or mousse to help define curls while providing hold
- Don’t fight your natural texture; work with it to create a beautifully textured twist
- Pull a few small curls loose from the twist to soften the overall appearance
- The sides can be smooth for contrast or slightly textured to match the twist
- This style looks elegant from every angle and photographs exceptionally well
20. Loose Curly Half-Updo with Ribbon Detail
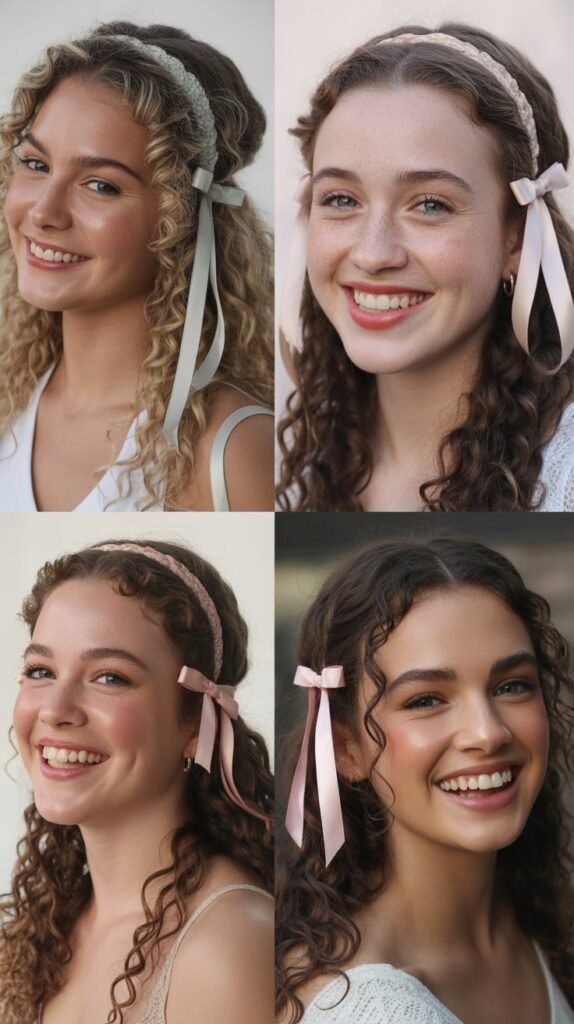
A simple ribbon can transform a basic half-updo into something truly special and wedding-worthy.
This style is perfect for brides who want something uncomplicated yet elegant, and the ribbon can be chosen to match wedding colors or theme.
The combination of structured ribbon and loose curls creates beautiful contrast.
Half-Updo Construction:
- Section the top third or half of hair from ear to ear
- Gather this section at the back of the head where you want the ribbon to be placed
- Secure with a clear elastic before adding the ribbon
- The ribbon should be tied in a bow or knotted in a way that’s secure yet decorative
- Ensure the gathered hair has volume and isn’t pulled too flat against the head
Ribbon Selection and Tying:
- Choose a ribbon that’s substantial enough to make a statement but not so heavy it pulls
- Satin, velvet, or organza ribbons all work beautifully for weddings
- The ribbon can match your bouquet ribbons, bridesmaid dresses, or wedding colors
- Consider having long ribbon tails that cascade down with your curls
- Practice tying the bow or knot beforehand to ensure it looks intentional and beautiful
21. Bohemian Curly Updo with Braided Elements
This free-spirited style combines multiple braiding techniques with loosely pinned curls to create a bohemian masterpiece.
The intentionally undone appearance requires significant skill to execute while maintaining all-day hold.
This style is perfect for outdoor, rustic, or bohemian-themed weddings and pairs beautifully with flowing, relaxed gown styles.
Multiple Braid Integration:
- Incorporate several different types of braids throughout the updo, such as traditional three-strand, fishtail, and Dutch braids
- The braids should appear random rather than symmetrical or overly planned
- Some braids can wrap around the updo while others are pinned directly into it
- Loosen braids after creating them to enhance the bohemian, relaxed appearance
- The various braiding techniques add visual interest and texture
Bohemian Styling:
- Don’t worry about perfection; slightly messy is the goal
- Allow some curls to escape naturally rather than pinning everything firmly
- Consider adding small flowers, greenery, or even feathers throughout the style
- The overall silhouette should be full and textured rather than sleek and contained
- This style looks beautiful slightly windblown, making it perfect for outdoor venues
22. Elegant Low Ponytail with Wrapped Sections

A low ponytail becomes wedding-appropriate when elevated with strategic wrapping and careful curl definition.
This style is perfect for brides who want something relatively simple but still polished and intentional.
The wrapped sections add visual interest and sophistication that distinguish this from an everyday ponytail.
Ponytail Positioning:
- Place the ponytail at the nape of the neck, low and centered or slightly off to one side
- Create volume at the crown before securing the ponytail to prevent a flat appearance
- Use a strong elastic that can hold the weight of long curly hair securely
- The ponytail should feel firm but not so tight that it causes pulling or discomfort
- Consider the veil placement when determining the exact position
Wrapping Technique:
- Take multiple small sections of hair from the ponytail and wrap them around the base and down the length
- Secure each wrapped section with small pins that are hidden within the curls
- The wrapping can cover the elastic completely and extend several inches down the ponytail
- This technique adds dimension and makes a simple ponytail look much more elaborate
- The wrapped sections should be strategically placed rather than uniform for a more organic appearance
23. Curly Hair with Delicate Chain Headpiece
Chain headpieces offer a modern, bohemian alternative to traditional veils and hair accessories.
When draped across curly hair, the chains create beautiful contrast between the structured metal and soft curls.
This style is perfect for fashion-forward brides who want to make a contemporary statement while embracing their natural texture.
Headpiece Placement:
- The chain headpiece typically connects at the crown or temples and drapes across the forehead or throughout the hair
- Position should be secure enough that the piece doesn’t shift but not so tight it causes discomfort
- Some chain pieces connect to a comb or clip, while others are secured with bobby pins
- Consider how the headpiece will work with your natural hair movement throughout the day
- Multiple layers of chain can create a more dramatic, goddess-like effect
Styling Around the Headpiece:
- Curls should be well-defined and bouncy to create beautiful contrast with the metal chains
- Use products that provide hold and shine to make the hair look as polished as the accessory
- Consider which curls will frame the face and ensure they’re perfectly shaped
- The rest of the hair can be left completely down or partially styled
- This look photographs dramatically and works particularly well with backlit photography
24. Vintage-Inspired Curly Updo with Birdcage Veil

The birdcage veil adds instant vintage glamour and pairs exceptionally well with curly updos.
This combination creates a look that’s simultaneously nostalgic and timeless, perfect for brides who love retro aesthetics.
The short veil allows the updo to remain visible and creates a sophisticated, Old Hollywood appearance.
Updo Creation:
- Create a low or mid-height updo with visible curl texture and vintage-inspired rolling techniques
- The updo should have structured elements that complement the structured nature of the birdcage veil
- Victory rolls, pin curls, or rolled sections work beautifully with this style
- The overall silhouette should be rounded and full rather than sleek and minimal
- Ensure the updo is positioned to accommodate the veil attachment point
Birdcage Veil Integration:
- The birdcage veil typically attaches at the crown or slightly to one side
- It should cover one or both eyes partially, creating that signature vintage look
- The veil can be attached to a comb, clip, or fascinator that becomes part of the hairstyle
- Consider whether you want French or Russian netting and what color best suits your complexion
- The veil adds drama without covering the beautiful updo you’ve created
25. Curly Mohawk Braid Updo

This edgy yet elegant style creates a mohawk shape using braiding and pinning techniques rather than any actual shaving or cutting.
The result is dramatic and unique while remaining appropriate for formal weddings.
This style is perfect for confident brides who want to showcase their personality through their hair.
Mohawk Construction:
- Section the hair into three parts: center section for the mohawk and two side sections
- Braid the center section using a Dutch braid technique so it stands up prominently
- Smooth the side sections down and back, securing them flat against the head
- Pin curls from the remaining length along the braided center to create height
- The finished mohawk should have impressive height and texture
Balancing Edginess with Elegance:
- While the mohawk shape is bold, the execution should be polished and refined
- Use strong-hold products to ensure the smoothed sides remain sleek throughout the event
- The pinned curls in the center should be artfully arranged rather than chaotic
- Consider adding subtle embellishments like small pearls or crystals for wedding appropriateness
- This style holds exceptionally well and actually looks better as the day progresses
26. Soft Curly Waves with Fresh Flower Accents

Sometimes less is more, and this style proves that beautifully styled curls enhanced with fresh flowers need nothing else.
This approach lets your natural texture be the star while the flowers add color and romance.
Perfect for garden weddings and outdoor ceremonies, this style looks effortlessly beautiful.
Wave Creation:
- Start with your natural curl pattern and enhance it with curl-defining products
- Use a diffuser or large-barrel curling iron to create uniform, soft waves throughout
- The waves should be loose and flowing rather than tight ringlets
- Brush through the curls slightly with a wide-tooth comb for a softer, more romantic texture
- Set with a flexible-hold hairspray that maintains movement
Flower Placement:
- Work with your florist to select flowers that can withstand being worn in hair
- Place flowers asymmetrically for a more natural, organic appearance
- Cluster several flowers together in one area rather than spacing them evenly
- Secure flowers with bobby pins that have been wrapped with floral tape for grip
- Consider using a mix of blooms and greenery for dimension
27. Braided Halo with Low Curly Bun

This style combines the romantic appeal of a halo braid with the sophistication of a low bun, creating a look that’s both structured and soft.
The halo frames the face beautifully while the bun provides a polished finishing point.
This versatile style works for various wedding themes from rustic to formal.
Halo Braid Creation:
- Create two braids starting at the nape, one on each side
- Bring the braids up and over the head like a crown or halo
- Cross the braids at the forehead or slightly behind, depending on preference
- Tuck the ends of the braids into the bun or pin them securely underneath
- The halo should sit comfortably without pulling or creating tension
Bun Construction:
- Gather the remaining hair at the nape into a low bun
- The bun should be textured and showcase curl definition
- Position the bun so it serves as an anchor point for the halo braids
- Leave a few loose curls to soften the overall appearance
- This combination creates beautiful dimension and interest from all angles
28. Curly Side Swept Style with Art Deco Clip

Art Deco-inspired hair accessories add instant vintage glamour and sophistication.
When paired with swept curly hair, the geometric lines of Art Deco design create beautiful contrast with the organic nature of curls.
This style is perfect for Great Gatsby-themed weddings or any celebration embracing 1920s-1930s aesthetics.
Side Swept Styling:
- Create a deep side part that immediately establishes the swept direction
- Smooth and sweep all hair to one side, over the shoulder
- Use gel or pomade on the smooth side to create a sleek, polished finish
- The swept curls should cascade over the shoulder in defined, beautiful spirals
- Secure the style at the back with pins placed strategically
Art Deco Clip Selection:
- Choose a clip with geometric designs, crystals, or metallic elements typical of the Art Deco period
- The clip should be substantial enough to make a statement and help hold the style
- Gold, silver, and crystal clips work particularly well with this vintage aesthetic
- Position the clip where the hair is swept, typically above and slightly behind the ear
- The clip becomes a focal point of the style, so choose something truly special
29. Twisted Crown with Cascading Ringlets
This style features twisted sections that create a crown effect while the back hair remains in loose, romantic ringlets.
The combination of structure and flowing movement makes this style both sophisticated and romantic.
It’s particularly beautiful for ceremonies and photographs as it looks stunning from every angle.
Crown Twisting:
- Take sections from the temples and twist them back toward the center of the head
- The twists should be smooth and rope-like, creating defined lines
- Secure where the twists meet with decorative pins or a small accessory
- Additional twists can be added from different angles to create a more elaborate crown
- The twisted sections should feel secure but not tight
Ringlet Formation:
- The remaining hair should be styled into defined, bouncy ringlets
- Use a curling iron with a small to medium barrel for tight, uniform spirals
- Each ringlet should be allowed to cool completely before being touched
- Gently separate and arrange the ringlets for a fuller appearance
- Set with hairspray that provides hold without stiffness
30. Bohemian Side Braid with Loose Curls

This relaxed, romantic style features a thick side braid that transitions into loose, flowing curls.
The bohemian aesthetic embraces imperfection and natural beauty, making it perfect for outdoor and rustic wedding venues.
This style is both practical and beautiful, keeping hair controlled while maintaining a free-spirited appearance.
Side Braid Construction:
- Create a thick braid that begins at one side and travels down over the shoulder
- The braid can be a traditional three-strand, fishtail, or Dutch braid depending on preference
- Incorporate curls into the braid without smoothing them completely for texture
- Pull sections of the braid apart after completion to create a fuller, more relaxed appearance
- Secure the end with a clear elastic or ribbon
Transition to Loose Curls:
- The braid should end mid-length, allowing the remaining hair to cascade in loose curls
- Create a seamless transition by gently separating the braid end
- The loose curls should be enhanced with curl cream for definition
- Consider adding flowers or greenery where the braid transitions to curls
- This style looks beautiful slightly windblown and casual
31. Sculpted Curly Updo with Geometric Pins

This modern, artistic style uses geometric hair pins as both functional and decorative elements.
The curls are sculpted and pinned in intentional directions while metallic geometric pins create a contemporary art installation effect.
This style is perfect for modern, minimalist, or art-focused weddings.
Sculpting Technique:
- Pin individual curls and sections in deliberate directions rather than randomly
- Create visible patterns and shapes with the placement of curls
- The overall structure should appear intentional and artistic
- Use strong-hold products to ensure each curl maintains its sculpted shape
- The updo should have height and dimension from multiple viewing angles
Geometric Pin Placement:
- Select pins in geometric shapes like triangles, hexagons, or abstract designs
- Place pins strategically so they’re visible and part of the overall design
- Gold, rose gold, or silver pins create beautiful contrast against hair
- The pins should be both functional (holding the style) and decorative
- Consider creating a pattern or cluster with the pin placement
32. Romantic Loose Curls with Cathedral Veil
Sometimes the most impactful choice is to keep hair simple and let a dramatic veil be the statement.
Loose, romantic curls provide the perfect foundation for a cathedral-length veil, creating a classic, timeless bridal look.
This style is perfect for traditional ceremonies in churches or formal venues.
Curl Preparation:
- Create large, loose curls throughout using a large-barrel curling iron or hot rollers
- The curls should be soft and romantic rather than tight or defined
- Brush through the curls gently with a paddle brush for a softer texture
- Add shine serum for a healthy, glossy finish
- The hair should have body and movement without looking overly styled
Veil Attachment:
- The cathedral veil typically attaches at the crown or mid-head
- Ensure the attachment point is secure enough to support the veil’s weight
- The veil should be positioned so it doesn’t pull on the hair or cause discomfort
- Consider having the veil professionally attached to a comb for maximum security
- Once the veil is removed after the ceremony, the loose curls still look beautiful for the reception
33. Curly Ponytail with Braided Wrap

This style elevates the simple ponytail by incorporating a braid that wraps around the base and extends into the ponytail itself.
The combination of braiding and loose curls creates beautiful texture and visual interest.
This style is youthful and fresh while still being polished enough for a wedding celebration.
Ponytail and Braid Creation:
- Create a ponytail at your desired height, typically mid to high for maximum impact
- Before securing, take a section from underneath to create a braid
- Wrap the braid around the ponytail base several times, covering the elastic
- Extend the braid down into the ponytail length or secure it at the base
- The remaining ponytail should be full of bouncy, defined curls
Texture Contrast:
- The smooth braid creates beautiful contrast against the textured curls
- Ensure the braid is tight enough to maintain definition throughout the day
- The ponytail curls should be enhanced with products for maximum volume and bounce
- Consider adding extensions to the ponytail for even more dramatic volume
- This style photographs beautifully from the back and side angles
34. Soft Updo with Curly Fringe
For brides with curly bangs or fringe, this style showcases that beautiful face-framing element while keeping the rest of the hair elegantly secured.
The updo is soft and romantic with visible curl texture, and the fringe adds a modern, fashion-forward element.
This style works particularly well with vintage-inspired or retro wedding themes.
Updo Construction:
- Gather hair from the ears back into a soft, textured updo
- The updo should maintain visible curl definition rather than being smooth
- Position the updo low to mid-range so it doesn’t compete with the fringe
- Leave the style loose and romantic rather than tight and controlled
- Secure with pins placed strategically throughout
Fringe Styling:
- The curly fringe should be well-defined and bouncy
- Use a small amount of curl cream to enhance definition without weighing it down
- The fringe can be full across the forehead or swept slightly to one side
- Ensure the fringe isn’t too long or it will obstruct vision and photos
- The fringe adds a youthful, modern touch to the classic updo
35. Goddess Curls with Gold Leaf Accents
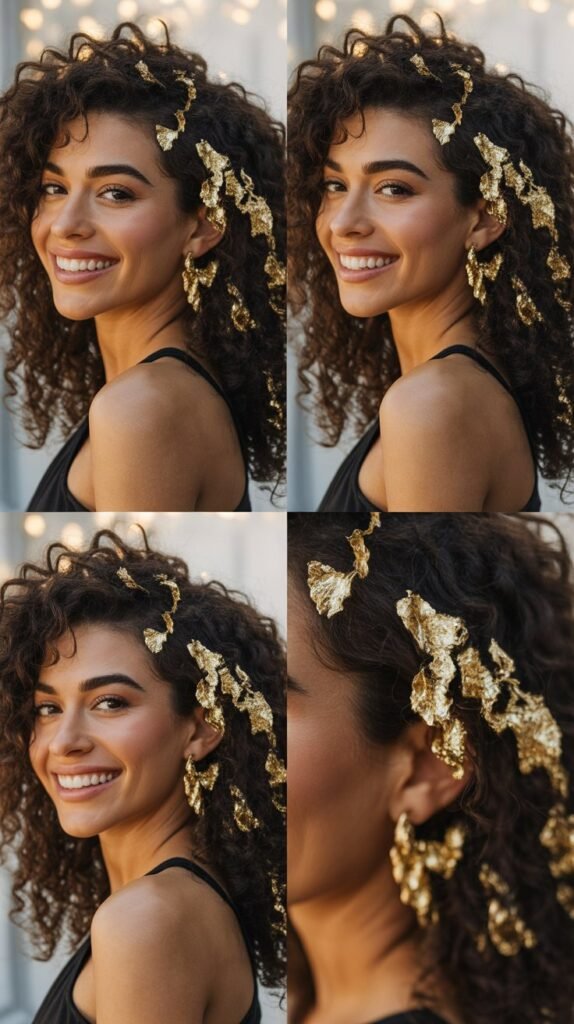
Gold leaf adds ethereal, mythological beauty to flowing curls, creating a goddess-like appearance that’s both dramatic and romantic.
The delicate gold catches light beautifully in photographs and adds a touch of luxury that’s perfect for formal weddings.
This style embraces natural curls while elevating them to something truly extraordinary.
Gold Leaf Application:
- Gold leaf sheets or flakes can be applied throughout the hair using hair spray as adhesive
- Apply to strategic sections rather than throughout all the hair for a delicate touch
- The gold leaf should look like natural highlights that catch the light
- Consider concentrating gold leaf around the face and crown for maximum impact
- Professional application is recommended to achieve the right balance
Curl Styling:
- The curls should be large, loose, and flowing like waves
- Create volume at the crown for a goddess-like silhouette
- The overall appearance should be natural yet polished
- Use shine-enhancing products to make the hair glow like the gold leaf
- This style looks particularly stunning in golden hour or candlelit photography
36. Curly Faux Hawk Updo

This edgy yet elegant style creates a faux hawk effect using pinned and teased curls rather than any shaving.
The result is bold and memorable while remaining appropriate for formal celebrations.
This style is perfect for brides who want to make a fashion statement and showcase their confident, unique personality.
Faux Hawk Construction:
- Tease the hair along the center of the head from forehead to crown for height
- Pin curls along this center line, directing them upward and back
- The sides should be smoothed down and secured flat against the head
- Use strong-hold gel or pomade on the sides for maximum contrast
- The center section should have significant height and textured volume
Styling Specifications:
- The contrast between smooth sides and textured center is crucial
- Back-comb sections thoroughly before pinning for maximum height
- Use multiple bobby pins on each curl to ensure security
- Consider your dress style to ensure the bold hair complements rather than overwhelms
- This style holds exceptionally well and maintains its shape throughout the day
37. Vintage Pin Curls Updo
Pin curls create a distinctly vintage aesthetic that’s perfect for Old Hollywood or retro-themed weddings.
Each curl is individually shaped and pinned to create a sculptural, art-piece quality updo.
This style requires significant time and skill but results in a truly show-stopping look that’s unlike anything else.
Pin Curl Creation:
- Section hair into small portions, typically one to two inches square
- Wrap each section around your finger to create a flat, circular curl
- Pin each curl flat against the head using multiple bobby pins in an X pattern
- Continue throughout the entire head, creating uniform curl sizes
- Once all curls are created and pinned, set with strong-hold spray
Styling and Shaping:
- The pinned curls can be left as-is for a very structured vintage look
- Alternatively, gently loosen and shape the curls after setting for a softer appearance
- The overall shape should be rounded and sculptural
- Consider adding a vintage hair accessory like a feather fascinator or jeweled comb
- This style looks remarkably authentic to the 1920s-1940s era
38. Curly Hair with Dramatic Side Part and Pearl Pins
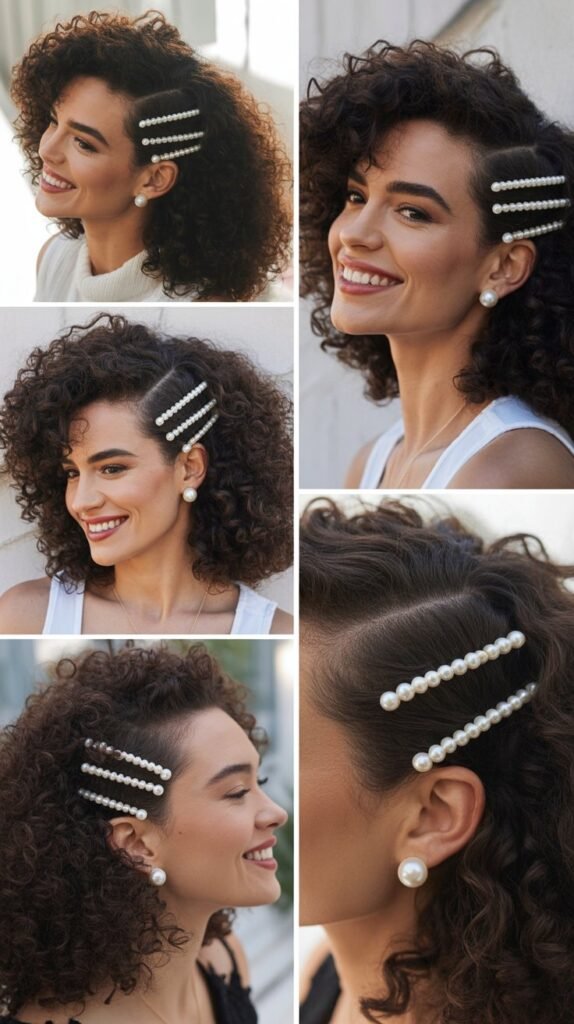
Sometimes simplicity makes the strongest statement, and a dramatic side part creates instant elegance and sophistication.
When combined with strategic pearl pin placement throughout curly hair, this style becomes wedding-worthy while still feeling natural and unfussy.
Perfect for brides who want to showcase their natural texture with minimal manipulation.
Side Part Creation:
- Create a deep side part that extends from the front hairline to the crown
- Use a rattail comb for a precise, clean part line
- The larger side should have significantly more volume and presence
- Apply gel or pomade along the part line to keep it crisp throughout the day
- The dramatic part creates asymmetry that’s visually interesting
Pearl Pin Placement:
- Scatter pearl pins throughout the hair on the heavier side of the part
- Pins can be clustered in one area or dispersed for a constellation effect
- Real or high-quality faux pearls both photograph beautifully
- Secure each pin by crossing two bobby pins through the pearl’s base
- The pearls add elegance without overwhelming the natural beauty of the curls
39. Braided Low Bun with Curly Texture

This style combines the structure of braiding with the softness of a textured bun, creating a look that’s both romantic and refined.
The braids add visual interest and help secure the bun while the maintained curl texture prevents the style from looking too severe or formal.
This versatile style works for virtually any wedding theme.
Braid and Bun Integration:
- Create two or three braids from different starting points on the head
- Bring all braids together at the nape of the neck
- Incorporate the braids into a low bun, wrapping and tucking them throughout
- The bun should maintain visible curl texture rather than being smooth
- Secure thoroughly with bobby pins placed at various angles
Texture Maintenance:
- Don’t pull hair too tightly as you braid and form the bun
- Allow individual curls to show through the structure
- Pull sections of the bun apart slightly after securing for a fuller appearance
- A few loose curls can be left out to frame the face or neck
- The finished style should look intentionally textured rather than perfectly smooth
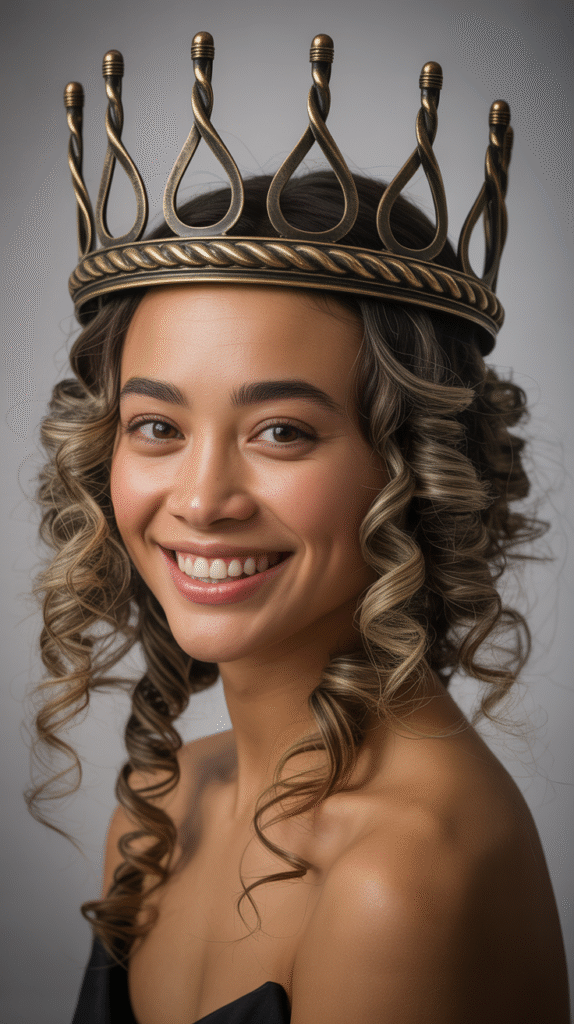
40. Curly Updo with Tiara Placement

A tiara transforms any updo into a fairytale moment, and curly updos provide the perfect textured foundation for tiara placement.
The combination is undeniably regal and princess-like, perfect for brides who’ve dreamed of wearing a tiara on their wedding day.
The updo provides height and structure that showcases the tiara beautifully.
Updo Construction for Tiara:
- Create an updo with significant height at the crown where the tiara will sit
- The updo should be very secure as the tiara adds weight
- Position the bulk of the updo behind where the tiara will be placed
- Maintain curl texture throughout rather than creating a completely smooth surface
- Test the tiara placement during styling to ensure proper positioning
Tiara Integration:
- The tiara should be secured with both its own combs and additional bobby pins
- Position it so it sits comfortably without sliding forward or causing pressure
- The tiara should complement the updo size rather than overwhelming or being overwhelmed by it
- Consider how the tiara looks from all angles, not just the front
- Choose a tiara style that works with your dress formality and wedding theme
41. Flowing Curls with Delicate Baby’s Breath Crown

Baby’s breath creates a delicate, ethereal crown that’s both romantic and understated.
When paired with flowing curls left completely loose, this style is the epitome of natural, effortless bridal beauty.
Perfect for garden weddings and outdoor ceremonies, this look embraces simplicity while still being distinctly bridal.
Baby’s Breath Crown Creation:
- Multiple stems of baby’s breath are wired together to create a circular crown
- The crown should be flexible enough to fit comfortably but structured enough to maintain its shape
- Position the crown approximately one to two inches back from the hairline
- Secure with bobby pins hidden within the stems
- The delicate white flowers create a halo effect that’s both sweet and sophisticated
Curl Styling:
- The curls should be soft, natural, and flowing
- Use minimal products to maintain a touchable, natural texture
- The hair should look effortless rather than over-styled
- Add shine serum for healthy-looking glossy curls
- This simple style lets both the curls and the delicate baby’s breath shine
42. Statement Curly Updo with Bold Hair Jewelry

This grand finale style features an elaborate updo adorned with bold, statement hair jewelry that creates a truly unforgettable look.
The combination of textured curls and dramatic jewelry pieces makes this style perfect for luxury weddings and brides who want maximum impact.
This is a red-carpet worthy style that commands attention.
Elaborate Updo Construction:
- Create a large, voluminous updo that serves as a canvas for jewelry placement
- The updo should have height, width, and dimension from all viewing angles
- Incorporate multiple techniques like twisting, pinning, and rolling throughout
- Ensure the structure is very secure as it will support substantial jewelry
- Maintain visible curl texture that adds to the overall drama
Bold Jewelry Selection:
- Choose substantial pieces like large combs, dramatic pins, or elaborate headpieces
- The jewelry should feature crystals, pearls, metals, or a combination
- Multiple pieces can be layered for even more impact
- The jewelry becomes an integral part of the hairstyle, not just an addition
- Consider how the hair jewelry coordinates with your dress embellishments and other jewelry
Conclusion
Throughout this comprehensive guide to 42 Elegant Fancy Wedding Hairstyles for Long Curly Hair That Wow, you’ve discovered an incredible range of options that celebrate and showcase the unique beauty of your natural curls.
From romantic cascading styles adorned with flowers to sophisticated updos embellished with crystals and pearls, from vintage-inspired pin curls to modern geometric designs, there’s truly a perfect style waiting for every bride with long curly hair.
The key to achieving your dream wedding hairstyle lies in choosing a style that not only complements your dress, venue, and wedding theme but also makes you feel authentically yourself.
Remember that your natural curls are already stunning, and the right hairstyle simply enhances what’s already beautiful.
Whether you choose an elaborate updo that takes hours to create or opt for flowing locks with a simple accessory, confidence is the most important element you’ll wear on your wedding day.
Work with a professional stylist who understands curly hair, do a trial run well before your wedding, and trust that when you see yourself in the mirror on your special day, you’ll feel as incredible as you look.
Claude is AI and can make mistakes.
Please double-check responses.