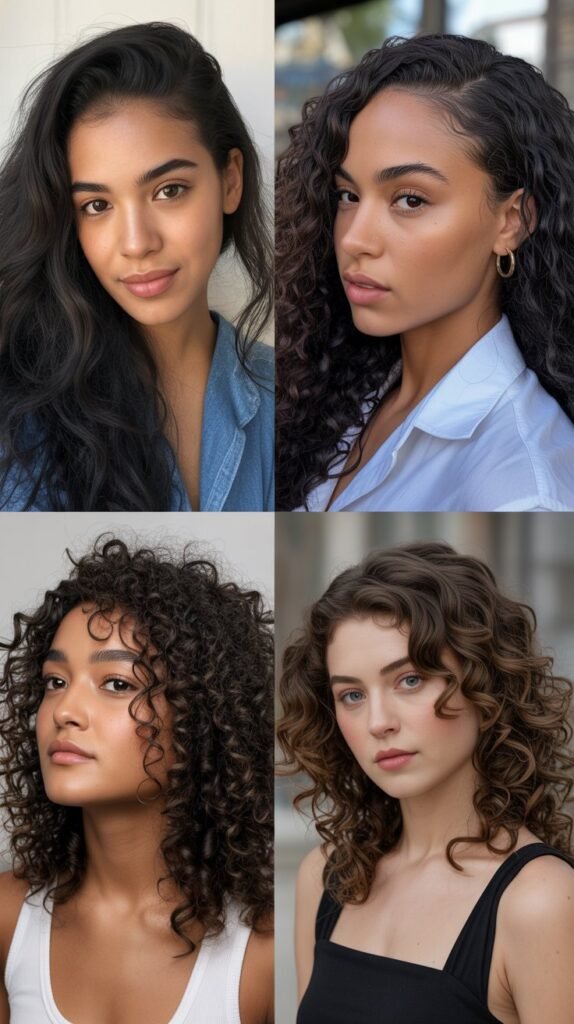
Your wedding day deserves a hairstyle that celebrates your natural curls while perfectly accommodating your veil.
Finding the right balance between securing your veil and showcasing your gorgeous long curly hair can transform your entire bridal look from ordinary to absolutely breathtaking.
This comprehensive guide presents 46 veil ready wedding hairstyles for long curly hair that look stunning, each designed to work seamlessly with various veil styles while highlighting your hair’s natural texture and beauty.
Whether you’re dreaming of romantic loose waves, elegant updos, or half-up styles that cascade down your back, you’ll discover detailed styling techniques, placement tips for different veil types, and expert advice to ensure your curls stay gorgeous from ceremony to reception.
Get ready to explore hairstyles that range from classic Hollywood glamour to bohemian goddess vibes, all specifically crafted to complement your veil and make you feel like the most beautiful version of yourself on your special day.
1. Classic Low Bun with Cathedral Veil Placement
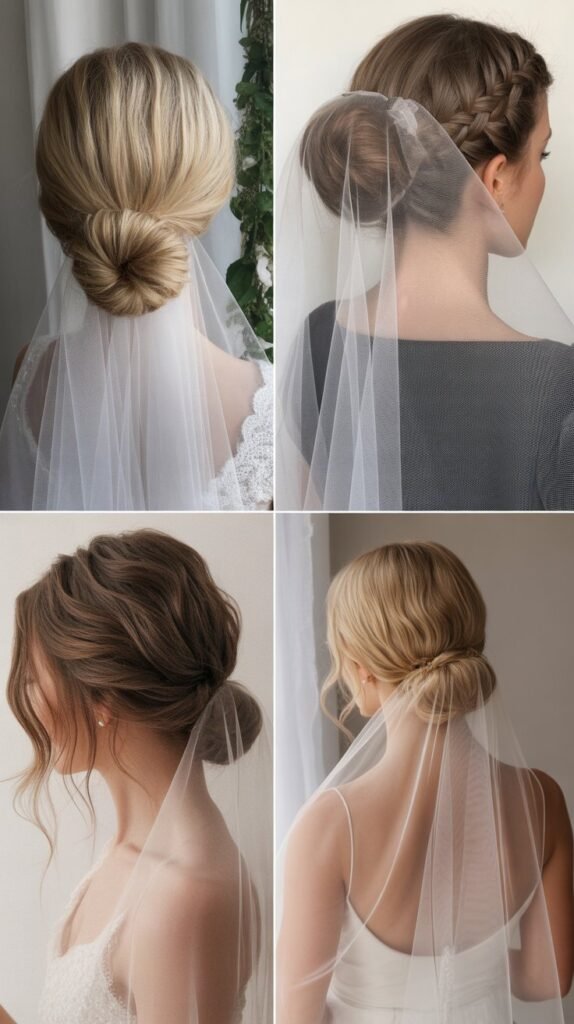
The classic low bun remains one of the most sophisticated choices for brides with long curly hair, offering an elegant foundation that beautifully supports cathedral and chapel-length veils.
This timeless style creates a polished base at the nape of your neck while allowing your natural curl texture to add dimension and romantic softness to the overall look.
Key Styling Steps
- Gather your curls at the nape of your neck, leaving a few face-framing tendrils loose for softness
- Twist the hair gently rather than pulling it tight to maintain the curl pattern and volume
- Secure the bun with bobby pins placed in a crisscross pattern for maximum hold
- Place your veil comb directly above the bun, allowing the veil to cascade over the hairstyle
- Use a medium-hold hairspray to set the style without creating stiffness
Why This Works for Veils
- The low placement keeps the veil comb secure and prevents it from pulling on your hair throughout the day
- Creates a smooth attachment point that distributes the veil’s weight evenly across multiple bobby pins
- Allows longer veils to flow naturally without getting tangled in loose hair
- Provides enough structure to support heavier, embellished veils without compromising comfort
- The bun acts as a cushion that prevents the veil comb from pressing directly against your scalp
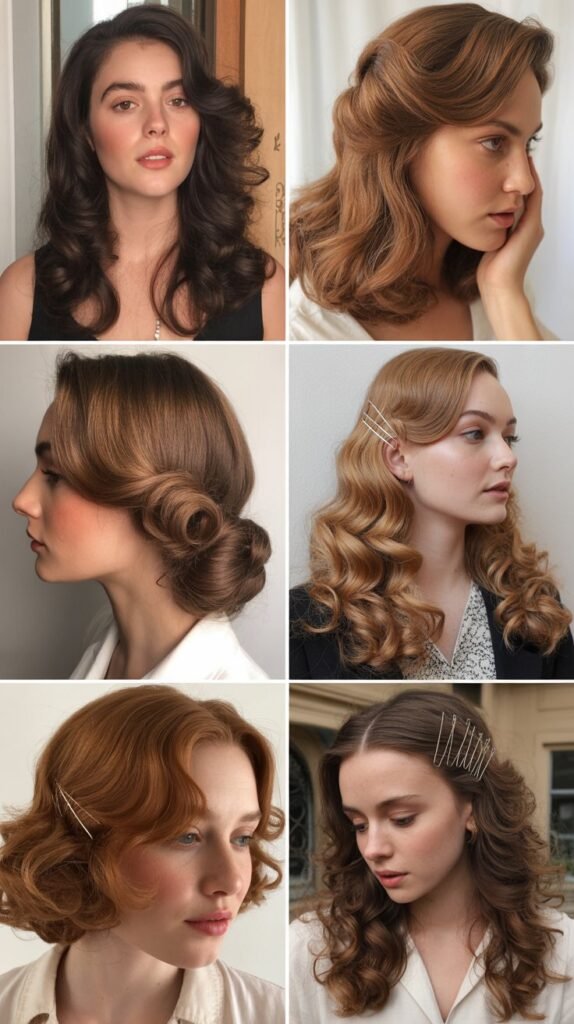
2. Romantic Side-Swept Curls with Birdcage Veil

Side-swept curls offer a glamorous Old Hollywood aesthetic that pairs exceptionally well with shorter birdcage or blusher veils.
This style showcases the full beauty of your long curly hair while creating an asymmetrical elegance that photographs beautifully from every angle.
Creating the Perfect Sweep
- Deep part your hair on one side, approximately two inches from your natural part line
- Sweep all hair to the opposite side, securing with bobby pins behind the ear
- Allow curls to cascade over one shoulder in loose, touchable waves
- Attach the birdcage veil at the crown or slightly to the side where hair is parted
- Use decorative pins or a jeweled comb to secure both hair and veil for added elegance
Veil Integration Techniques
- Position birdcage veils to sit at a slight angle for a more dramatic, vintage-inspired look
- Ensure the veil netting doesn’t flatten the crown area by teasing hair underneath for lift
- Use clear elastic bands first, then cover with bobby pins for invisible hold
- The side placement allows the veil to frame your face without obscuring your hairstyle
- This combination works particularly well for art deco or vintage-themed weddings
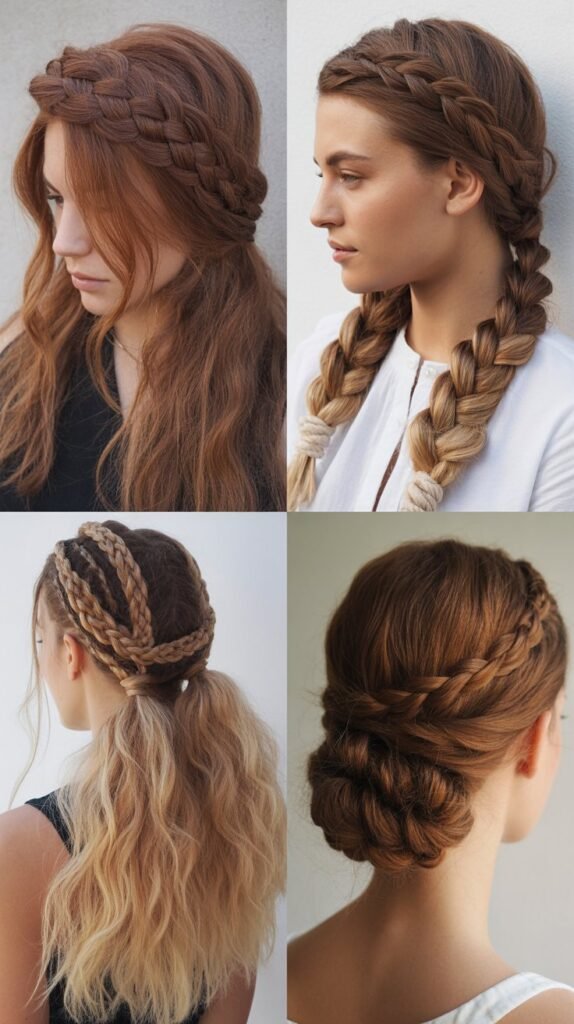
3. Braided Crown with Cascading Curls

A braided crown creates a fairy-tale foundation for your veil while allowing your long curls to flow freely down your back.
This style combines the structure needed for secure veil placement with the romantic movement of loose curls.
Braiding Technique for Curly Hair
- Start with defined, moisturized curls to prevent frizz during the braiding process
- Create two French braids or Dutch braids starting from each temple
- Braid across the crown, incorporating hair from the hairline as you work around the head
- Join the braids at the back center, securing with clear elastics and bobby pins
- Leave the remaining length unbraided to showcase your natural curl pattern
Optimal Veil Attachment
- Place the veil comb directly where the two braids meet for the most secure hold
- The braided section creates a sturdy base that can support various veil weights
- Consider a fingertip or waltz-length veil to complement the flowing curls beneath
- The crown braid keeps hair away from your face during the ceremony
- This style accommodates both dramatic cathedral veils and delicate chapel-length options
4. Textured High Bun with Mantilla Veil
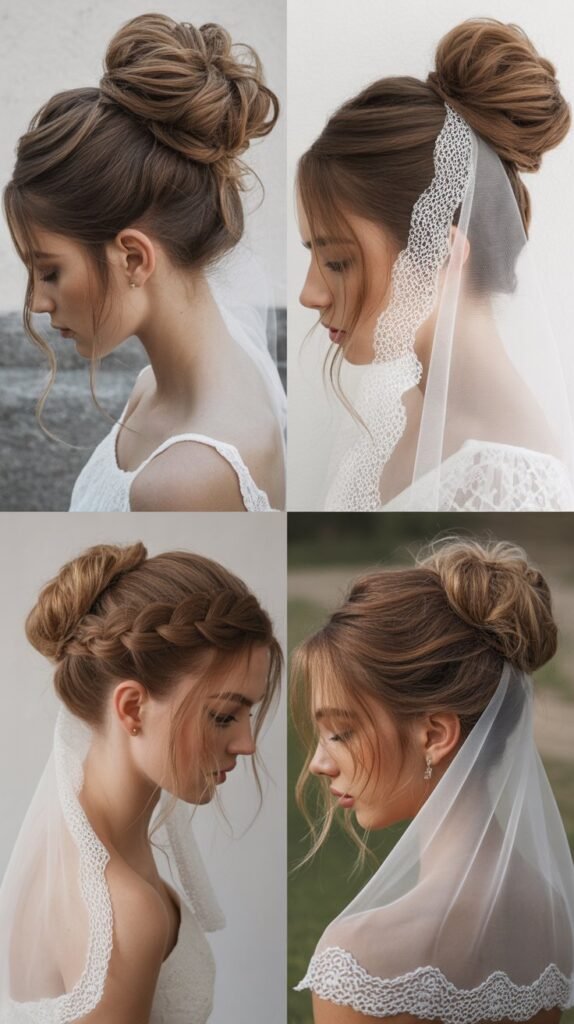
The high bun elevates your look both literally and figuratively, creating a regal silhouette that pairs beautifully with Spanish-style mantilla veils.
This style showcases the volume and texture of curly hair while providing a sophisticated foundation for veil placement.
Building Volume and Height
- Flip your head upside down and gather hair at the crown for maximum height
- Twist hair loosely to maintain curl definition rather than smoothing it completely
- Create a voluminous bun by pulling sections slightly apart after securing
- Leave the bun intentionally textured rather than sleek for a modern romantic look
- Secure with a combination of U-pins and bobby pins for all-day stability
Mantilla Veil Styling
- Position the mantilla veil to rest on top of the bun rather than beneath it
- The lace edging of mantilla veils complements the textured nature of curly hair beautifully
- Allow the veil to drape forward over your face for ceremony drama
- After the ceremony, flip the veil back to showcase the full height of your bun
- The high placement prevents the veil from interfering with your dress details
5. Half-Up Twisted Crown with Cathedral Length
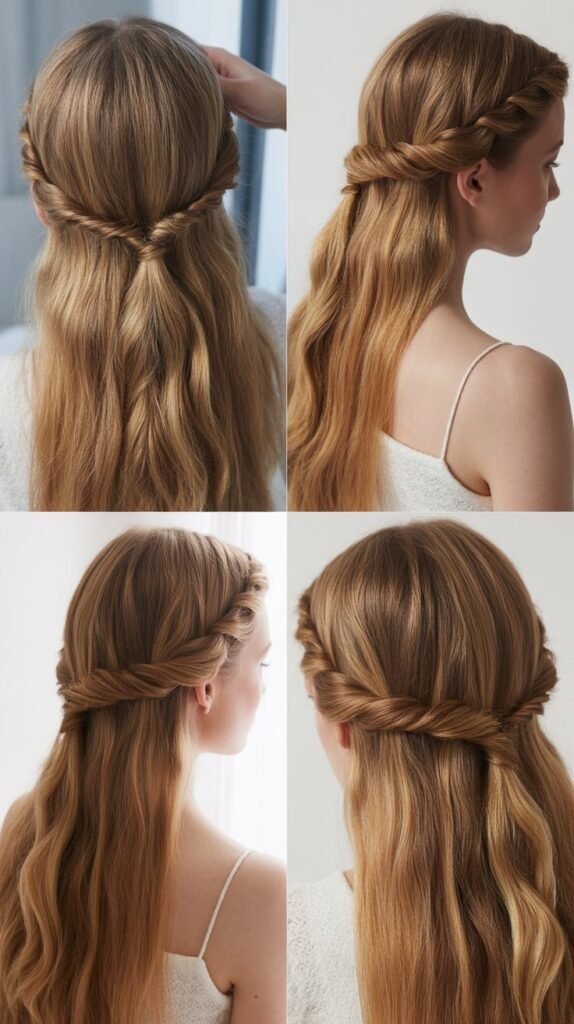
The half-up, half-down style offers the best of both worlds—elegant structure on top with flowing curls below.
This versatile option works seamlessly with cathedral-length veils while maintaining a romantic, approachable aesthetic.
Creating Balanced Proportions
- Section the top half of your hair from ear to ear across the crown
- Create twists, braids, or simply gather this section smoothly at the back
- Secure the half-up portion with a decorative clip, pins, or elastic
- Allow the bottom section to maintain its natural curl pattern and volume
- Add subtle teasing at the crown for lift that balances with the veil’s volume
Veil Placement Strategy
- Attach the veil comb directly beneath the half-up section for seamless integration
- This placement allows the veil to blend with the loose curls below
- The secured top section prevents veil combs from sliding throughout the day
- Works beautifully with single-tier or two-tier cathedral veils
- The half-up structure provides enough grip for even heavy, embellished veils
6. Loose Bohemian Waves with Flower Crown Base

For bohemian or garden weddings, loose waves combined with a flower crown create the perfect foundation for softer, more casual veil styles.
This approach celebrates natural texture while providing multiple attachment points for your veil.
Achieving Effortless Waves
- Work with your hair’s natural curl pattern rather than fighting against it
- Use a curl-enhancing cream and diffuser to define waves without creating tight ringlets
- Leave hair mostly down with minimal pinning for maximum movement and flow
- Incorporate face-framing layers that have been lightly curled for softness
- Finish with a light texturizing spray rather than heavy hairspray for touchable results
Integrating Flowers and Veil
- Create a flower crown or half-crown that wraps around the crown or back of the head
- Weave the veil comb into the flower crown base for invisible attachment
- Choose a soft tulle or silk veil that matches the organic nature of flowers
- Opt for shorter veil lengths like fingertip or waltz to maintain the bohemian aesthetic
- The flowers provide multiple anchor points, distributing veil weight across the head
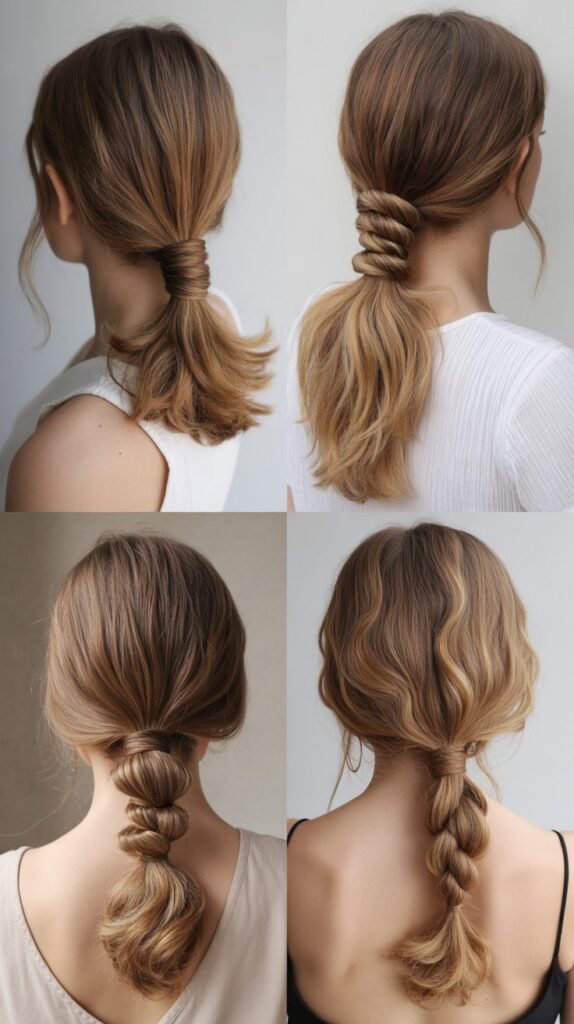
7. Voluminous Ponytail with Bubble Texture
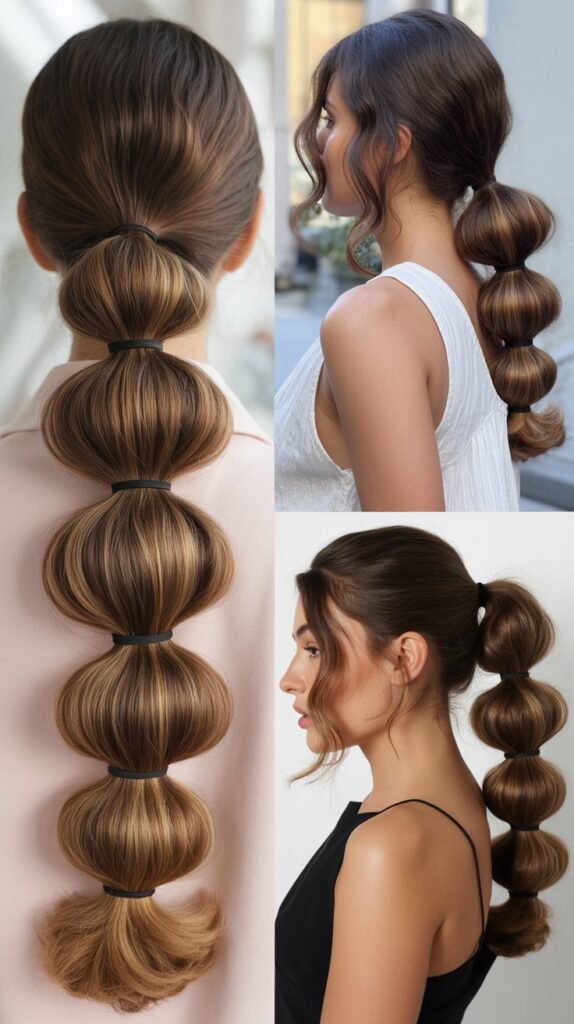
A textured ponytail offers a modern, fashion-forward take on bridal hair while providing excellent support for various veil styles.
This look works particularly well for contemporary weddings and brides who want to make a statement.
Creating the Bubble Effect
- Gather hair into a high or mid-level ponytail, securing with a strong elastic
- Gently pull sections of the ponytail at intervals to create “bubbles” of volume
- Secure each bubble section with a small clear elastic wrapped loosely
- Leave the end of the ponytail in natural curls for organic texture
- Wrap a small section of hair around the base elastic to conceal it
Veil Attachment for Ponytails
- Place the veil comb directly above or at the base of the ponytail
- The ponytail provides exceptional support for heavier veils due to the gathered structure
- This style works well with single-tier veils that can cascade down with the ponytail
- Consider coordinating the veil placement with where you want the bubbles to start
- The height of the ponytail can be adjusted based on your veil length preference
8. Sleek Top with Curly Bottom Contrast
Creating contrast between a sleek top section and voluminous curly bottom offers visual interest and practical veil placement.
This style is particularly flattering for brides with very thick, long curly hair.
Achieving Smooth-to-Curly Transition
- Use a smoothing serum or gel on the top section only, from roots to mid-shaft
- Blow-dry or air-dry the top section smooth while avoiding the bottom portion
- Allow your natural curls to form from mid-length to ends without interference
- Create a clean horizontal line where the smooth section meets the curly portion
- The transition point becomes the perfect spot for veil attachment
Strategic Veil Integration
- Position your veil comb exactly at the transition line between smooth and curly
- This placement camouflages the veil attachment within the textural change
- The sleek top provides a smooth foundation that won’t compete with veil embellishments
- The curly bottom adds romantic movement that complements flowing veils
- This style accommodates any veil length from blusher to cathedral
9. Asymmetrical Low Bun with Side Detail

An off-center low bun creates sophisticated asymmetry while offering a secure base for veil attachment.
This style is particularly elegant for formal weddings and pairs beautifully with chapel or cathedral-length veils.
Positioning for Impact
- Gather hair to one side at the nape, slightly off-center rather than directly in the middle
- Create a loose, textured bun that appears deliberately undone rather than messy
- Allow curly tendrils to escape naturally around the face and neckline
- The asymmetrical placement creates visual interest in photographs from all angles
- Use decorative pins on the visible side of the bun for added elegance
Veil Placement Considerations
- Attach the veil slightly above and to the opposite side of the bun for balance
- This creates a diagonal line that’s visually pleasing and photographs beautifully
- The off-center bun prevents the veil from looking too symmetrical or predictable
- Works exceptionally well with single-tier veils that can drape over one shoulder
- The side placement allows you to showcase earrings and necklace details
10. Pin Curls at Crown with Flowing Lengths

Pin curls at the crown create vintage glamour while keeping the length of your curly hair flowing freely.
This technique offers multiple secure points for veil attachment while showcasing your hair’s natural beauty.
Creating Vintage-Inspired Pin Curls
- Section the crown area from temple to temple, approximately three inches deep
- Create small, flat pin curls by wrapping small sections around your fingers
- Pin each curl flat against the scalp using bobby pins in an X formation
- Leave the remaining hair in its natural curly state flowing down the back
- Set with medium-hold hairspray before carefully removing pins
Integrating the Veil
- The pin curl section creates multiple anchor points between the individual curls
- Weave the veil comb between pin curls for secure, invisible attachment
- This technique distributes the veil’s weight across multiple points rather than one spot
- Works beautifully with vintage-style veils featuring lace or beaded edges
- The structured top contrasts elegantly with loose, flowing curls below
11. Braided Base Updo with Texture

A completely braided updo foundation provides maximum security for any veil style while celebrating the texture of curly hair.
This intricate style is perfect for brides who want their hairstyle to be as memorable as their dress.
Braiding Technique for Secure Hold
- Begin with Dutch or French braids from multiple starting points around the head
- Incorporate all hair into various braids that eventually meet at the back
- Pin braids strategically to create an updo that’s both structured and organic
- Pull gently on braid sections to create width and dimension
- The interwoven braids create a sturdy base that can support substantial veil weight
Optimal Veil Attachment Points
- Multiple braids offer numerous secure attachment options throughout the updo
- Place veil combs between braids where they intersect for invisible hold
- This foundation supports even the heaviest cathedral veils without slipping
- The textured surface of braids provides excellent grip for veil combs
- Consider placing the veil at the crown for dramatic length or lower for traditional draping
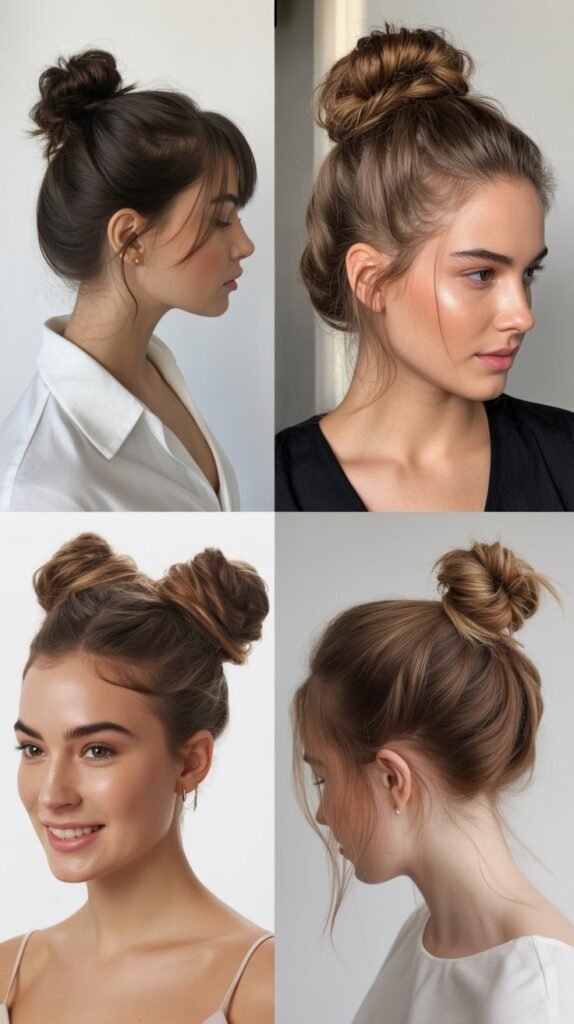
12. Messy Top Knot with Intentional Texture
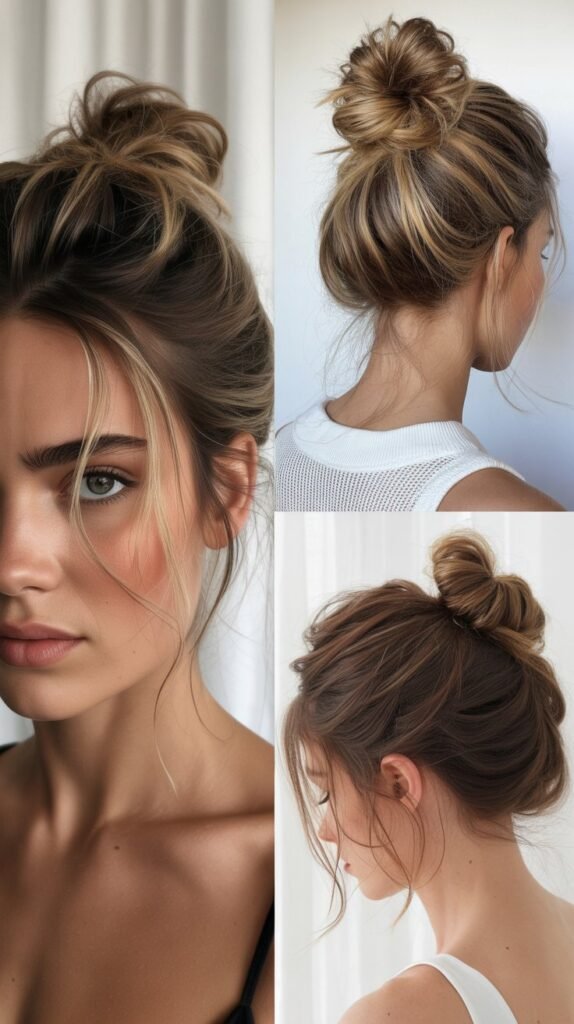
The messy top knot embraces the natural volume of curly hair while creating a fashion-forward look.
This style is perfect for modern brides and pairs wonderfully with shorter veil styles or dramatic longer veils for contrast.
Building the Perfect Imperfection
- Gather hair high on the crown without over-smoothing or slicking down sides
- Twist hair loosely and wrap into a knot, allowing pieces to escape naturally
- Pull sections of the knot apart to create deliberate volume and texture
- Leave face-framing pieces and a few strands at the nape loose
- The goal is “undone elegance” rather than a sleek, perfect finish
Veil Styling for Top Knots
- Position the veil beneath the knot, allowing it to cascade down from the attachment point
- The high placement creates dramatic height and showcases the veil’s full length
- Works particularly well with single-tier veils in fingertip or floor length
- The messy texture of the knot complements softer tulle veils beautifully
- This combination is ideal for outdoor, rustic, or bohemian-themed weddings
13. Grecian-Inspired Twisted Updo

Drawing inspiration from ancient Greek goddesses, this twisted updo incorporates the natural texture of curls into an ethereal, romantic style.
The technique creates a secure foundation perfect for supporting decorative veils or delicate Juliet cap veils.
Creating Grecian Twists
- Divide hair into multiple vertical sections from forehead to nape
- Twist each section individually, maintaining the curl texture within the twist
- Pin twisted sections diagonally across the back of the head, creating an intricate pattern
- Allow some curls to escape the twists for a softer, more romantic appearance
- Secure all ends together at the nape or tuck them under for a finished look
Veil and Accessory Pairing
- Grecian styles pair exceptionally well with Juliet cap veils or decorative headbands
- Attach veils at the crown or slightly back where multiple twists intersect
- Consider adding pearl pins or gold accessories throughout the twists for goddess vibes
- The diagonal pattern of twists creates visual interest that complements flowing veils
- This style accommodates various veil lengths but looks particularly stunning with chapel-length
14. Rolled Vintage Style with Fingertip Veil
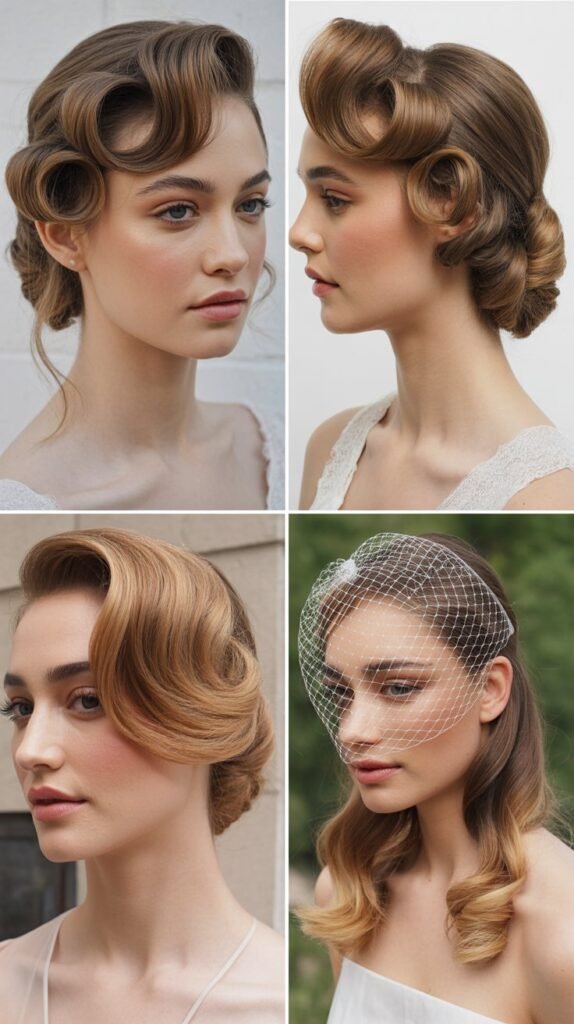
Vintage rolled styles bring 1940s glamour to modern weddings while providing an excellent foundation for shorter veil styles.
This technique works beautifully with curly hair’s natural volume and creates a distinctly retro aesthetic.
Creating Victory Rolls and Curls
- Section the front portions of hair from temple to temple
- Roll these sections backward and pin to create the signature rolled shape
- The natural volume of curly hair makes creating substantial rolls easier
- Style the remaining hair in soft curls or waves that flow from the rolled front
- Set the rolls with strong-hold products to ensure they last throughout the event
Fingertip Veil Placement
- Attach the veil between the rolls and the back section for seamless integration
- Fingertip-length veils complement vintage styles without overwhelming the retro aesthetic
- The structured front rolls balance beautifully with a shorter, simpler veil
- Consider veils with vintage lace trim or beading to enhance the period-appropriate look
- This combination is perfect for vintage-themed or intimate wedding venues
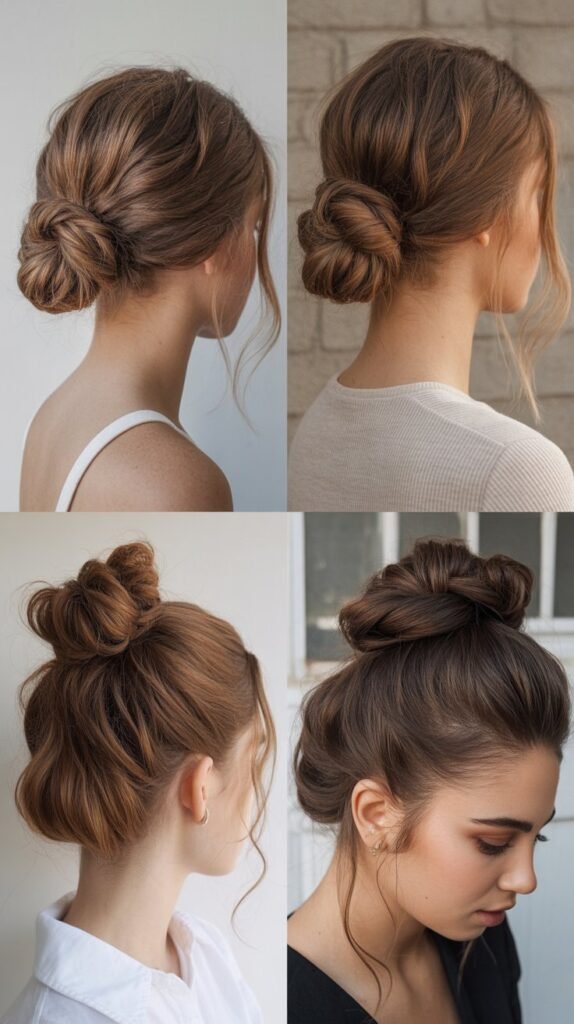
15. Loose Chignon with Soft Texture

A chignon offers timeless elegance with the flexibility to showcase curly texture.
This versatile style can be positioned low, at the nape, or slightly off-center, and works with virtually any veil style.
Constructing a Textured Chignon
- Gather hair at your desired height, keeping tension loose to maintain volume
- Twist and wrap sections around the base, pinning as you go
- Don’t smooth curls completely—allow texture to show through the chignon
- Pull small sections slightly loose to create dimension and romantic imperfection
- Secure with bobby pins placed strategically to hold without flattening the style
Veil Integration Techniques
- The rounded shape of a chignon provides an ideal surface for veil comb placement
- Position veils directly above the chignon for traditional draping
- The soft texture of the chignon prevents veils from sliding or shifting
- Works beautifully with both simple tulle veils and heavily embellished styles
- Consider the chignon height based on your veil length for optimal proportions
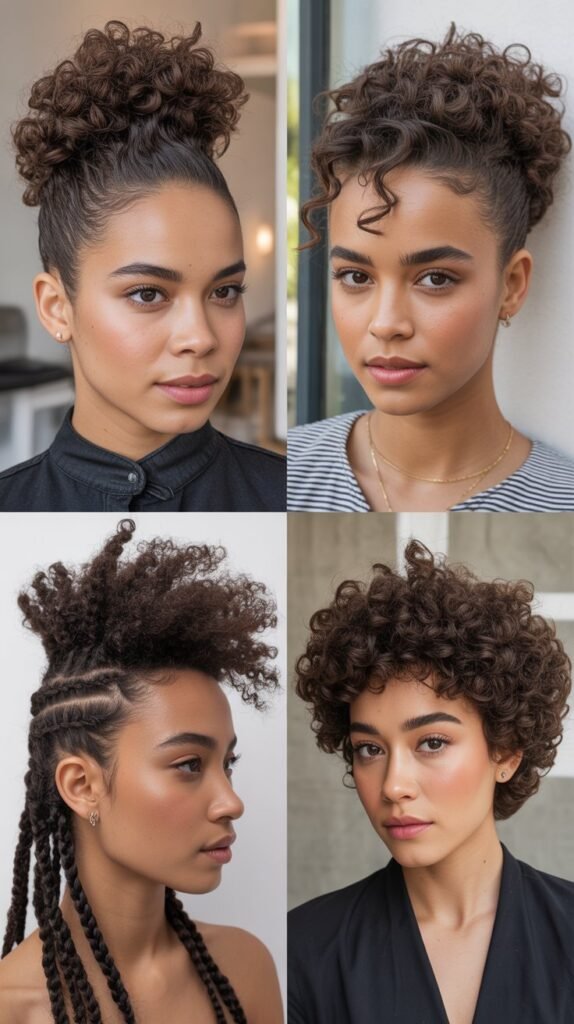
16. Curly Mohawk-Style Crown

For edgy, modern brides, a curly mohawk-style crown makes a bold statement while providing a unique foundation for veil placement.
This style celebrates natural curl volume in an unexpected way.
Creating the Mohawk Effect
- Slick the sides of your hair back smoothly using gel or pomade
- Leave a wide strip of hair from forehead to nape loose and voluminous
- Encourage maximum curl definition and volume in the center section
- Pin sides flat against the head for contrast with the textured center
- The dramatic height of the center section creates stunning visual impact
Unconventional Veil Placement
- Attach the veil at the back of the center section where it meets the nape
- This placement allows the veil to emerge from within the dramatic hair volume
- Works best with simpler veil styles that won’t compete with the hairstyle statement
- Consider shorter veil lengths that complement rather than overwhelm the look
- This style is perfect for non-traditional, modern, or fashion-forward weddings
17. Twisted Rope Braid Down the Back

A rope braid incorporates all your curly hair into one stunning, textured braid that runs down the center of your back.
This style provides excellent support for veils while showcasing your hair’s length and texture.
Rope Braiding Technique
- Divide all hair into two equal sections at the crown
- Twist each section individually in the same direction (typically clockwise)
- Wrap the two twisted sections around each other in the opposite direction
- Continue twisting and wrapping down the full length of your hair
- Secure at the end with a clear elastic and gently pull braid sections for width
Veil Attachment Strategy
- Place the veil comb at the crown where the rope braid begins
- The twisted structure provides excellent grip for keeping veils secure
- This style works beautifully with single-tier veils in any length
- The linear nature of the braid creates a dramatic line down the back
- Consider adding decorative pins or pearls along the braid for extra embellishment
18. Waterfall Braid with Cascading Curls
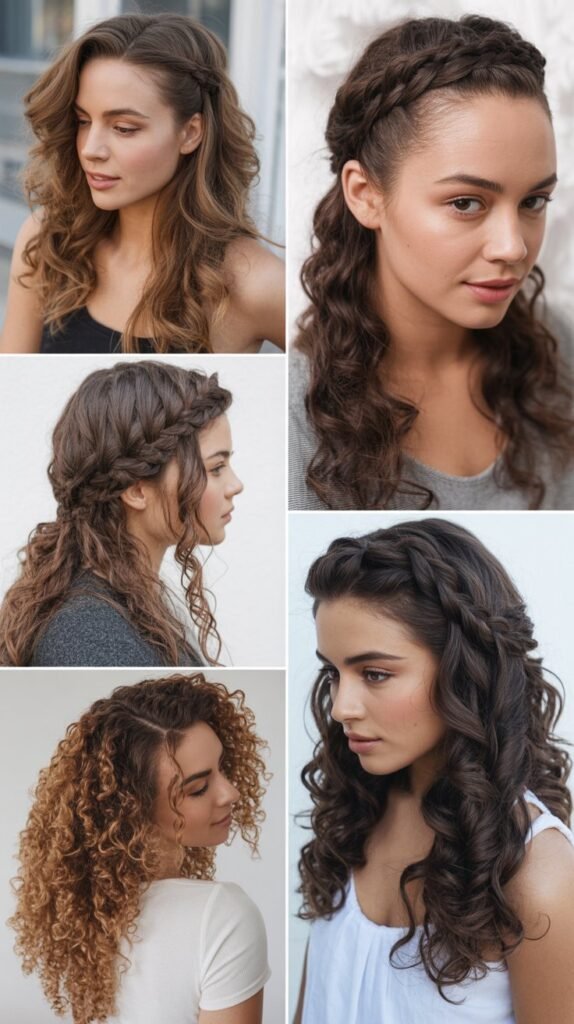
The waterfall braid creates a beautiful frame across the crown while allowing curls to cascade freely through and beneath the braid.
This romantic style is perfect for showcasing both your braiding skills and natural curl beauty.
Mastering the Waterfall Technique
- Begin at one temple with a standard three-strand braid
- As you braid across the crown, drop the bottom strand at each crossover
- Pick up a new strand from above to replace the dropped section
- The dropped strands create the “waterfall” effect as they fall freely
- Continue the braid across to the opposite temple and secure
Veil Placement Options
- Attach veils directly behind where the waterfall braid ends
- The braid creates a natural frame that the veil can cascade from
- This style accommodates various veil lengths, particularly waltz and chapel
- The horizontal braid line contrasts beautifully with the vertical flow of veils
- Works well with both single and two-tier veil styles
19. Double Bun Stack with Modern Edge
Stacking two buns vertically creates an unexpected modern silhouette while providing multiple secure points for veil attachment.
This fashion-forward style is perfect for contemporary weddings.
Creating the Double Bun
- Divide hair horizontally at mid-head level into top and bottom sections
- Create a bun from the top section first, securing at crown level
- Form a second bun below it using the bottom section at nape level
- Make both buns textured rather than sleek to showcase curl patterns
- Ensure both buns are secure enough to support veil weight
Innovative Veil Integration
- Attach the veil between the two buns for a unique placement option
- Alternatively, place it above the top bun for traditional draping
- The double structure distributes veil weight across multiple points
- This style works particularly well with modern, minimalist veil designs
- Best suited for chapel-length or shorter veils to maintain the contemporary aesthetic
20. Twisted Halo with Free-Flowing Length

A twisted halo style creates an ethereal crown effect while leaving most of your curly hair flowing freely.
This bohemian-inspired look is perfect for outdoor or garden weddings.
Constructing the Halo
- Take sections from around your hairline, leaving the back bulk of hair free
- Twist these front sections backward as you work around the head
- Connect all twisted sections at the back, forming a continuous halo shape
- Pin the halo securely where sections meet but keep the crown area visible
- Allow maximum volume and natural curl definition in the free-flowing length
Ethereal Veil Placement
- Attach veils at the back where all halo sections connect
- This placement allows the veil to blend seamlessly with flowing hair beneath
- Works beautifully with soft tulle or silk veils in waltz or chapel length
- The halo frame creates a perfect foundation for flower crown additions
- This style is ideal for achieving a natural, goddess-like bridal aesthetic
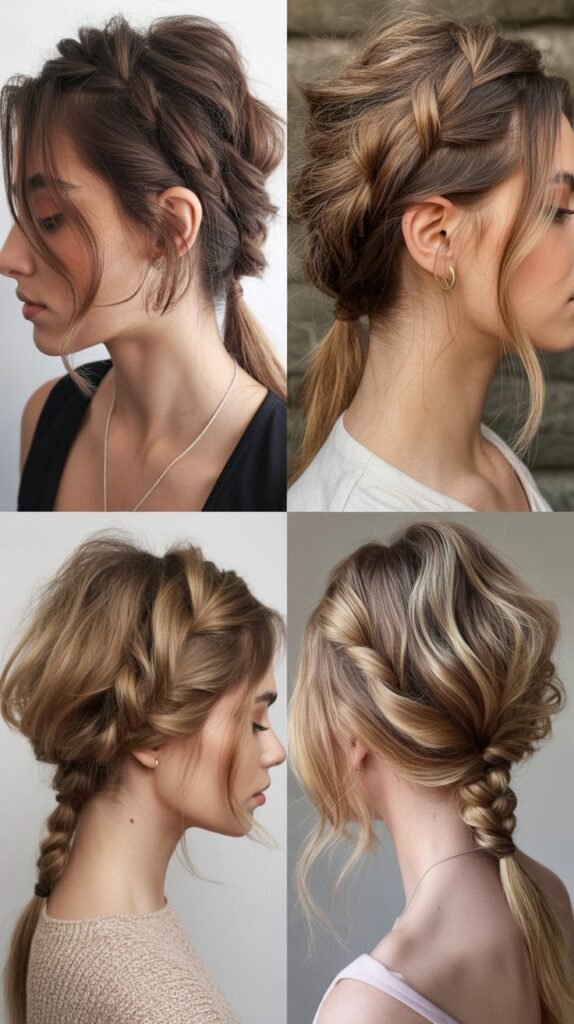
21. Braided Ponytail with Wrapped Base

Combining a ponytail with braiding techniques creates texture and visual interest while maintaining the practical benefits of gathered hair.
This style offers excellent veil support with fashion-forward appeal.
Creating the Braided Ponytail
- Gather hair into a ponytail at your desired height (mid or low typically works best)
- Divide the ponytail into sections and braid each using your preferred technique
- Fishtail, three-strand, or rope braids all work beautifully with curly texture
- Wrap a section of hair around the elastic base to conceal it elegantly
- Leave the ends slightly loose to showcase natural curl texture
Securing the Veil
- Place the veil comb directly above the ponytail base before wrapping
- The wrapped section will hide the veil attachment for a seamless look
- The gathered ponytail structure provides excellent support for heavier veils
- This placement prevents the veil from interfering with the braid detail
- Works well with single-tier cathedral or chapel-length veils
22. Side Braid into Low Bun

This asymmetrical style combines the texture of braiding with the elegance of a low bun, creating visual interest from every angle.
The side braid provides an excellent foundation for secure veil placement.
Braiding Technique
- Begin a Dutch or French braid at one temple, working diagonally down
- Continue braiding along the side of the head toward the opposite ear
- Gather all remaining hair with the braid into a low bun at the nape
- The braid creates a beautiful diagonal line that frames the face
- Keep the braid slightly loose to showcase the texture of curly hair
Strategic Veil Attachment
- Position the veil comb where the braid transitions into the bun
- This placement is exceptionally secure due to the combined structure
- The diagonal braid creates asymmetry that photographs beautifully
- Works with various veil lengths, though chapel-length complements the diagonal line
- The braid prevents face-framing hair from falling forward during the ceremony
23. Curly Pompadour with Volume

A curly pompadour brings drama and height to the front while maintaining romantic curls throughout the rest of the style.
This look offers vintage glamour with modern sophistication.
Building Pompadour Height
- Section off the front portion of hair from temple to temple
- Backcomb or tease this section at the roots for maximum lift
- Roll the section backward and pin securely at the crown
- Maintain the natural curl texture rather than smoothing it completely
- The pompadour should have height without looking stiff or unnatural
Veil Integration Behind Pompadour
- Attach the veil directly behind the pompadour section at the crown
- The height of the pompadour creates a dramatic foundation for veil draping
- This placement showcases both the hairstyle and veil to maximum effect
- Works particularly well with cathedral-length veils for full drama
- The front height balances beautifully with the length and flow of longer veils
24. Triple Twist Updo

Creating an updo from three distinct twisted sections offers dimension and security while celebrating curly texture.
This style provides multiple anchor points for veil attachment.
Constructing the Triple Twist
- Divide hair into three vertical sections: center and two sides
- Twist each section individually from roots to ends
- Pin each twisted section up and back, creating an intricate updo pattern
- Allow the twists to overlap slightly for added security and visual interest
- The natural curl texture within each twist creates beautiful dimension
Multiple Veil Placement Options
- Attach veils where all three twists converge for central placement
- Alternatively, position the veil between twists for creative placement
- The three-section structure distributes veil weight effectively
- This foundation supports even heavy, embellished cathedral veils
- The twists create texture that prevents veil combs from slipping
25. Faux Undercut with Pinned Sides
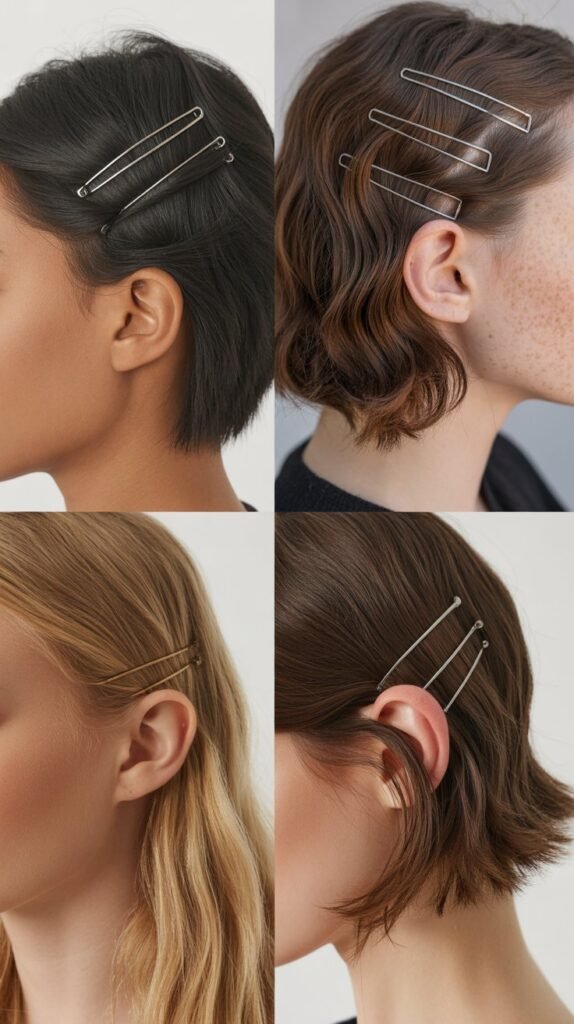
Creating the illusion of an undercut by sleekly pinning the sides offers edge and modernity while keeping all your hair intact.
This style provides a unique foundation for contemporary veil placement.
Achieving the Faux Undercut Look
- Slick sides of hair down tightly using strong-hold gel or pomade
- Pin sides flat against the head using bobby pins in rows
- Leave the top section loose, voluminous, and full of natural curls
- The contrast between sleek sides and textured top creates dramatic effect
- This technique works best on hair long enough to show significant height on top
Modern Veil Styling
- Place veils within the voluminous top section for integrated attachment
- The sleek sides create clean lines that complement simple, modern veils
- This style works best with fingertip or shorter veil lengths
- The edgy aesthetic pairs beautifully with minimalist, contemporary wedding themes
- Consider juliet cap veils or simple silk veils to enhance the modern look
26. Vintage Waves with Deep Side Part

Deep side-parted vintage waves create timeless Hollywood glamour while providing practical styling for veil attachment.
This classic look has graced red carpets and remains perfect for elegant weddings.
Creating Defined Waves
- Create a deep side part, positioning it approximately two to three inches from center
- Use a curling iron or hot rollers to create uniform wave patterns
- Brush through curls gently to merge them into connected waves rather than separate ringlets
- Pin waves in place while cooling to set the pattern
- Finish with shine spray for that signature vintage gloss
Classic Veil Placement
- Attach veils on the side with less hair for asymmetrical elegance
- Birdcage or blusher veils complement vintage waves beautifully
- The smooth wave pattern provides excellent grip for veil combs
- This combination is perfect for art deco or vintage-themed weddings
- Consider pearl or crystal-embellished veils to enhance the glamorous aesthetic
27. Knotted Sections Updo
Creating an updo from multiple knotted sections offers a unique textural element while providing exceptional security for veil placement.
This technique celebrates the natural volume of curly hair.
Knotting Technique
- Divide hair into multiple sections (four to six typically works well)
- Tie each section in a simple knot rather than twisting or braiding
- Pin each knot securely to the head, building an up do structure
- The knots create three-dimensional texture and visual interest
- Allow some curl ends to escape from knots for softness
Securing Veils in Knotted Styles
- The multiple knots create numerous secure attachment points throughout the updo
- Place veil combs between knots where they provide the most grip
- This structure supports various veil weights without requiring excessive pinning
- The textured surface prevents veils from sliding or shifting
- Works beautifully with veils featuring scattered crystals or pearls
28. Crown Braid with Low Gathered Curls

A crown braid creates a tiara effect while gathering the remaining curls low at the nape.
This romantic style offers the elegance of braiding with the softness of loose curls.
Crown Braiding Method
- Create a Dutch or French braid starting at one ear
- Braid across the crown like a headband to the opposite ear
- The braid should sit forward enough to frame the face beautifully
- Secure the braid end where it meets the remaining hair
- Gather all remaining curls loosely at the nape without pulling tight
Veil Attachment Below Crown
- Position veils just below the crown braid where gathered hair begins
- This placement allows the braid to frame the face without veil interference
- The gathered section provides excellent support for various veil lengths
- Cathedral and chapel-length veils look particularly stunning with this style
- The crown braid keeps hair off the face during ceremony and photos
29. Asymmetrical Curly Updo with Fresh Flowers

An asymmetrical updo incorporates fresh flowers for a naturally romantic bridal look.
This organic style provides flexible veil placement options and celebrates garden-inspired aesthetics.
Creating Asymmetrical Balance
- Gather hair to one side, creating intentional off-center placement
- Build an updo structure that’s fuller on one side than the other
- Pin sections at varying heights to create visual interest and dimension
- Leave strategic pieces loose and curly around the face and neck
- The asymmetry should look deliberate rather than accidental
Flower and Veil Integration
- Weave fresh flowers throughout the updo, creating natural anchor points
- Position veils to emerge from within or beside the floral arrangements
- The flowers help distribute veil weight and camouflage attachment points
- Choose flowers that complement your bouquet for cohesive design
- Ensure flowers are properly wired and pinned to last throughout the event
30. Textured Fishtail Braid

A fishtail braid showcases intricate detail while working beautifully with curly hair’s natural texture.
This bohemian-chic style provides a secure foundation for veil placement.
Fishtail Braiding Technique
- Divide hair into two equal sections rather than the traditional three
- Take small pieces from the outer edge of one section and cross to the other
- Continue alternating sides, taking small pieces for intricate detail
- The smaller the pieces, the more intricate and impressive the braid appears
- Gently pull the braid sections to create width and showcase texture
Optimal Veil Placement
- Attach veils at the crown where the fishtail braid begins
- The detailed braid structure provides excellent grip for veil combs
- This style works with any veil length but looks especially stunning with chapel or cathedral
- Consider leaving some face-framing curls loose for softened beauty
- The braid prevents tangling between veil and loose hair during the reception
31. Rolled Vintage Updo with Tucked Ends

A fully rolled vintage updo tucks all ends under for a polished, sophisticated finish.
This classic style evokes 1940s elegance and provides a smooth foundation for various veil styles.
Creating Smooth Rolls
- Section hair into horizontal layers from nape to crown
- Roll each section under, tucking ends beneath and pinning securely
- Work methodically from bottom to top, creating uniform rolls
- The natural volume of curly hair creates fuller, more dramatic rolls
- Set each section before moving to the next for lasting hold
Formal Veil Pairing
- This polished style pairs beautifully with formal, embellished veils
- Attach veils at the crown above the highest roll for traditional draping
- Cathedral-length veils complement the formality of this vintage updo
- The smooth surface provides secure attachment without texture interference
- This combination is ideal for ballroom, black-tie, or formal religious ceremonies
32. Pulled-Apart Curls in Low Cluster

Gathering curls into a low cluster while gently pulling them apart creates romantic volume and texture.
This effortless-looking style actually provides substantial support for veil attachment.
Building the Curl Cluster
- Gather hair at the nape without smoothing the natural curl pattern
- Secure loosely with bobby pins placed strategically throughout
- Gently pull individual curls apart to create fullness and dimension
- The goal is voluminous texture rather than a tight, compact shape
- Allow some shorter curls to escape naturally around the hairline
Veil Integration Strategy
- Place veils directly above the curl cluster for seamless blending
- The textured surface provides excellent grip for veil combs
- This style works particularly well with single-tier veils in any length
- The soft, pulled-apart texture complements romantic, flowing veils
- Ideal for garden, outdoor, or romantic-themed weddings
33. Mohawk Braid with Sleek Sides
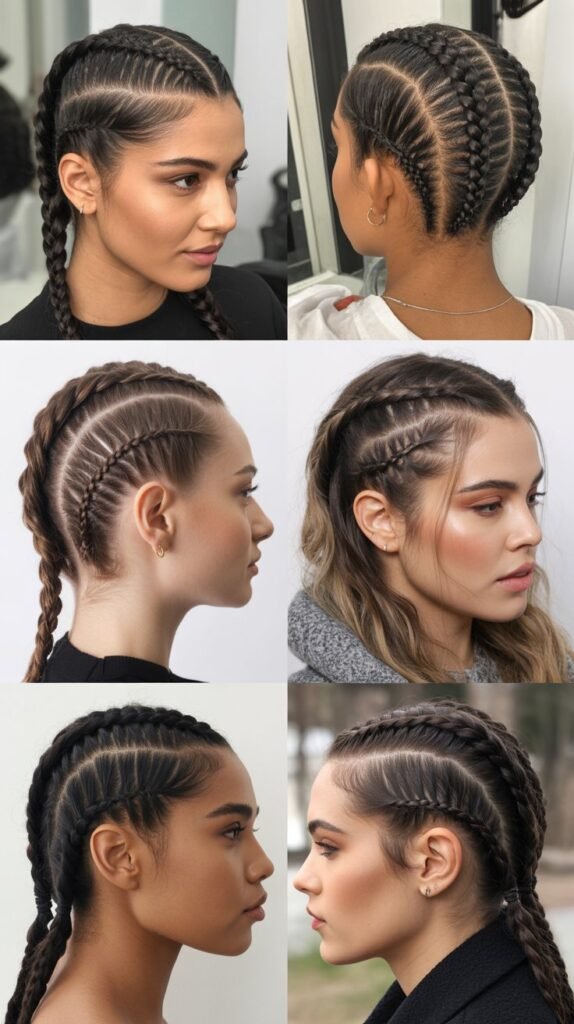
A center mohawk braid combines edge with elegance while sleek sides provide contrast.
This modern style offers a unique foundation for contemporary veil placement.
Creating the Mohawk Braid
- Slick the sides of hair down completely using strong-hold products
- Leave a wide center strip of hair from forehead to nape loose
- Braid this center section using Dutch braiding for raised effect
- The braid should be substantial and prominent down the center
- Secure sides with bobby pins to ensure they stay sleek throughout the day
Modern Veil Styling
- Attach veils at the base of the mohawk braid where it ends
- This placement allows the veil to flow naturally from the braid
- Works best with simpler, more modern veil styles that complement the edge
- Consider shorter veil lengths for contemporary aesthetic
- This bold style is perfect for fashion-forward, non-traditional weddings
34. Twisted Low Ponytail with Wrapped Sections
A low ponytail enhanced with twisted sections and decorative wrapping creates understated elegance.
This versatile style accommodates various veil styles while remaining timelessly beautiful.
Constructing Twisted Elements
- Create a low ponytail at the nape, securing with a strong elastic
- Divide the ponytail into several sections
- Twist each section individually to create rope-like texture
- Wrap a decorative section of hair around the elastic base
- The twists showcase curl texture while maintaining a polished appearance
Veil Placement Options
- Attach veils directly above the ponytail base for traditional placement
- The wrapped base conceals veil combs for seamless integration
- This style supports various veil weights due to the secure ponytail foundation
- Works beautifully with single-tier veils in any length
- The low placement keeps veils from interfering with ceremony movements
35. Curly Faux Hawk Updo
A faux hawk updo creates height and drama through pinning rather than shaving, offering temporary edge for your wedding day.
This style provides a bold foundation for veil placement.
Building the Faux Hawk Structure
- Section hair down the center from forehead to nape
- Pin sides up and under, directing hair toward the center strip
- Create maximum height in the center section through strategic pinning
- Allow natural curl texture to create dimension in the raised center
- The sides should disappear underneath while center remains prominent and voluminous
Edgy Veil Integration
- Place veils within the faux hawk structure for integrated placement
- Alternatively, attach at the nape where the faux hawk ends
- This bold style works best with simpler, less embellished veils
- Consider shorter veil lengths that don’t compete with the hairstyle drama
- Perfect for modern, fashion-forward, or non-traditional wedding themes
36. Braided Headband with Loose Curls

Creating a braided headband from your own hair frames the face beautifully while leaving the majority of curls flowing freely.
This romantic style offers flexible veil placement.
Creating the Hair Headband
- Take sections from behind each ear, leaving front face-framing pieces free
- Braid each section using three-strand, Dutch, or rope braiding techniques
- Bring both braids across the top of the head like a headband
- Secure where they meet using bobby pins hidden beneath hair
- The remaining hair flows freely with natural curl definition
Versatile Veil Attachment
- Position veils where the two braids meet at the back
- This placement provides secure attachment while showcasing the headband effect
- Works with various veil lengths, particularly chapel and waltz
- The braided frame creates a beautiful foundation for soft, romantic veils
- This style is ideal for outdoor, garden, or bohemian-themed weddings
37. Stacked Twisted Buns

Creating multiple smaller buns stacked vertically or horizontally offers a unique modern aesthetic.
This innovative style provides multiple secure points for veil attachment.
Creating Stacked Buns
- Divide hair into sections based on how many buns you want (typically two to four)
- Create individual twisted buns from each section
- Stack buns in your desired pattern (vertical for height, horizontal for width)
- Each bun should maintain visible curl texture rather than being sleek
- Secure each bun independently before moving to the next
Innovative Veil Placement
- Attach veils between buns for creative, unexpected placement
- Alternatively, position above all buns for traditional draping
- The multiple-bun structure distributes veil weight across several points
- This modern style pairs well with contemporary, minimalist veil designs
- Best suited for fashion-forward, non-traditional wedding aesthetics
38. Halo Braid with Center Part

A complete halo braid that circles the entire head creates a crown effect while maintaining a visible center part.
This ethereal style offers excellent security for veil attachment.
Completing the Halo Circle
- Create a clean center part from forehead to nape
- Begin braiding on one side, working around the entire head
- Continue the braid all the way around until it meets the starting point
- Tuck the ending tail under the beginning of the braid
- The completed circle creates a natural crown effect
Regal Veil Placement
- Attach veils at the back of the head where the halo sits lowest
- The circular braid provides secure attachment around its entire circumference
- This style works beautifully with cathedral-length veils for maximum drama
- The crown-like halo complements formal, regal wedding themes
- Consider adding decorative pins around the halo for extra embellishment
39. Wrapped Low Bun with Curl Accent

A low bun wrapped with sections of your own curly hair creates texture and visual interest.
This technique highlights your hair’s natural beauty while providing secure veil foundation.
Creating Wrapped Texture
- Form a low bun at the nape using most of your hair
- Leave several sections free specifically for wrapping
- Wrap these reserved sections around the bun, pinning as you go
- Allow the curl texture to show prominently in the wrapped sections
- The wrapping creates dimension and prevents the bun from looking flat
Strategic Veil Attachment
- Position veils directly above the wrapped bun
- The textured wrapping creates excellent grip for veil combs
- This style accommodates various veil weights due to the secure bun foundation
- Works with any veil length from blusher to cathedral
- The wrapped texture adds sophistication that complements embellished veils
40. Curly Space Buns (Double Top Buns)
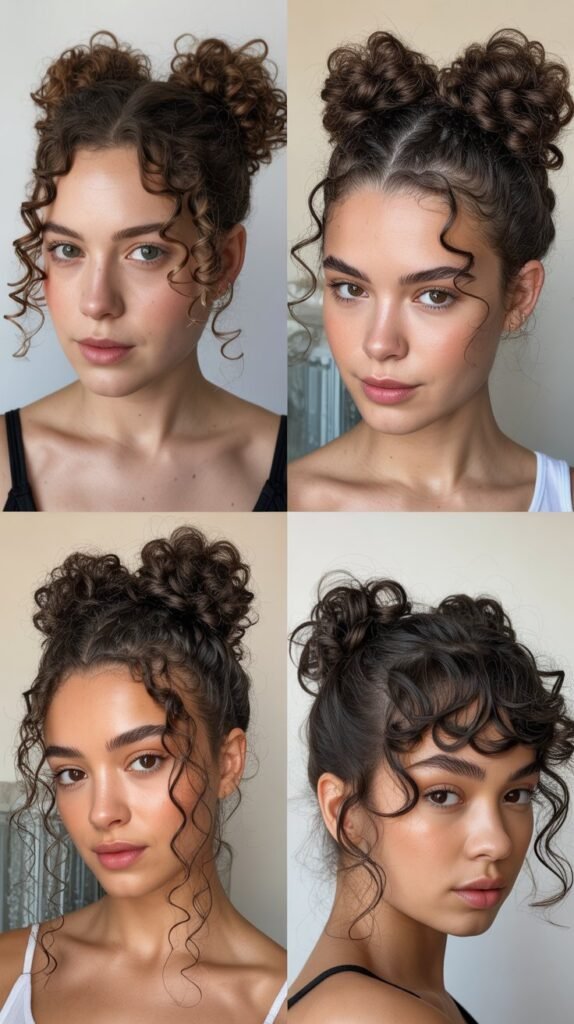
Double buns positioned high on the head create a playful yet elegant look for modern brides.
This youthful style offers unique veil placement opportunities.
Creating Balanced Space Buns
- Part hair down the center from forehead to nape
- Create two high buns on either side of the part
- Position buns symmetrically for balanced appearance
- Keep buns textured and full rather than tight and sleek
- Ensure both buns are the same size and height for cohesive look
Playful Veil Integration
- Attach veils between the two buns for central placement
- Alternatively, position the veil behind both buns
- This youthful style works best with shorter, simpler veil styles
- Consider fingertip-length veils to maintain the playful aesthetic
- Perfect for modern, non-traditional, or fashion-forward weddings
41. Diagonal French Twist with Texture
A French twist positioned diagonally across the back creates unexpected visual interest.
This sophisticated style showcases curly texture while providing excellent veil support.
Creating the Diagonal Twist
- Gather hair to one side at shoulder level
- Twist hair upward at a diagonal angle across the back
- Tuck the twisted ends under and secure with bobby pins
- Allow curl texture to show through the twist rather than smoothing completely
- The diagonal line creates dynamic visual interest from all angles
Veil Placement Along the Twist
- Attach veils at the top of the diagonal twist
- The angled structure provides secure attachment along its length
- This style works beautifully with single-tier veils in any length
- The diagonal line complements asymmetrical veil draping beautifully
- Ideal for modern brides seeking sophisticated elegance with contemporary flair
42. Cascading Pinned Curls
Strategic pinning of individual curls creates a cascading effect down the back.
This technique celebrates each curl while providing multiple veil attachment options.
Pinning for Cascade Effect
- Work with natural curl clumps rather than separating them
- Pin individual curl groups at staggered heights down the back
- Create a flowing cascade from crown to nape
- Each pinned section should maintain its natural curl definition
- The staggered pinning creates beautiful dimension and movement
Flexible Veil Attachment
- The cascading structure offers numerous secure attachment points
- Place veils at the crown for traditional draping over the cascade
- Alternatively, attach veils between pinned sections for integrated placement
- This style works with various veil lengths and styles
- The natural curl movement complements flowing veils beautifully
43. Textured Top Knot with Loose Lower Half

Combining a high textured knot with flowing lower curls offers the best of both styles.
This versatile look provides secure veil placement while showcasing your hair’s length and texture.
Creating Height and Flow
- Section hair horizontally at mid-head level
- Create a high, textured knot from the top section
- Leave the bottom section completely loose and naturally curly
- The knot should be deliberately textured rather than sleek
- This creates beautiful contrast between structured and free-flowing elements
Dual-Level Veil Options
- Attach veils at the base of the top knot
- This placement allows veils to flow with the loose bottom half
- The secure knot foundation supports various veil weights
- Works beautifully with single-tier veils in any length
- The height of the knot creates dramatic proportions with longer veils
44. Interwoven Rope Braids
Multiple rope braids interwoven together create intricate texture and exceptional security.
This detailed style celebrates the dimension of curly hair while providing a stunning foundation for veils.
Rope Braiding and Interweaving
- Divide hair into four or more sections
- Create rope braids from each section individually
- Interweave the completed rope braids together like a basket weave
- Pin strategically where braids intersect for maximum security
- The multiple braids create rich texture and dimension
Secure Veil Foundation
- The interwoven structure offers numerous secure attachment points
- Place veils where multiple braids intersect for strongest hold
- This foundation supports even heavy, embellished cathedral veils
- The textured surface prevents veil combs from slipping
- Works beautifully with veils featuring scattered pearls or crystals
45. Gathered Twist with Floral Accent
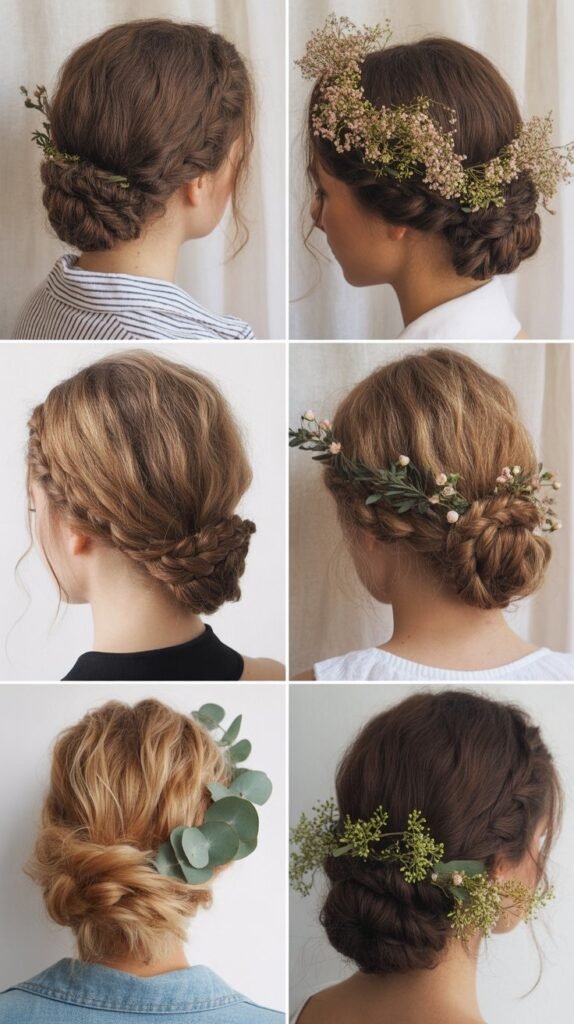
Gathering hair into a low twist enhanced with fresh or silk flowers creates organic romance.
This garden-inspired style offers flexible veil placement with natural beauty.
Creating the Gathered Twist
- Gather hair loosely at one side of the nape
- Twist gently without pulling tight to maintain volume
- Pin the twist in place, allowing texture to remain visible
- Integrate flowers throughout the twist for organic embellishment
- Choose flowers that coordinate with your bouquet and wedding palette
Floral Veil Integration
- Weave veil combs into the twist among the floral elements
- The flowers help camouflage veil attachment points naturally
- This style works particularly well with soft tulle or silk veils
- Chapel and waltz-length veils complement the romantic aesthetic
- Perfect for garden, outdoor, or nature-inspired wedding themes
46. Curly Faux Bob with Pinned Length
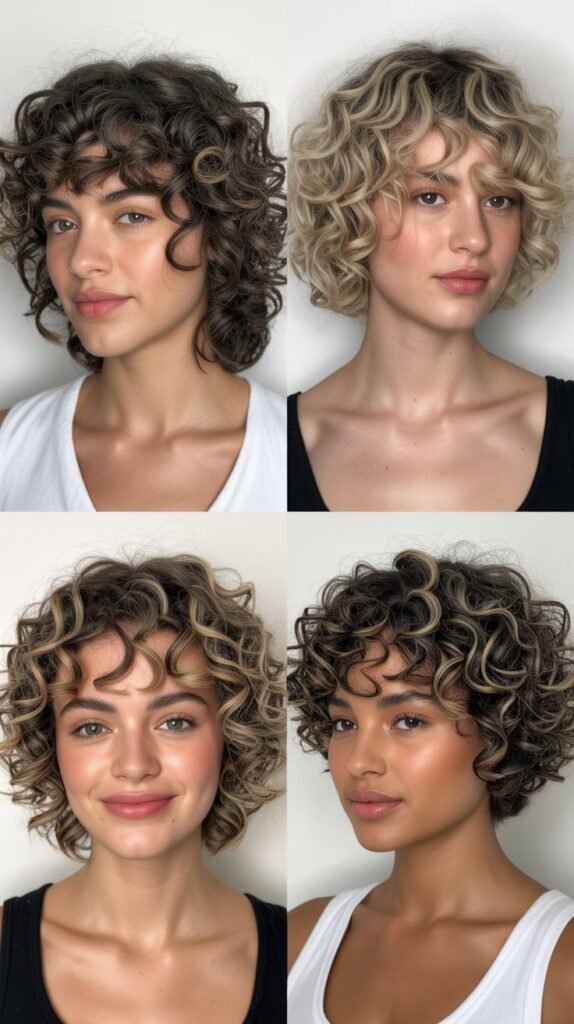
Creating the illusion of a shorter bob while pinning length underneath offers versatility and vintage charm.
This technique provides unique veil placement while maintaining your hair’s actual length.
Creating the Faux Bob Illusion
- Section hair at chin or jaw length, leaving top layers free
- Pin underneath sections up and under, hiding them beneath top layers
- Style the top layers in loose curls that appear to end at chin length
- The pinned underneath sections create volume and fullness
- This technique requires secure pinning to last throughout the event
Vintage Veil Pairing
- Attach veils at the back where length is pinned under
- The pinned foundation provides excellent security for veil combs
- This style pairs beautifully with birdcage or blusher veils
- The vintage bob silhouette complements retro-inspired wedding themes
- After the reception, you can easily release pins to showcase full length
Conclusion
Your journey to finding the perfect hairstyle from these 46 veil ready wedding hairstyles for long curly hair that look stunning should now feel exciting rather than overwhelming.
Each style offers unique benefits, from the timeless elegance of classic buns to the bohemian romance of braided crowns and the modern edge of textured updos.
Remember that the most important factor is choosing a style that makes you feel confident, beautiful, and authentically yourself on your wedding day.
Consider your veil length, dress neckline, wedding theme, and personal comfort when making your final decision. Schedule a trial run with your hairstylist well before the wedding day, bringing your veil along to ensure the combination works perfectly together.
Your long curly hair is a crown you wear naturally every day, and on your wedding day, it deserves to shine in a style that celebrates its texture while creating the perfect foundation for your veil to complete your bridal vision.