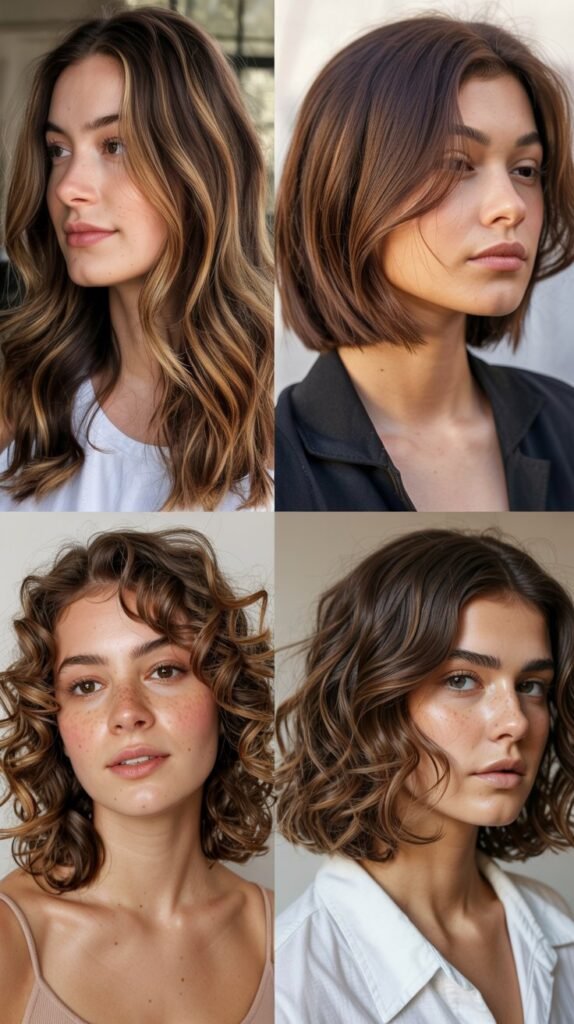
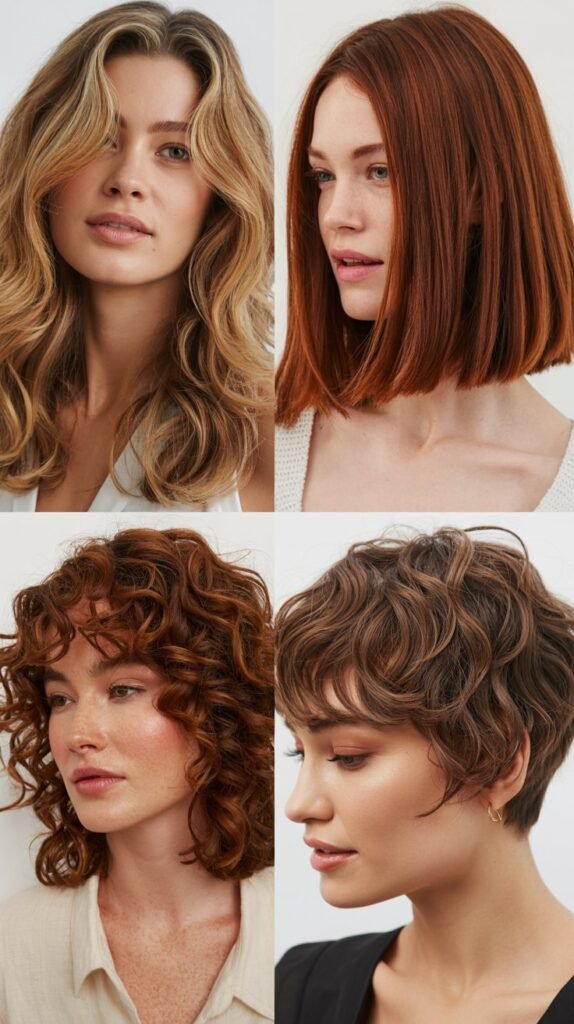
Dark brown curly hair transforms into a masterpiece when kissed by the perfect caramel highlights, creating dimension that makes every curl come alive with movement and depth.
If you’ve been dreaming of adding warmth to your natural texture while maintaining that rich chocolate base, you’re about to discover 63 stunning ways to achieve curl-defining perfection with highlights that truly pop.
This comprehensive guide walks you through everything from subtle honey-toned accents to bold caramel ribbons, offering placement techniques, maintenance secrets, and styling methods that celebrate your curls while enhancing them with sun-kissed radiance.
Whether you’re considering your first highlighting adventure or looking to refine your current look, these expertly curated options will inspire you to embrace the beautiful contrast between deep brunette waves and golden caramel strands that catch the light with every turn.
Overview of the Article
This article explores 63 distinct approaches to curl defining dark brown curly hair with caramel highlights that pop, covering color placement strategies, curl pattern considerations, maintenance routines, and styling techniques.
You’ll discover face-framing options, balayage methods, money piece trends, and full-head highlighting patterns specifically designed to enhance natural curl texture.
The guide includes practical advice on color selection for different skin tones, damage prevention during the highlighting process, and product recommendations that keep both your color and curls looking their absolute best.
From subtle enhancements to dramatic transformations, each section provides actionable insights that help you communicate your vision to your stylist and maintain your results long after leaving the salon.
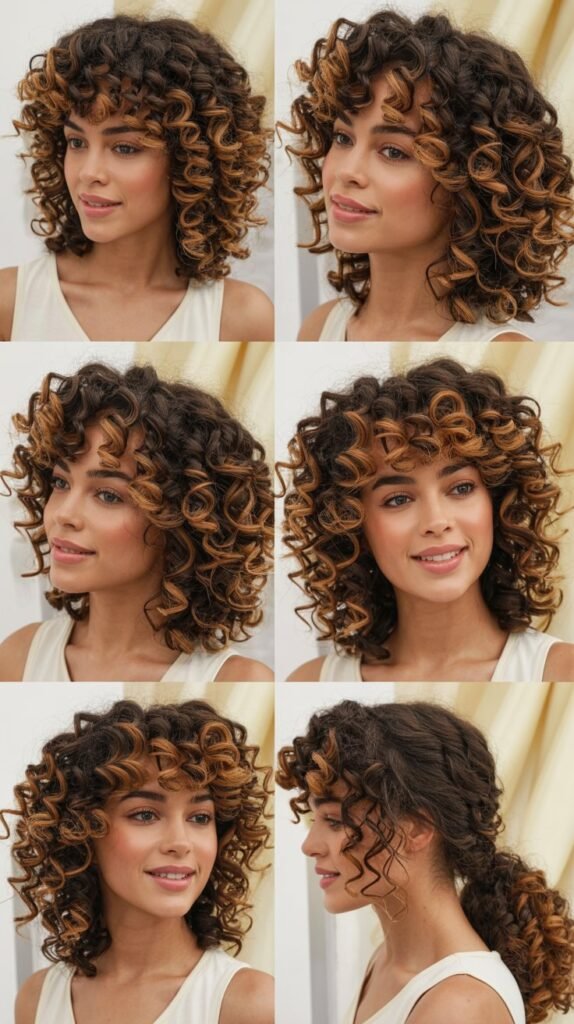
1. Face-Framing Caramel Highlights for Natural Definition
Face-framing caramel highlights strategically place lighter tones around your hairline and cheekbones, creating an illuminating effect that draws attention to your facial features while adding instant dimension to your curls.
This technique works beautifully for those wanting a low-maintenance introduction to highlighting without committing to color throughout their entire head.
The contrast between dark brown curls and bright caramel pieces creates a halo effect that enhances your natural curl pattern.
- Face-framing highlights require fewer touch-ups than full-head color, making them budget-friendly for long-term maintenance.
- The placement typically starts at your temples and frames down to your jawline, with some stylists extending to collarbone length for added drama.
- This technique complements all curl types from loose waves to tight coils, as the front placement ensures visibility regardless of curl density.
- Caramel tones in the face-framing area soften harsh lines and create a more youthful appearance by mimicking natural sun-lightening patterns.
- Most stylists recommend starting with 3-5 foils per side to achieve a natural look that can be intensified in future appointments.
2. Balayage Technique for Seamless Curl Color Transition

Balayage represents a hand-painted highlighting method that creates soft, natural-looking gradients perfect for curly hair textures that need color placement respecting their natural movement patterns.
Unlike traditional foil highlights, balayage allows colorists to customize placement based on how your individual curls fall and catch light.
This freehand technique prevents the striped appearance that can occur when foils are applied to curly hair without considering curl pattern.
- Balayage works exceptionally well on curly hair because the color is painted where light would naturally hit the outer curves of your curls.
- The technique creates a multi-dimensional effect with darker roots gradually lightening toward the ends for a sun-kissed finish.
- Touch-up appointments can be scheduled every 3-4 months rather than the traditional 6-8 weeks required for traditional highlights.
- Stylists typically apply stronger caramel tones to the mid-lengths and ends while keeping the root area darker for natural grow-out.
- This method minimizes damage because it doesn’t require color application directly at the scalp, preserving your healthiest hair.
- Balayage can be customized with varying thickness of painted sections to create either subtle or dramatic contrast depending on preference.
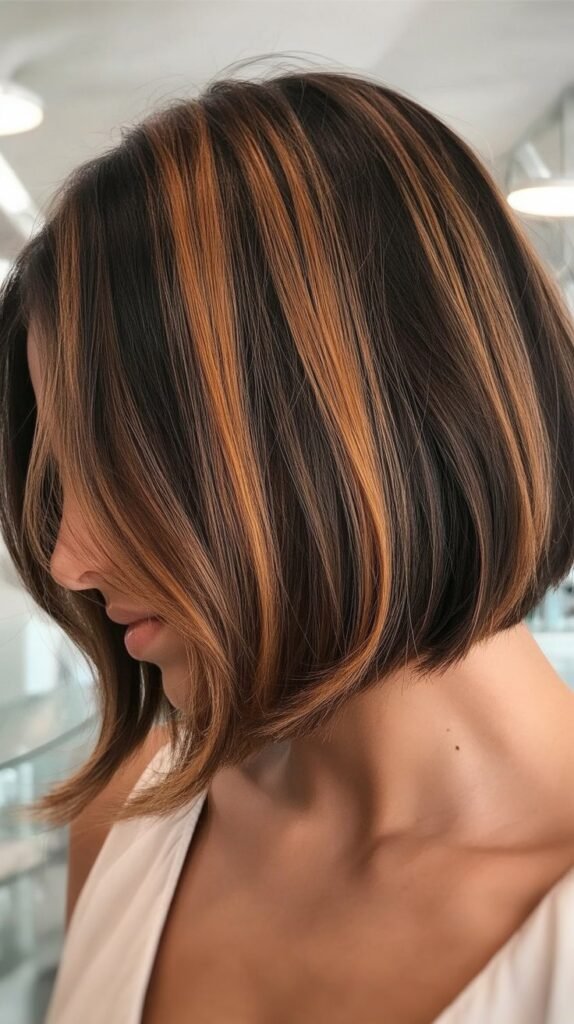
3. Chunky Caramel Highlights for Bold Statement Curls

Chunky caramel highlights deliver maximum impact through thicker, more visible sections of color that create striking contrast against your dark brown base for those wanting their highlights to truly pop.
This bold approach embraces the 90s-inspired trend while modernizing it with strategic placement that flatters contemporary curl styles.
The larger sections of caramel create a ribboning effect throughout your curls that’s impossible to miss.
- Chunky highlights typically range from 1/2 inch to 1 inch in width, significantly larger than traditional fine highlights.
- This technique works particularly well on medium to thick curl density where the larger color sections won’t appear too sparse.
- The bold contrast creates a fashion-forward look that stands out in photographs and makes a memorable impression.
- Stylists often concentrate chunky highlights around the crown and top layers for maximum visibility when hair is worn naturally.
- This method requires confident commitment to noticeable color change rather than subtle enhancement.
- Maintenance includes purple or blue shampoo to prevent brassiness in the caramel sections as they oxidize over time.
4. Subtle Honey-Toned Lowlights for Dimensional Depth

Subtle honey-toned lowlights work in reverse by adding slightly lighter shades within your dark brown curls rather than dramatic caramel highlights, creating understated dimension that catches light beautifully.
This approach suits professionals or those preferring a conservative color enhancement that appears naturally multidimensional rather than obviously highlighted.
The honey tones provide warmth without the high-contrast pop of traditional caramel highlights.
- Honey lowlights typically sit 1-2 shades lighter than your base color for a barely-there enhancement.
- This technique adds richness and prevents flat, one-dimensional color without announcing “I got my hair highlighted.”
- The subtle approach works exceptionally well for curl types that already have natural variation in color from root to tip.
- Placement focuses on interior sections of hair rather than surface layers, creating depth that reveals itself with movement.
- This option requires minimal maintenance as the close color match to your natural shade means grow-out is virtually undetectable.
- Honey tones complement warm, olive, and medium skin tones particularly well without creating harsh contrast.
5. Money Piece Highlights for Maximum Face Illumination

Money piece highlights concentrate the brightest, most impactful caramel color at the very front sections of your hair flanking your face, creating an instant brightening effect that elevates your entire look.
This trend-forward technique gets its name from the high-impact results achieved from highlighting just two small sections, making it cost-effective while delivering dramatic results.
The money piece works as a standalone treatment or as the brightest element in a full highlighting service.
- Money piece highlights are typically applied to 1-2 inch sections on either side of your part, extending from root to tip.
- The technique creates an instant face-lift effect by drawing light toward your complexion and framing your features.
- This placement works beautifully when hair is worn down, in ponytails, or in updos as the front pieces remain visible.
- Colorists often make money pieces 3-4 shades lighter than the base for maximum contrast and visibility.
- The concentrated placement means you’re only processing a small percentage of your hair, minimizing overall damage.
- Money pieces require touch-ups every 6-8 weeks to maintain the bright, root-to-tip effect as new growth emerges.
6. Full Head Caramel Highlights for All-Over Richness

Full head caramel highlights distribute color throughout your entire head of curls, creating comprehensive dimension that ensures your highlights are visible from every angle and in every style.
This complete approach transforms your overall color story rather than adding strategic accent pieces, ideal for those wanting maximum color presence.
The full head application creates consistent warmth and prevents any single-toned appearance.
- Full head highlighting typically involves 40-80 foils depending on hair density and desired saturation of caramel tones.
- This comprehensive approach ensures highlights are visible whether your hair is up, down, or styled in braids and twists.
- The time investment ranges from 3-5 hours in the salon depending on curl length and density.
- Full head highlights create the most dramatic transformation from your natural dark brown base color.
- This option requires the most maintenance with touch-ups recommended every 8-12 weeks to prevent obvious demarcation lines.
- The investment is higher both initially and for maintenance, but delivers the most complete color transformation.
- Stylists can vary the placement density, keeping some areas darker for continued dimension rather than uniform lightness.
7. Root Shadow Technique for Low-Maintenance Dimension
Root shadow technique intentionally keeps your natural dark brown color at the roots while placing caramel highlights throughout the mid-lengths and ends, creating a built-in grow-out period that extends time between salon visits.
This method has gained popularity among curly-haired clients who want the dimensional benefits of highlights without frequent maintenance appointments.
The gradual transition from dark roots to caramel ends appears intentional rather than neglected.
- Root shadow typically maintains 1-3 inches of natural dark brown color at the scalp before transitioning to caramel.
- This technique can extend your salon visit intervals to 4-6 months depending on how quickly your hair grows.
- The darker root area helps protect your most fragile hair near the scalp from chemical processing.
- Root shadow creates a lived-in, effortless appearance that aligns with current low-maintenance beauty trends.
- The technique works particularly well for active lifestyles or those with limited time for frequent salon appointments.
- Stylists can adjust the transition zone to be either soft and gradual or more defined depending on your preference.
8. Ribbon Highlights Through Curl Spirals
Ribbon highlights strategically place vertical sections of caramel color that follow the natural spiral pattern of your curls, creating a candy-cane effect that emphasizes curl definition and movement.
This artistic approach considers the three-dimensional nature of curls and places color where it will maximize visual impact as curls bounce and rotate.
The result is highlights that appear to spiral through your hair rather than sitting flat.
- Ribbon highlights require a colorist experienced with curly hair who understands how curl patterns affect color visibility.
- The technique involves sectioning hair in the direction curls naturally spiral rather than traditional horizontal or vertical patterns.
- This placement ensures that as curls move and bounce, the highlights remain visible rather than hiding within the curl structure.
- Ribbon highlights work best on well-defined curl patterns from 2C to 4A where the spiral structure is clear.
- The vertical nature of the placement creates a lengthening effect that can make hair appear longer and more flowing.
- This approach typically uses fewer foils than traditional highlighting because placement is more strategic than comprehensive.
9. Babylights for Natural Sun-Kissed Curls

Babylights utilize ultra-fine sections of caramel highlighting to mimic the subtle, natural lightening that children’s hair develops from sun exposure, creating the most natural-looking dimension possible.
This delicate technique requires precision and patience but delivers results that appear as though you were simply blessed with naturally multitonal hair.
The fine sections blend seamlessly with your dark brown base, eliminating harsh lines.
- Babylights involve sections of hair as fine as a few strands, significantly thinner than traditional highlighting techniques.
- This approach takes longer to apply due to the precision required but creates the most seamless, natural results.
- The technique works beautifully on all curl types because the fine sections don’t disrupt the natural curl pattern.
- Babylights are ideal for highlighting first-timers or those wanting to add dimension without dramatic change.
- The subtle nature means touch-ups can be spaced 3-4 months apart as grow-out is barely noticeable.
- This method can be concentrated around the hairline and top layers for a natural “halo” effect where sun would naturally lighten hair.
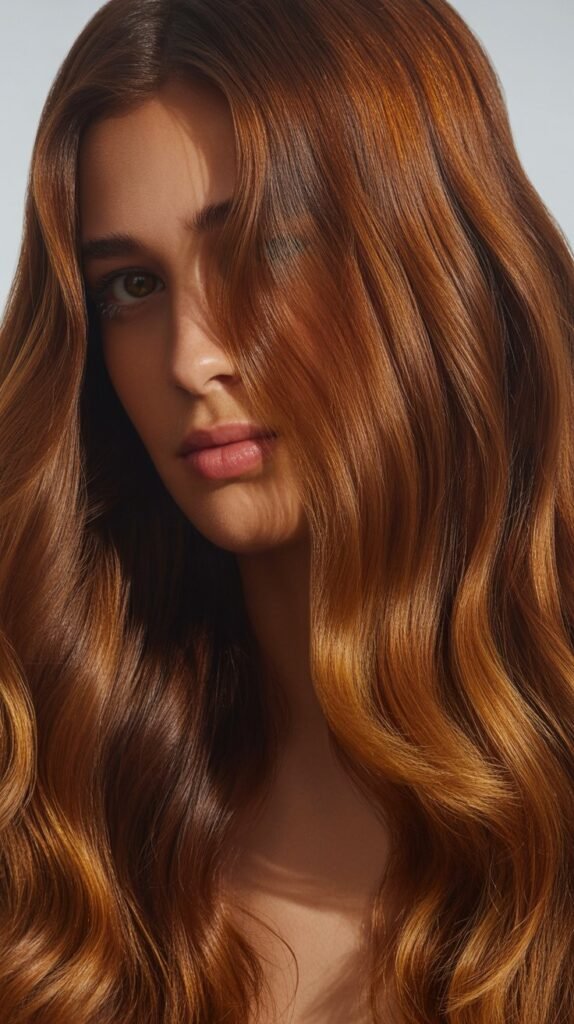
10. Ombré Effect with Caramel Ends

Ombré effect concentrates caramel color at the ends of your curls while maintaining your natural dark brown from roots through mid-lengths, creating a graduated color transition that’s both trendy and practical.
This technique differs from balayage through its more horizontal demarcation line rather than the painted, scattered placement of traditional balayage.
The concentration of color at the ends puts the lightest tones where curls naturally catch the most light.
- Ombré typically begins the color transition at ear or shoulder level depending on your hair length and desired effect.
- This technique is particularly practical because you can trim away damaged highlighted ends without affecting your overall color story.
- The concentration of color at the ends makes them the focal point, drawing eyes to the length and bounce of your curls.
- Ombré requires minimal maintenance as the color doesn’t extend to your roots, eliminating the need for frequent touch-ups.
- The technique works exceptionally well for those growing out previous highlighting or transitioning to their natural color.
- Stylists can customize how gradual or dramatic the transition from dark brown to caramel appears based on preference.
11. Teasy Lights for Textured Dimension

Teasy lights combine the backcombing technique with highlighting to create a lived-in, textured appearance that distributes caramel tones irregularly throughout your dark brown curls for maximum natural-looking dimension.
This method involves gently backcombing sections before applying color, which results in varied saturation and softer grow-out lines.
The technique prevents the uniform, striped appearance that can occur with traditional foiling methods.
- Teasy lights create a more random, natural distribution of color that mimics how sun would naturally lighten hair over time.
- The backcombing technique ensures that color doesn’t reach all the way to the root, creating automatic shadow and depth.
- This method is gentler on curls than traditional highlighting because the backcombing creates a protective buffer.
- The irregular placement means grow-out appears soft and blended rather than harsh and obvious.
- Teasy lights work particularly well on medium to coarse curl textures that can handle the gentle backcombing process.
- This technique can be applied to just the surface layers for subtle dimension or throughout for more comprehensive color.
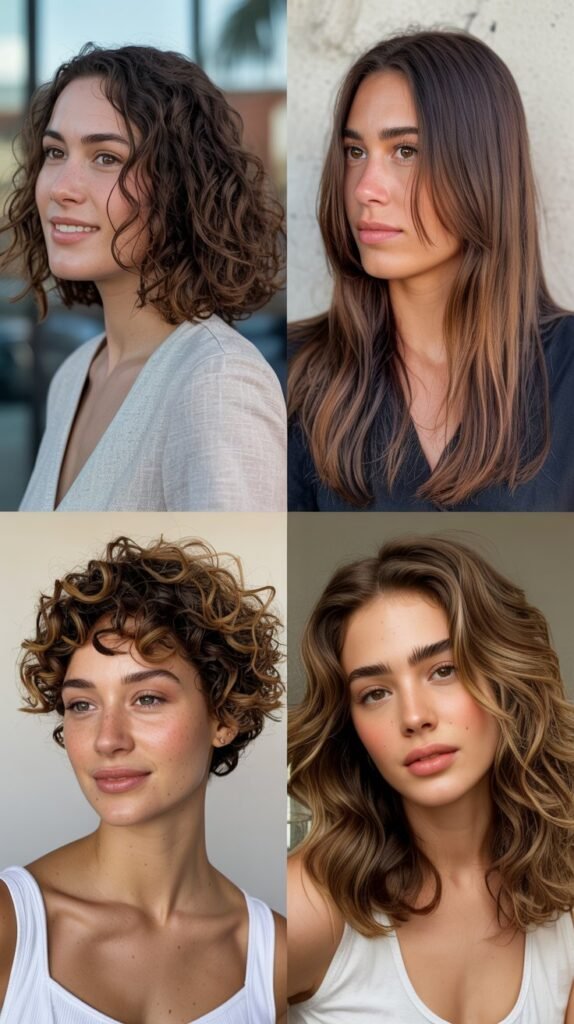
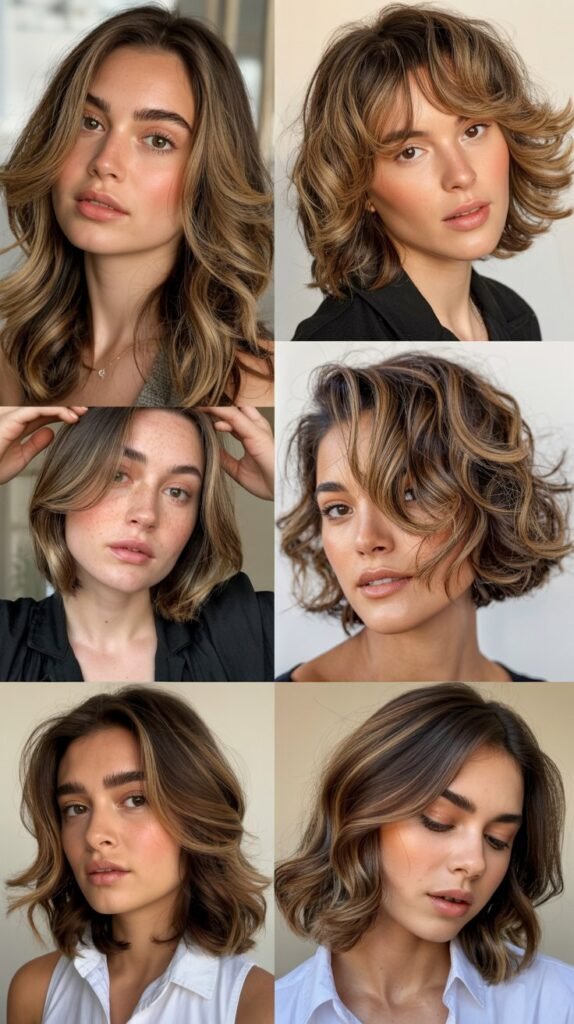
12. Caramel Highlights on Type 2 Wavy Curls
Caramel highlights on Type 2 wavy curls create beautiful movement and dimension that emphasizes the S-shaped wave pattern while adding warmth to the dark brown base.
Wavy textures respond particularly well to highlighting because the gentler curl pattern allows light to reflect off the color from multiple angles.
The combination of waves and caramel creates a beachy, effortless aesthetic.
- Type 2 waves (2A, 2B, 2C) benefit from strategic highlight placement that follows the wave pattern rather than fighting against it.
- Caramel highlights on waves create a softening effect that prevents the hair from appearing flat or one-dimensional.
- The looser curl pattern means highlights remain visible even when hair is straightened or styled differently.
- Wavy textures typically require less product to define curls, allowing the highlight color to remain visible without being weighed down.
- The S-shaped pattern catches light along multiple curves, making highlights appear more dynamic than on straighter hair.
- Touch-ups for wavy hair can often be extended because the less-defined curl pattern makes grow-out less noticeable than on tighter curls.
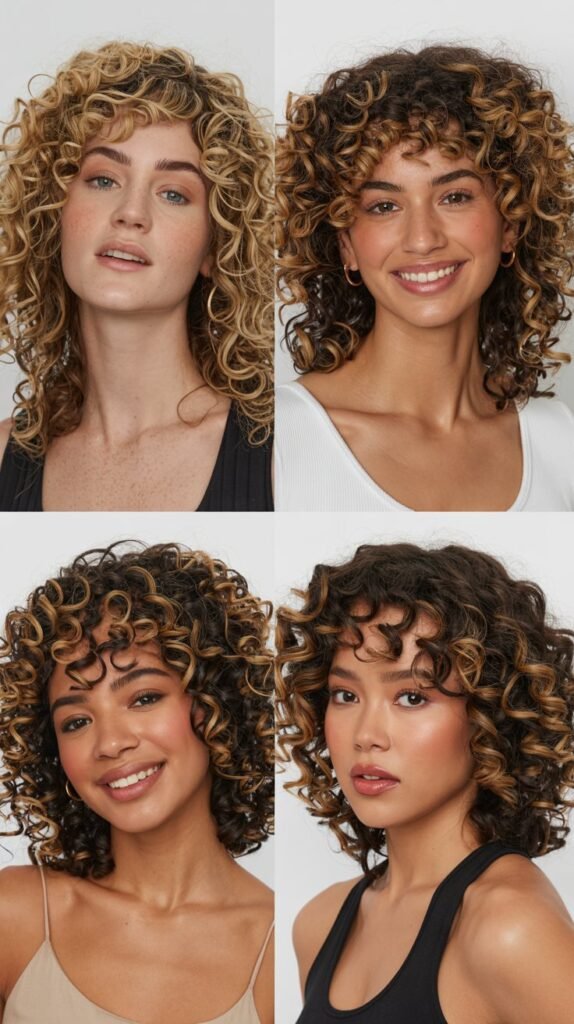
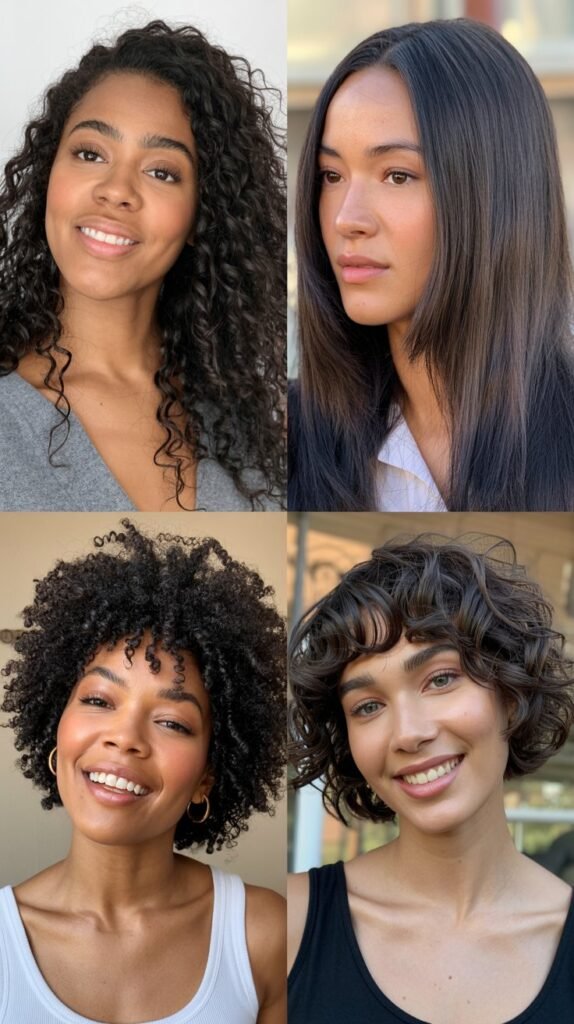
13. Caramel Highlights on Type 3 Curly Hair
Caramel highlights on Type 3 curly hair enhance the springy, well-defined spiral and corkscrew patterns that characterize this curl type, creating dimension that celebrates rather than masks natural texture.
Type 3 curls (3A, 3B, 3C) have enough definition to showcase color placement beautifully while benefiting from the volume-enhancing effect that highlights provide.
The caramel tones prevent the hair from appearing heavy or dense.
- Type 3 curls benefit from highlights placed on the outer curves of spirals where light naturally catches the curl shape.
- The defined pattern means highlights create a three-dimensional effect as curls bounce and rotate throughout the day.
- Caramel tones add warmth that complements the volume and body characteristic of Type 3 textures.
- This curl type typically holds moisture well, making it more resilient to the highlighting process than finer textures.
- The springy nature of Type 3 curls means highlights remain visible even in humid conditions when curls tighten.
- Stylists should apply color while considering the curl’s stretched length as Type 3 curls shrink significantly when dry.
- The ribbon-like appearance of Type 3 spirals is enhanced when caramel highlights follow the curl’s natural path.
14. Caramel Highlights on Type 4 Coily Hair

Caramel highlights on Type 4 coily hair create stunning contrast that celebrates the tight, densely packed curl patterns while adding dimension to hair that can sometimes appear single-toned without strategic color placement.
Type 4 coils (4A, 4B, 4C) have unique highlighting considerations due to their fragility and the way tightly coiled patterns affect color visibility.
When executed properly, caramel highlights on coils create a halo effect that’s absolutely breathtaking.
- Type 4 coils require extra moisture and protein treatments before, during, and after the highlighting process due to their fragility.
- Highlights on coily hair are most visible at the ends and crown where hair catches the most light despite the tight curl pattern.
- The highlighting process must be carefully timed on Type 4 hair to prevent over-processing which can lead to breakage.
- Caramel highlights create beautiful dimension when Type 4 hair is worn in stretched styles like twist-outs or braid-outs.
- Many stylists recommend lowering the developer volume and extending processing time for gentler lifting on coily textures.
- The shrinkage factor of Type 4 hair means stylists should apply highlights generously throughout the length for visibility in shrunken state.
- Protective styles like braids and twists beautifully showcase highlights on Type 4 hair while protecting color-treated strands.
15. Caramel Highlights with Purple Toning for Richness

Caramel highlights with purple toning incorporate cool undertones that prevent brassiness while creating a sophisticated, multidimensional result that reads as rich caramel rather than orange or yellow.
This technique is essential for maintaining the true caramel appearance over time as highlighted hair naturally oxidizes and can turn brassy.
The purple toning neutralizes unwanted warmth while preserving the golden caramel glow.
- Purple toning works by depositing violet pigments that neutralize the yellow and orange tones that emerge as highlights fade.
- This step is typically applied after highlights are processed and before styling for immediate brass correction.
- At-home maintenance requires purple or violet shampoo used 1-2 times weekly to maintain the toned caramel appearance.
- The toning process adds shine and dimension by evening out porosity differences between highlighted and natural hair.
- Over-toning can create an ashy or muddy appearance, so it’s important to monitor processing time carefully.
- Different purple toners target different levels of brass, with some formulated specifically for lighter highlights versus deeper caramel tones.
16. Warm Caramel Versus Cool Caramel Highlights

Warm caramel versus cool caramel highlights represent different undertone families within the caramel color spectrum, with warm caramels leaning golden and honey-toned while cool caramels incorporate ashy, beige elements for a more neutral appearance.
Understanding the difference helps you communicate your vision to your colorist and choose tones that complement your skin’s undertones.
The contrast between warm and cool caramels creates entirely different aesthetics on dark brown curls.
| Characteristic | Warm Caramel | Cool Caramel |
|---|---|---|
| Undertones | Golden, honey, copper | Beige, ash, champagne |
| Best for skin tones | Warm, golden, olive complexions | Cool, pink, neutral complexions |
| Appearance | Sun-kissed, beachy | Sophisticated, neutral |
| Maintenance | Requires purple shampoo to prevent excess warmth | Requires careful toning to maintain ash |
| Seasonal association | Summer, spring vibes | Fall, winter elegance |
- Warm caramel highlights create a more casual, vacation-ready appearance that evokes beachside hair lightening.
- Cool caramel offers a more editorial, high-fashion aesthetic that photographs beautifully in professional settings.
- Your natural skin undertones guide which caramel family will look most harmonious and flattering on you.
- Warm caramels can appear brassy without proper maintenance while cool caramels can look flat without dimensional placement.
- Many clients opt for a blend of both warm and cool caramels to create complex, multidimensional color.
- The lighting in which you spend most time affects how warm versus cool caramels appear on your curls.
17. Placement Patterns for Maximum Curl Definition
Placement patterns for maximum curl definition involve strategic decisions about where caramel highlights are positioned relative to your natural curl structure, face shape, and desired outcome.
Understanding traditional placement patterns like horizontal sections, diagonal slicing, and panel work helps you discuss options with your colorist.
The right placement pattern enhances your curl type rather than working against its natural behavior.
- Horizontal placement creates a more traditional, uniform distribution of highlights throughout the hair.
- Diagonal slicing follows the natural fall of hair and creates movement and flow in the highlighting pattern.
- Panel work involves separating hair into quadrants and working each section independently for customized results.
- Face-framing placement concentrates color around the hairline and perimeter for maximum facial illumination.
- Halo placement focuses highlights on the crown and top layers where they’re most visible from all angles.
- Interior placement adds depth by highlighting underneath layers that peek through when hair moves.
- Random placement mimics natural sun-lightening and prevents any pattern from being obvious or artificial-looking.
18. Skin Tone Considerations for Caramel Selection

Skin tone considerations for caramel selection ensure your highlights enhance your natural complexion rather than creating unflattering contrast or clashing with your undertones.
The science of coordinating hair color with skin tone involves understanding whether your complexion has warm, cool, or neutral undertones and selecting caramels accordingly.
The right caramel shades create a harmonious, cohesive appearance that brightens your face.
- Warm skin tones with golden or peachy undertones look stunning with honey-based, golden caramels that echo the warmth in their complexion.
- Cool skin tones with pink or blue undertones benefit from ashier, champagne-toned caramels that don’t clash with their natural coloring.
- Neutral skin tones have the flexibility to wear both warm and cool caramels depending on their personal preference and lifestyle.
- Deep skin tones are complemented by richer, more saturated caramel shades that provide visible contrast without appearing washed out.
- Fair skin tones often look best with softer, more subtle caramel placement that doesn’t overpower their delicate coloring.
- Medium olive skin tones can wear almost any caramel shade but particularly shine with golden-bronze caramels that enhance their natural warmth.
- The vein test helps determine undertones: green-appearing veins suggest warm undertones while blue veins indicate cool undertones.
19. Glossing Treatments to Enhance Caramel Vibrancy
Glossing treatments enhance caramel vibrancy by depositing semi-permanent color that refreshes faded highlights, adds shine, and creates a cohesive blend between your dark brown base and caramel tones.
These treatments work at the surface level rather than penetrating deeply, making them a gentle maintenance option between full highlighting sessions.
Glosses can adjust tone, add richness, and extend the life of your color investment.
- Glossing treatments typically last 4-6 weeks and gradually fade with each shampoo rather than growing out with harsh lines.
- These treatments can adjust the tone of your caramel highlights warmer or cooler without additional lightening.
- The shine-enhancing properties of glosses make curls appear healthier and more defined by smoothing the cuticle layer.
- At-home gloss treatments are available but professional applications provide more precise color correction and longer-lasting results.
- Glosses can be applied just to highlighted sections for targeted refreshment or throughout all hair for cohesive blending.
- The conditioning agents in most glosses provide additional benefits beyond color maintenance including improved manageability.
20. Bond-Building During the Highlighting Process

Bond-building during the highlighting process incorporates specialized treatments that protect hair’s internal structure during chemical processing, minimizing damage while achieving desired caramel results.
These innovative products work at the molecular level to prevent breakage and maintain curl integrity throughout the coloring process.
Understanding bond-building technology helps you make informed decisions about protecting your curls during transformation.
- Bond-building treatments like Olaplex, K18, or Wellaplex rebuild disulfide bonds that break during the lightening process.
- These treatments can be added directly into the highlight mixture or applied as standalone steps before, during, and after coloring.
- Curly hair benefits significantly from bond-building because curls are naturally more fragile than straight hair due to their structure.
- The investment in bond-building treatments pays off through reduced breakage, maintained curl pattern, and healthier-feeling hair.
- Many salons now include bond-building as a standard part of any lightening service due to its protective benefits.
- At-home bond-building treatments can maintain the strengthening effects between salon visits with regular weekly use.
21. Deep Conditioning Routines for Highlighted Curls
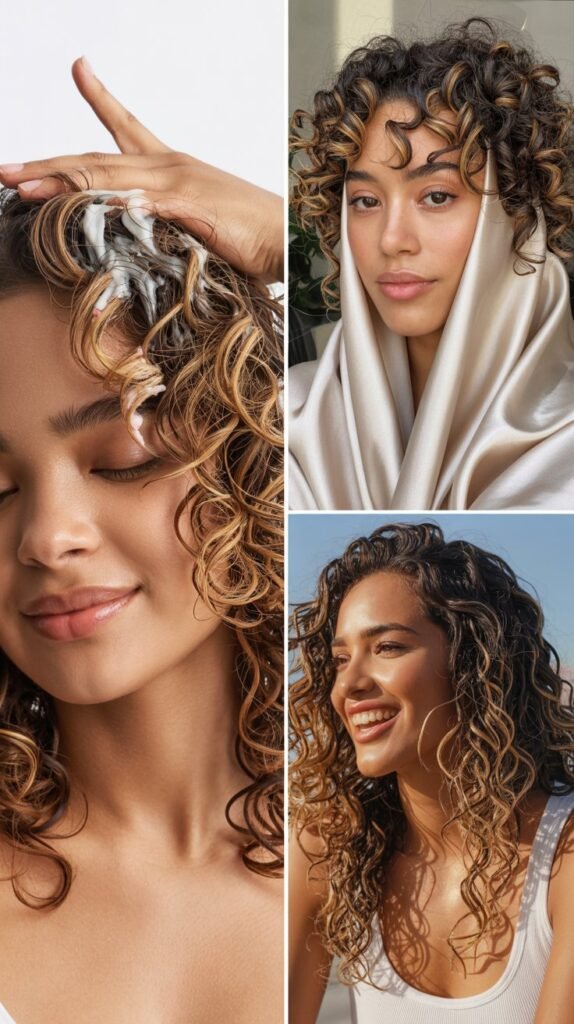
Deep conditioning routines for highlighted curls become essential maintenance as the highlighting process increases porosity and your hair’s need for moisture and protein replenishment.
Strategic deep conditioning preserves both your caramel color and curl pattern by addressing the specific needs of chemically processed hair.
A consistent routine prevents the dryness, frizz, and definition loss that can occur after highlighting.
- Deep conditioning should occur at minimum weekly after highlighting, with many curl specialists recommending twice-weekly treatments initially.
- Protein treatments strengthen hair structure compromised by highlighting while moisture treatments address dryness and improve elasticity.
- The alternation between protein and moisture treatments prevents imbalance that can lead to either brittleness or mushiness.
- Heat application through steam caps or warm towels enhances deep conditioner penetration for maximum benefit.
- Leave-in time matters: most deep conditioners require 15-30 minutes to properly penetrate the hair shaft.
- Color-safe deep conditioners are formulated without sulfates and harsh ingredients that could strip your caramel highlights.
- DIY deep conditioning options include avocado oil, coconut oil, and honey masks that provide natural nourishment.
22. Product Selection for Color-Treated Curls

Product selection for color-treated curls requires careful consideration of ingredients that preserve both your caramel highlights and natural curl pattern while providing necessary moisture, definition, and protection.
The wrong products can strip color, create buildup, or fail to address the specific needs of highlighted curls. Understanding product categories and their purposes helps you build an effective routine.
- Sulfate-free shampoos are essential as sulfates strip color and natural oils that highlighted curls desperately need.
- Color-depositing conditioners help maintain caramel vibrancy between salon visits by depositing small amounts of toning pigment.
- Curl creams with UV protection prevent sun damage that can fade caramel highlights and create brassiness.
- Protein-rich leave-ins strengthen highlighted areas that experience more porosity and potential breakage.
- Lightweight oils like argan or jojoba seal in moisture without weighing down curls or creating greasiness.
- Avoid products with drying alcohols, silicones that create buildup, and harsh preservatives that damage compromised hair.
23. Washing Frequency for Color Longevity

Washing frequency for color longevity involves finding the balance between maintaining scalp health and preserving your caramel highlights which fade with each shampoo session.
Over-washing strips color and natural oils while under-washing can lead to buildup and scalp issues. Understanding your curl type’s specific needs helps establish an optimal washing schedule that extends color life.
- Most color experts recommend washing 1-2 times per week maximum for color-treated curls to preserve vibrancy.
- Co-washing with cleansing conditioner between shampoo days provides cleaning without stripping color.
- Dry shampoo absorbs oil and refreshes curls on non-wash days, extending time between color-fading shampoos.
- Water temperature matters significantly: hot water opens the cuticle and releases color molecules while cool water seals them in.
- The first 48-72 hours after highlighting are critical color-sealing time when washing should be avoided entirely.
- Pre-poo treatments with oil before washing create a protective barrier that minimizes color loss during cleansing.
24. Heat Styling Considerations for Highlighted Curls
Heat styling considerations for highlighted curls involve understanding that colored hair has lower heat tolerance and requires protective measures to prevent additional damage beyond what the highlighting process created.
While many curlies embrace heat-free styling, those who occasionally straighten or use diffusers need specific strategies.
Proper heat management preserves both curl health and color vibrancy.
- Heat protectant spray creates a barrier between hot tools and hair, providing a crucial protective layer for vulnerable highlighted sections.
- Temperature settings should never exceed 350°F (175°C) for highlighted curls as the compromised structure can’t withstand higher heat.
- Diffusing on medium-low settings preserves curl pattern and color better than high heat which can cause both pattern loosening and color fading.
- The frequency of heat styling should decrease after highlighting to give hair recovery time between heat exposures.
- Ceramic or tourmaline tools distribute heat more evenly and are gentler on color-treated hair than metal alternatives.
- Air-drying when possible extends the time between heat applications, allowing hair to maintain its strength and color integrity.
25. Night Care Routine for Protected Curls and Color

Night care routine for protected curls and color involves establishing bedtime practices that preserve both your curl definition and prevent friction that can dull caramel highlights or cause breakage.
The hours spent sleeping represent significant potential for damage or preservation depending on your protective measures.
A consistent night routine extends color life and reduces morning styling time.
- Silk or satin pillowcases reduce friction that cotton creates, preventing frizz and color-dulling damage to the cuticle layer.
- Protective styles like loose braids or pineappling concentrate curls at the crown, preventing crushing and preserving definition.
- Bonnets or silk scarves create a protective barrier that maintains moisture and prevents environmental damage during sleep.
Refreshing sprays applied before bed prep hair for easier morning styling while adding moisture to highlighted sections.
- Avoiding elastic bands with metal components prevents breakage and snagging, particularly on fragile highlighted sections.
- Loosely secured styles prevent tension damage while maintaining curl groupings that need minimal morning refreshing.
26. Refreshing Techniques Between Wash Days

Refreshing techniques between wash days revitalize your dark brown curls and caramel highlights without full washing, maintaining definition and color vibrancy through strategic moisture application and styling.
Proper refreshing extends the life of your wash-day style while keeping curls bouncy and highlights visible.
Mastering refresh methods reduces the frequency of color-fading washes.
- Water-based refresh sprays rehydrate curls that have dried out or lost definition without requiring full rewashing.
- The “scrunch and spray” method redistributes products already in hair while adding moisture to areas needing revival.
- Curl creams or gels can be applied to damp, refreshed hair to redefine sections that have become frizzy or undefined.
- The praying hands method smooths product onto individual curl clumps, reducing frizz while defining pattern.
- Diffusing refreshed curls on cool or low settings sets the reformation without causing heat damage to highlighted hair.
- Section-by-section refreshing allows you to address problem areas without over-manipulating hair that still looks good.
27. Trimming Schedule for Healthy Highlighted Ends

Trimming schedule for healthy highlighted ends maintains the integrity of your caramel-toned ends which experience the most processing and environmental exposure, preventing split ends from traveling up the hair shaft.
Regular trims keep your style looking fresh and prevent the raggedy appearance that can develop when highlighted ends become damaged.
Strategic trimming preserves length while maintaining health.
- Color-treated curls benefit from trims every 8-12 weeks to remove damage before it progresses up the hair shaft.
- The “search and destroy” method involves removing only visibly split or damaged ends rather than cutting a uniform length.
- Dry cutting techniques allow stylists to see exactly how your curls fall and where damage exists for precise trimming.
- Highlighted ends may require more frequent trimming than your natural roots due to increased processing and porosity.
- Regular trims actually support length retention by preventing breakage that causes more significant length loss than trimming.
- Curl-by-curl cutting respects individual curl patterns and removes damage while maintaining your overall style shape.
28. Color-Safe Curl Defining Gels and Mousses

Color-safe curl defining gels and mousses provide hold and definition without ingredients that strip your caramel highlights while offering the styling control curly hair needs.
These products are specifically formulated to work with colored hair’s altered structure and increased porosity.
Choosing the right styling products makes the difference between defined, bouncy curls with vibrant color versus frizzy, dull-looking hair.
- Color-safe gels create cast formation that holds curl definition while sealing in moisture without color-stripping alcohols.
- Mousse provides lighter hold than gel while adding volume, making it ideal for finer curl textures that need lift.
- The scrunch-out-the-crunch method breaks the gel cast after drying, revealing soft, defined curls with movement.
- Glycerin-based products attract and hold moisture, particularly beneficial for the drier texture of highlighted hair.
- Protein-infused styling products strengthen highlighted sections while providing hold and definition.
- Application on soaking wet hair allows products to distribute evenly and define curls from root to tip.
29. Sun Protection for Color-Treated Curls
Sun protection for color-treated curls prevents UV damage that fades caramel highlights and turns them brassy while also protecting hair structure from sun-induced brittleness and dryness.
Just as skin requires sunscreen, colored hair needs protective measures during sun exposure.
Understanding UV protection options maintains your color investment and hair health during outdoor activities.
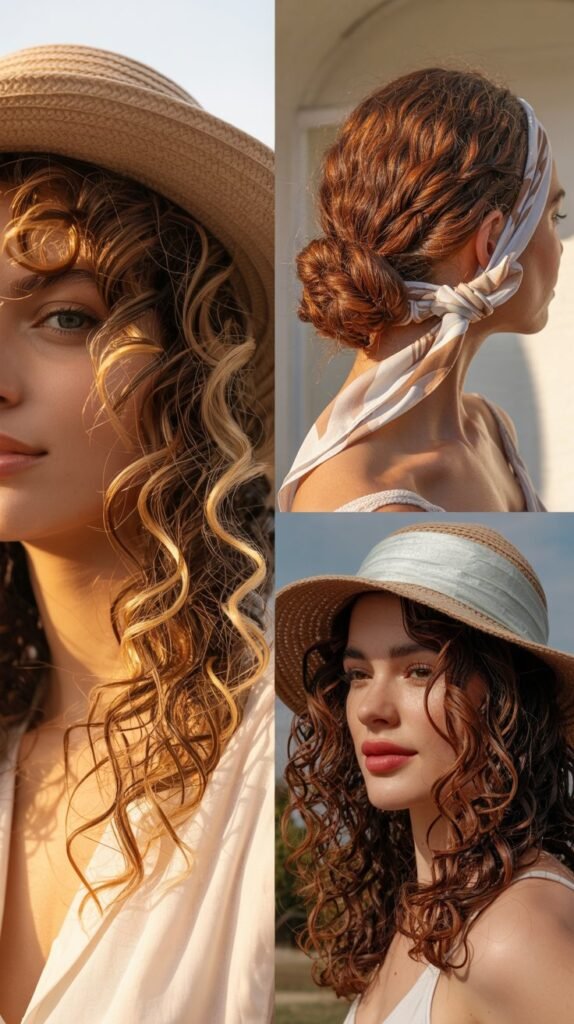
- UV-protectant sprays create an invisible shield that absorbs or reflects damaging rays before they penetrate the hair shaft.
- Physical barriers like hats, scarves, and updos limit direct sun exposure during peak UV hours between 10 AM and 4 PM.
- Highlighted sections are particularly vulnerable to sun damage due to their compromised structure and lighter pigmentation.
- Chlorine and saltwater amplify sun damage, requiring extra protection during swimming and beach activities.
- Leave-in conditioners with built-in UV filters provide dual benefits of moisture and sun protection in one product.
- Reapplication of UV products every few hours maintains protection during extended outdoor exposure.
30. Swimming and Highlighted Curl Care

Swimming and highlighted curl care requires pre-swim preparation and post-swim restoration to minimize the damaging effects chlorine and salt water have on caramel-toned strands.
Both pool chemicals and ocean salt can strip color, create green tones, and cause severe dryness. Strategic protective measures allow you to enjoy aquatic activities without sacrificing your color or curl health.
- Pre-saturating hair with clean water before swimming fills the hair shaft, leaving less room for chlorine or salt water absorption.
- Applying coconut oil or conditioner before swimming creates a protective barrier that repels damaging pool chemicals.
- Swim caps provide maximum protection though they may not be practical or comfortable for all swimming situations.
- Immediate post-swim rinsing removes chlorine or salt before it can bond with hair proteins and cause lasting damage.
- Chelating shampoos remove mineral buildup from pool water that can create green tones in blonde and caramel highlights.
- Deep conditioning after each swim session replenishes moisture stripped by chlorine or salt exposure.
31. Avoiding Green Tones in Caramel Highlights

Avoiding green tones in caramel highlights requires understanding the chemical reactions between copper in pool water and lighter hair pigments, plus knowing preventive and corrective measures.
Green tones appear when oxidized copper deposits bind with the lightened proteins in highlighted hair.
Prevention is always easier than correction for this frustrating color problem.
- The green tone occurs specifically in highlighted sections because unprocessed dark brown hair doesn’t have enough exposed protein for copper binding.
- Pre-swim protection with leave-in conditioner or oil creates a barrier that prevents copper absorption into the hair shaft.
- Chelating or clarifying shampoos with EDTA remove existing copper deposits before they oxidize and turn green.
- Vitamin C treatments can sometimes remove green tones by breaking down the copper oxidation through acidic action.
- Red or copper-toned toning treatments neutralize green by depositing opposite-spectrum pigments that cancel the unwanted color.
- Professional color correction may be necessary for severe green toning that home treatments cannot resolve.
32. Seasonal Color Maintenance Adjustments
Seasonal color maintenance adjustments address the changing environmental conditions that affect your caramel highlights differently throughout the year, requiring modified care routines for optimal results.
Winter’s dry indoor heating, summer’s intense UV exposure, fall’s crisp air, and spring’s humidity each present unique challenges.
Adapting your routine seasonally maintains consistent color vibrancy and curl health.
- Winter requires increased moisturizing treatments to combat dry heating systems that dehydrate highlighted hair and dull color.
- Summer demands enhanced UV protection and chlorine prevention as outdoor activities increase exposure to color-damaging elements.
- Fall’s transitional weather often means returning to deeper conditioning routines after summer sun exposure.
- Spring humidity can cause frizz in highlighted sections that have higher porosity, requiring anti-humidity products.
- Indoor air conditioning in summer creates unexpected dryness similar to winter heating, requiring similar moisture-intensive care.
- Seasonal gloss treatments refresh faded color that occurs from changing environmental conditions throughout the year.
33. Gray Coverage with Caramel Highlights

Gray coverage with caramel highlights creates a strategic approach to blending emerging gray hairs with your dark brown base while the caramel tones provide distraction and dimension that makes individual grays less noticeable.
This technique acknowledges the reality of aging hair while maintaining a youthful, vibrant appearance.
The combination approach is more forgiving than solid color as regrowth becomes less obvious.
- Caramel highlights create visual interruption that breaks up the line where gray roots meet colored hair, making regrowth less stark.
- The dimensional nature of highlights means that some gray hairs can be left untouched as they read as additional highlights.
- Lowlights can be added alongside caramel highlights to provide fuller gray coverage while maintaining dimension.
- The placement of caramel highlights strategically around the face draws attention away from graying temples or crown areas.
- As gray percentage increases, transitioning to a lighter overall base with caramel highlights can create easier maintenance.
- Demi-permanent color on the base provides gentle gray coverage that fades gradually rather than showing harsh regrowth lines.
34. Transitioning from Solid Color to Caramel Highlights

Transitioning from solid color to caramel highlights involves carefully lightening selected sections of uniformly colored dark brown hair to create dimension and movement without compromising overall hair health.
This process differs from highlighting virgin hair due to the existing color that must be lifted.
Understanding the transition process helps set realistic expectations for timeline and results.
- Previously colored hair often requires multiple sessions to achieve desired caramel tones due to buildup and color resistance.
- Color remover may be necessary before highlighting if previous dye has created significant buildup that prevents lifting.
- The transition works best when approached gradually, adding more highlights with each session rather than attempting full transformation immediately.
- Existing box dye creates particular challenges as these products deposit deeply and resist lightening without damage.
- Professional assessment determines whether your existing color can be safely highlighted or requires color correction first.
- Patience during the transition preserves hair integrity rather than rushing the process and causing irreversible damage.
35. DIY Highlighting Versus Professional Services

DIY highlighting versus professional services represents a choice between cost savings and expertise, with significant implications for your curl health and color results.
While at-home highlighting kits exist, they cannot replicate the customized approach and technical knowledge that professional colorists provide.
Understanding both options helps you make informed decisions about your highlighting journey.
| Aspect | DIY Highlighting | Professional Services |
|---|---|---|
| Cost | $15-50 per session | $150-400 per session |
| Customization | Limited by kit contents | Fully customized formulas |
| Placement expertise | Self-applied with mirrors | Trained professional application |
| Damage risk | Higher due to lack of training | Lower with proper techniques |
| Color correction | Your responsibility if issues arise | Professional fixes included |
| Time investment | 3-5 hours including cleanup | Sit and relax while pro works |
- DIY highlighting cannot account for curl pattern, face shape, and the three-dimensional placement that creates professional results.
- At-home kits use standardized formulas that may not suit your specific hair porosity, texture, or color goals.
- The savings from DIY highlighting often disappear when professional color correction is needed to fix at-home mistakes.
- Professional colorists can troubleshoot issues in real-time rather than discovering problems only after damage occurs.
- Certain techniques like balayage and teasy lights require training and experience that DIY attempts cannot replicate.
36. Choosing a Curl-Specialist Colorist
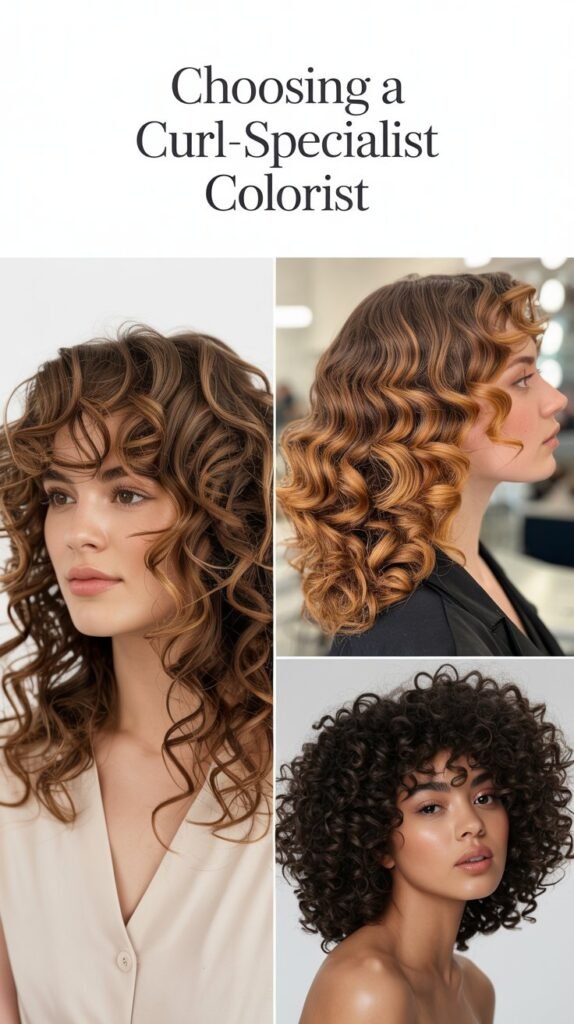
Choosing a curl-specialist colorist ensures your caramel highlights are applied by someone who understands the unique needs of textured hair and how curl patterns affect color placement and outcome.
Not all excellent colorists have curly hair expertise, making the selection process crucial.
Finding the right professional prevents damage, disappointment, and the need for expensive corrections.
- Curl specialists understand how shrinkage affects color placement and apply highlights considering both wet and dry curl lengths.
- Portfolio review reveals whether a colorist has extensive experience with various curl types and highlighting techniques.
- Consultation skills matter as curl-specialist colorists ask about your routine, products, and curl goals beyond just color.
- Certifications in curly hair cutting and coloring demonstrate commitment to specialized education in textured hair.
- Client reviews specifically from other curly-haired individuals provide insight into consistent quality with textured hair.
- A good curl colorist will refuse service if your hair isn’t healthy enough for highlighting, prioritizing your hair health over profit.
- Questions about your curl routine, wash frequency, and product usage indicate a colorist who considers the whole picture.
37. Consultation Questions for Your Colorist

Consultation questions for your colorist ensure clear communication about your caramel highlight vision, hair history, and expectations before any color is applied.
A thorough consultation prevents misunderstandings and helps your colorist create a customized plan.
Knowing what information to provide and what questions to ask sets the foundation for successful results.
Essential Questions to Ask Your Colorist:
- What highlighting technique do you recommend for my curl type and desired outcome?
- How many sessions will it take to achieve my goal caramel tone without damaging my curls?
- What is the realistic maintenance schedule for the look I want, including time and cost?
- Which tones of caramel will best complement my skin tone and natural hair color?
- What home care products and routine do you recommend for maintaining both my color and curls?
Information to Provide to Your Colorist:
- Complete history of previous color treatments including box dye, henna, or professional services
- Your current hair care routine including products, washing frequency, and styling methods
- Any hair health concerns like breakage, dryness, or previous damage
- Realistic expectations about maintenance commitment you’re willing to make
- Reference photos showing both color and curl styles you admire
38. Cost Considerations for Highlighted Curly Hair
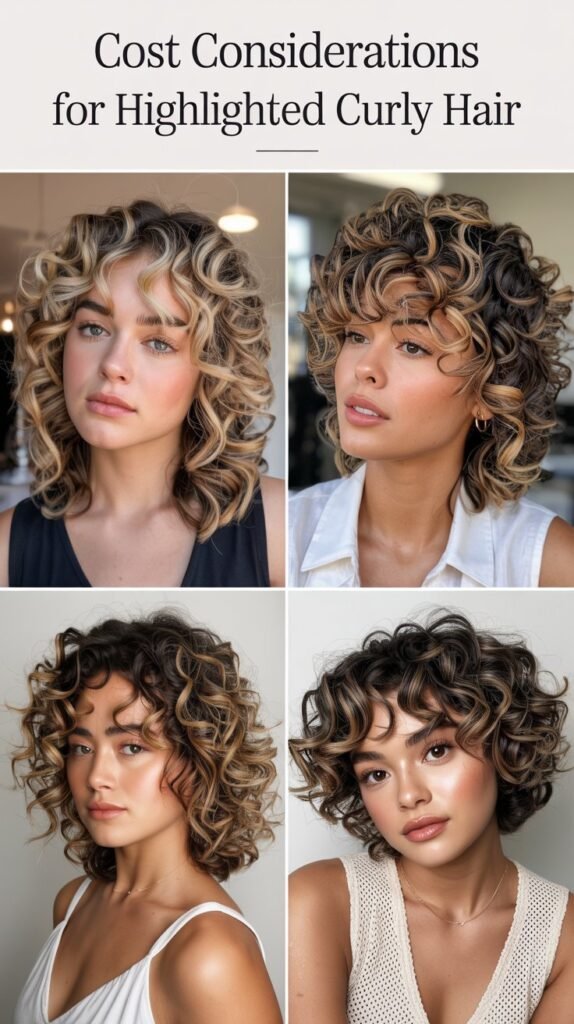
Cost considerations for highlighted curly hair extend beyond the initial service to include ongoing maintenance, specialized products, and additional treatments that preserve your investment.
Understanding the full financial commitment helps you budget appropriately and avoid surprises.
The true cost includes both salon services and at-home care products that maintain results.
Initial Highlighting Service Costs:
- Balayage highlights: $200-350 depending on length and salon location
- Traditional foil highlights: $150-300 with curl-specialist rates typically higher
- Color correction: $250-500+ if transitioning from previous color issues
Ongoing Maintenance Costs:
- Touch-up appointments every 8-12 weeks: $150-300 per visit
- Glossing treatments every 4-6 weeks: $50-100 per session
- Deep conditioning treatments: $30-75 per professional treatment or $15-40 for at-home products monthly
Product Investment:
- Color-safe shampoo and conditioner: $25-60 per set lasting 6-8 weeks
- Purple or toning shampoo: $15-35 per bottle lasting 8-12 weeks
- Deep conditioner: $20-50 per jar lasting 2-3 months
- Styling products (gel, mousse, leave-in): $15-40 each, various replacement schedules
39. Realistic Timeline from Dark Brown to Caramel
Realistic timeline from dark brown to caramel depends on your starting color, desired caramel intensity, and hair health, with dramatic transformations often requiring 6-12 months of gradual lightening sessions.
Rushing the process risks severe damage that destroys your curl pattern. Understanding realistic timelines prevents disappointment and allows proper planning for your color journey.
Session-by-Session Typical Timeline:
Session 1 (Week 0):
- Initial consultation and strand test
- First highlighting session achieving subtle caramel dimension
- Hair likely lifts to golden brown rather than true caramel initially
Session 2 (Week 8-10):
- Additional highlights between initial placements
- Toning to refine color and remove brassiness
- More visible caramel dimension developing
Session 3 (Week 16-20):
- Further lightening of existing highlights
- Possible addition of new highlighted sections
- True caramel tones becoming evident
Session 4+ (Week 24+):
- Final refinements to achieve desired saturation
- Comprehensive toning for perfect caramel shade
- Maintenance schedule established
- Virgin dark brown hair lightens more predictably than previously colored hair which may require additional sessions.
- Each lightening session must be followed by adequate recovery time of at least 6-8 weeks to prevent cumulative damage.
- Hair health assessments before each session ensure your curls can handle continued processing without compromising integrity.
40. Managing Expectations with Your Colorist

Managing expectations with your colorist involves honest conversations about what’s achievable given your hair’s current condition, history, and the laws of color chemistry that cannot be bypassed.
Unrealistic expectations lead to disappointment or damaged hair from over-processing.
Setting appropriate expectations creates satisfaction with your results and maintains your relationship with your colorist.
- Dark brown hair cannot achieve platinum or very light blonde caramel tones in one session without severe damage to curl structure.
- Previously dyed hair has limitations based on existing color molecules that affect how new highlights will lift and appear.
- Curl shrinkage means highlights may appear less dramatic on coily textures than on loose waves when comparing to reference photos.
- Maintenance commitment required for vivid caramel highlights is significant and some clients underestimate the time and cost involved.
- Reference photos from Instagram often show fresh-from-salon results with professional styling that don’t represent everyday appearance.
- The condition of your hair might mean your colorist recommends fewer highlights or multiple sessions when you wanted immediate transformation.
41. Fixing Brassy Caramel Highlights at Home

Fixing brassy caramel highlights at home addresses the orange or yellow tones that develop as highlights fade and oxidize, using accessible products and techniques that restore the rich caramel appearance.
Brassiness is a common challenge with caramel highlights on dark brown hair, but several effective at-home solutions exist.
Understanding the cause and correction methods empowers you to maintain professional-looking color between salon visits.
- Purple shampoo neutralizes yellow-orange tones by depositing violet pigments that cancel warm tones on the color wheel.
- Proper purple shampoo technique involves applying to dry hair, leaving for 3-10 minutes depending on brassiness level, then rinsing thoroughly.
- Blue shampoo targets orange tones specifically and works better than purple for deeper caramel shades with intense warmth.
- Toning masks or conditioners provide longer-lasting brass correction than shampoos because they remain on hair longer.
- Over-using purple or blue products can create muddy, ashy, or even purple-tinged results requiring careful monitoring.
- Apple cider vinegar rinses help close the cuticle after toning treatments, sealing in the corrective pigments for longer-lasting results.
42. Color-Depositing Conditioners for Maintenance

Color-depositing conditioners for maintenance gradually refresh your caramel highlights between salon visits by adding small amounts of pigment each time you condition, extending the vibrancy of your color.
These products work differently than purple shampoo by actually depositing color rather than just neutralizing unwanted tones.
Understanding how to incorporate color-depositing conditioners into your routine maintains salon-fresh results.
- Color-depositing conditioners come in various shades from golden caramel to cool champagne allowing you to customize your maintenance.
- These products work best on clean, damp hair where they can penetrate slightly opened cuticles and deposit pigment evenly.
- Application time affects intensity with 3-5 minutes providing subtle refresh and 10-20 minutes delivering more noticeable color.
- Weekly use maintains vibrancy while daily use can potentially over-deposit and create unnatural color intensity.
- These conditioners provide dual benefits of color maintenance and conditioning treatment in a single step.
- Gloves are recommended during application as the pigments can temporarily stain hands and nails.
43. Protein Treatments for Highlighted Curl Strength
Protein treatments for highlighted curl strength repair and reinforce the internal structure of your hair that becomes compromised during the highlighting process, preventing breakage and maintaining curl pattern integrity.
The lightening process removes proteins along with pigment, creating weakness that requires strategic protein replenishment.
Understanding protein treatment types and frequency prevents both under-treatment and protein overload.
- Protein treatments range from light daily leave-ins to intensive reconstructive treatments applied weekly or monthly depending on damage level.
- Signs your highlighted curls need protein include excessive stretching without bounce-back, limp definition, and unusual breakage.
- Light protein treatments contain hydrolyzed proteins that easily penetrate the hair shaft for gentle strengthening.
- Intensive protein treatments use larger protein molecules that coat the shaft and temporarily fill in structural gaps.
- The alternation between protein and moisture treatments prevents the brittle, straw-like texture that indicates protein overload.
- Heat application during protein treatments enhances penetration and bonding to the hair structure for improved results.
44. Moisture-Protein Balance for Color-Treated Hair

Moisture-protein balance for color-treated hair represents the equilibrium between strength and elasticity that keeps highlighted curls healthy, defined, and resilient rather than either brittle or mushy.
Imbalance in either direction creates problems that affect both curl appearance and color longevity.
Understanding how to assess and adjust your moisture-protein balance is fundamental to highlighted curl care.
Signs of Moisture-Protein Imbalance:
Moisture Overload (too soft):
- Hair feels overly soft and mushy when wet
- Curls lose definition quickly and become limp
- Hair stretches excessively without bouncing back
- Difficulty achieving or maintaining styling hold
Protein Overload (too hard):
- Hair feels rough, brittle, and straw-like
- Increased breakage and snapping
- Curls appear stiff and lack natural movement
- Resistance to absorbing moisture products
Achieving Balance:
- Alternate protein treatments with deep moisture treatments on a weekly or bi-weekly schedule
- Listen to your hair’s feedback by performing regular stretch tests to assess elasticity
- Adjust treatment frequency based on seasonal changes, styling practices, and hair behavior
- Use products with both light proteins and humectants for daily maintenance of balance
- Consider your curl type as finer textures need less protein while coarser curls benefit from more
45. Porosity Management After Highlighting
Porosity management after highlighting addresses the increased porosity that results from the lightening process, which causes highlighted sections to absorb and release moisture more quickly than your natural dark brown sections.
Understanding porosity and how to manage it prevents the dryness, frizz, and color fading that plague highlighted curls.
Strategic porosity management maintains consistent curl behavior throughout your hair.
- The float test determines porosity by placing clean hair strands in water: high porosity hair sinks quickly while low porosity floats.
- Highlighted sections always have higher porosity than virgin hair due to lifted cuticle layers from chemical processing.
- High porosity requires heavier moisturizers, butters, and oils that can penetrate and remain in the hair shaft.
- Sealing techniques using oils after water-based products help trap moisture in high-porosity highlighted sections.
- Acidic rinses with apple cider vinegar or pH-balancing products help close lifted cuticles and reduce porosity temporarily.
- Layering products from lightest to heaviest on high-porosity sections ensures adequate moisture retention throughout the day.
46. Styling Techniques That Showcase Highlights

Styling techniques that showcase highlights strategically position your caramel-toned sections where light can hit them, maximizing the visual impact of your color investment through curl arrangement and finishing methods.
Certain styling approaches hide highlights while others make them pop, affecting how dynamic and dimensional your hair appears.
Learning highlight-enhancing styling techniques ensures your color always looks its best.
- Side parts expose more of the highlighted crown area than center parts, creating greater color visibility from the front.
- Volume at the root lifts highlighted sections away from the scalp where shadows diminish their impact.
- Forward-swept styles bring face-framing highlights into prominent viewing position rather than tucking them behind ears.
- Layered haircuts allow interior highlights to peek through rather than hiding beneath surface layers.
- Finger-coiling the highlighted sections creates more defined individual curls that catch light from multiple angles.
- Strategic clipping while drying encourages root lift that prevents highlights from flattening against the scalp where they become less visible.
47. Half-Up Styles That Feature Caramel Tones

Half-up styles that feature caramel tones combine the practical benefits of hair off your face with intentional color display that showcases your highlights from multiple angles simultaneously.
These versatile styles work for casual daily wear or dressed-up occasions while ensuring your color investment remains visible.
Understanding which half-up variations best display highlights maximizes the impact of your caramel tones.
- High half-up buns concentrate highlighted crown area into a focal point while letting lower highlighted layers flow freely.
- Twisted half-up styles showcase highlights through the twisted sections where lighter tones create ribbon effects.
- Side-swept half-up arrangements intentionally position face-framing highlights for maximum visibility.
- Braided crown styles display highlights throughout the braid’s structure while leaving lower layers loose to show dimension.
- The height of your half-up placement affects which highlighted sections are featured versus which remain in the hanging portion.
- Textured, messy half-up styles create more surface area for light to catch highlighted sections than sleek pulled-back versions.
48. Updos and Protective Styles with Visible Highlights

Updos and protective styles with visible highlights require strategic planning to ensure your caramel tones remain displayed rather than hidden within the style structure.
While protective styling benefits hair health, it can mask your color investment if not executed thoughtfully.
Learning to incorporate highlight visibility into protective styles ensures your color remains showcased even in practical hairstyles.
- Loose, textured buns allow highlighted pieces to peek through rather than smoothing all color into uniform structure.
- Strategically leaving highlighted face-framing pieces out of updos maintains color visibility while achieving the updo’s purpose.
- Chunky twists and braids showcase highlights running through them better than tiny braids that obscure color.
- Crown placement for buns and top knots features highlighted crown area as the style’s focal point.
- Two-toned effects in braided styles intentionally alternate darker and lighter sections for maximum dimensional impact.
- Low updos can position the highlighted perimeter around the face while securing crown area for practical wear.
49. Natural Texture Versus Stretched Styling

Natural texture versus stretched styling creates different levels of highlight visibility with shrunken curls often hiding caramel tones within their dense structure while stretched styles display more length and color distribution.
Understanding how curl manipulation affects color visibility helps you choose styling methods that align with your goals for any particular day.
Neither approach is superior—each offers distinct aesthetic benefits.
- Natural shrunken curls create a halo effect where highlights primarily show at the crown and perimeter edges.
- Stretched styles like twist-outs, braid-outs, and blow-outs display highlights throughout the hair’s entire length.
- The same highlighting placement appears dramatically different depending on whether hair is worn in its natural versus stretched state.
- Combination approaches like partial stretching at the roots while leaving ends natural can optimize highlight visibility.
- Some curl types show highlights beautifully in natural state (looser types) while others require stretching for color to be visible (tighter coils).
- Temporary stretching methods like banding or African threading display highlights without heat damage concerns.
50. Photography Tips for Showcasing Your Highlights

Photography tips for showcasing your highlights ensure your caramel tones appear vibrant and dimensional in photos rather than washed out or invisible, maximizing your ability to capture and share your beautiful color.
Lighting, angles, and background choices dramatically affect how highlights photograph. Understanding photography basics helps you document your color journey and share your style inspiration.
- Natural outdoor lighting in golden hour (hour after sunrise or before sunset) creates the most flattering highlight visibility without harsh shadows.
- Positioning yourself with light source behind or beside you creates backlighting that makes caramel tones glow.
- Dark or neutral backgrounds provide contrast that makes both your dark brown base and caramel highlights pop rather than blending together.
- Indoor photography near windows with sheer curtains diffuses harsh sunlight while providing adequate brightness for highlight visibility.
- Overhead indoor lighting creates unflattering shadows that can hide highlights and create uneven color appearance in photos.
- Movement shots where hair is flipped or styled mid-motion capture highlights catching light from multiple angles simultaneously.
- Close-up shots showcase individual highlighted curl definition while full-length photos display overall color distribution and balance.
51. Seasonal Color Refresh Strategies
Seasonal color refresh strategies adjust your caramel highlights throughout the year to maintain vibrancy despite changing environmental conditions while also allowing you to evolve your look with seasonal trends.
Strategic refresh timing and technique selection keep your color looking intentional and fresh rather than faded or grown-out.
Planning refreshes around seasonal changes optimizes both appearance and budget.
Seasonal Refresh Timeline:
Spring (March-May):
- Brighten caramel tones after winter dullness with glossing treatments
- Add additional face-framing highlights for fresh, renewed appearance
- Focus on removing winter buildup with clarifying treatments before color refresh
Summer (June-August):
- Reinforce UV protection with toning that adds depth to prevent sun fading
- Consider slightly deeper caramel tones at roots to minimize maintenance during vacation season
- Schedule refresh before major summer events or vacations for peak appearance
Fall (September-November):
- Deepen caramel tones with warmer, richer shades that complement autumn wardrobes
- Add lowlights to create more dimensional, less contrasted appearance for cooler months
- Address any summer sun damage with intensive conditioning before fall color service
Winter (December-February):
- Maintain existing highlights rather than adding new ones to minimize cold-weather damage
- Focus on glossing and toning to preserve color without additional processing
- Deep conditioning treatments take priority over color to combat winter dryness
52. Budget-Friendly Highlight Maintenance Tips

Budget-friendly highlight maintenance tips extend the life and vibrancy of your caramel highlights without frequent expensive salon visits through strategic at-home care, product selection, and smart timing of professional services.
Quality highlighted curls don’t require unlimited funds with the right knowledge and discipline.
These strategies maintain professional results while respecting financial constraints.
- Drugstore purple shampoos perform nearly as well as salon brands at a fraction of the cost for maintaining brass-free caramel tones.
- DIY gloss treatments using demi-permanent color from beauty supply stores cost $15-25 versus $75-100 for salon glossing.
- Extending time between professional touch-ups from 8 weeks to 12 weeks saves hundreds annually without significant appearance compromise.
- Root shadow application at initial highlighting eliminates need for frequent root touch-ups as grow-out appears intentional.
- Rotating between expensive and affordable hair care products maintains adequate care without breaking the budget on every purchase.
- DIY deep conditioning treatments using kitchen ingredients (avocado, honey, coconut oil) replace some professional conditioning needs.
- Loyalty programs and new client discounts at salons reduce professional service costs significantly when used strategically.
53. Transitioning Highlights as You Age

Transitioning highlights as you age involves adapting your caramel placement, intensity, and maintenance routine to accommodate changing hair texture, increasing gray coverage needs, and evolving personal style preferences.
Hair naturally changes with age in thickness, texture, and growth rate, affecting how highlights look and what maintenance they require.
Strategic highlight evolution keeps your look current and flattering through different life stages.
- More generous highlight placement in later years creates easier gray blending as the percentage of gray hair increases naturally.
- Softer, more blended caramel tones replace high-contrast placement as mature skin benefits from gentler transitions.
- The shift toward lower-maintenance color becomes practical as hair texture changes and grows more slowly with age.
- Warmer caramel tones often become more flattering as skin loses some of its natural warmth and benefits from color that adds glow.
- Thinning hair texture common with age shows highlights more prominently, requiring adjustment in placement density.
- The frequency of highlighting may decrease as hair becomes more fragile and requires gentler chemical processing.
54. Highlight Removal or Color Correction Options
Highlight removal or color correction options address situations where caramel highlights didn’t turn out as desired, have become damaged, or no longer suit your style, offering paths back to your natural dark brown or toward a different color direction.
Understanding correction options prevents making hasty decisions that cause additional damage.
Professional assessment determines the safest correction path for your specific situation.
- Color filling with darker demi-permanent dye brings highlighted sections closer to your natural dark brown without harsh chemicals.
- Lowlights strategically placed among existing highlights create blending that makes too-light caramels appear more natural.
- Color removal products strip lightened pigment but can be harsh on already-compromised curl structure requiring careful consideration.
- Growing out and trimming remains the gentlest option though it requires patience spanning 6-18 months depending on hair length.
- Glazes in darker shades temporarily tone down overly bright highlights while you decide on permanent correction approach.
- Professional color correction costs significantly more than initial highlighting but prevents further damage from DIY attempts.
55. Combining Caramel Highlights with Other Color Techniques

Combining caramel highlights with other color techniques creates complex, multidimensional results that elevate beyond simple highlighting through strategic use of lowlights, babylights, color melting, or contrasting tones.
Advanced color combinations require skilled colorists but deliver unparalleled depth and richness.
Understanding combination possibilities expands your color options beyond basic highlighting.
- Lowlights in darker chocolate or espresso tones added alongside caramel highlights create superior dimension than highlights alone.
- Color melting blends multiple shades seamlessly from dark roots through caramel mid-lengths to lighter honey ends.
- Accent pieces in copper or auburn add warmth that makes caramel highlights appear richer and more complex.
- Ribbons of both lighter and darker tones throughout curls create a lived-in, naturally multitonal appearance.
- Shadow rooting combined with caramel balayage delivers low-maintenance color with maximum dimension.
- Teasy lights mixed with traditional foiling creates varied saturation levels for natural-looking depth.
56. Caramel Highlights for Different Face Shapes
Caramel highlights for different face shapes require strategic placement that enhances your natural features while creating balance and proportion through color positioning rather than just random highlight distribution.
Understanding face-flattering placement ensures your highlights work with your facial structure.
Customized placement transforms highlighting from simple color to a complete framing technique.
Face Shape-Specific Placement:
Round Faces:
- Vertical highlight placement creates lengthening illusion
- Concentrate color around crown for height
- Avoid heavy face-framing that adds width at cheeks
Oval Faces:
- Most versatile face shape works with any placement
- Focus on personal preference rather than corrective placement
- Balance highlights evenly throughout for harmonious appearance
Square Faces:
- Soften angular jaw with face-framing caramel pieces
- Diagonal placement creates softening movement
- Avoid blunt, horizontal placement that emphasizes angles
Heart Faces:
- Balance wider forehead with highlights concentrated lower
- Add dimension around chin and jawline
- Keep crown highlighting moderate to avoid top-heavy appearance
Long Faces:
- Horizontal placement creates width illusion
- Concentrate highlights at sides rather than crown to avoid elongating
- Face-framing pieces add necessary width
57. Maintaining Curl Pattern During Highlighting Process

Maintaining curl pattern during highlighting process requires protective measures, proper technique, and strategic aftercare that preserves your natural texture despite the chemical processing inherent in lightening hair.
The highlighting process can loosen curl pattern if not executed carefully with curl health in mind.
Understanding protective strategies ensures your curls bounce back beautifully after color.
- Wetting hair minimally during application prevents excessive curl manipulation that can temporarily loosen pattern.
- Bond-building treatments added to lightener protect disulfide bonds responsible for maintaining curl structure.
- Lower volume developers (20 instead of 30 or 40) with longer processing time achieve lift more gently though slowly.
- Avoiding overlapping lightener onto previously highlighted sections prevents cumulative damage to curl pattern.
- Deep conditioning immediately after highlighting replenishes moisture that supports curl reformation.
- The first wash after highlighting should include protein treatment to reinforce weakened curl structure before it fully dries.
- Some temporary curl loosening immediately after highlighting typically recovers within 2-3 wash cycles with proper care.
58. Common Highlighting Mistakes to Avoid

Common highlighting mistakes to avoid include rushing the process, using incorrect products, over-processing, poor placement decisions, and neglecting aftercare—all of which compromise both color results and curl health.
Learning from others’ mistakes prevents you from experiencing the same damaging outcomes.
Awareness of common pitfalls helps you make informed decisions throughout your highlighting journey.
Frequent Mistakes and Their Prevention:
- Over-processing to achieve immediate results: Damages curl pattern; instead, plan for multiple sessions
- Using box dye highlights at home: Creates unpredictable results; invest in professional services
- Skipping strand tests: Leads to unexpected color or damage; always test first
- Neglecting purple shampoo: Allows brassiness to develop; incorporate weekly toning
- Excessive heat styling after highlighting: Compounds damage; embrace air-drying and heat-free methods
- Insufficient deep conditioning: Causes dryness and breakage; maintain weekly intensive moisture treatments
- Highlighting over henna or metallic dyes: Creates chemical reactions and unpredictable color; wait for complete growth-out first
59. Long-Term Hair Health with Regular Highlighting
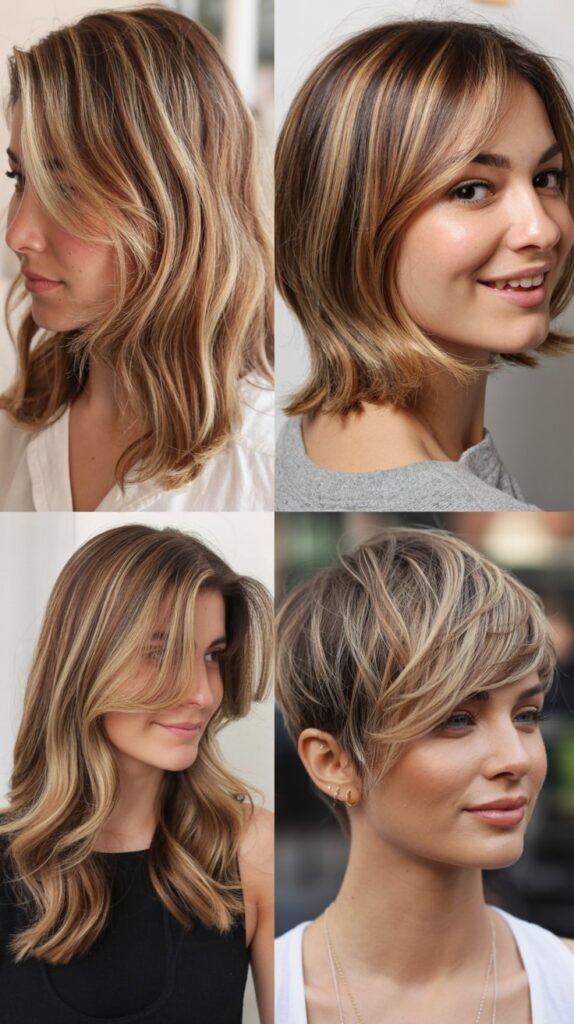
Long-term hair health with regular highlighting requires balancing your desire for maintained color with your hair’s ongoing structural integrity through strategic spacing of services, intensive care routines, and periodic highlighting breaks.
Sustainable highlighting practices ensure you can enjoy caramel tones for years without accumulating irreversible damage.
Planning for the long term prevents the regretful day when you realize your curls are too damaged to continue coloring.
- Scheduling touch-ups no more frequently than every 10-12 weeks gives hair adequate recovery time between chemical processes.
- Annual highlighting breaks of 3-6 months allow comprehensive restoration without compromising your overall color story.
- Alternating between highlighting new sections and glossing existing color reduces the percentage of hair undergoing chemical processing at any time.
- Regular protein and moisture treatments become non-negotiable rather than occasional luxuries for sustainable highlighting.
- Trimming damaged ends prevents split ends from traveling upward and compromising healthy highlighted sections.
- Listening to your hair’s feedback about excessive dryness, breakage, or pattern loosening guides when to pause highlighting temporarily.
- Professional assessments before each session ensure your hair remains healthy enough to continue highlighting safely.
60. Cultural Considerations in Highlighting Curly Hair
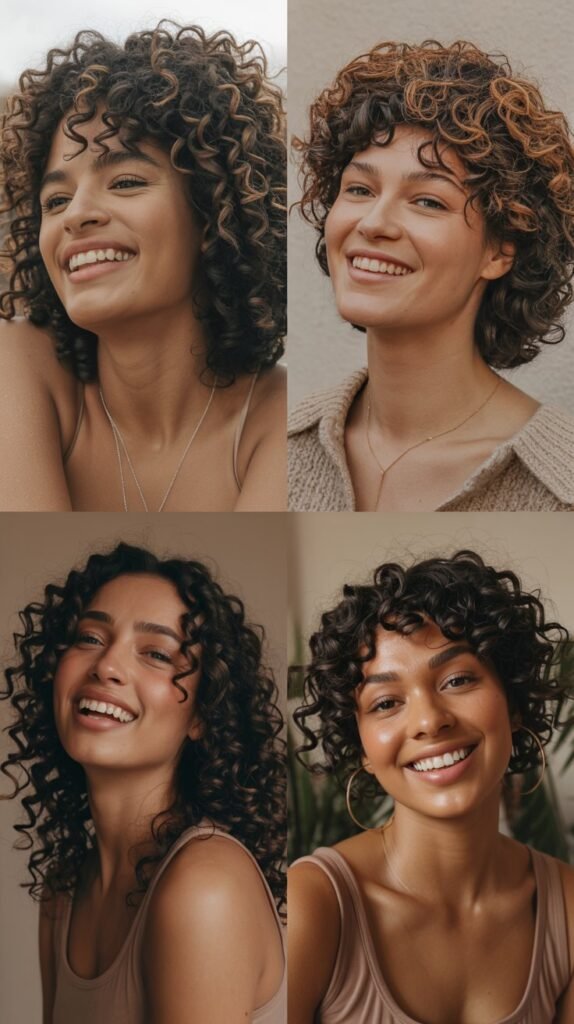
Cultural considerations in highlighting curly hair acknowledge that hair holds cultural significance in many communities and highlighting may carry different meanings, acceptability levels, or practical considerations depending on cultural context.
Respecting cultural perspectives while making personal choices about your appearance creates authenticity.
Understanding various cultural viewpoints enriches your decision-making process.
- Some cultural traditions view natural unaltered hair as most authentic while others embrace color as personal expression.
- Professional environments in certain cultures maintain stricter expectations about “natural” hair appearance than others.
- The history of hair discrimination affects how visible color changes may be perceived or received in professional or social settings.
- Protective styling traditions common in some cultures must be adapted when incorporating highlighting for color visibility.
- Family or community opinions about hair modification vary widely and may influence personal comfort with highlighting decisions.
- Religious considerations in some cultures affect acceptability or appropriateness of hair coloring practices.
- The celebration of natural texture has grown alongside acceptance of color enhancement as compatible rather than contradictory choices.
61. Inspiration Sources for Your Highlight Journey

Inspiration sources for your highlight journey provide visual references, technical information, and creative ideas that help you articulate your caramel highlight vision to your colorist while setting realistic expectations.
Quality inspiration sources distinguish between filtered, edited photos and achievable real-world results.
Curating a collection of inspiration images guides your color journey productively.
- Instagram hashtags like #caramelhighlights, #curlyhighlights, and #balayagecurls provide thousands of real-world examples from various curl types.
- Pinterest boards allow you to collect and organize multiple inspiration photos showing different aspects of your desired look.
- Your colorist’s portfolio demonstrates their specific skill level with curly hair highlighting and realistic achievable results.
- Curl-focused hair blogs and YouTube channels provide educational content alongside inspirational imagery explaining techniques.
- Celebrity examples offer aspirational ideas though professional styling and lighting often create unrealistic everyday expectations.
- Before-and-after photos from your colorist’s actual clients show what results look like immediately after service and during grow-out phases.
- Saving multiple angles and lighting conditions of the same style helps your colorist understand what you love about the look.
62. Future Trends in Curly Hair Highlighting
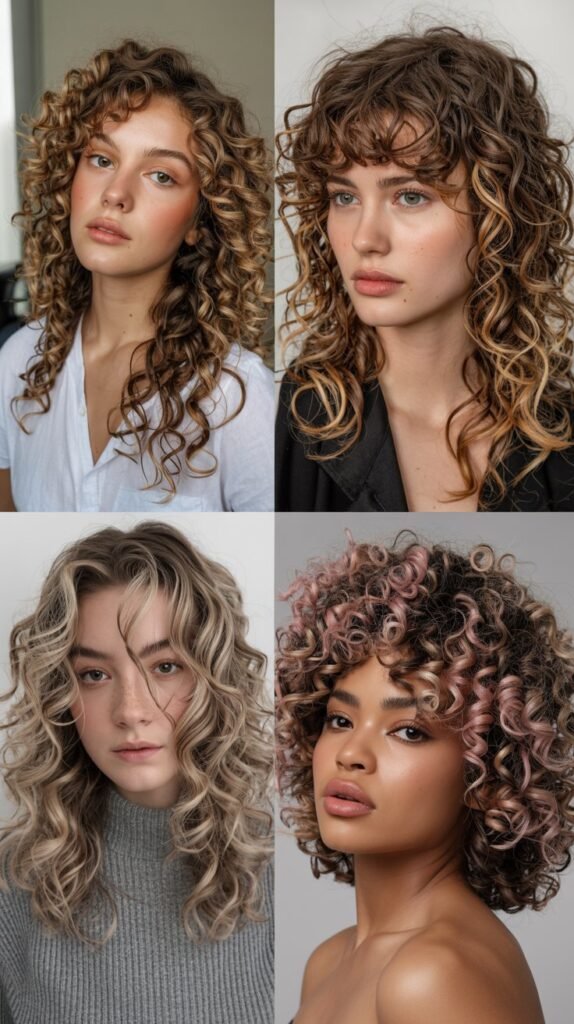
Future trends in curly hair highlighting evolve as techniques improve, color preferences shift, and the natural hair movement continues influencing how people approach color on textured hair.
Staying informed about emerging trends helps you decide whether to adopt new techniques or maintain classic approaches.
Understanding trend cycles prevents committing to fads that may not suit your personal style long-term.
- Lived-in, low-maintenance color continues gaining popularity as busy lifestyles demand less frequent salon visits for upkeep.
- Customized formulas using hair strand analysis technology create perfectly matched caramel tones for individual complexions.
- Sustainable and less-damaging highlighting methods including plant-based lighteners are emerging in environmentally conscious salons.
- Bold, unconventional placements that intentionally break traditional highlighting rules create artistic, fashion-forward looks.
- Multi-chromatic caramels incorporating rose gold, copper, and champagne undertones add complexity beyond single-tone caramel.
- Embracing natural gray as part of the highlighting palette creates intentional silver-caramel combinations on mature hair.
- The continuing celebration of natural texture means highlighted curls are photographed and showcased in their authentic state rather than straightened for color display.
63. Making the Final Decision: Is Highlighting Right for You?
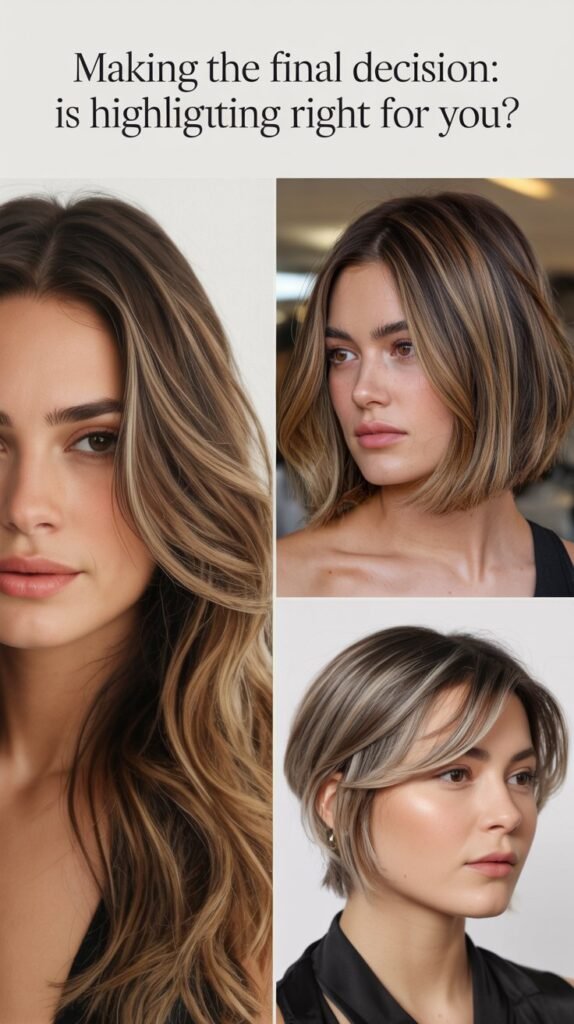
Making the final decision about whether highlighting is right for you involves weighing the benefits of dimensional caramel color against the commitment, cost, maintenance, and potential hair health implications.
Not everyone needs or should get highlights despite their popularity.
Honest self-assessment ensures you make the choice that aligns with your lifestyle, values, and hair goals.
Questions to Ask Yourself Before Highlighting:
- Am I willing to invest 2-4 hours every 8-12 weeks for maintenance appointments?
- Can I budget $150-350 per salon visit plus $50-100 monthly for specialized products?
- Is my current hair health good enough to withstand chemical processing without significant damage?
- Am I prepared to modify my hair care routine to include color-safe products and additional treatments?
- Do I have realistic expectations about what color results are achievable on my specific hair?
- Am I choosing highlighting because I genuinely want it or because of external pressure or trends?
- Will highlighted hair work within my professional environment and personal lifestyle?
Indicators Highlighting May Be Right for You:
- You’re excited about dimensional color and ready to maintain it
- Your hair is in good health with strong curl pattern
- You have access to a skilled curl-specialist colorist
- Your budget accommodates both initial and ongoing costs
- You understand and accept the maintenance commitment
Indicators to Reconsider or Postpone:
- Your hair is currently damaged, breaking, or struggling with health issues
- Budget constraints make ongoing maintenance stressful rather than enjoyable
- You prefer absolutely minimal hair maintenance and styling effort
- You’re uncertain about committing to regular salon appointments
- Your workplace or personal situation makes visible color problematic
Conclusion
The journey through these 63 Curl Defining Dark Brown Curly Hair With Caramel Highlights That Pop demonstrates that achieving and maintaining dimensional caramel tones on natural curls requires knowledge, commitment, and strategic care that extends far beyond the initial coloring appointment.
From understanding the various highlighting techniques like balayage, babylights, and money piece placements to mastering the maintenance routines involving purple shampoo, deep conditioning, and protein treatments, every element works together to create and preserve that stunning contrast between rich chocolate brown and sun-kissed caramel.
Whether you’re drawn to subtle honey-toned dimension or bold ribbons of golden caramel, the key to success lies in choosing a curl-specialist colorist, setting realistic expectations, committing to proper aftercare, and making decisions that honor both your aesthetic vision and your hair’s health.
Your curls deserve color that celebrates their natural texture rather than compromising it, and with the comprehensive insights shared throughout this guide, you’re now equipped to embark on your caramel highlighting journey with confidence, achieving that perfect pop of warmth that makes your dark brown curls absolutely unforgettable.