Have you ever walked out of a salon with perfectly layered hair and wondered if you could recreate that magic at home? The truth is, achieving a professional-looking layered haircut in your own bathroom is not only possible but surprisingly simple when you know the right techniques.
Most people assume that layering requires years of training and expensive tools, but the reality is far different.
With the Secret Technique! DIY Layered Haircut That Looks Professionally Done (Fool Everyone!), you’re about to discover methods that hairstylists have used for decades, adapted perfectly for home use.
This comprehensive guide will walk you through everything from understanding what layers actually do for your hair to mastering cutting angles, sectioning techniques, and blending methods that create seamless, salon-quality results.
Whether you have long flowing locks, a medium-length bob, or shorter hair that needs dimension, you’ll learn how to customize layers for your specific hair type and face shape.
We’ll cover the essential tools you need (most of which you probably already own), common mistakes that make DIY haircuts look homemade, and professional tricks for fixing any mishaps along the way.
By the end of this article, you’ll have the confidence and knowledge to transform your hair with layers that look so good, everyone will assume you just left an expensive salon.
1. Understanding Layers and Why They Transform Your Hair
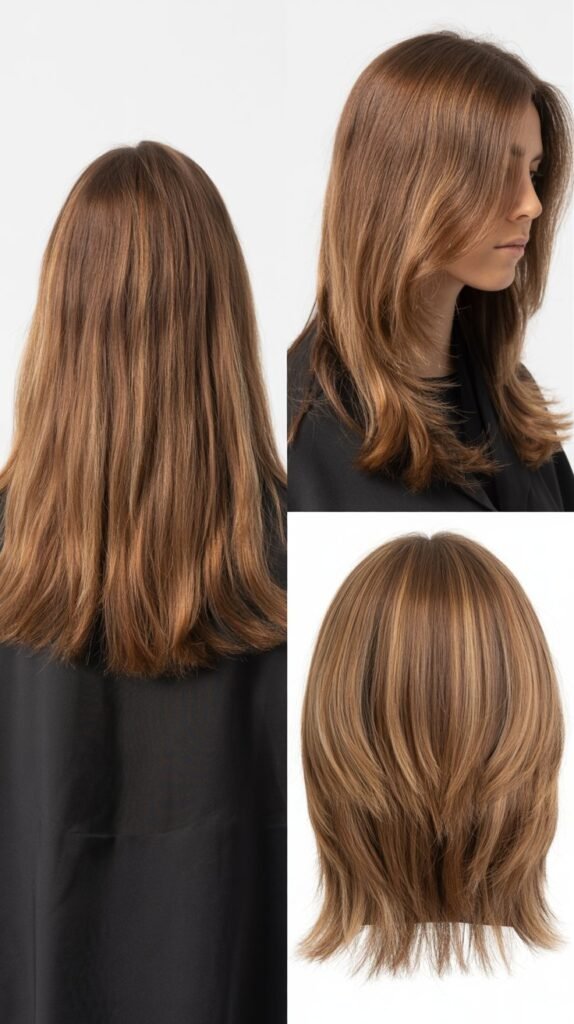
Before you pick up scissors, understanding what layers actually do will help you cut with purpose and achieve results that look intentional rather than accidental.
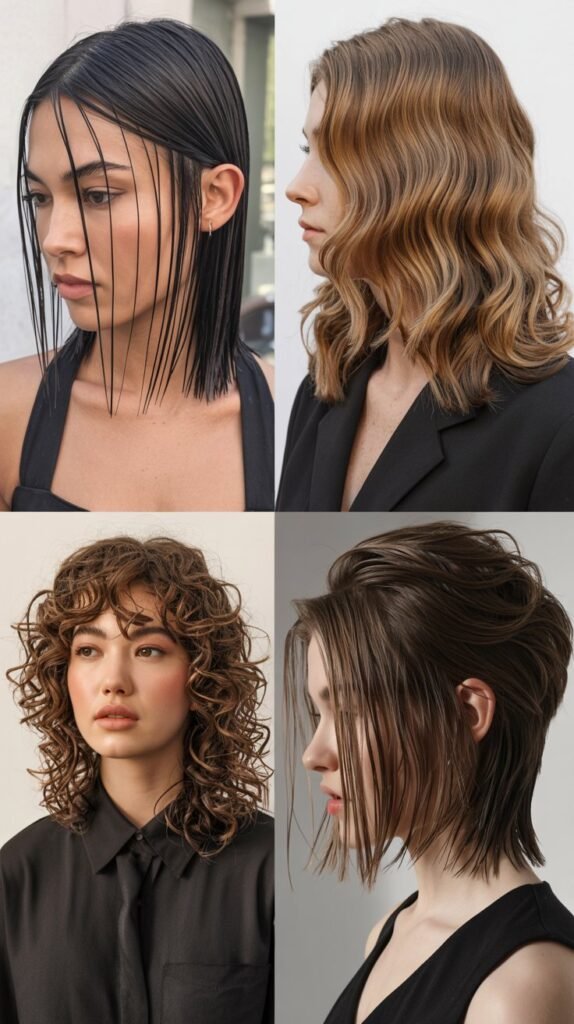
Layers are essentially different lengths of hair strategically cut throughout your head to create movement, remove weight, and add dimension that makes hair appear fuller and more dynamic.
- Layers work by creating multiple levels of hair length that stack upon each other, with shorter pieces on top and longer pieces underneath.
- The primary benefit of layers is removing bulk from thick hair while simultaneously adding volume and body to fine or thin hair.
- Well-executed layers frame your face naturally, drawing attention to your best features while softening harsh angles or balancing proportions.
- Layers create internal texture that allows hair to move freely rather than hanging in one heavy, lifeless sheet.
- Different layer lengths serve different purposes: short layers add volume at the crown, medium layers create body throughout, and long layers add gentle movement to the ends.
- Face-framing layers specifically target the front sections of hair to complement your facial structure and enhance your natural beauty.
- Layers reduce styling time because they create natural shape and movement that requires less manipulation with heat tools.
- The placement of layers determines whether your hair looks edgy and modern or soft and romantic, making them incredibly versatile.
2. Essential Tools You Actually Need for DIY Layering
The difference between a choppy disaster and a professional-looking layered cut often comes down to using the right tools.
While you don’t need an entire salon’s worth of equipment, investing in a few key items will dramatically improve your results and make the cutting process much easier.
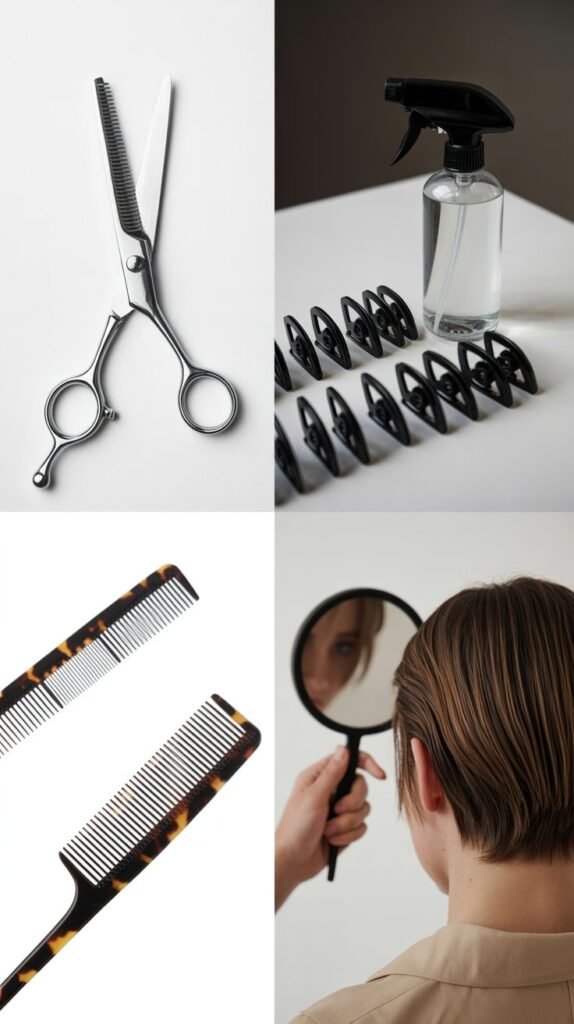
- Professional hair-cutting shears (6-7 inches long) are absolutely non-negotiable because regular scissors crush hair strands instead of cleanly slicing through them, creating split ends and uneven cuts.
- Sharp shears make the difference between clean, precise cuts and ragged edges that look homemade and damaged.
- A spray bottle filled with clean water keeps hair damp throughout the cutting process, which is crucial for maintaining control and seeing true lengths.
- Sectioning clips (at least 6-8) allow you to divide hair into manageable sections and keep hair you’re not cutting completely out of the way.
- A fine-tooth comb helps create clean parts and ensures you’re working with smooth, tangle-free hair that won’t cause uneven cuts.
- A tail comb (a comb with a long, pointed handle) is perfect for creating precise sections and subsections with professional accuracy.
- A handheld mirror becomes your second set of eyes, allowing you to check the back and sides of your head for symmetry and balance.
- Hair elastics or bands help create the foundational ponytail technique that many DIY layering methods rely on for foolproof results.
- A cape or old towel protects your clothing from hair clippings and makes cleanup significantly easier after you’re finished.
- Good lighting, preferably natural light or bright white bulbs, ensures you can see every strand clearly and avoid mistakes caused by shadows.
3. The Ponytail Method: The Secret Technique for Perfect Layers
This is the game-changing technique that makes professional-looking layers achievable for complete beginners.
The ponytail method uses your head’s natural shape and gravity to create beautifully graduated layers with minimal skill required, and it’s the exact technique many hairstylists use as a foundation for layered cuts.
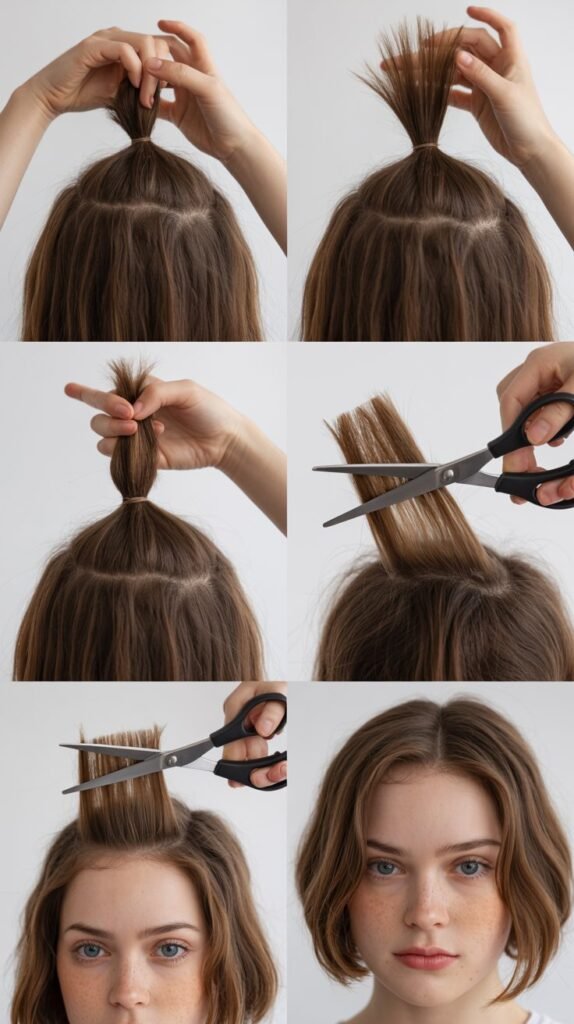
- Brush all your hair thoroughly to remove every tangle, then flip your head upside down to gather hair more easily.
- Create a ponytail at the very top center of your head (the highest point of your skull) and secure it tightly with a hair elastic.
- The position of this ponytail is critical: too far forward creates shorter front layers, too far back creates shorter back layers.
- Flip your head back upright and pull the ponytail straight up toward the ceiling, perpendicular to your head, creating tension.
- Slide your fingers or a second elastic down the ponytail to the point where you want your shortest layer to end.
- Hold the ponytail firmly with one hand while using your other hand to cut straight across just above where your fingers mark the length.
- The angle at which you cut determines your layer intensity: cutting straight across creates subtle layers, cutting at a slight angle creates more dramatic layering.
- When you release the ponytail, the hair naturally falls into graduated layers because the hair from the back of your head was longer in the ponytail than the hair from the top.
- This method works because your head is round, so gathering hair to one central point automatically creates different lengths based on where the hair originates.
- For more conservative layers, cut less hair (perhaps only 1-2 inches); for dramatic layers, you can cut more, but always start conservative since you can always cut more but can’t add length back.
4. Face-Framing Layers That Enhance Your Features
Face-framing layers are the secret weapon that makes any haircut look custom and expensive.
These strategic front pieces draw attention to your eyes and cheekbones while creating a polished, finished look that screams professional styling rather than DIY experimentation.
- Face-framing layers typically begin somewhere between your cheekbone and chin, depending on which features you want to accentuate.
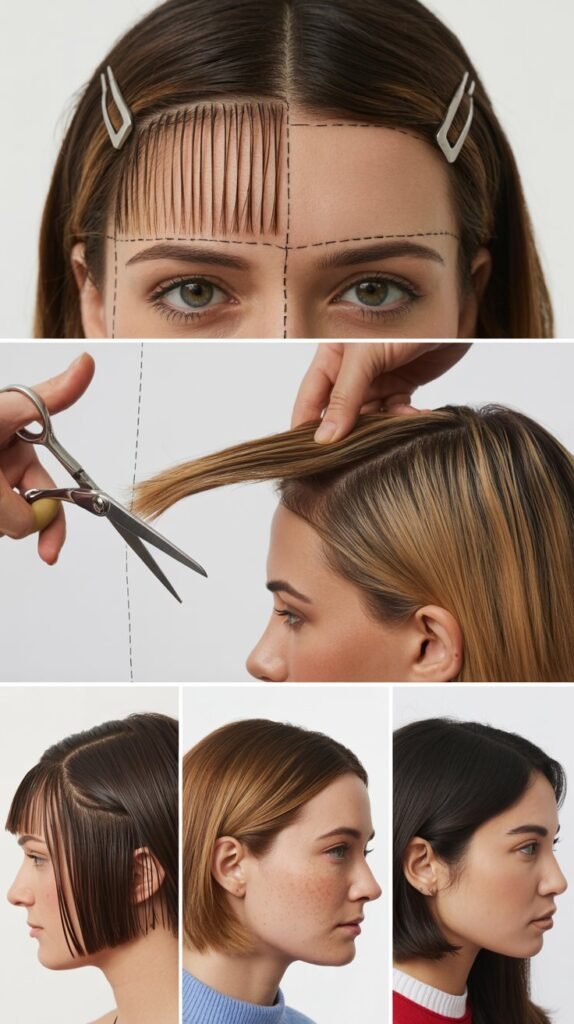
- Start by parting your hair down the middle or in your natural part, then section off a triangular piece of hair at the front on each side.
- These front sections should be about 1-2 inches wide at the hairline and taper back toward your ears in a triangle shape.
- Pull one front section forward and down along your face, holding it with tension between your fingers where you want the shortest point to be.
- Cut at a slight downward angle (called point cutting) rather than straight across to create soft, blended edges that don’t look blunt or harsh.
- The key is cutting while the hair is positioned exactly how it falls naturally on your face, not pulled away from your face or stretched.
- Always cut face-framing layers slightly longer than you think you want because hair bounces up when it dries, especially if you have any natural wave or curl.
- Repeat the exact same process on the opposite side, constantly checking that both sides match in length and angle.
- For round faces, keep face-framing layers longer (starting at chin or below) to create the illusion of length and avoid widening the face.
- For square faces, softer, textured layers starting at the cheekbone help soften angular jawlines.
- For oval faces, you have the most flexibility and can experiment with various lengths from cheekbone to collarbone based on personal preference.
- For heart-shaped faces, layers starting at the chin help balance a wider forehead and draw attention to the lower half of the face.
5. The Vertical Cutting Technique for Seamless Blending

Professional hairstylists rarely cut hair in straight horizontal lines because it creates obvious demarcation lines between layers.
The vertical cutting technique, also called point cutting or slide cutting, is what creates those seamlessly blended layers that look natural and professionally executed rather than choppy and homemade.
- Point cutting means holding your scissors vertically (perpendicular to the hair shaft) and cutting small points into the ends rather than cutting straight across.
- This technique removes weight and creates texture while making layers melt into each other rather than sitting in distinct, separate sections.
- Hold a small section of hair taut between your fingers, then gently snip into the ends with the tips of your scissors pointing upward.
- Make small, quick cuts (about 1/4 to 1/2 inch into the hair) rather than one long cut across.
- The vertical angle softens the cut line and creates feathered ends that blend naturally with the hair above and below.
- Move systematically through all your layers, point cutting the ends of each section to create cohesion throughout the entire haircut.
- This technique is especially important where one layer meets another layer because it disguises the transition point.
- Avoid cutting too deeply into the hair (more than 1/2 inch) as this can create excessive thinning and a stringy appearance.
- Point cutting works best on damp (not soaking wet) hair because you can see how the texture is developing as you cut.
- For thicker hair, you can point cut more aggressively to remove bulk; for finer hair, use this technique more sparingly to maintain density.
6. Customizing Layers for Different Hair Types
Not all hair responds to layers the same way, and understanding your specific hair type is crucial for achieving results that enhance rather than detract from your natural texture.
What works beautifully on straight hair might create a pyramid shape on curly hair, so customization is key to professional-looking results.
- Straight hair shows every cutting mistake clearly, so work slowly and check your progress frequently in multiple mirrors.
- The natural weight and lack of texture in straight hair means layers create the most dramatic movement and dimension.
- Wavy hair benefits from layers that enhance the natural wave pattern, typically starting at or below the chin to maintain density at the top.
- Always account for “shrinkage” with wavy hair by cutting at least one inch longer than your target length since waves contract as they dry.
- Curly hair should ideally be cut when completely dry so you can see the true length and shape of each curl.
- For curly hair, long layers (starting at shoulder length or below) prevent the dreaded triangle or pyramid shape that results from too many short layers.
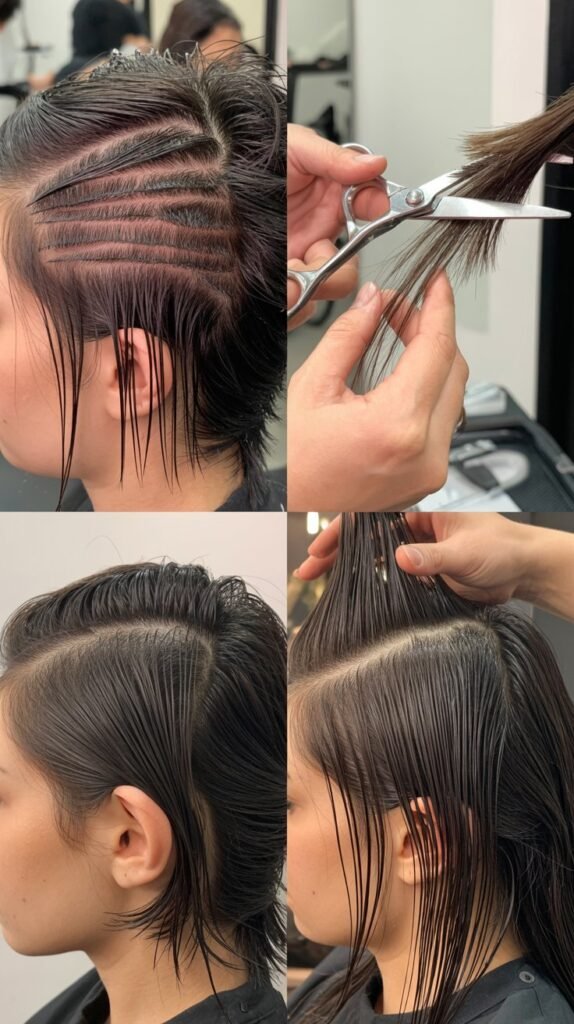
- Thick hair requires more aggressive layering with multiple sections to properly remove bulk and create movement throughout.
- Create at least 4-6 ponytail sections throughout thick hair rather than just one central ponytail for more thorough layering.
- Fine hair needs conservative layering because too many layers reduce overall density and can make hair look thin and wispy.
- For fine hair, focus layers around the face and keep the bulk of the hair relatively one-length to maintain the appearance of fullness.
7. Common Mistakes and How to Fix Them Instantly
Even with perfect technique, mistakes happen, but the good news is that most DIY layering errors have simple fixes that can save your haircut.
Knowing how to troubleshoot problems as they arise separates a disaster from a learning experience that still results in great-looking hair.
- The most common mistake is cutting too much too fast, so always start conservative and work gradually toward your desired length.
- If you cut one section too short, resist the urge to match everything to that shortest piece or you’ll end up with a much shorter overall haircut than intended.
- Instead, blend the too-short section into surrounding hair using the point cutting technique to disguise the length difference.
- Choppy, visible lines between layers usually result from cutting hair in straight horizontal lines rather than using vertical point cutting.
- Fix choppy layers by going back through with scissors held vertically and softening all the blunt edges with small snips into the ends.
- Uneven sides are incredibly common and usually result from not checking both sides simultaneously throughout the cutting process.
- To even out sides, section the front hair on both sides, bring them forward, and cut them together in front of your face where you can see both simultaneously.
- If layers look too heavy or not distinct enough, you likely didn’t remove enough hair in the initial cut.
- Create a second ponytail slightly lower or in a different position and remove another inch to increase layer definition.
- Stringy, over-thinned ends result from too much point cutting or cutting too deeply into the hair shaft.
- Unfortunately, overly thinned hair can only be fixed by trimming off the damaged ends and being more conservative with texturizing techniques next time.
- If your layers create a pyramid or triangle shape (common with curly hair), you need longer layers concentrated more on the bottom sections rather than throughout.
- Always cut less than you think you need because you can always cut more in a second pass, but you cannot add length back once it’s gone.
8. Professional Finishing Touches That Elevate the Results
The difference between a good DIY haircut and one that looks professionally done often comes down to the finishing details.
These final touches take just a few extra minutes but dramatically improve the polish and sophistication of your layered cut.
- After cutting all your layers, wash and completely dry your hair to see the true result since wet hair appears longer and behaves differently than dry hair.
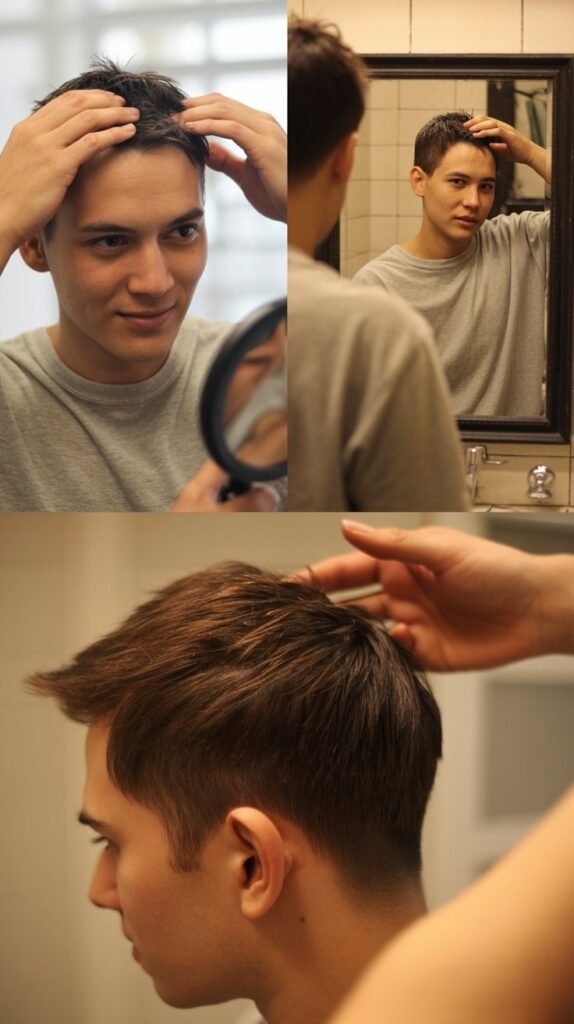
- Once dry, check for any uneven pieces or spots you missed by standing in good lighting and examining your hair from all angles using multiple mirrors.
- Clean up the perimeter (the very ends of your hair) by trimming any straggly pieces that fall below your desired length.
- The perimeter should be slightly beveled (angle-cut) rather than blunt to create a soft, natural-looking edge that appears professionally finished.
- Check your face-framing layers by pulling small sections forward and ensuring both sides are symmetrical in length and angle.
- Run your fingers through your hair repeatedly to identify any pieces that feel longer or stick out awkwardly from the rest.
- Trim these rogue pieces individually rather than cutting new sections, which could create more unevenness.
- Style your hair using your normal routine to see how the layers interact with your natural texture and typical styling methods.
- If any sections appear too heavy or don’t move well when styled, you can go back and do additional point cutting on just those areas.
- Take photos from all angles (front, both sides, and back) so you can objectively assess the results and identify any final adjustments needed.
- Apply a small amount of lightweight styling product or hair oil to the ends to enhance shine and make layers appear more polished and intentional.
- Consider having a trusted friend or family member check the back of your hair since this is the hardest area to see and cut accurately on yourself.
Conclusion
Mastering the Secret Technique! DIY Layered Haircut That Looks Professionally Done (Fool Everyone!) is genuinely achievable when you understand the fundamental principles and techniques that professional hairstylists use every day.
The ponytail method provides a foolproof foundation that works with your head’s natural shape to create beautiful graduated layers without requiring years of training or expensive salon visits.
By customizing your approach based on your specific hair type, incorporating face-framing sections that enhance your best features, and using vertical cutting techniques that create seamless blending, you can achieve results that rival professional cuts.
Remember that the key to success lies in working slowly, cutting conservatively at first, and constantly checking your progress from multiple angles throughout the process.
The finishing touches—proper perimeter cleanup, symmetry checks, and strategic point cutting—transform a good DIY cut into one that genuinely looks professionally executed.
With the right tools, a clear understanding of layering principles, and the confidence to trust the process, you’ll save hundreds of dollars on salon visits while maintaining beautifully layered hair that moves, flows, and frames your face perfectly.
The techniques you’ve learned here aren’t shortcuts or compromises but actual professional methods adapted for home use, which is why they produce results that will genuinely fool everyone into thinking you just stepped out of an upscale salon.
