Remember when achieving salon-worthy hair seemed impossible without professional help? The iconic ’70s shag haircut is making a massive comeback, and here’s the exciting part—you don’t need years of training or expensive salon visits to rock this timeless look.
This retro-chic style that defined an era of carefree confidence is surprisingly simple to recreate in your own bathroom with just a few basic tools and techniques.
Whether you have long flowing locks or a shoulder-length bob, The Effortless ’70s Shag Haircut You Can Master at Home in 15 Minutes is about to become your new signature style.
This comprehensive guide walks you through everything from understanding what makes a shag uniquely flattering to the exact cutting techniques that professionals use, complete with troubleshooting tips for common mistakes.
Get ready to transform your hair and channel your inner rock star without breaking the bank or spending hours in front of the mirror.
1. Understanding the Classic ’70s Shag Haircut
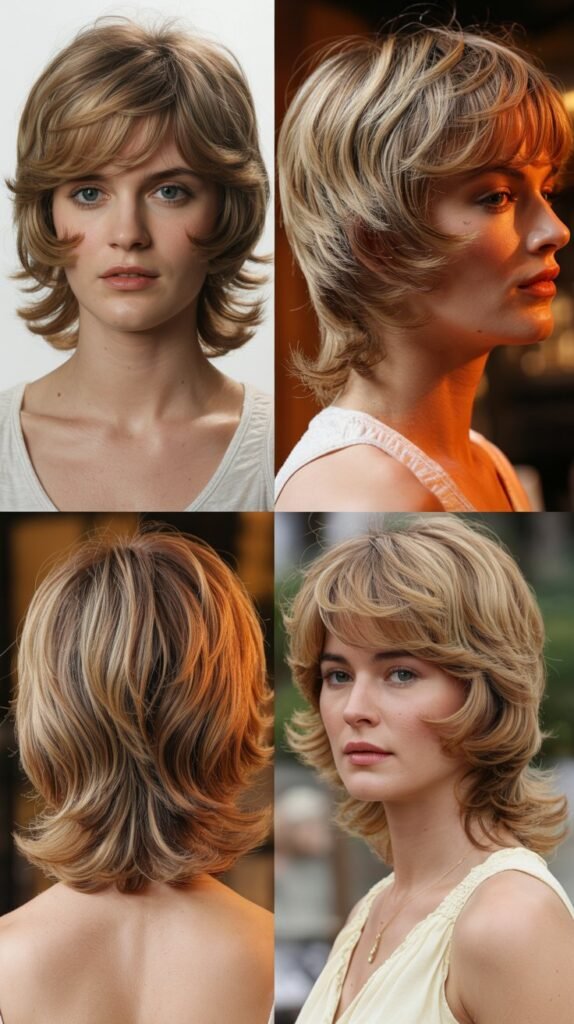
The shag haircut emerged as a revolutionary style during the 1970s, breaking away from the structured, heavily styled looks of previous decades.
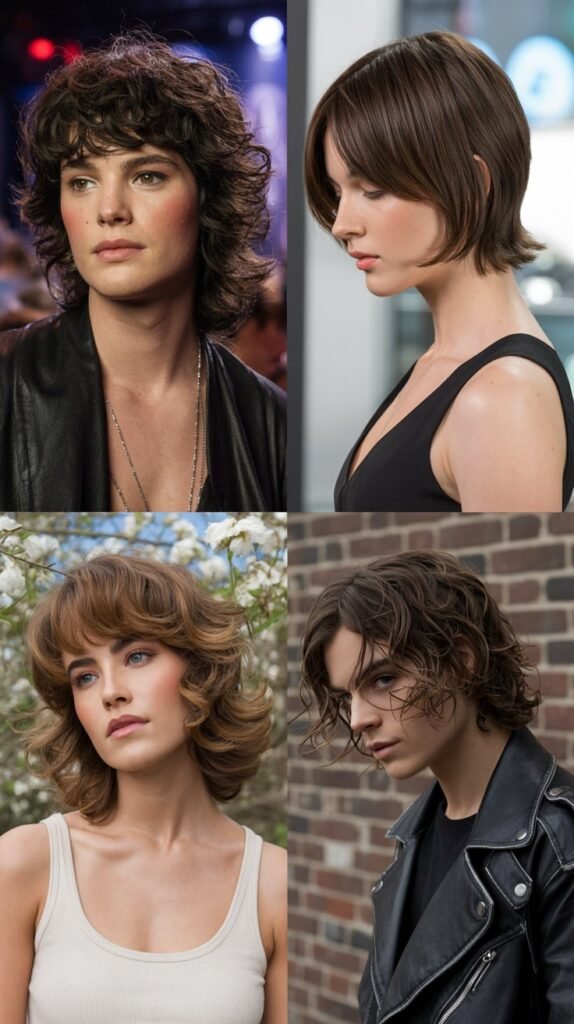
This cut is defined by its choppy layers, feathered ends, and effortlessly tousled appearance that works beautifully with virtually any hair texture.
Key Characteristics:
- The shag features multiple layers throughout the hair that create volume and movement
- Shorter layers frame the face while longer layers cascade down the back and sides
- Feathered ends give the cut a soft, wispy finish rather than blunt edges
- The crown area typically has the shortest layers to create lift and body
- Face-framing pieces are cut to enhance your natural features and bone structure
Why It Works:
- This versatile cut flatters round, oval, square, and heart-shaped faces equally well
- The layered structure removes bulk from thick hair while adding dimension to fine hair
- Natural texture shines through without requiring extensive styling products or heat tools
- The shag grows out gracefully, meaning you won’t need frequent trims to maintain the shape
- It adapts to different lengths from chin-grazing bobs to flowing mid-back styles
2. Essential Tools and Materials You’ll Need
Before you begin cutting, gathering the right tools ensures a smooth process and professional-looking results.
Most of these items are affordable and readily available at beauty supply stores or online retailers.
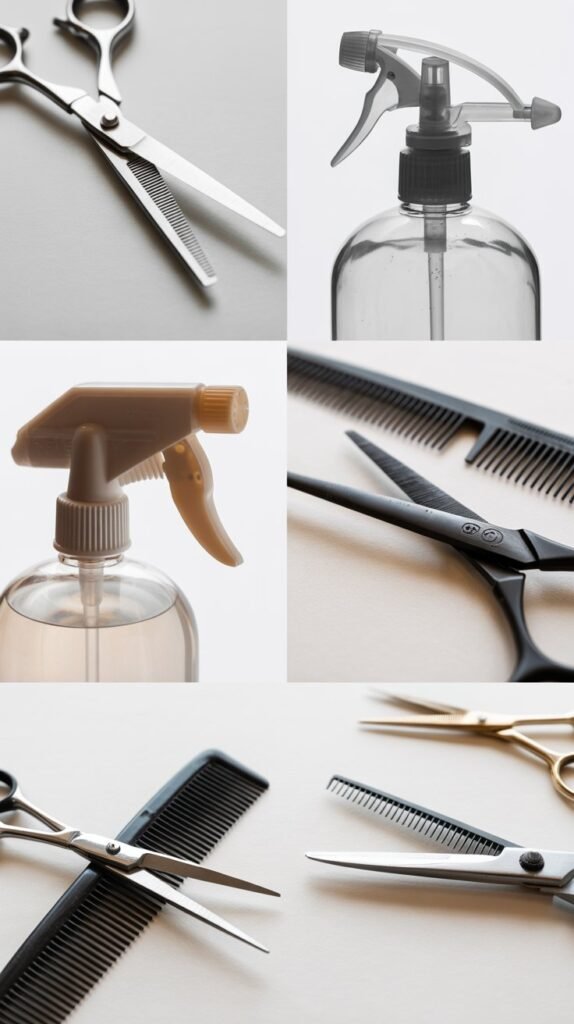
Cutting Tools:
- Professional hair cutting shears with a blade length between 5.5 to 6.5 inches work best for precision
- A fine-toothed comb helps section hair cleanly and guides your cutting angles
- Hair clips or elastics keep sections separated while you work on specific areas
- A spray bottle filled with clean water keeps hair damp throughout the cutting process
- Thinning shears are optional but helpful for softening harsh lines and creating texture
Preparation Items:
- A large mirror positioned where you can see the back of your head using a handheld mirror
- Good lighting from multiple angles prevents shadows that hide uneven sections
- A cape or old towel protects your clothing from hair clippings
- A comfortable chair at the right height allows you to work without straining
- Paper towels or a small broom for easy cleanup after you finish
Styling Products for After:
- Texturizing spray enhances the piecey, separated look characteristic of shags
- Light-hold mousse adds volume without creating stiffness or crunch
- A diffuser attachment for your blow dryer encourages natural wave patterns
- Dry shampoo refreshes the style between washes and adds grit for texture
- A small amount of styling cream tames flyaways while maintaining movement
3. Preparing Your Hair for the Perfect Cut
Proper preparation makes the difference between a choppy disaster and a beautifully blended shag.
Taking time to set up correctly saves frustration and ensures even results throughout your hair.
Washing and Conditioning:
- Cleanse your hair thoroughly to remove all product buildup, oils, and dirt
- Apply conditioner only from mid-lengths to ends to avoid weighing down the roots
- Rinse with cool water to close the hair cuticle and create smoother texture
- Gently squeeze excess water with a microfiber towel rather than rubbing vigorously
- Hair should be damp but not dripping wet when you begin cutting
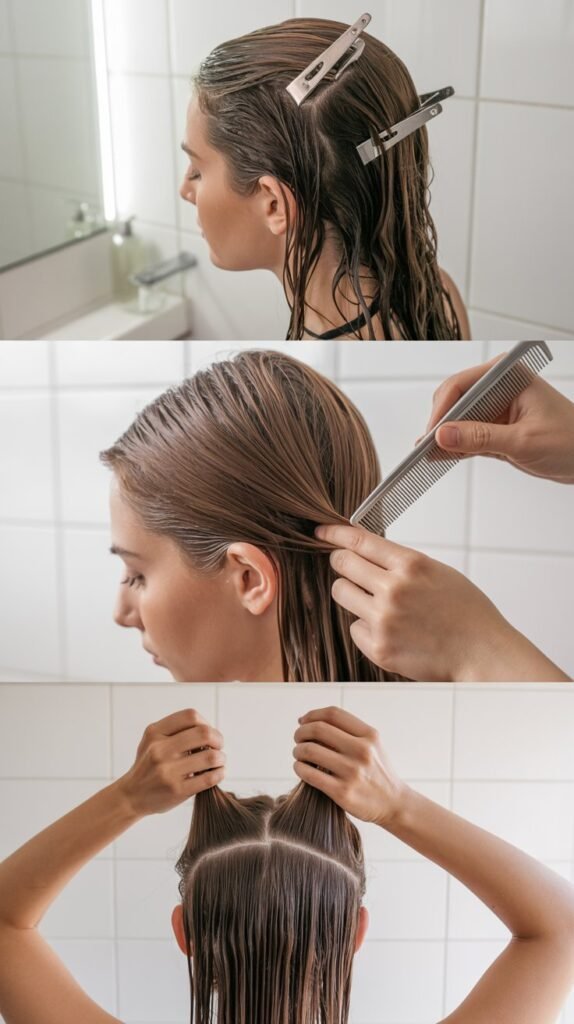
Detangling Process:
- Start detangling from the ends and gradually work your way up to the roots
- Use a wide-tooth comb on damp hair to prevent breakage and damage
- Take your time working through any knots or tangles completely before cutting
- Ensure hair lies naturally without forced parts or artificial smoothing
- Let your hair settle for a few minutes after combing to see its true fall pattern
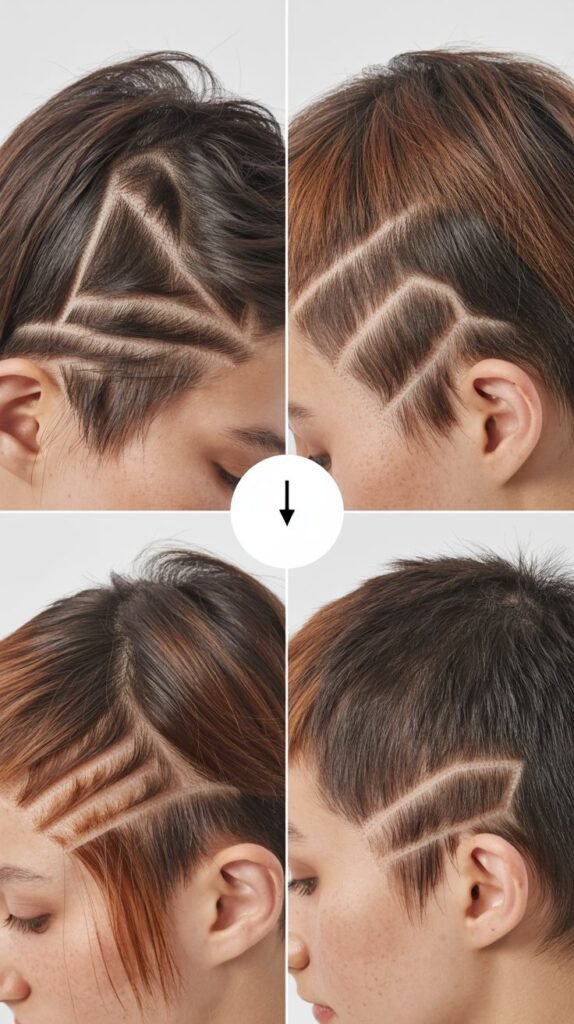
Sectioning Strategy:
- Divide hair into four main quadrants by creating a center part from forehead to nape
- Make a horizontal part from ear to ear across the crown of your head
- Secure each section with clips, keeping them out of your working area
- The bottom sections near the nape will be cut first, moving upward progressively
- Keep sections slightly damp by misting with water as you work through each area
4. Step-by-Step Cutting Technique
This method uses a simple approach that creates the signature shag layers without requiring advanced cosmetology skills.
Following these steps carefully produces consistent results that mimic professional cuts.
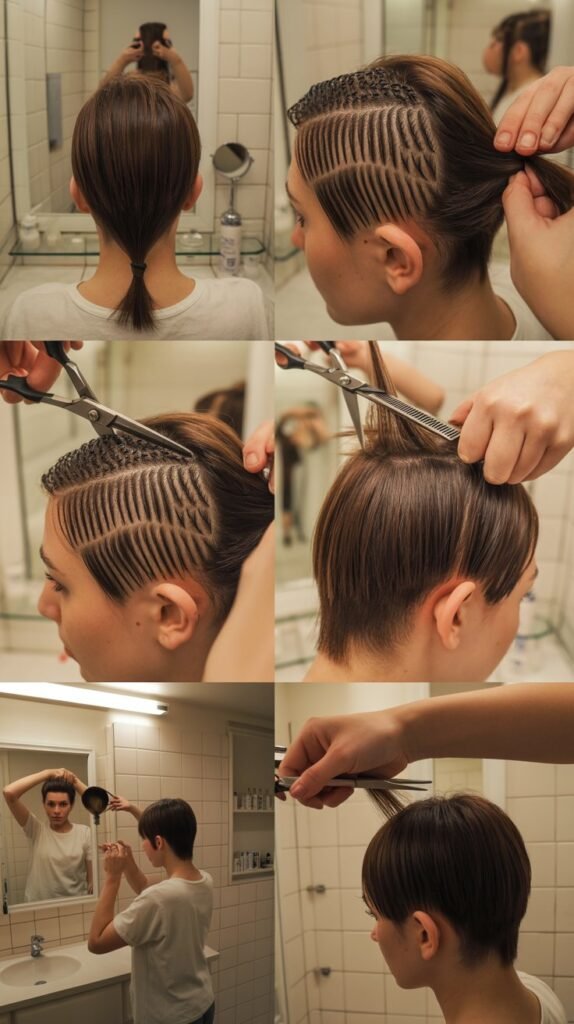
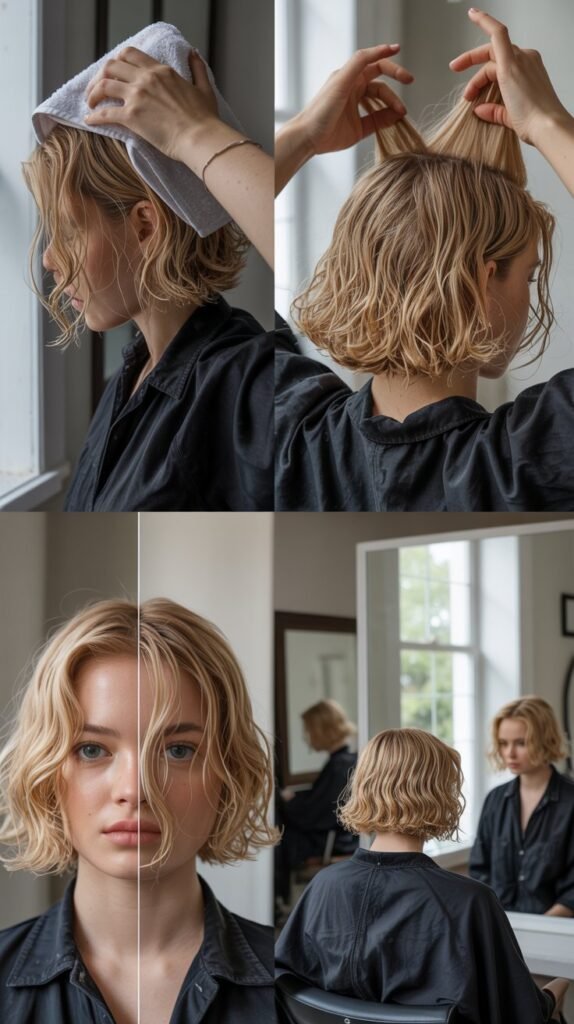
The Ponytail Method:
- Flip your head upside down and gather all hair into a high ponytail at the top center of your head
- Position the elastic so it sits directly at your hairline where your forehead meets your scalp
- Comb through the ponytail to ensure all hair is smooth and evenly distributed
- Hold the ponytail straight up perpendicular to your head for maximum layering effect
- Cut straight across at your desired shortest layer length, typically 2 to 4 inches from the elastic
- This single cut creates graduated layers throughout your hair when released
Alternative Section-by-Section Approach:
- Start with the bottom back section, holding hair at a 45-degree angle from your head
- Cut vertically into the ends using point-cutting technique for soft, feathered edges
- Move to side sections, maintaining consistent angle and cutting length
- The top crown section should be cut shorter to create volume and lift
- Check both sides frequently to ensure symmetry and balance
- Face-framing pieces are cut last, angling slightly forward toward your chin
Creating Texture:
- After establishing basic length, use thinning shears on the bottom half of each section
- Open and close the thinning shears as you glide down hair shafts to remove bulk
- Focus on areas that feel heavy or thick, avoiding over-thinning which causes frizz
- Point-cut into ends by snipping small vertical notches rather than straight across
- Twist small sections and lightly cut into the twist to create natural separation
- Step back frequently to assess the overall shape and texture distribution
5. Styling Your New Shag for Maximum Impact
Once you’ve completed the cut, proper styling techniques bring out the best in your new shag and showcase all those beautiful layers.
The right approach enhances natural texture while maintaining the effortless vibe that defines this cut.
Air-Dry Method:
- Apply a quarter-sized amount of texturizing spray to damp hair immediately after cutting
- Scrunch sections gently upward toward your scalp to encourage natural wave formation
- Avoid touching hair as it dries to prevent frizz and maintain piece-y separation
- Once completely dry, shake hair at the roots to create volume and movement
- Use fingers rather than a brush to separate layers and create the tousled look
- This method works exceptionally well for naturally wavy or curly hair types
Blow-Dry Technique:
- Start by drying the roots first using your fingers to lift sections away from your scalp
- Attach a diffuser to your blow dryer and use low heat with medium airflow
- Cup sections of hair in the diffuser and pulse warm air without moving it constantly
- For straighter hair, use a round brush to create subtle bends and curves
- Focus the dryer downward along the hair shaft to smooth the cuticle and add shine
- Flip your head side to side while drying to maximize volume at the crown
Finishing Touches:
- Once dry, run a small amount of lightweight styling cream through the ends only
- Use a flat iron on low heat to gently curve face-framing pieces away from your face
- Spray dry shampoo at the roots and massage it in for added texture and grip
- Tease the crown area slightly with a fine-tooth comb for extra height if desired
- Set the style with a light mist of flexible-hold hairspray from 10 inches away
- Avoid over-styling or making the hair look too perfect—imperfection is the goal
6. Common Mistakes and How to Fix Them
Even experienced home haircutters encounter challenges when creating a shag, but most issues have simple solutions.
Recognizing these problems early prevents the need for drastic corrective measures.
Uneven Layers:
- This typically happens when sections aren’t held at consistent angles during cutting
- Fix it by wetting the hair again and carefully trimming longer pieces to match shorter areas
- Use your fingers to feel for length discrepancies rather than relying solely on visual assessment
- Take smaller sections when correcting to avoid removing too much hair at once
- Stand in front of multiple mirrors to check evenness from all viewing angles
- Remember that slight variations add to the natural, lived-in appearance of a shag
Too Much Bulk Removed:
- Over-thinning creates frizz and makes hair look stringy rather than textured
- Combat this by avoiding thinning shears near the roots or on already fine hair
- Focus future thinning only on the thickest sections of mid-lengths and ends
- Use deep conditioning treatments to improve the appearance of over-processed ends
- Style with smoothing products and oils to weigh down flyaways temporarily
- Allow several weeks of growth before attempting any additional thinning
Choppy or Blunt Lines:
- Harsh lines appear when cutting straight across rather than using point-cutting technique
- Soften these areas by holding scissors vertically and snipping small notches into the line
- Blend sections by taking thin horizontal slices and cutting at slight angles
- Thinning shears can also diffuse overly blunt edges when used sparingly
- Styling with texturizing products helps disguise harsh lines while they grow out
- Patience is key—sometimes waiting two weeks allows the cut to settle naturally
7. Maintaining Your Shag Between Cuts

A well-executed shag requires minimal maintenance compared to many other styles, but a few simple practices keep it looking fresh and intentional as it grows.
These tips extend the life of your cut significantly.
Weekly Care Routine:
- Wash hair 2-3 times per week maximum to prevent stripping natural oils that enhance texture
- Use sulfate-free shampoo that cleanses gently without removing essential moisture
- Apply a lightweight leave-in conditioner to ends after each wash for added manageability
- Sleep on a silk or satin pillowcase to reduce friction and prevent tangled layers
- Refresh the style on non-wash days with dry shampoo and texturizing spray
- Avoid heavy oils or serums that weigh down layers and eliminate the airy quality
Monthly Touch-Ups:
- Trim any split ends that appear using sharp scissors and point-cutting technique
- Re-thin areas around the face that grow faster and tend to become bulky
- Check the overall shape in mirrors from multiple angles to identify problem spots
- Adjust face-framing pieces if they’ve grown past your preferred length
- Clean your cutting shears with rubbing alcohol to prevent dull blades and snags
- Document your results with photos to track what works best for your hair type
8. Adapting the Shag for Different Hair Types
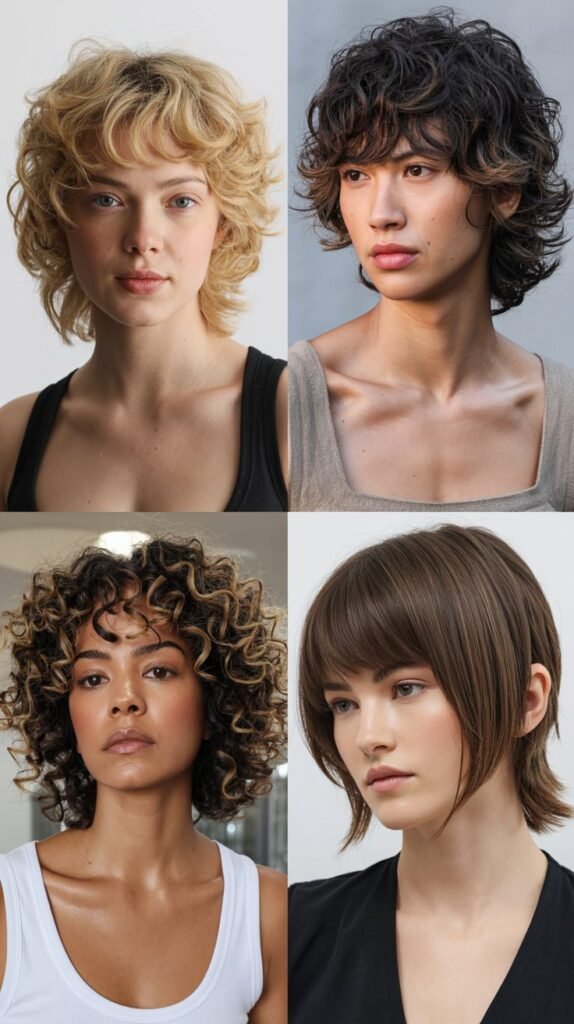
The beauty of the shag lies in its versatility across various hair textures and densities.
Understanding how to modify the basic technique for your specific hair type ensures optimal results.
Fine or Thin Hair:
- Keep thinning shears to an absolute minimum or skip them entirely
- Focus on creating shorter layers at the crown for the illusion of fullness
- Leave slightly more length overall to prevent hair from appearing sparse
- Use volumizing products at the roots and lightweight texturizers on lengths
- Consider cutting when hair is completely dry to better gauge true volume
- Point-cut ends liberally to create the appearance of thickness through texture
Thick or Coarse Hair:
- Use thinning shears generously throughout mid-lengths and ends to remove bulk
- Create more dramatic layering to prevent a triangular or bottom-heavy shape
- Take larger sections when cutting to work through density efficiently
- Deep point-cutting throughout creates necessary movement and prevents stiffness
- Consider razor-cutting techniques for an even softer, more feathered result
- Styling products should be lightweight to avoid weighing down the cut
Curly or Wavy Hair:
- Cut hair when dry in its natural state to account for shrinkage and curl pattern
- Remove less length than you think necessary since curls bounce up significantly
- Layer strategically to prevent creating pyramid shapes or excessive volume
- Point-cut while respecting the natural curl formation rather than fighting it
- Use hydrating styling products that define curls without creating crunch
- The shag naturally enhances curl patterns and reduces the need for heat styling
Straight Hair:
- This hair type shows cutting imperfections most readily, requiring extra precision
- Create more texture through point-cutting and strategic thinning for movement
- Shorter layers are essential to prevent the cut from falling flat
- Style with texturizing sprays and light-hold mousses for grip and dimension
- Consider adding subtle waves with a curling iron for enhanced visual interest
- The geometric nature of straight hair beautifully showcases clean layer lines
9. Troubleshooting Advanced Concerns
Sometimes challenges arise that go beyond basic cutting mistakes, requiring more nuanced solutions.
These advanced tips address complex issues that may develop during or after your home shag cutting experience.
Dealing with Cowlicks:
- Identify the direction your cowlick naturally wants to push hair before cutting
- Never fight against a cowlick’s growth pattern—work with it instead
- Leave slightly more length in cowlick areas to weigh down the lifting effect
- Cut layers around cowlicks to blend them seamlessly into the overall style
- Style these sections when hair is very wet and use a blow dryer to set the direction
- Strategic placement of face-framing pieces can disguise or complement stubborn cowlicks
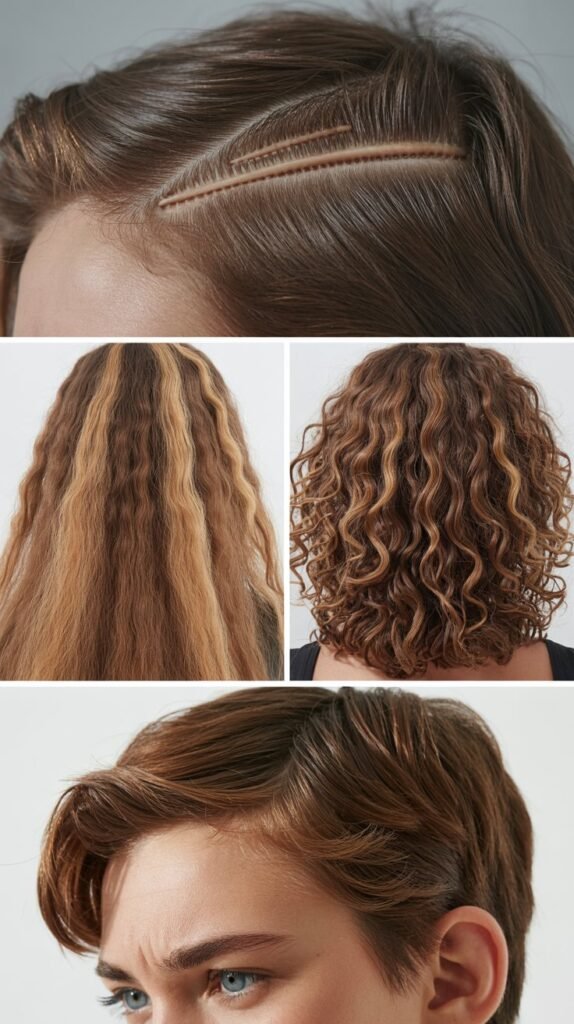
Addressing Curl Pattern Variations:
- Many people have multiple curl patterns throughout their head requiring different approaches
- Tighter curls at the nape typically need more length to match looser crown curls
- Cut each section according to its individual curl pattern rather than uniform length
- Test small sections before committing to major length removal on varied textures
- Layering helps balance different curl patterns by removing weight strategically
- Embrace the natural variation as part of your unique, textured shag appearance
Fixing Major Cutting Errors:
- If you’ve cut too short, focus on blending rather than trying to restore length
- Create additional texture and piece-y separation to disguise overly short areas
- Style with products that add volume and dimension to compensate for lost length
- Consult a professional stylist if the error is severe or affects large sections
- Sometimes growing out a mistake gracefully with strategic trims works better than over-correcting
- Document what went wrong to avoid repeating the same mistake in future cuts
Managing Transition Periods:
- Growing out a shag or transitioning from another style requires patience and planning
- Get regular micro-trims every 3-4 weeks to maintain shape during the awkward phase
- Use accessories like headbands, clips, and scarves to manage in-between lengths
- Experiment with different styling techniques to find what works at each growth stage
- Deep conditioning treatments keep hair healthy during extended growth periods
- Consider the shag as a stepping stone to other layered styles rather than a permanent commitment
10. Celebrity-Inspired Shag Variations
Drawing inspiration from iconic shag wearers throughout history helps you visualize how to personalize this versatile cut.
These variations demonstrate the style’s adaptability across decades and personal aesthetics.
The Rock Star Shag:
- Heavily layered throughout with dramatic length variation from crown to ends
- Face-framing pieces cut quite short, sometimes above the cheekbone
- Lots of texture and piece-y separation for an undone, rebellious appearance
- Works exceptionally well for those wanting maximum volume and movement
- Style with fingers only, embracing imperfection and natural texture
- This version looks best with some length, typically shoulder-length or longer
The Modern Minimalist Shag:
- Softer, more subtle layering that appears polished while maintaining the shag structure
- Longer face-framing pieces that gently curve rather than dramatically feather
- Less aggressive texturizing for a cleaner, more refined finish
- Ideal for professional environments where extreme styles might be inappropriate
- Can be styled sleek and smooth or textured depending on the occasion
- This adaptation works beautifully on shorter lengths including lob and bob variations
The Curtain Bang Shag:
- Incorporates wispy bangs that part in the middle and frame both sides of the face
- Bangs are cut as an extension of the shortest face-framing layers
- Creates a soft, romantic appearance that’s simultaneously retro and contemporary
- The curtain element draws attention to eyes and balances facial proportions
- Requires slightly more maintenance as bangs grow quickly and need frequent trimming
- This style particularly flatters oval and heart-shaped face structures
The Shaggy Mullet:
- Combines shag layering on top and sides with distinctly longer length in back
- More dramatic than traditional shags with bold contrast between sections
- Crown layers are kept very short for maximum height and volume
- This edgy variation suits those comfortable with unconventional, statement-making styles
- Works across gender expressions and has gained popularity in alternative fashion circles
- Requires confidence to pull off but creates incredible visual impact when done well
Conclusion
The Effortless ’70s Shag Haircut You Can Master at Home in 15 Minutes truly lives up to its promise when you approach it with the right tools, techniques, and confidence.
This comprehensive guide has walked you through every aspect of creating this iconic style, from understanding its defining characteristics to mastering the cutting technique and personalizing it for your unique hair type.
The shag’s enduring popularity stems from its remarkable versatility—it flatters virtually every face shape, works with all hair textures, and requires minimal daily styling while delivering maximum impact.
By following the step-by-step instructions, avoiding common pitfalls, and adapting the cut to suit your individual needs, you’ve unlocked a timeless look that saves both money and salon appointments.
Remember that haircutting is a skill that improves with practice, so don’t be discouraged if your first attempt isn’t perfect.
The beauty of the shag lies in its forgiving, lived-in nature that actually looks better with a bit of imperfection.
Whether you’re channeling vintage rock star energy or seeking a modern, low-maintenance style, your new shag haircut empowers you to embrace your natural texture and express your personality through your hair.
Now grab those scissors, trust the process, and get ready to fall in love with the effortlessly cool reflection staring back at you in the mirror.
