As a busy mom, finding time for yourself between school runs, work deadlines, and endless household tasks can feel impossible.
Your hair routine shouldn’t add stress to your already packed schedule.
That’s why discovering quick, beautiful hairstyles that work with medium-length hair is absolutely essential for modern mothers who want to look polished without spending hours in front of the mirror.
This comprehensive guide to 27 Easy Hairstyles for Moms with Medium Hair You’ll Use Every Day will transform your morning routine and give you confidence throughout your busiest days.
Whether you’re heading to a parent-teacher conference, running errands, or enjoying a rare date night, these versatile styles adapt to every occasion in your life.
From classic ponytails with fresh twists to elegant braided updos that stay secure through playground adventures, you’ll find practical solutions that actually work for real moms with real schedules.
Each hairstyle in this collection takes 10 minutes or less to create, requires minimal tools, and looks intentionally styled rather than rushed.
Get ready to bookmark this guide and rotate through these gorgeous options that will make you feel put-together every single day, no matter how chaotic life gets.
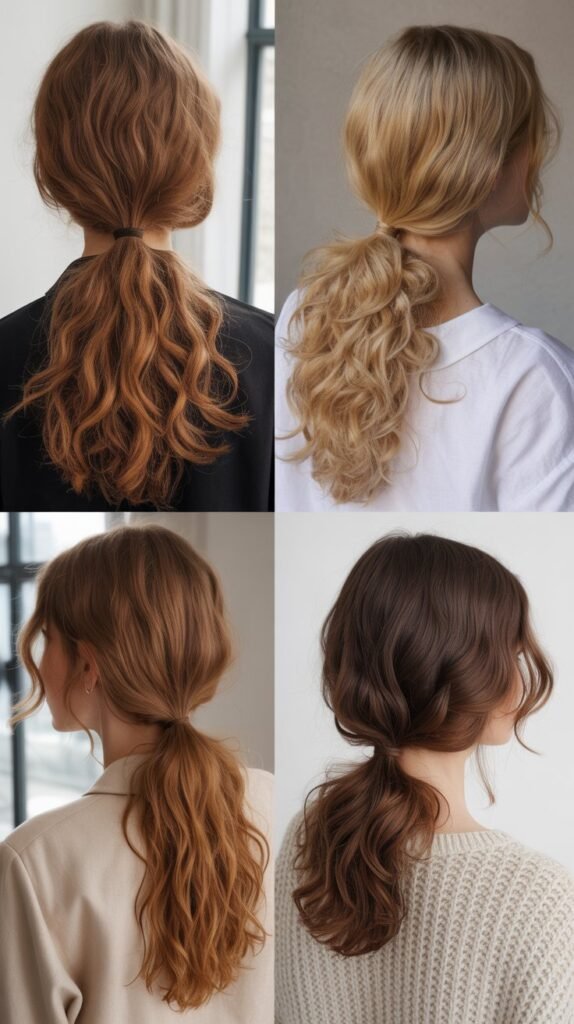
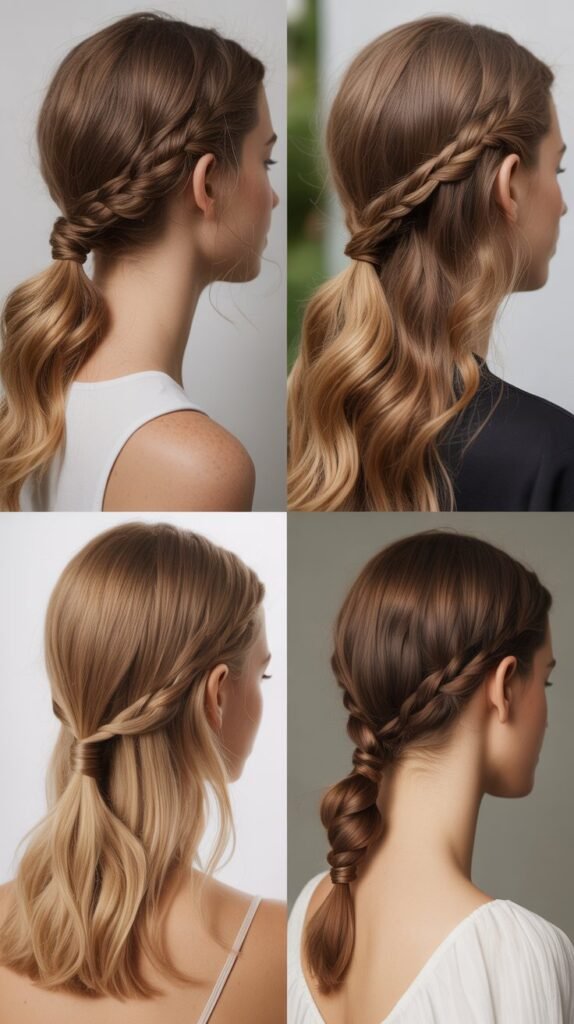
1. The Classic Low Ponytail with a Twist
The low ponytail serves as the foundation of quick styling, but adding a simple twist elevates this everyday look from basic to sophisticated in seconds.
This style works perfectly for moms who need something reliable that transitions seamlessly from morning drop-off to evening activities.
- Start by brushing your medium-length hair thoroughly to remove all tangles and create a smooth base for styling.
- Gather your hair at the nape of your neck and secure it with a hair elastic, positioning the ponytail slightly off-center for added interest.
- Take a small section of hair from the underside of the ponytail and wrap it around the elastic to conceal the band completely.
- Secure the wrapped section with a bobby pin that matches your hair color, tucking the end underneath for a seamless finish.
- Gently pull at the crown area to add subtle volume and prevent the style from looking too flat or severe.
- Apply a light-hold hairspray to tame flyaways while maintaining natural movement and texture throughout the day.
2. The Messy Bun with Face-Framing Pieces
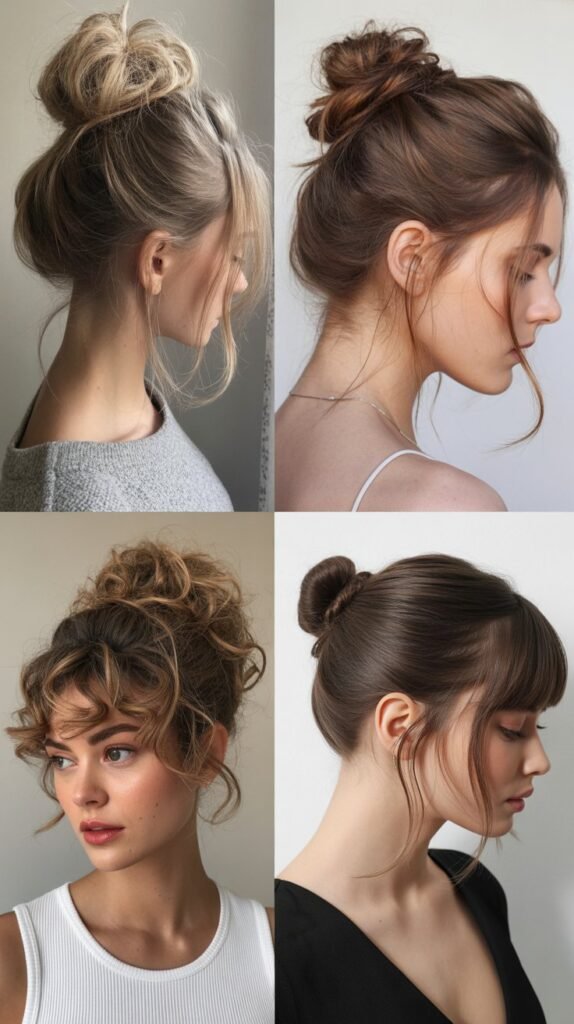
The messy bun has become the unofficial hairstyle of motherhood for good reason—it’s quick, comfortable, and genuinely looks better when it’s slightly imperfect.
Leaving face-framing pieces softens the overall look and adds a touch of femininity.
- Flip your head upside down and gather all your hair into a high ponytail, allowing natural texture to remain rather than brushing smooth.
- Twist the ponytail loosely and wrap it around the base, creating an organic, undone bun shape that doesn’t need to be perfectly circular.
- Secure the bun with another elastic or several bobby pins, intentionally letting some pieces escape for that effortlessly chic appearance.
- Pull out small sections of hair around your face on both sides, keeping them thin and wispy rather than chunky.
- Use your fingers to gently loosen the bun by pulling on different sections to create volume and dimension.
- Finish with a texturizing spray to enhance the lived-in quality and ensure the style holds without looking stiff or overly styled.
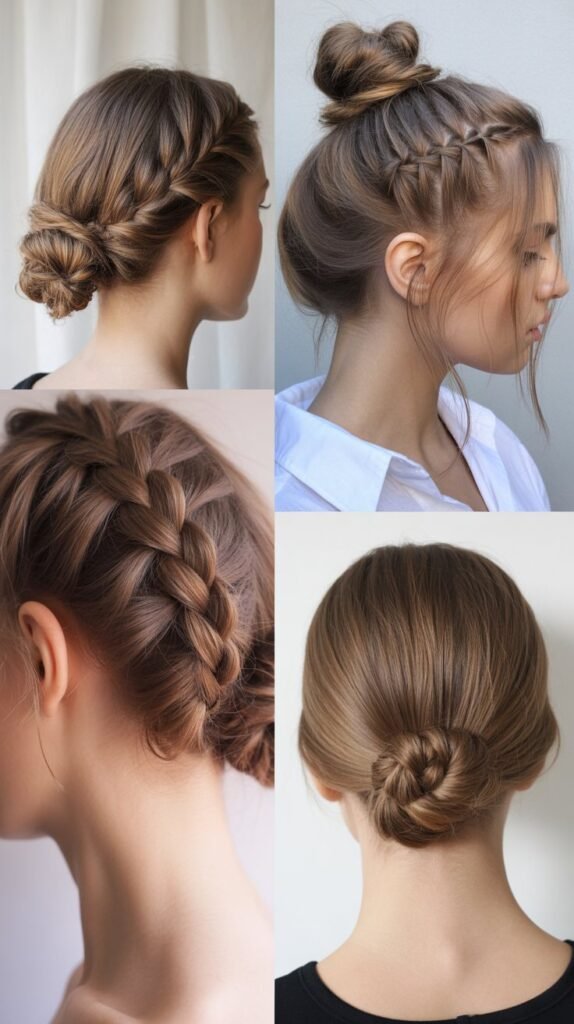
3. The Half-Up Top Knot
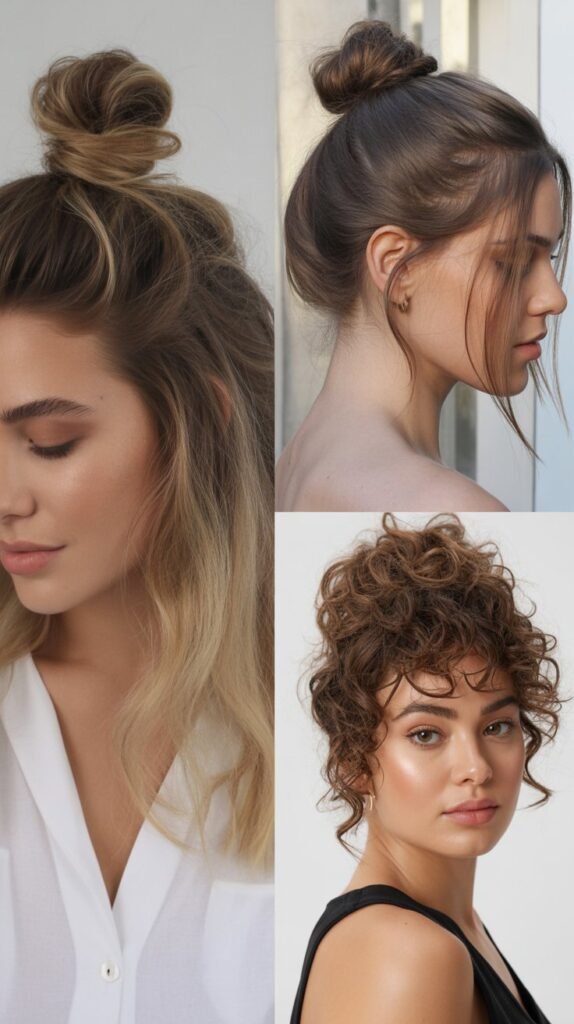
This trendy style combines the practicality of getting hair off your face with the flattering effect of length in the back.
The half-up top knot works exceptionally well for moms with medium hair because it showcases your length while staying functional.
- Section off the top portion of your hair from temple to temple, creating a horizontal parting about two inches back from your hairline.
- Gather this top section into a high ponytail at the crown of your head, ensuring it sits where you want the knot positioned.
- Twist the ponytail and wrap it around itself to form a small bun or knot, securing with bobby pins or another elastic.
- Leave the remaining hair down and loose, adding soft waves with a curling iron if time permits for extra polish.
- Gently tug on the knot to make it fuller and more textured, creating a relaxed rather than rigid appearance.
- Smooth the hair leading into the top knot with a small amount of styling cream to eliminate any bumps or flyaways.
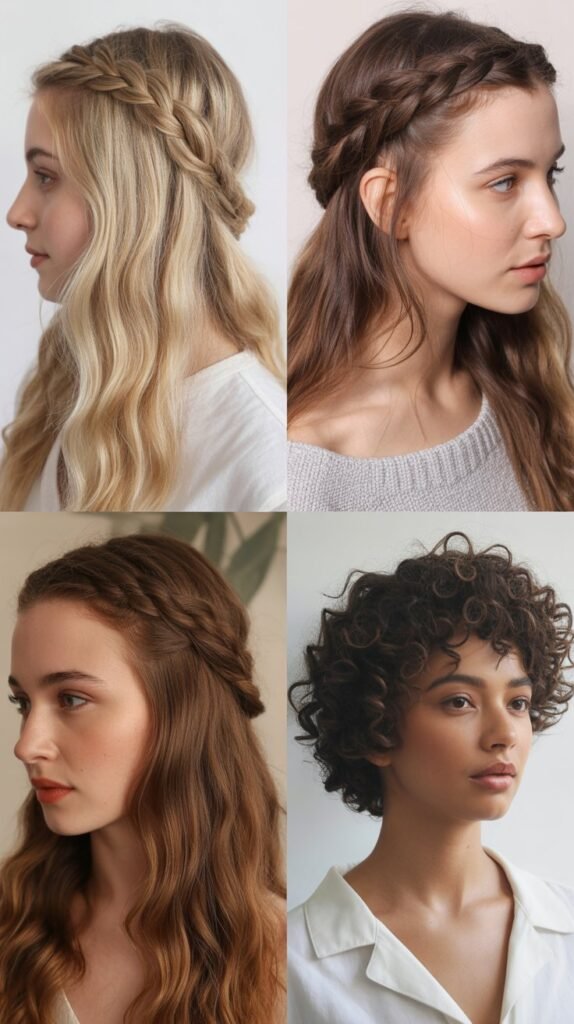
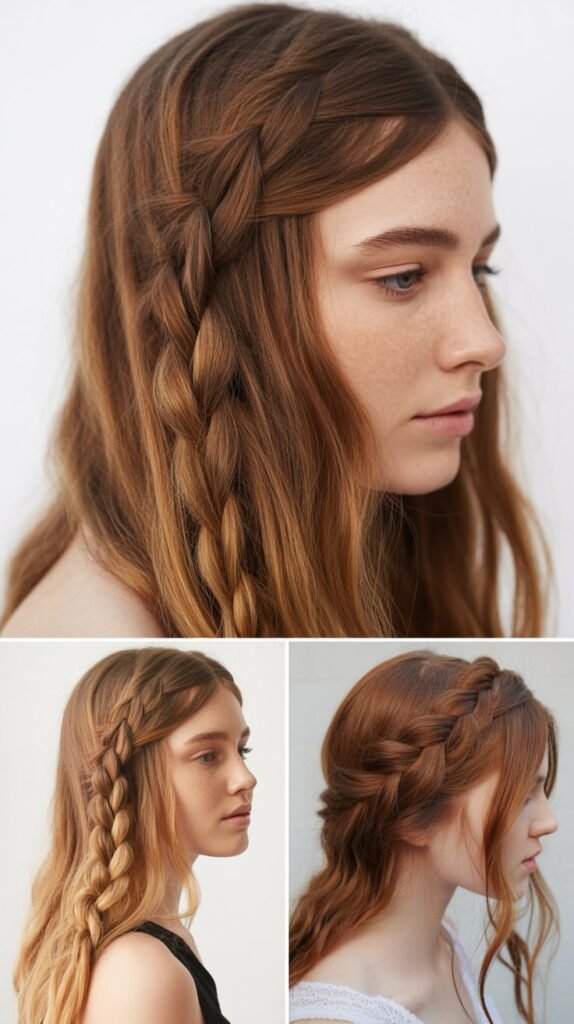
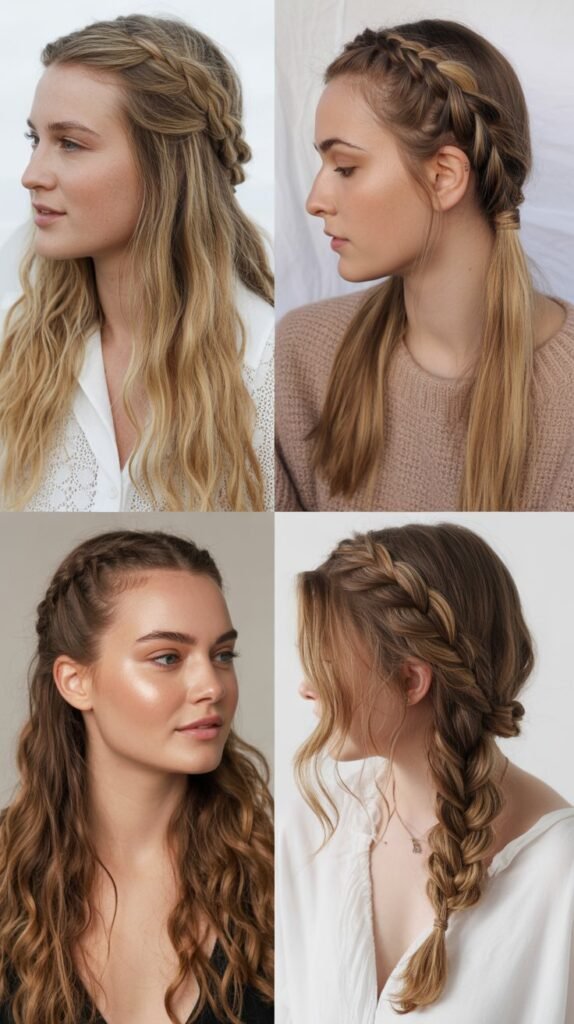
4. The Braided Headband
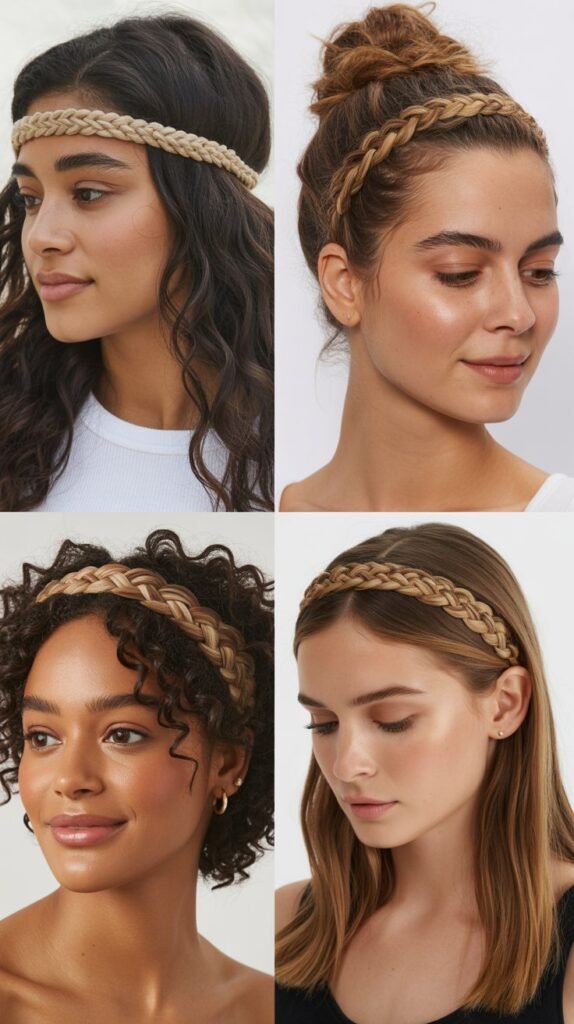
Creating a headband from your own hair offers a bohemian, romantic look that keeps hair off your face without requiring any accessories.
This style particularly flatters moms with layers in their medium-length hair.
- Take a small section of hair from behind your ear on one side and divide it into three equal strands for braiding.
- Create a simple three-strand braid, keeping it relatively tight so it maintains its structure as a headband throughout the day.
- Bring the braid across the top of your head like a headband, positioning it where an actual headband would naturally sit.
- Secure the end of the braid behind your opposite ear with bobby pins, tucking the tail underneath other hair to hide it.
- Repeat the same braiding process on the other side if you want a double-braided headband for additional detail and security.
- Leave the rest of your hair down in its natural texture or add loose waves for a complete, polished appearance.
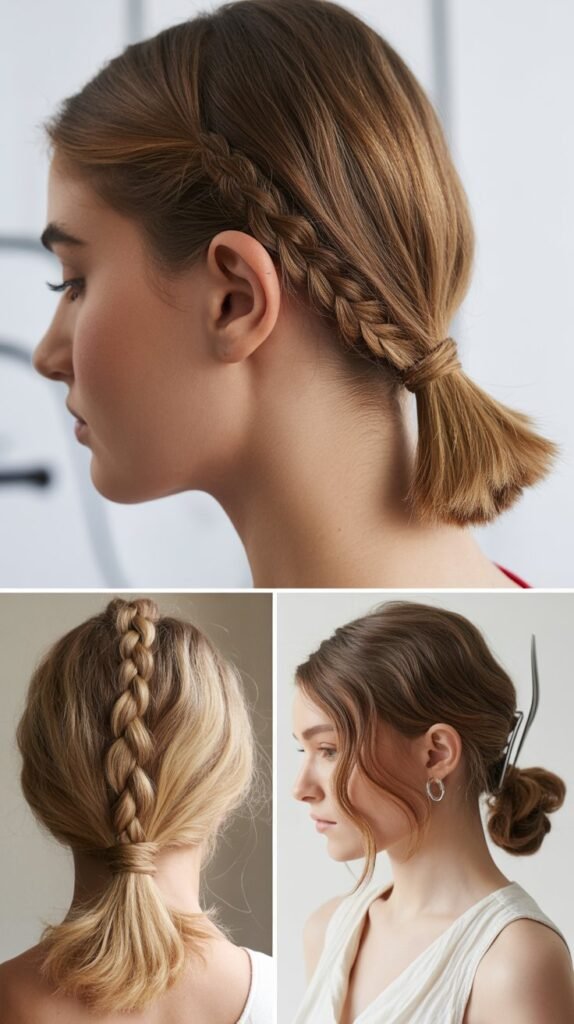
5. The Simple Side Braid
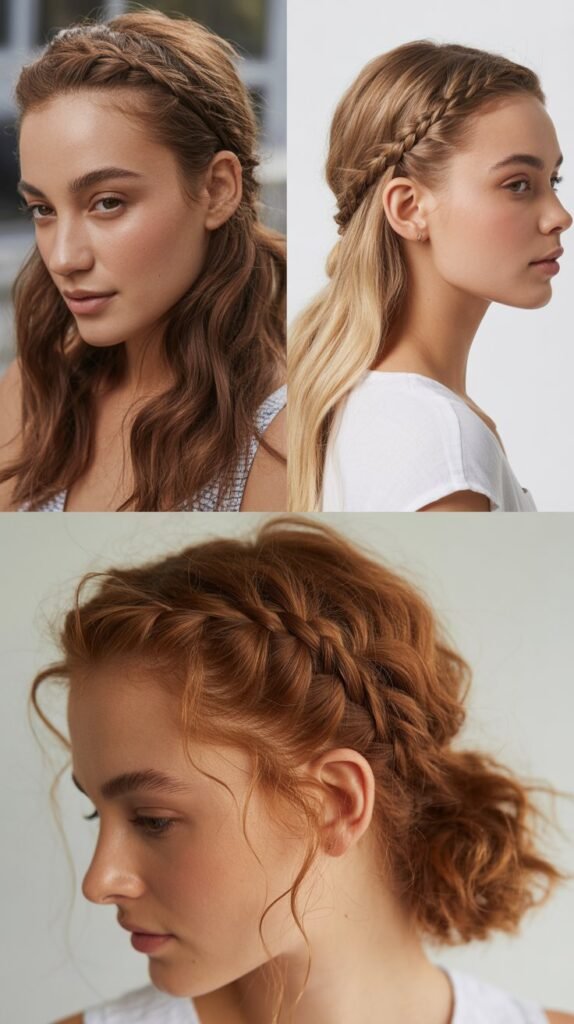
The side braid offers timeless elegance while keeping your hair completely manageable throughout even the most active mom days.
This asymmetrical style draws the eye and works beautifully for casual and slightly dressed-up occasions.
- Sweep all your hair over one shoulder, deciding which side feels most comfortable and flattering for your face shape.
- Divide your hair into three even sections and begin braiding downward, keeping consistent tension for a neat appearance.
- Continue braiding all the way to the ends of your hair and secure with a clear or matching elastic band.
- Gently pancake the braid by pulling on the outer edges of each section to create width and a fuller, more romantic look.
- Wrap a small piece of hair around the elastic at the bottom to conceal it and add a professional finishing touch.
- Apply a small amount of smoothing serum to the braid to add shine and control any frizz without weighing down the style.
6. The Double Twisted Ponytail
This sophisticated variation on the standard ponytail adds visual interest through simple twisting techniques that anyone can master.
The double twist creates the illusion of a more complex style while remaining completely practical.
- Part your hair down the middle from your forehead to the nape of your neck, creating two equal sections.
- Take the right section and twist it backward toward the center back of your head, keeping the twist tight and smooth.
- Secure the twisted right section temporarily with a clip while you work on the left side using the same twisting technique.
- Bring both twisted sections together at the center back and combine them into a single ponytail, securing with an elastic.
- Wrap a small section of hair from the ponytail around the elastic to hide it and create a polished, intentional finish.
- Gently pull on the twists to loosen them slightly and create additional volume and texture along the sides of your head.
7. The Low Braided Bun
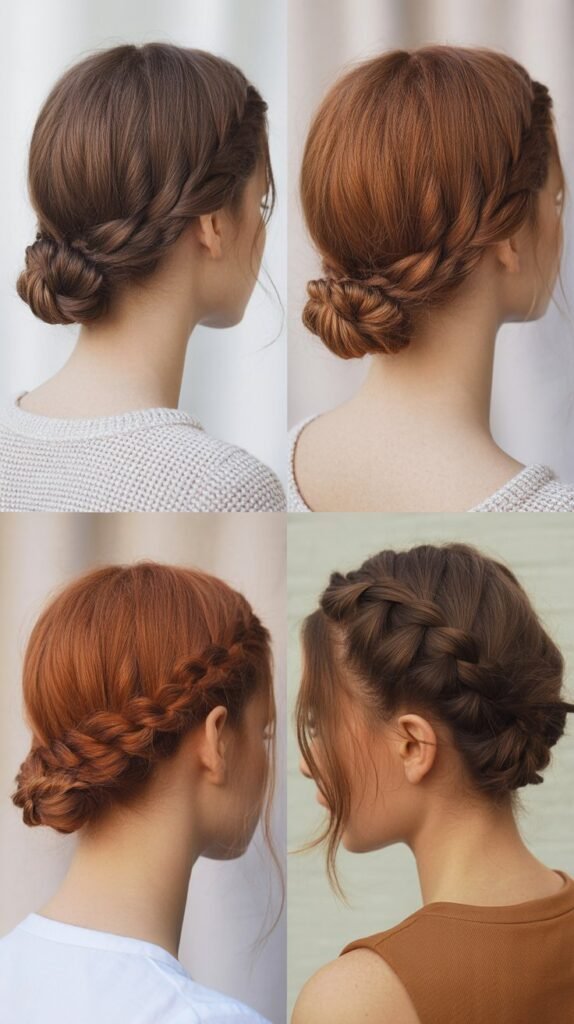
Combining the security of a bun with the texture of a braid creates this elegant style perfect for moms who need their hair to stay put all day.
This look works beautifully for work settings and special occasions alike.
- Gather your hair into a low ponytail at the nape of your neck and secure it with a hair elastic.
- Braid the entire ponytail using a traditional three-strand braid technique, working all the way down to the ends.
- Wrap the braid around the base of the ponytail in a circular motion, creating a coiled bun shape.
- Secure the bun with several bobby pins placed strategically around the perimeter to ensure it stays in place.
- Tuck the end of the braid underneath the bun and pin it securely so no loose ends are visible.
- Finish with a light mist of hairspray to hold everything in place while maintaining a soft, natural appearance.
8. The Sleek High Ponytail
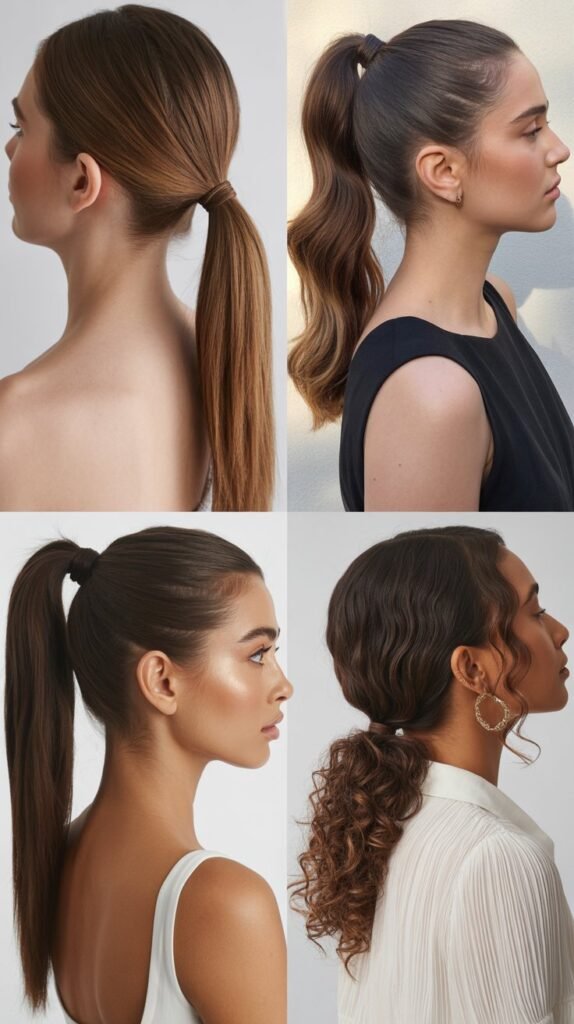
Nothing says polished and put-together quite like a sleek high ponytail that sits at the crown of your head.
This classic style elongates the neck and works perfectly for moms who want to look professional and energized.
- Apply a smoothing cream or gel to damp or dry hair, distributing it evenly from roots to ends for maximum control.
- Brush your hair upward toward the crown of your head, using a fine-tooth comb to eliminate any bumps or irregularities.
- Secure your hair into a high ponytail positioned at the highest point of your head where you want maximum lift.
- Take a small section from the underside of the ponytail and wrap it around the elastic to conceal the band completely.
- Use a flat iron on the length of the ponytail if needed to create sleek, straight strands that enhance the polished effect.
- Apply shine spray or serum to the ponytail for a glossy finish that catches the light beautifully.
9. The Twisted Crown Braid
This romantic style creates the appearance of a crown around your head using simple twisting rather than complex braiding.
The twisted crown works exceptionally well for moms with medium hair who want something special without the time investment.
- Part your hair deeply on one side, creating an asymmetrical division that adds interest to the overall style.
- Take a section of hair from the heavy side of the part near your forehead and divide it into two pieces.
- Twist these two pieces around each other, adding small amounts of hair from the hairline as you work across your head.
- Continue the twisting motion along your hairline, creating a crown effect that frames your face beautifully.
- Secure the twist behind your opposite ear with bobby pins, ensuring it feels tight and secure enough to last.
- Leave the remaining hair down or gather it into a low bun for a complete, sophisticated appearance.
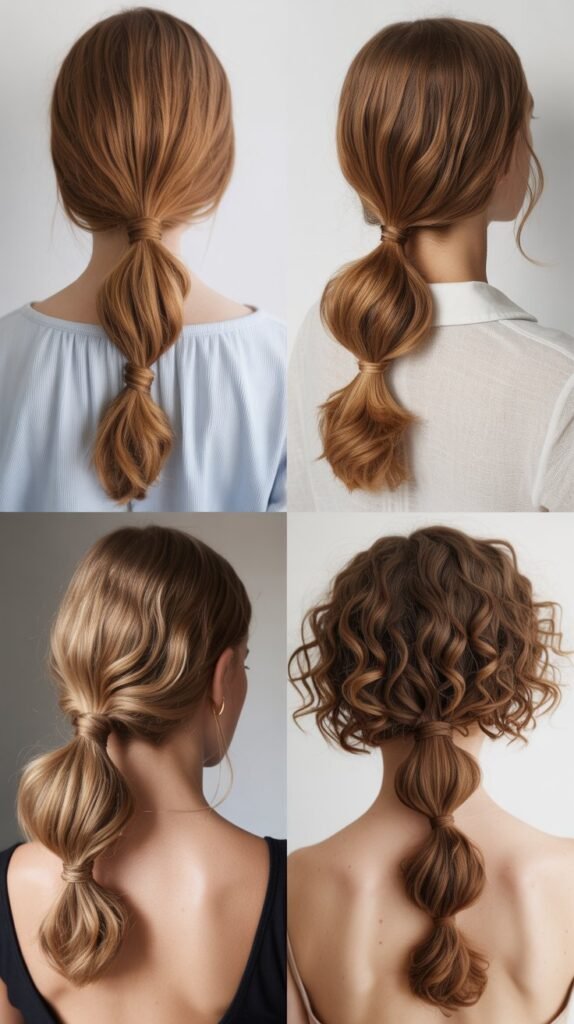
10. The Bubble Ponytail
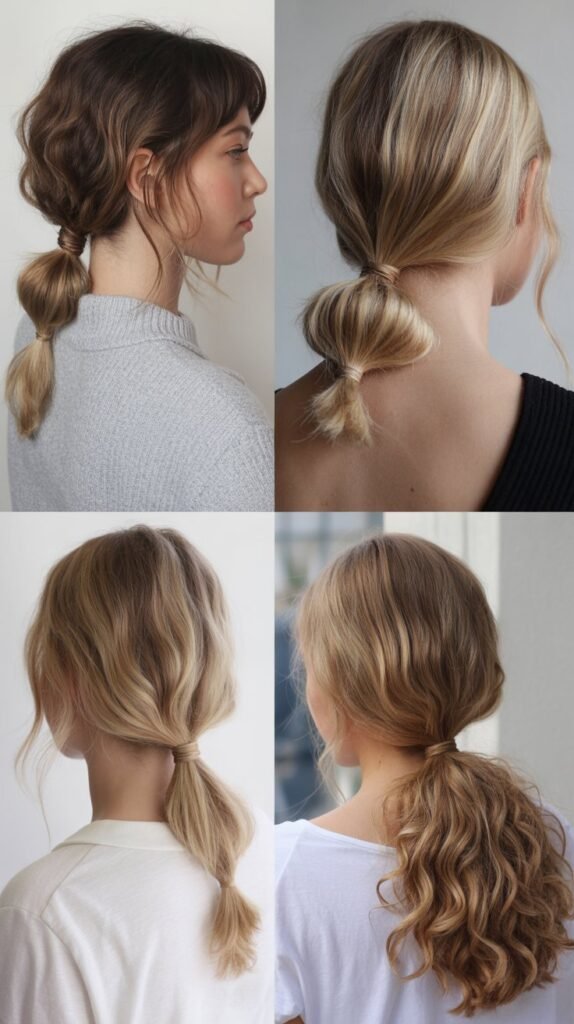
This playful yet chic style segments your ponytail into rounded sections that create dimension and visual interest.
The bubble ponytail offers a modern twist on traditional styling that younger moms particularly love.
- Create a high or mid-level ponytail depending on your preference and secure it tightly with a hair elastic.
- Measure down approximately two to three inches from the first elastic and add another clear elastic around the ponytail.
- Gently pull on the hair between the two elastics, teasing it outward to create a rounded bubble effect.
- Continue adding elastics at regular intervals down the length of your ponytail, spacing them evenly for consistency.
- Create bubble sections between each elastic by pulling the hair outward gently to form rounded segments.
- Finish by lightly pulling on each bubble to make them fuller and more pronounced for maximum visual impact.
11. The French Twist
This timeless updo exudes elegance and sophistication while keeping every strand of hair secured and off your neck.
The French twist works beautifully for professional settings and evening events when moms need to look especially polished.
- Brush your hair thoroughly and gather it at the nape of your neck as if creating a low ponytail but don’t secure it.
- Twist the gathered hair upward in one continuous motion, rolling it toward the center back of your head.
- Continue twisting until all the hair is rolled into a vertical column against your head, creating the classic French twist shape.
- Secure the twist with bobby pins inserted vertically along the seam where the hair meets your head.
- Tuck the ends of your hair into the twist, hiding them completely inside the roll for a seamless finish.
- Apply a firm-hold hairspray to ensure the style stays intact throughout your entire day or evening.
12. The Side-Swept Curls
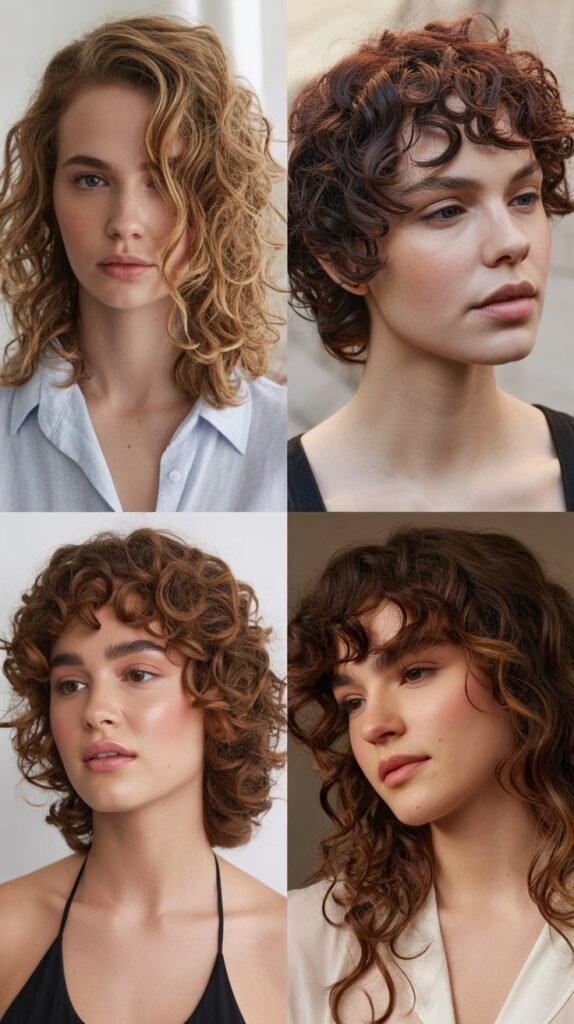
Sweeping your curled medium-length hair to one side creates an asymmetrical, romantic look that feels effortless yet intentional.
This style works perfectly for moms who want glamour without appearing overdone.
- Use a curling iron or wand to create loose curls throughout your medium-length hair, working in small sections for consistency.
- Allow the curls to cool completely before touching them, which helps them set and hold their shape longer.
- Sweep all your hair over one shoulder, deciding which side creates the most flattering frame for your face.
- Secure the hair on the opposite side behind your ear with several bobby pins that match your hair color.
- Gently separate the curls with your fingers to create soft, flowing waves rather than defined ringlets.
- Finish with a flexible-hold hairspray that maintains movement while keeping the side-swept style in place throughout the day.
13. The Waterfall Braid
This intricate-looking braid creates a cascading effect where strands of hair fall through the braid like a waterfall.
Despite its complex appearance, this style becomes easy with practice and offers stunning results.
- Begin with a small section of hair near your temple, dividing it into three strands to start a traditional braid.
- Complete one stitch of the braid, but when you bring the top strand down, drop it and let it fall free instead of continuing to braid it.
- Pick up a new section of hair from above to replace the dropped strand and continue the braiding pattern.
- Repeat this dropping and replacing motion as you work the braid across your head, creating the waterfall effect.
- Continue the waterfall braid around to the back of your head or just to the opposite temple, depending on your preference.
- Secure the end with a small clear elastic and consider curling the loose “waterfall” strands for added dimension and beauty.
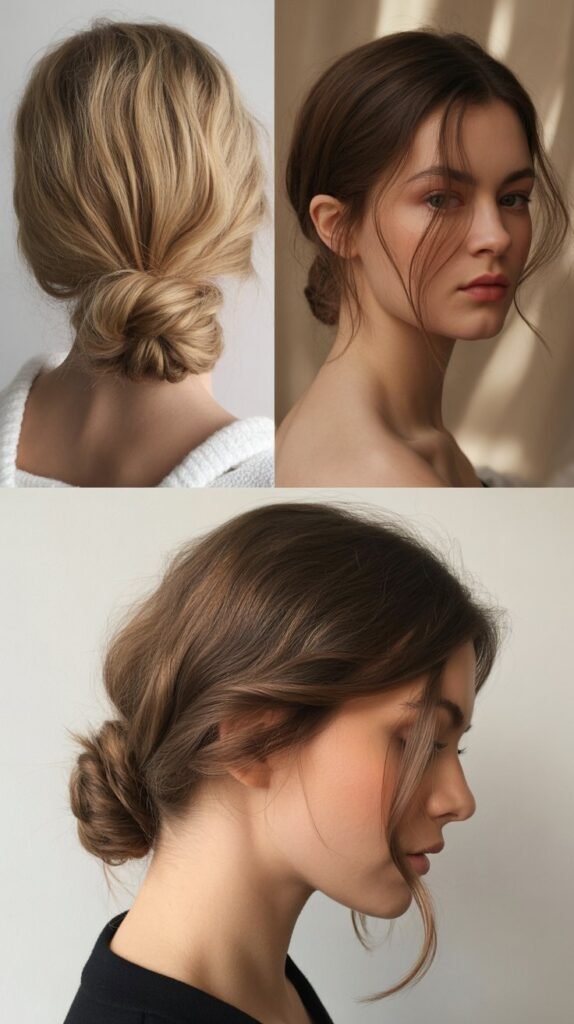
14. The Twisted Low Bun
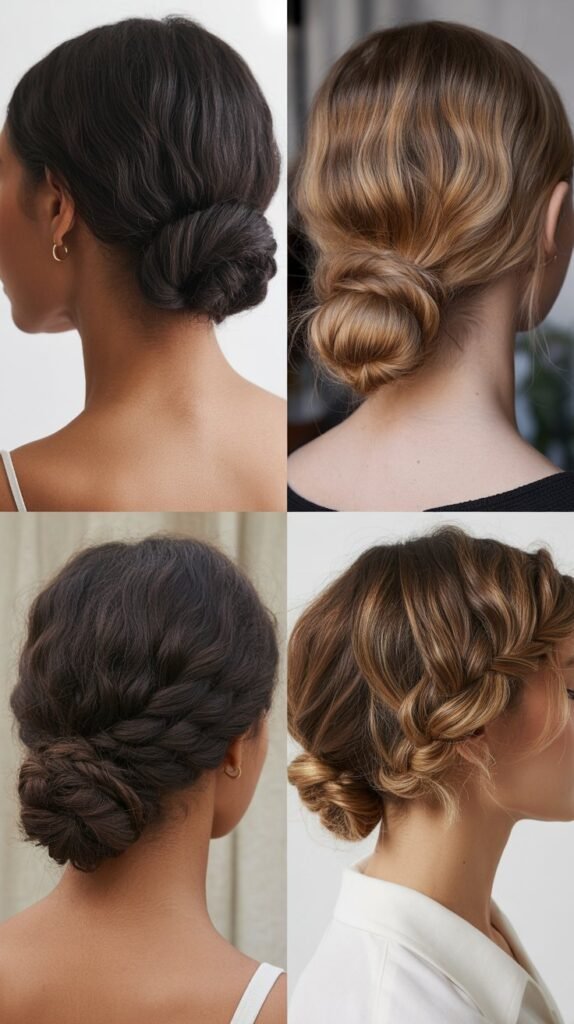
This sophisticated bun combines twisting techniques with a low placement for a style that’s both secure and elegant.
The twisted low bun flatters every face shape and works for virtually any occasion in a busy mom’s life.
- Divide your hair into two equal sections down the middle, creating a clean part from forehead to nape.
- Take one section and twist it tightly from the roots down to the ends, maintaining consistent tension throughout.
- Repeat the twisting process with the second section, ensuring both twists have similar tightness and texture.
- Cross the two twisted sections over each other at the nape of your neck and begin wrapping them together into a bun.
- Secure the twisted bun with bobby pins inserted at multiple angles to ensure it holds firmly all day.
- Gently pull on the twists to loosen them slightly and create a fuller, more textured appearance in the finished bun.
15. The Pull-Through Braid

This faux braid creates impressive dimension and fullness using ponytails rather than traditional braiding techniques.
The pull-through braid works exceptionally well for moms whose medium hair might lack volume.
- Create a small ponytail at the crown of your head using a clear elastic, leaving the rest of your hair loose below.
- Make a second ponytail directly below the first one, positioning it about two inches down from the original ponytail.
- Split the first ponytail in half and bring both sections around the second ponytail, temporarily clipping them out of the way.
- Create a third ponytail below the second one, incorporating the split sections from the first ponytail into this new ponytail.
- Continue this pattern of splitting and pulling through down the length of your hair until you reach the ends.
- Gently pull on each segment to create volume and width, transforming the stacked ponytails into a beautiful faux braid.
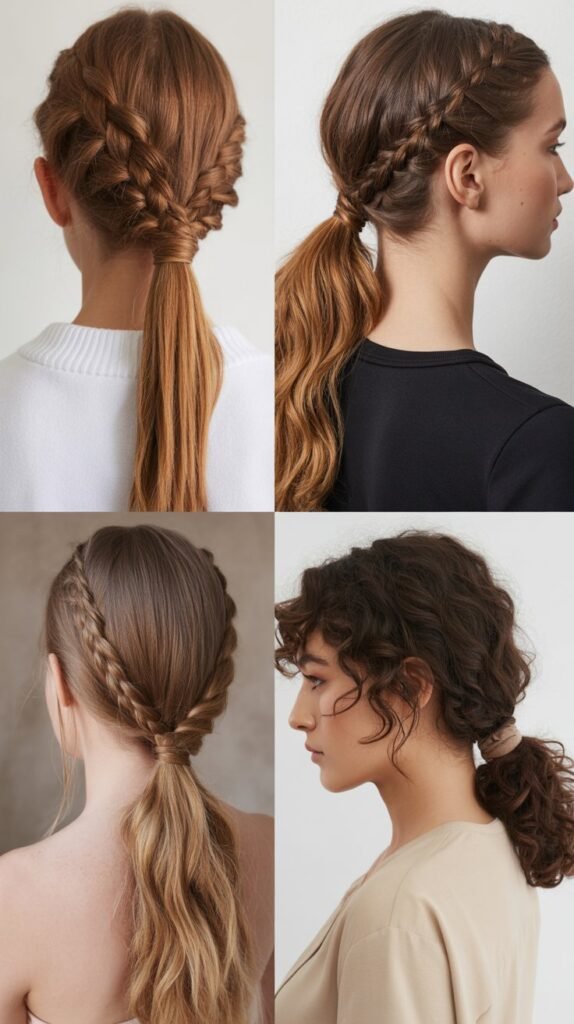
16. The Braided Ponytail
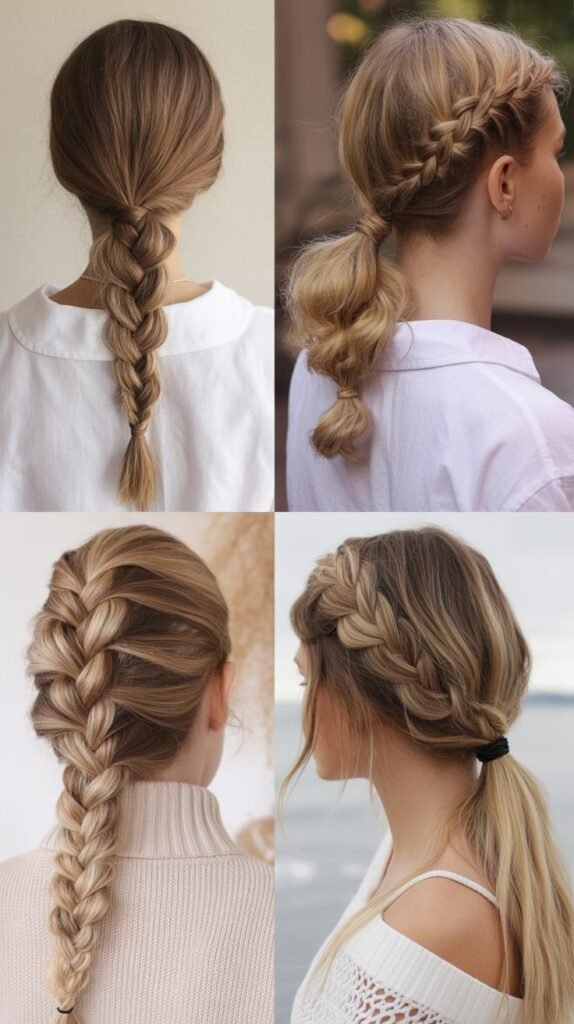
Adding a braid to your ponytail elevates this basic style into something more interesting and textured.
The braided ponytail offers the security of a ponytail with the visual appeal of intricate styling.
- Gather your hair into a ponytail at your desired height, whether high at the crown or low at the nape.
- Secure the ponytail with a hair elastic, ensuring it feels tight and secure before beginning to braid.
- Divide the ponytail into three equal sections and create a traditional three-strand braid down the entire length.
- Secure the end of the braid with another elastic, choosing clear or matching color depending on your preference.
- Gently pancake the braid by pulling on the edges to create width and a fuller, more voluminous appearance.
- Wrap a small section of hair around both elastics to conceal them and add a polished, professional finishing touch.
17. The Rope Braid Updo
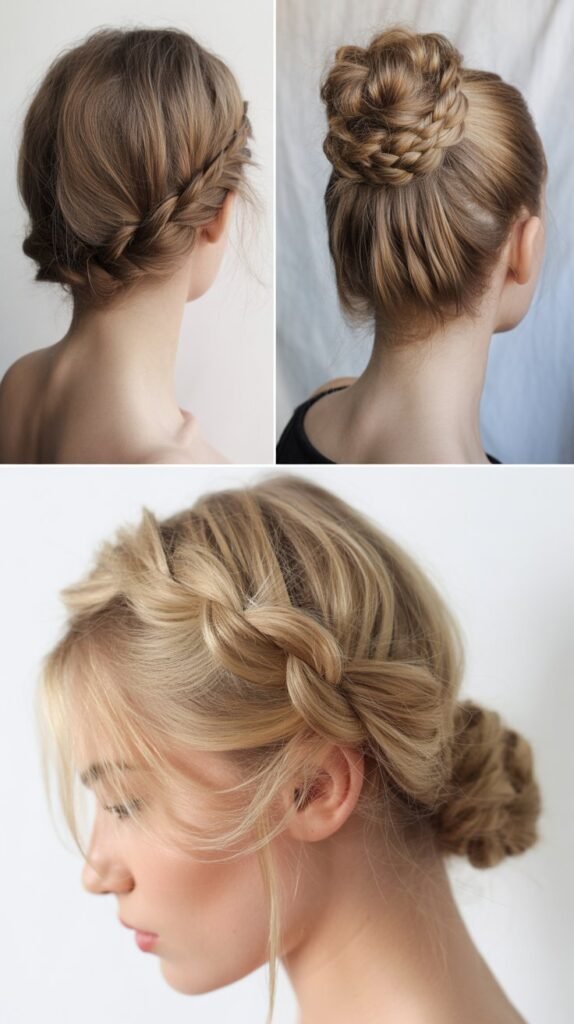
The rope braid creates a twisted, textured effect that looks complex but requires only two sections of hair.
When coiled into an updo, this style offers elegance and security for active mom days.
- Gather your hair into a high ponytail and secure it with a hair elastic at the crown of your head.
- Divide the ponytail into two equal sections and twist each section individually in the same direction, usually clockwise.
- Take the two twisted sections and wrap them around each other in the opposite direction, creating a rope effect.
- Continue rope braiding all the way to the ends of your hair, securing with another elastic when complete.
- Wrap the rope braid around the base of the ponytail in a circular motion, creating a textured bun.
- Secure the bun with bobby pins placed around the perimeter and finish with hairspray for all-day hold.
18. The Half-Up Braid
This versatile style combines the best of both worlds by incorporating a braid on top while leaving length down below.
The half-up braid works beautifully for casual days and slightly dressier occasions.
- Section off the top portion of your hair from temple to temple, creating a horizontal parting across your head.
- Gather this top section and create a braid using your preferred braiding technique, whether traditional, Dutch, or French.
- Continue braiding until you reach the crown area where you want the braid to end and the loose hair to begin.
- Secure the end of the braid with a small clear elastic, positioning it where it sits naturally against your head.
- Leave the remaining hair down in its natural texture or add waves for additional styling.
- Gently pull on the braid to loosen it slightly and create a softer, more relaxed overall appearance.
19. The Vintage Victory Rolls
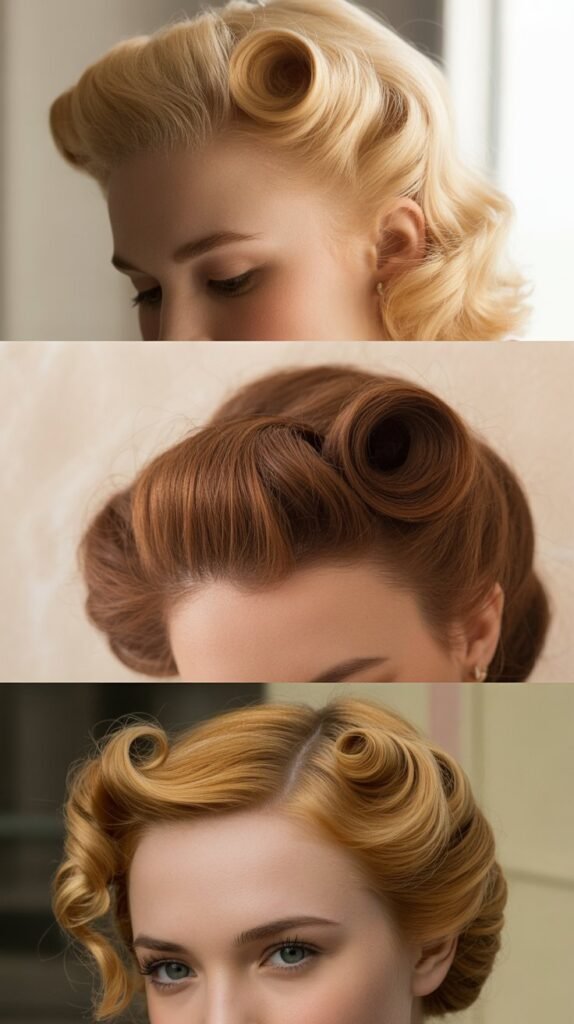
These retro-inspired rolls bring glamorous 1940s style to modern mom life with surprising ease.
Victory rolls work exceptionally well for themed events or when you want to try something completely different.
- Apply volumizing mousse to dry hair to create the texture and hold needed for this structured vintage style.
- Section off the front portions of your hair on both sides, leaving the back section down for now.
- Take one front section and backcomb it at the roots to create volume and structure for rolling.
- Roll the section backward toward your head, creating a tubular roll shape that sits against your scalp.
- Secure the roll with several bobby pins inserted from different angles to ensure it holds its shape.
- Repeat the rolling process on the opposite side and style the remaining hair in loose waves or curls.
20. The Crisscross Ponytail
This unique ponytail style creates visual interest through crisscrossing sections that converge at the back.
The crisscross ponytail offers a modern, geometric look that stands out from standard ponytails.
- Part your hair down the middle from forehead to crown, creating two distinct front sections.
- Take the right front section and bring it diagonally across your head toward the left side of your nape.
- Secure this section temporarily with a clip while you work on the opposite side.
- Take the left front section and cross it diagonally toward the right side of your nape, creating an X pattern.
- Gather both crossed sections together with the remaining hair at the back and secure into a single ponytail.
- Adjust the crossed sections so they lay flat and smooth against your head, creating clean, defined lines.
21. The Braided Bun
Incorporating a braid into your bun adds texture and detail to this classic updo.
The braided bun provides security and style for moms who need their hair completely contained yet attractive.
- Gather all your hair into a ponytail at your preferred location, whether high, mid-level, or low on your head.
- Create a braid with the ponytail using your favorite braiding technique, working all the way to the ends.
- Wrap the braid around the base of the ponytail in a circular or spiral pattern, creating a coiled bun shape.
- Secure the bun by inserting bobby pins through the braid into the hair beneath, ensuring stability.
- Tuck the end of the braid underneath the bun so no loose ends or elastics are visible.
- Gently pull on sections of the braid to create a fuller, more voluminous bun with enhanced texture.
22. The Side Ponytail with Volume
Moving your ponytail off-center immediately adds interest, and incorporating volume at the crown creates a style that’s playful yet polished.
This asymmetrical look flatters most face shapes and adds personality.
- Tease the hair at your crown using a fine-tooth comb to create height and volume in this area.
- Smooth the top layer of the teased section lightly to eliminate frizz while maintaining the underlying volume.
- Gather all your hair over one shoulder, deciding which side feels most comfortable and flattering.
- Secure the side ponytail with a hair elastic, positioning it at a height that balances with your facial features.
- Wrap a small section of hair around the elastic to conceal it and add a polished finishing detail.
- Use your fingers to gently adjust the crown area, ensuring the volume appears intentional rather than messy.
23. The Fishtail Braid
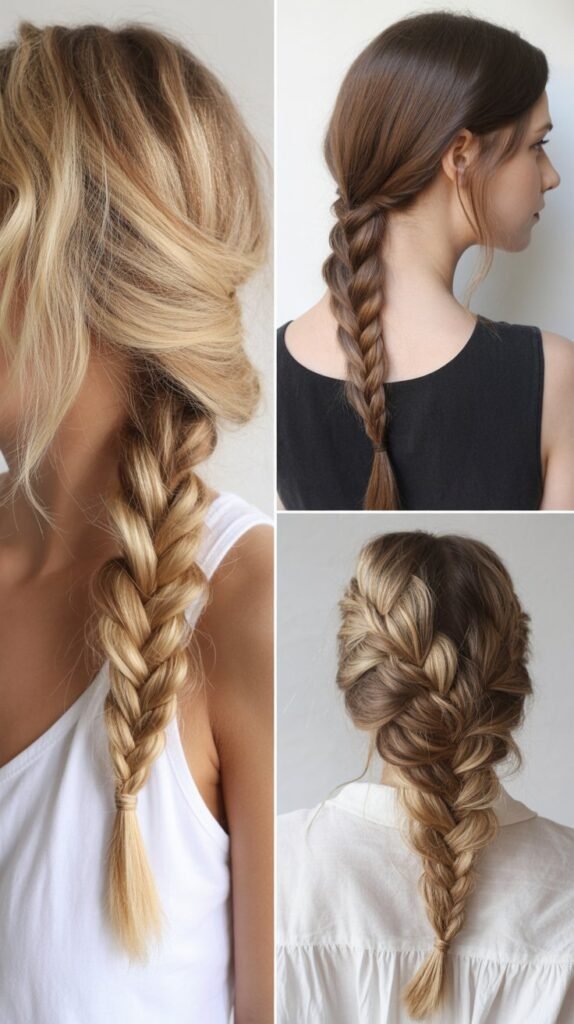
The intricate appearance of the fishtail braid belies how simple it actually is to create with just two sections.
This sophisticated braid works beautifully for medium-length hair and offers impressive results.
- Divide your hair into two large, equal sections rather than the three sections used in traditional braiding.
- Take a small piece from the outer edge of the right section and cross it over to join the left section.
- Take a small piece from the outer edge of the left section and cross it over to join the right section.
- Continue this alternating pattern of crossing small pieces from the outer edges all the way down your hair.
- Keep the small sections you cross over relatively thin to create the characteristic detailed, textured look of fishtail braids.
- Secure the end with an elastic and pancake the braid by gently pulling on the edges to create width and dimension.
24. The Top Knot with Wrapped Base
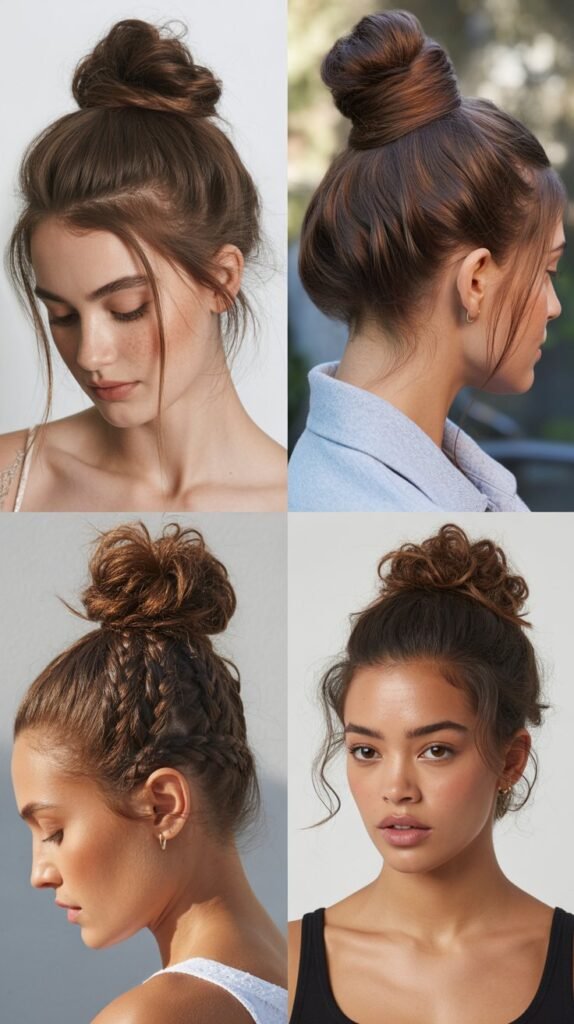
Elevating the basic top knot by wrapping the base with your own hair creates a refined detail that elevates this simple style.
The wrapped base adds an intentional, polished element to an otherwise casual look.
- Flip your head forward and gather your hair into a high ponytail at the very top of your head.
- Twist the ponytail and wrap it around itself to create a top knot, securing it with an elastic or pins.
- Before finishing, separate a small section of hair from the ponytail before creating the knot.
- After the knot is secure, take this reserved section and wrap it around the base of the top knot.
- Secure the wrapped section with bobby pins, tucking the end underneath to hide it completely.
- Adjust the knot by pulling on different sections to create your desired level of messiness or structure.
25. The Dutch Braid Crown
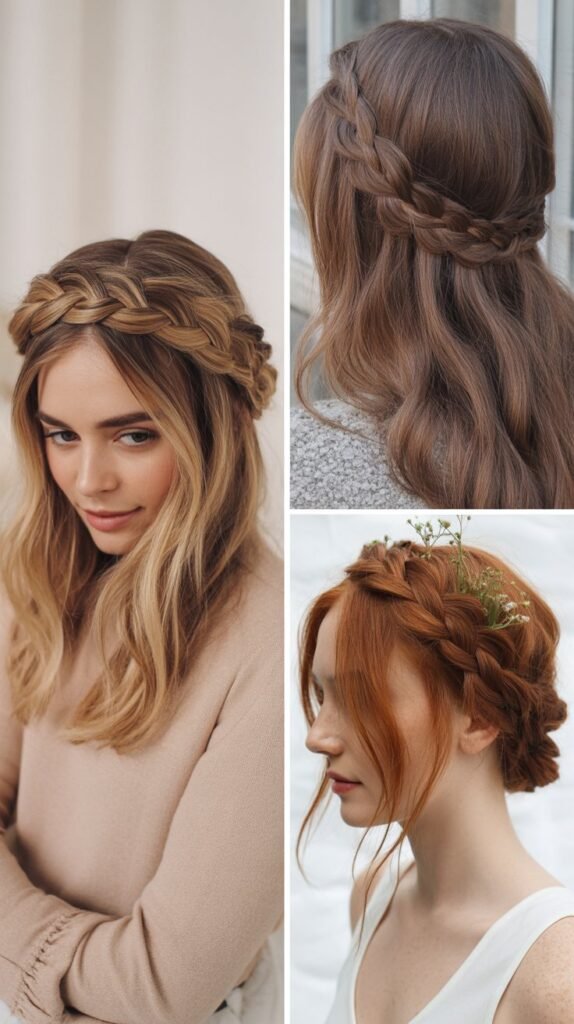
The Dutch braid sits on top of your hair rather than underneath, creating a raised, dimensional crown effect.
This style keeps hair completely secured while looking intricate and beautiful.
- Part your hair deeply on one side and begin your Dutch braid near the heavier side of the part.
- Create the Dutch braid by crossing sections under rather than over, which makes the braid sit on top of your hair.
- Continue the braid along your hairline, following the natural curve around your head like a crown.
- Add small sections of hair as you work around, maintaining consistent tension for an even, raised appearance.
- When you reach your starting point, secure the braid and tuck the end underneath, pinning it invisibly.
- Gently pull on the Dutch braid to make it wider and more prominent, enhancing the crown effect.
26. The Twisted Half-Up Style
Simple twists on each side that meet in the back create an elegant half-up style without requiring braiding skills.
This romantic look works perfectly for moms who want something pretty but not complicated.
- Take a section of hair from above your temple on the right side, about two inches wide.
- Twist this section backward toward the center back of your head, keeping the twist tight and smooth.
- Secure the twisted section temporarily with a clip while you work on the opposite side.
- Repeat the twisting process on the left side, creating a matching twist that also moves toward the center back.
- Bring both twists together at the back of your head and secure them with bobby pins or a small elastic.
- Leave the remaining hair down and consider adding loose waves for a complete, romantic appearance.
27. The Low Ponytail with Knot Detail
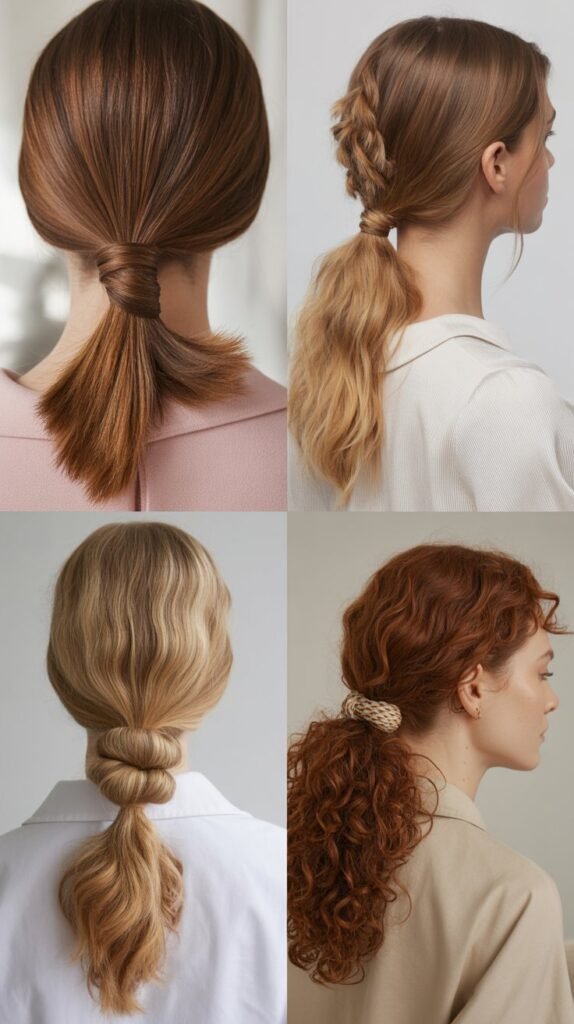
Adding a simple knot above your ponytail creates an unexpected detail that transforms this basic style into something more interesting.
The knot detail provides a focal point that catches attention.
- Divide your hair horizontally into two sections, with the top section containing about one-third of your total hair.
- Take the top section and tie it into a simple overhand knot, just as you would tie a knot in a rope.
- Position the knot where you want it to sit, typically about halfway down the back of your head.
- Gather the bottom section along with the ends from the knotted section into a low ponytail beneath the knot.
- Secure the ponytail with an elastic, ensuring the knot sits above it as a decorative element.
- Gently pull on the knot to loosen it slightly and create a fuller, more intentional appearance that serves as the style’s focal point.
Conclusion
Finding your signature look among these 27 Easy Hairstyles for Moms with Medium Hair You’ll Use Every Day will revolutionize your morning routine and boost your confidence throughout every busy day.
Each style in this collection has been chosen specifically because it delivers maximum impact with minimal time investment, which is exactly what modern mothers need in their demanding lives.
From professional meetings to playground adventures, you now have a complete repertoire of gorgeous options that work with your medium-length hair and your packed schedule.
Remember that the best hairstyle is one you’ll actually do, so start with the styles that appeal to you most and gradually expand your rotation as you become more comfortable with different techniques.
These versatile looks prove that being a busy mom doesn’t mean sacrificing your personal style or settling for the same boring ponytail every single day.
Bookmark this guide, keep your basic styling tools handy, and give yourself permission to take those few extra minutes to feel beautiful and put-together, because you absolutely deserve it.
