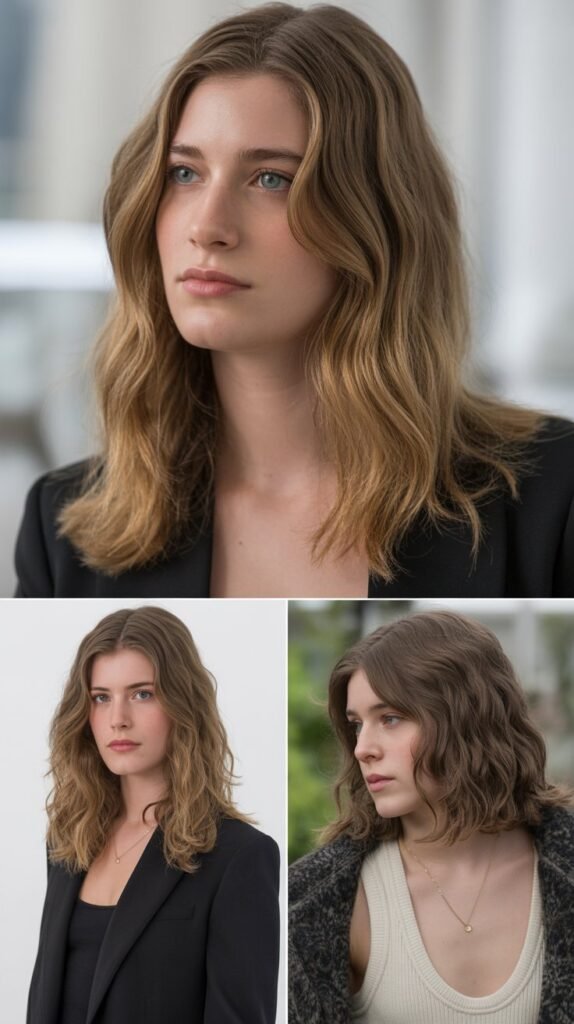
Being a mom means juggling countless responsibilities, and spending hours on hair styling simply isn’t realistic.
If you have short hair, you’re already ahead of the game with a low-maintenance cut, but that doesn’t mean you have to sacrifice style for convenience.
The beauty of short hair lies in its versatility—you can create polished, trendy looks in mere minutes, whether you’re rushing to school drop-off, heading to work, or enjoying a rare moment out with friends.
This comprehensive guide to 25 Easy Hairstyles for Moms with Short Hair That Are Fast and Stylish will transform your morning routine and prove that short hair can be just as dynamic and fashionable as longer styles.
From sleek and professional to effortlessly tousled, these hairstyles are designed specifically for busy moms who want to look put-together without the fuss.
You’ll discover techniques that work with various short hair lengths—from pixie cuts to lobs—and learn styling tricks that take five minutes or less.
Each hairstyle is practical, modern, and perfect for real life, ensuring you feel confident and beautiful no matter what your day brings.
1. The Classic Side Part
The side part is a timeless styling technique that instantly adds sophistication to any short haircut.
This simple adjustment in how you position your part can dramatically change your overall appearance, creating asymmetry that flatters most face shapes and adds visual interest to even the simplest hairstyle.
- Create a deep side part using a fine-tooth comb, positioning it approximately two inches from your natural center part.
- Apply a small amount of smoothing serum or styling cream to damp hair before blow-drying to enhance shine and control flyaways.
- Use a round brush while blow-drying to add volume at the roots on the heavier side of the part.
- Tuck the shorter side behind your ear for an elegant, face-framing effect that keeps hair out of your eyes.
- Set the style with a light-hold hairspray to maintain the part throughout your busy day.
- This hairstyle works exceptionally well for professional settings, parent-teacher conferences, or any occasion requiring a polished appearance.
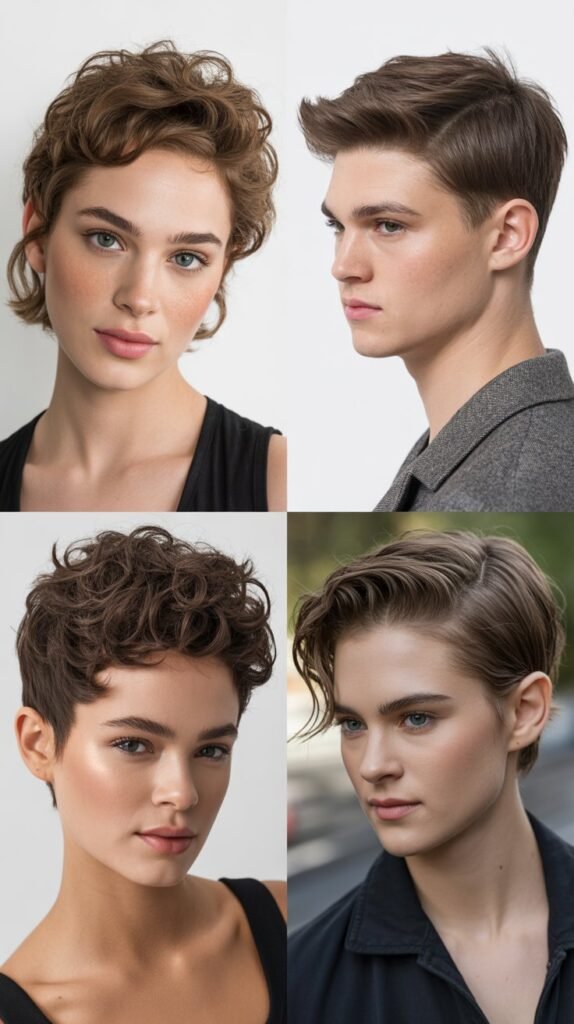
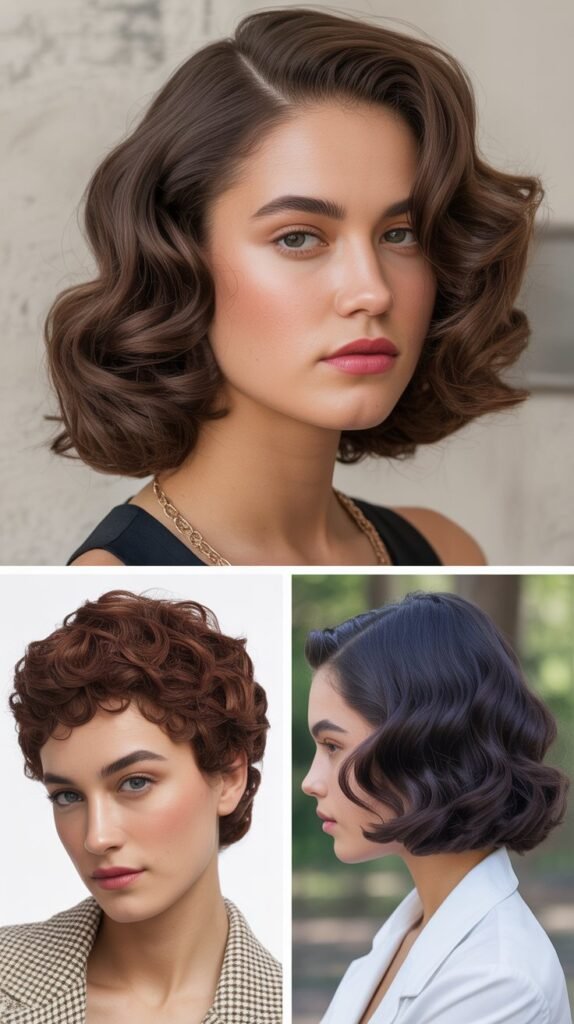
2. Textured Pixie with Products
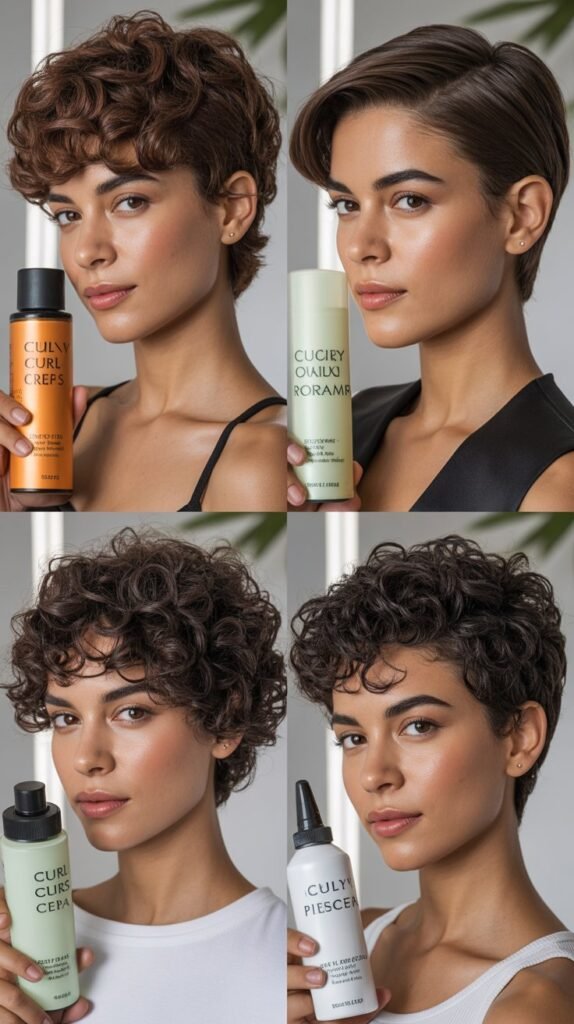
A textured pixie cut is the ultimate wash-and-go style for moms, but the right products can elevate it from basic to beautiful.
Adding texture products creates dimension, movement, and modern edge that makes your pixie cut look intentionally styled rather than simply grown out.
- Start with damp hair and apply a pea-sized amount of texturizing paste or pomade to your palms.
- Rub your hands together to warm and distribute the product evenly before applying.
- Work the product through your hair using your fingers, focusing on the ends and mid-lengths rather than the roots to avoid greasiness.
- Use your fingertips to piece out individual sections, creating separation and definition that highlights your haircut’s layers.
- Scrunch your hair gently to encourage natural wave and texture formation.
- For extra volume at the crown, lift sections at the roots and direct them upward while blow-drying.
- Finish with a small amount of lightweight texturizing spray for hold without stiffness.
3. Sleek Bob with Middle Part
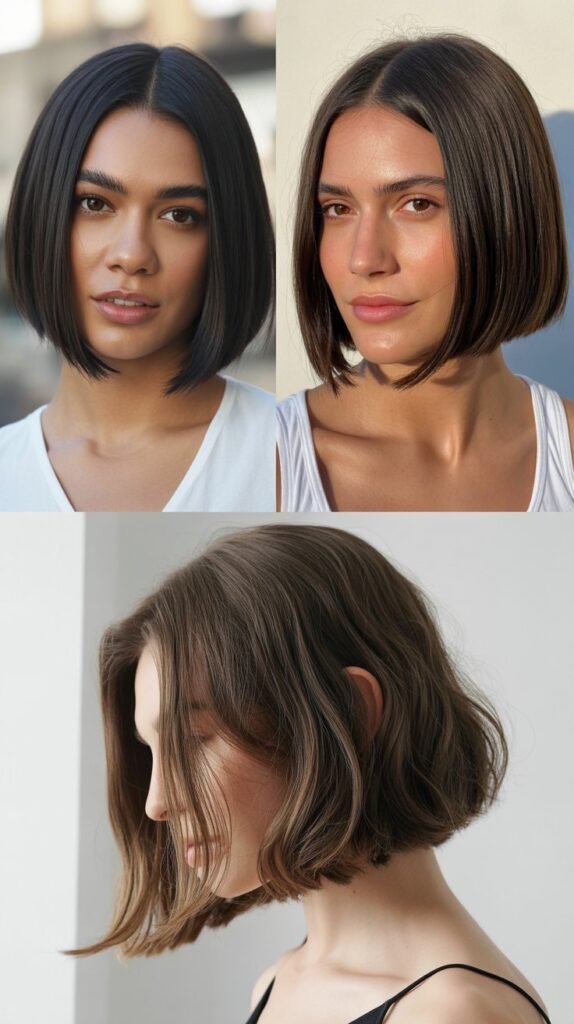
The sleek bob with a middle part channels minimalist elegance and contemporary sophistication.
This hairstyle is perfect for moms who prefer a clean, modern aesthetic and want a style that looks expensive and intentional with minimal effort.
- Begin with freshly washed hair and apply a heat protectant spray throughout.
- Blow-dry your hair straight using a paddle brush, pulling hair taut from roots to ends.
- Create a precise middle part using a rattail comb, ensuring it’s perfectly centered from forehead to crown.
- Section your hair and run a flat iron through small portions, maintaining consistent tension for ultra-smooth results.
- Apply a tiny amount of shine serum to your palms and smooth over the surface layer to eliminate frizz and add gloss.
- Tuck both sides behind your ears for a sleek, face-framing finish, or leave them forward for a more dramatic look.
- This style typically lasts all day without touch-ups, making it ideal for long workdays or busy schedules.
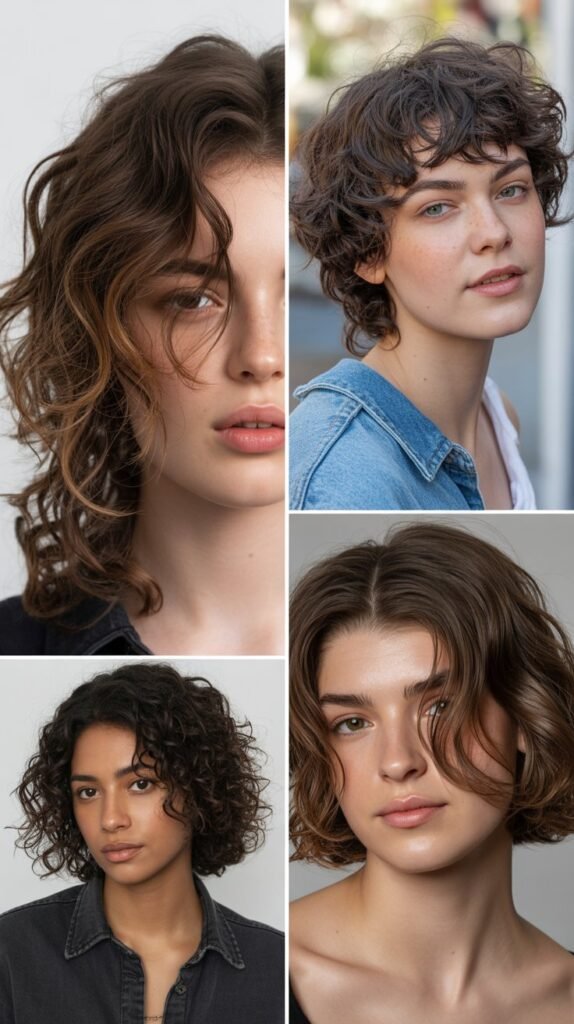
4. Messy Bedhead Waves
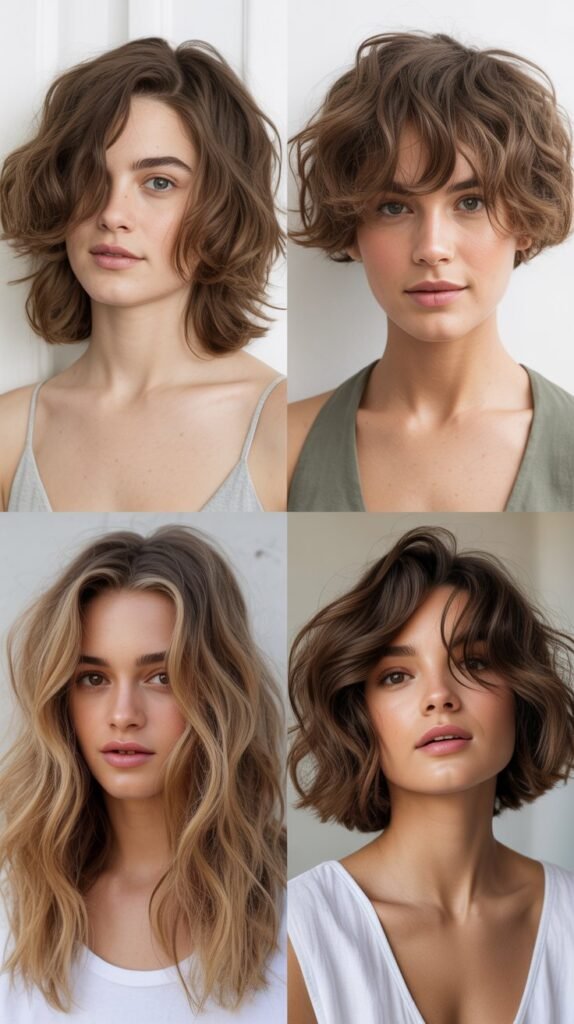
The messy bedhead waves look is perfect for moms who want to appear effortlessly stylish without actually putting in much effort.
This intentionally undone hairstyle embraces natural texture and creates a relaxed, approachable vibe that’s perfect for casual days.
- Apply sea salt spray or texturizing spray to dry or slightly damp hair for instant grit and hold.
- Scrunch your hair with your hands, working from ends toward roots to encourage wave formation.
- Use your fingers to twist random sections of hair while blow-drying on low heat, creating irregular wave patterns.
- Avoid brushing or combing through the waves—the beauty of this style lies in its imperfection.
- For added volume, flip your head upside down and shake your hair at the roots.
- Finish by using your fingers to piece out sections and create strategic messiness.
- This style works beautifully for weekend errands, playground visits, or coffee dates with friends.
5. Half-Up Top Knot
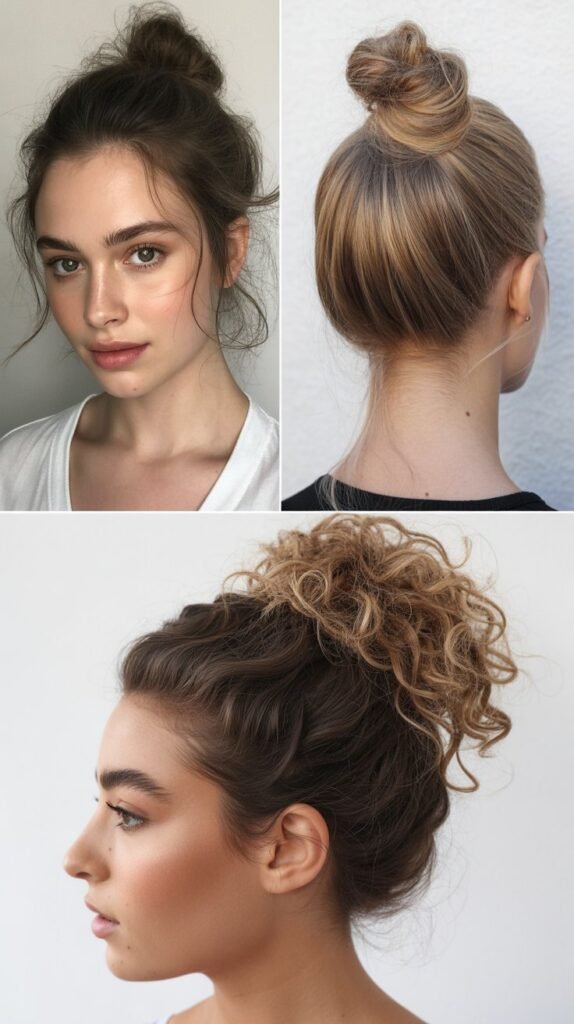
The half-up top knot is a playful yet practical style that works surprisingly well with short hair.
This look pulls hair away from your face while maintaining volume and interest, making it perfect for active days when you need your hair completely secure.
- Gather the top section of your hair from temple to temple, creating a horizontal section across your crown.
- Secure this section with a small elastic band, positioning it at your desired height (higher for more drama, lower for subtlety).
- Twist the gathered hair and wrap it around the base to form a small bun or knot.
- Secure the knot with another elastic or bobby pins, tucking the ends underneath for a polished finish.
- Gently pull at the bun to create a fuller, more relaxed appearance that doesn’t look too tight or severe.
- Leave the remaining hair down, styling it with your usual products for texture or smoothness.
- This versatile style transitions easily from morning school runs to evening activities without requiring adjustments.
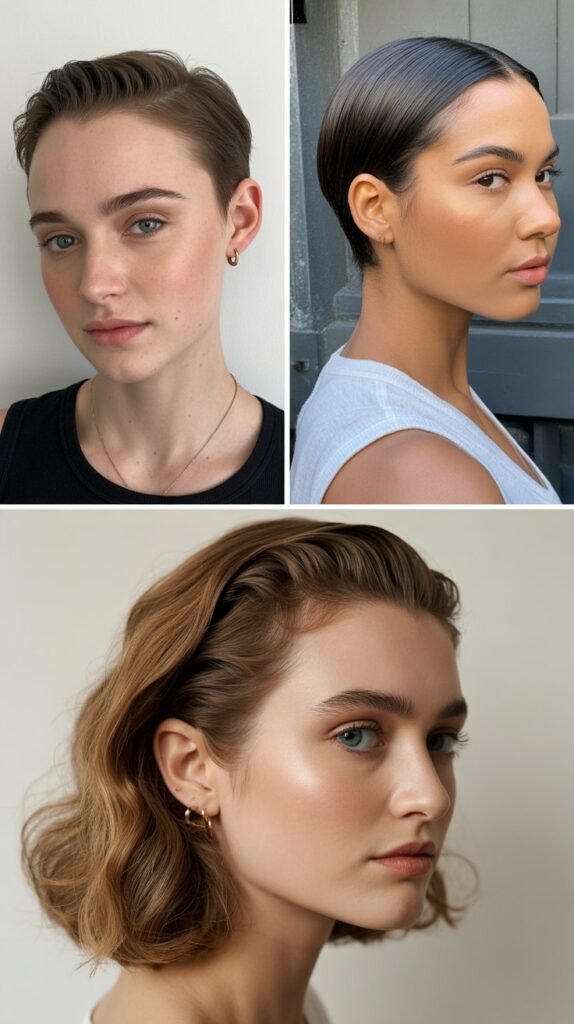
6. Slicked Back Style
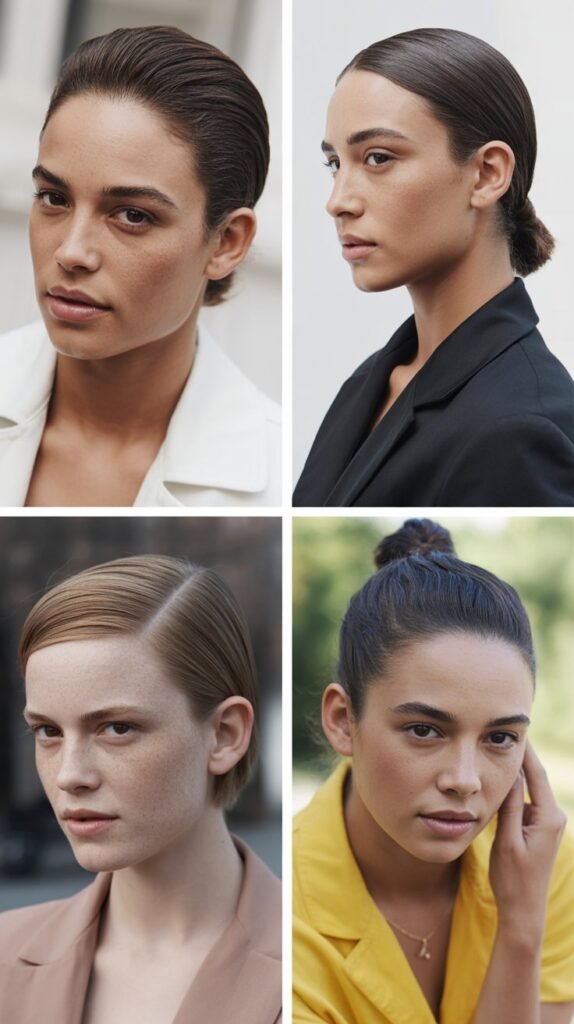
The slicked-back style exudes confidence and modern edge, perfect for moms who want to make a bold statement.
This hairstyle elongates the face, showcases your facial features, and creates a fashion-forward look that’s surprisingly easy to achieve.
- Start with damp hair and apply a generous amount of strong-hold gel or pomade.
- Use a fine-tooth comb to brush all your hair straight back from your hairline, creating a smooth surface.
- For short hair that tends to stick up, apply extra product to problem areas and hold them in place momentarily.
- Create a slight lift at the crown by holding hair upward briefly before setting it back for a more voluminous slick-back.
- Secure any longer pieces at the nape with bobby pins if needed, tucking them discreetly.
- Allow the style to air-dry or use a blow-dryer on low heat, continuously combing backward to maintain the sleek direction.
- This bold look pairs wonderfully with statement earrings and works for both professional meetings and evening events.
7. Curled Ends Outward
Flipping your ends outward creates a retro-inspired, playful look that adds bounce and personality to short hair.
This technique works especially well with bobs and lobs, creating a silhouette that’s both fun and flattering.
- Section your hair into manageable portions, working with one-inch sections at a time.
- Use a small barrel curling iron (approximately 1-inch diameter) or a round brush while blow-drying.
- Instead of curling hair toward your face, flip the ends away from your face and head, creating outward movement.
- Hold each curl for approximately 10-15 seconds to set the shape before releasing.
- Allow curls to cool completely before touching them, which helps the shape hold longer.
- Gently run your fingers through the curls to soften them slightly, creating a more natural flip rather than tight curls.
- Finish with flexible-hold hairspray to maintain the outward movement throughout the day without creating stiffness.
8. Twisted Side Sections
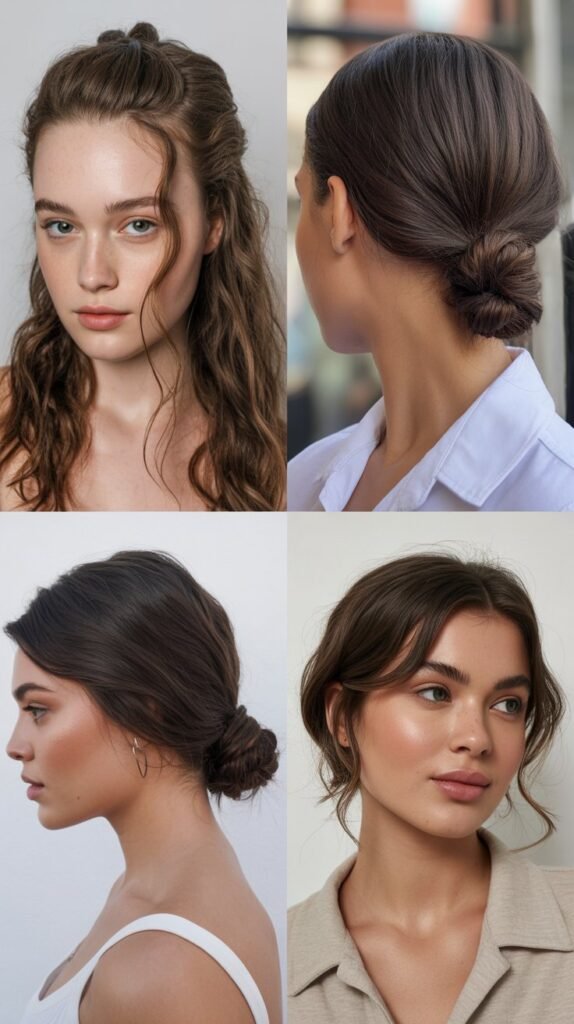
Adding twisted sections to short hair creates instant elegance and visual interest without requiring complex braiding skills.
This romantic styling technique is perfect for special occasions or days when you want to elevate your everyday look.
- Take a small section of hair from one side of your part, approximately one inch wide.
- Twist this section away from your face, maintaining tension to keep it tight and defined.
- Secure the twisted section behind your ear with bobby pins that match your hair color for a seamless look.
- Repeat on the opposite side if desired, or keep asymmetrical for a modern twist.
- For added security, cross two bobby pins in an X-shape when securing twists.
- Gently pull at the edges of the twist to create a slightly fuller, more relaxed appearance.
- This style keeps hair off your face during busy days while maintaining a polished, feminine aesthetic.
9. Deep Side Sweep
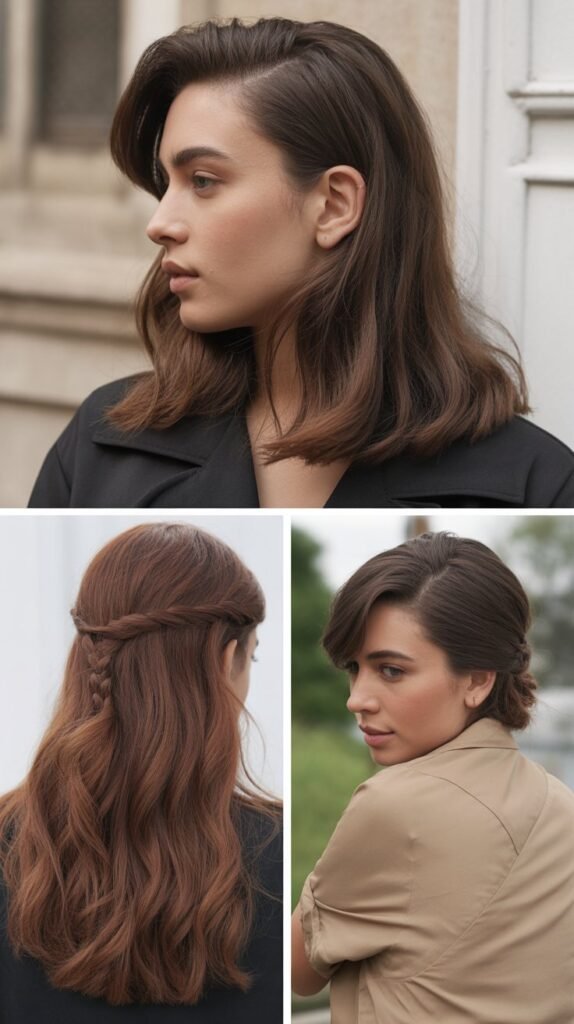
The deep side sweep is an elegant way to add drama and sophistication to short hair.
This style creates beautiful asymmetry that flatters virtually every face shape while giving the illusion of more volume and length.
- Create an extreme side part, positioning it at or near your temple rather than closer to center.
- Apply volumizing mousse at the roots on the heavier side for lift and body.
- Blow-dry your hair while directing all of it to one side, using your fingers or a brush to guide the direction.
- Once dry, sweep everything dramatically across your forehead and toward the opposite ear.
- Secure the swept section behind your ear with multiple bobby pins placed vertically for maximum hold.
- For shorter pixie cuts, use more product to help hair stay in the swept direction.
- Finish with strong-hold hairspray, concentrating on the swept section to ensure it stays in place.
10. Pinned Back Bangs
Pinning back your bangs or front sections is a quick styling trick that completely changes your look while keeping hair out of your face.
This practical style is perfect for busy mornings, workouts, or any time you need clear visibility.
- Gather your bangs or the front section of your hair, pulling it straight back from your hairline.
- Twist the section slightly for added texture and visual interest before securing.
- Use bobby pins, small clips, or decorative barrettes to hold the section in place at your crown.
- For extra style points, crisscross two decorative bobby pins or use a small jeweled clip as an accent.
- Leave the rest of your hair in its natural texture or style as desired.
- This technique works equally well whether your short hair is curly, straight, or textured.
- For shorter bangs, you may need to pin them to the side rather than straight back for better hold.
11. Voluminous Crown with Teasing
Creating volume at the crown adds instant glamour and makes short hair appear fuller and more dynamic.
This classic technique has stood the test of time because it works beautifully for virtually any hair type or texture.
- Section off the top portion of your hair from ear to ear, creating a horizontal division.
- Take small vertical sections within this area and backcomb (tease) at the roots using a fine-tooth comb.
- Hold each section upward and comb downward toward the scalp, building a cushion of volume.
- Spray each teased section lightly with hairspray before moving to the next for better hold.
- Once sufficient volume is achieved, gently smooth the top layer over the teased hair without flattening it completely.
- Use your fingers rather than a brush to preserve the volume while creating a polished surface.
- This technique adds height that balances facial proportions and creates a red-carpet-worthy effect.
12. Beach Waves with Salt Spray
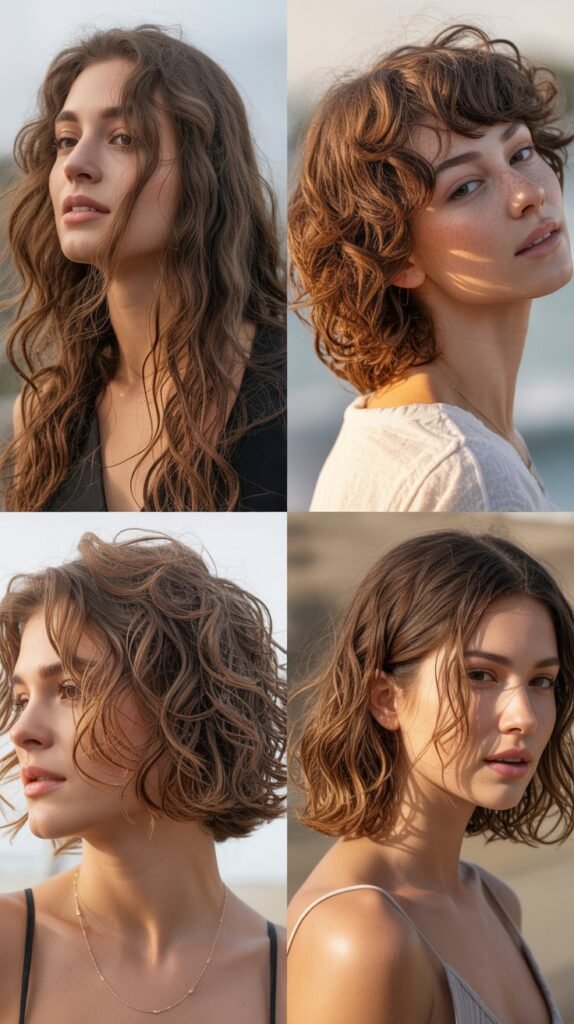
Beach waves bring effortless coastal vibes to short hair, creating texture and movement that looks naturally sun-kissed.
This relaxed styling approach is perfect for moms who want a carefree, vacation-inspired look for everyday wear.
- Spray sea salt spray liberally throughout damp hair, ensuring even distribution from roots to ends.
- Scrunch your hair with your hands, squeezing upward to encourage natural wave patterns.
- Twist random sections of hair around your fingers to create irregular, organic-looking waves.
- Allow hair to air-dry for the most natural texture, or use a diffuser attachment on low heat.
- Avoid touching your hair too much while it dries, as this can disrupt wave formation and create frizz.
- Once completely dry, scrunch again to break up any crunchy texture from the salt spray.
- For enhanced dimension, lightly spray dry shampoo at the roots to add grit and volume.
13. Smooth and Tucked Behind Ears

The smooth and tucked style is minimalist perfection, offering a clean, professional appearance that highlights your facial features.
This understated look is ideal for moms who prefer classic elegance over trendy styling.
- Begin with straightened hair, using a flat iron to create a sleek, glossy finish.
- Apply a small amount of anti-frizz serum or shine spray to enhance smoothness.
- Carefully tuck both sides of your hair behind your ears, smoothing as you go.
- For hair that won’t stay tucked, use small clear elastics or bobby pins hidden behind your ears.
- Ensure the hair at your crown and back remains smooth and even, without bumps or irregularities.
- This style showcases earrings beautifully, so consider adding statement pieces to complete the look.
- The tucked style typically stays secure throughout the day, requiring minimal touch-ups or adjustments.
14. Faux Hawk with Height
The faux hawk is an edgy, modern style that adds serious attitude to short hair.
This bold look creates dramatic height and visual interest, perfect for moms who want to express their creative side.
- Apply strong-hold styling gel or pomade to damp hair, concentrating on the center strip from forehead to crown.
- Use your fingers to push hair from the sides toward the center, creating a raised ridge along the middle of your head.
- Spike the central section upward using your fingertips, creating height and texture.
- Smooth the hair on both sides of your head downward and slightly back, keeping it flat against your head.
- Use bobby pins to secure the sides if necessary, especially for longer short hairstyles.
- Allow the style to air-dry or use a blow-dryer on cool setting to set the shape without disturbing it.
- This bold style pairs perfectly with leather jackets and edgy accessories for a rock-and-roll mom vibe.
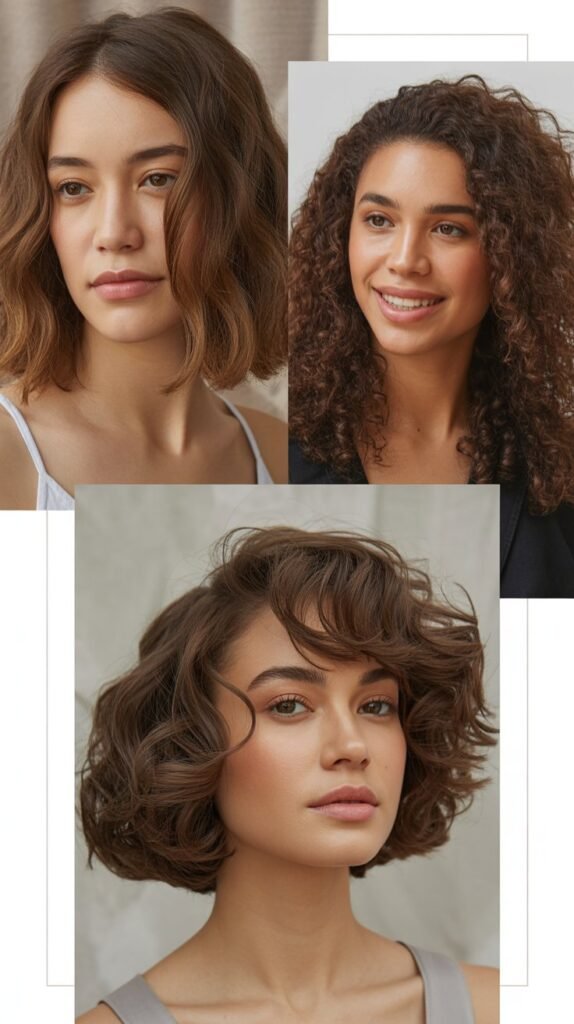
15. Soft Romantic Curls
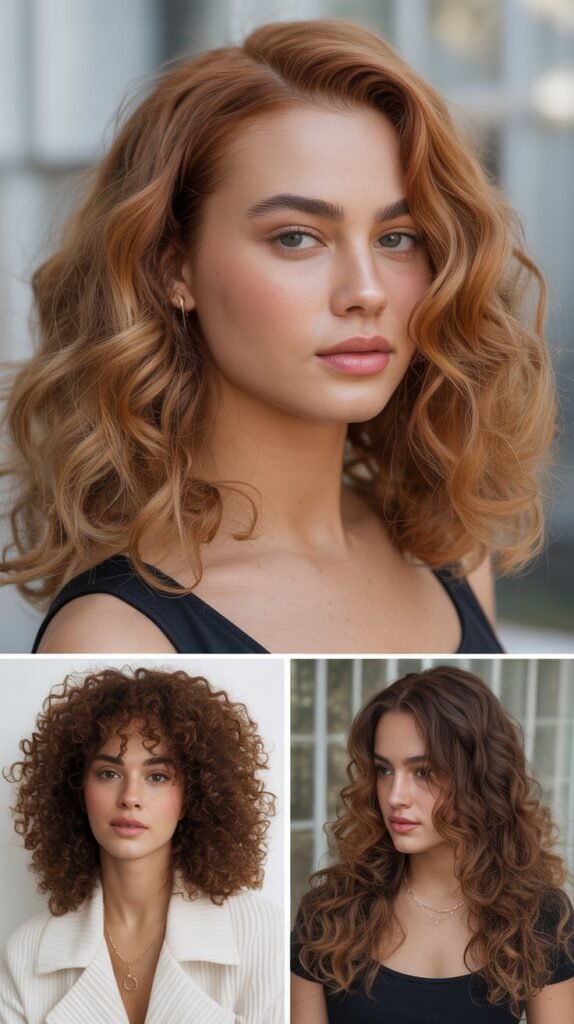
Soft romantic curls transform short hair into an elegant, feminine masterpiece perfect for special occasions.
This styling technique adds sophistication and grace, proving that short hair can be just as romantic as long flowing locks.
- Section your hair into small portions, approximately half-inch wide sections.
- Use a small barrel curling iron (3/4-inch to 1-inch diameter) to create tight curls throughout.
- Curl each section by wrapping hair around the barrel, holding for 10-15 seconds before releasing.
- Alternate the direction you curl each section (some toward face, some away) for a more natural appearance.
- Allow all curls to cool completely before touching them—this sets the curl pattern effectively.
- Once cooled, gently run your fingers through the curls to soften and separate them into romantic waves.
- Finish with flexible-hold hairspray and perhaps a sparkly hair accessory for special events.
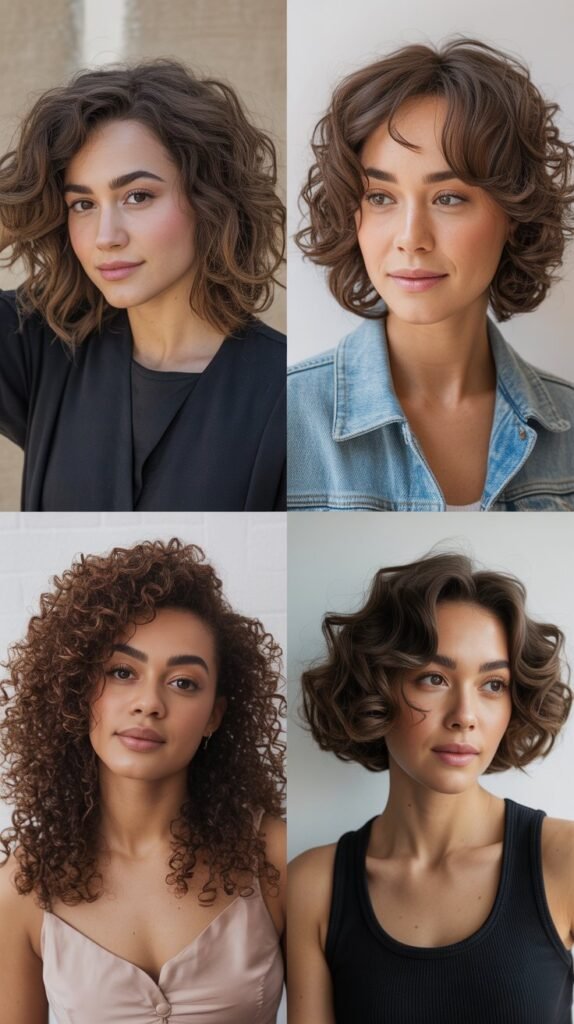
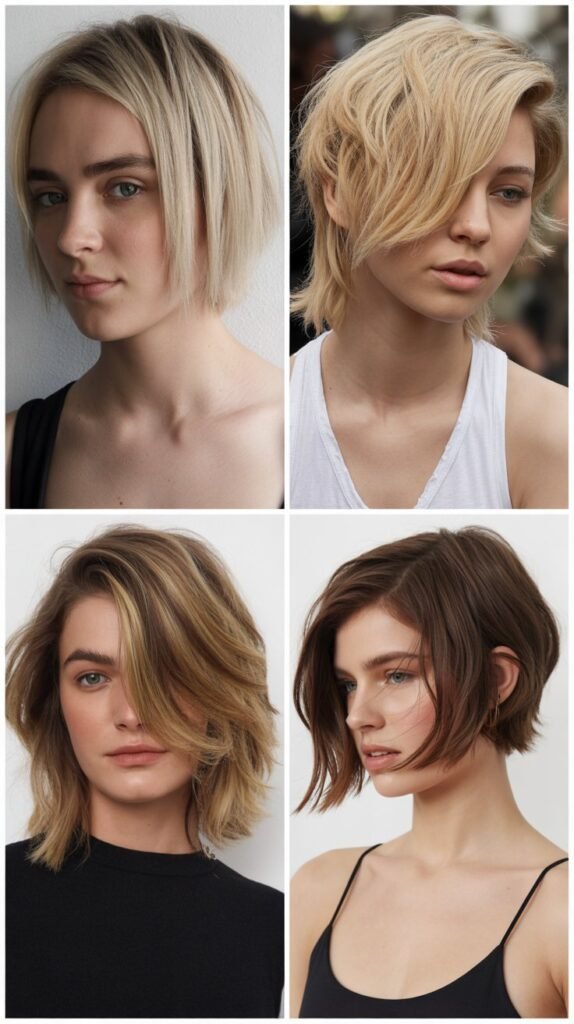
16. Choppy Layers Enhanced
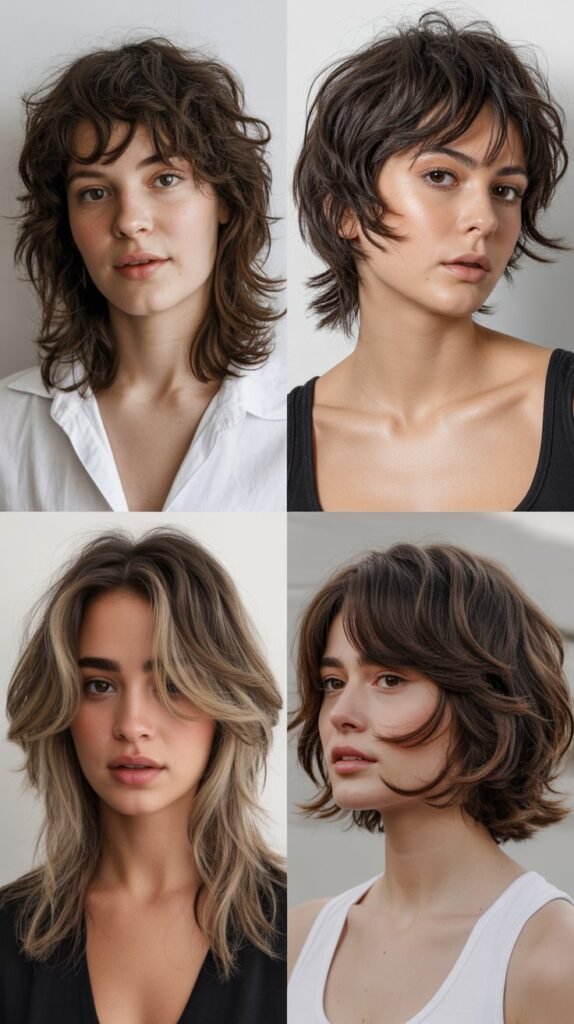
If your short haircut already has layers, enhancing them with the right products and techniques can create incredible texture and dimension.
This styling approach celebrates the architectural nature of layered cuts, making each level distinct and intentional.
- Apply a texturizing cream or paste to damp hair, focusing on mid-lengths and ends where layers are most prominent.
- Use your fingers to separate and define individual layers, pulling pieces in different directions.
- Blow-dry your hair using your fingers rather than a brush, lifting and scrunching to enhance natural volume.
- Once dry, take small sections and apply additional product to the very ends, twisting them for definition.
- Use a small amount of pomade or wax to piece out face-framing layers, creating strategic separation.
- For extra dimension, lightly tease underneath layers at the crown before smoothing the top layer.
- This style showcases the expertise of a great haircut and requires minimal daily maintenance beyond product application.
17. Slicked to One Side
Slicking all your hair to one side creates dramatic asymmetry and modern sophistication.
This bold styling choice works particularly well for evening events or when you want to make a confident fashion statement.
- Apply strong-hold gel or pomade throughout damp hair for maximum control.
- Create a deep side part at your temple or even further to the side.
- Use a fine-tooth comb to direct all your hair toward the opposite side, creating smooth tension.
- Secure the style with bobby pins behind your ear if needed, especially for longer short styles.
- For extremely short cuts, you may need to apply extra product and hold hair in place while it dries.
- Set the style with strong-hold hairspray, applying while hair is still damp for best results.
- This dramatic look pairs beautifully with bold makeup and elegant evening attire.
18. Textured Finger Waves
Finger waves bring vintage glamour to short hair with modern styling products making them easier than ever to achieve.
This retro-inspired technique creates sculptural beauty that’s perfect for formal events or when you want to channel old Hollywood elegance.
- Start with damp hair and apply generous strong-hold gel throughout.
- Create a deep side part and comb all hair in one direction.
- Use your fingers to create an S-shaped wave pattern, pushing hair forward then back in alternating curves.
- Place setting clips or duck-bill clips along each curve to hold the wave pattern in place.
- Allow hair to dry completely with clips in place—this is essential for wave retention.
- Once dry, carefully remove clips and avoid disturbing the wave pattern.
- Finish with shine spray and strong-hold hairspray to maintain the sculptural shape throughout your event.
19. Messy Side Part with Texture
The messy side part with texture combines the sophistication of a classic part with the relaxed appeal of undone styling.
This versatile look works for virtually any occasion, from professional settings to casual weekends.
- Create a side part while hair is damp, positioning it where you prefer (subtle or dramatic).
- Apply texturizing spray or mousse throughout, scrunching to encourage natural texture.
- Blow-dry using your fingers to lift and tousle hair, creating intentional disorder.
- Once dry, apply a small amount of pomade or paste to your palms and work through randomly.
- Use your fingers to piece out sections and create strategic messiness rather than uniform texture.
- Avoid making it too perfect—the beauty of this style lies in its imperfect, lived-in appearance.
- Scrunch one more time and shake your head to settle everything into place naturally.
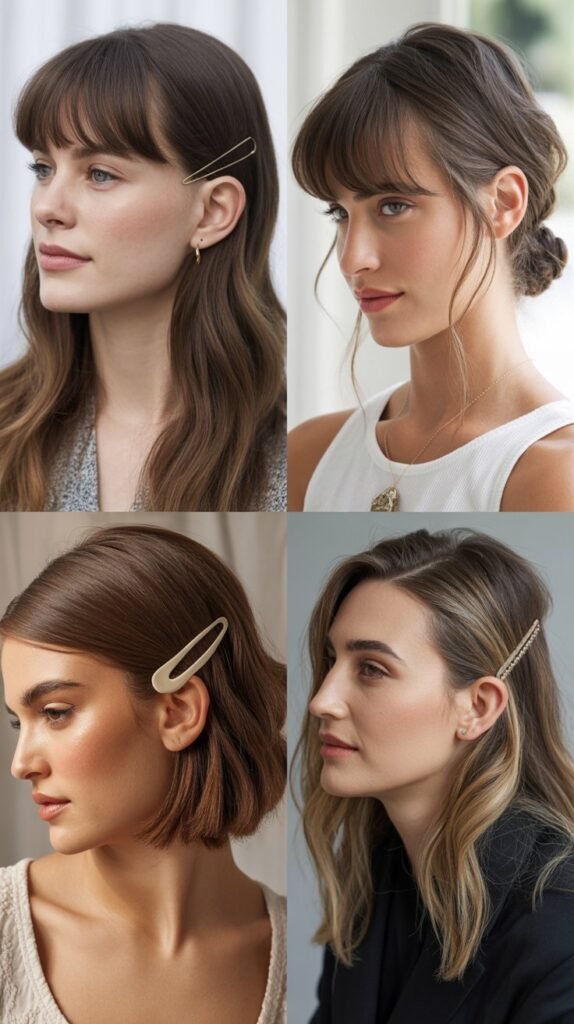
20. Bobby Pin Art
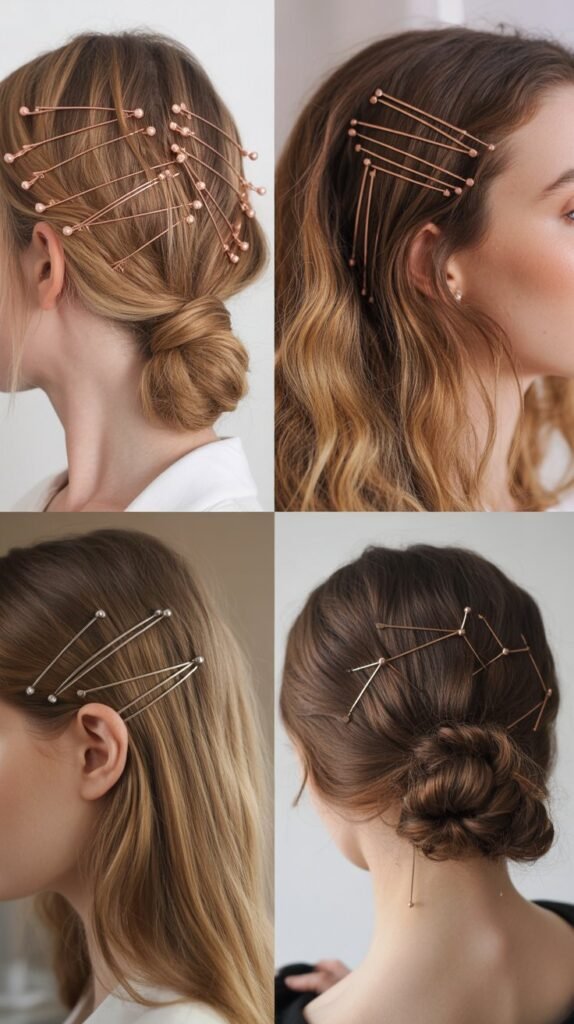
Bobby pins aren’t just functional—they can be decorative focal points that transform simple short hairstyles into artistic statements.
This trend involves using bobby pins in creative patterns or arrangements to add visual interest and personality.
- Choose bobby pins in metallic colors (gold, rose gold, silver) or fun colors that complement your outfit.
- Start with styled hair—this technique works on sleek, wavy, or textured short hair.
- Create patterns with pins such as parallel lines along one side, geometric shapes, or starburst designs.
- Use pins to secure functional elements like swept bangs while making them part of the overall design.
- Space pins evenly for a modern, minimalist look, or cluster them together for dramatic impact.
- Mix different colored pins for an eclectic, playful aesthetic.
- This styling technique is particularly popular on social media and perfect for fashion-forward moms who love experimenting with trends.
21. Wet Look Styling
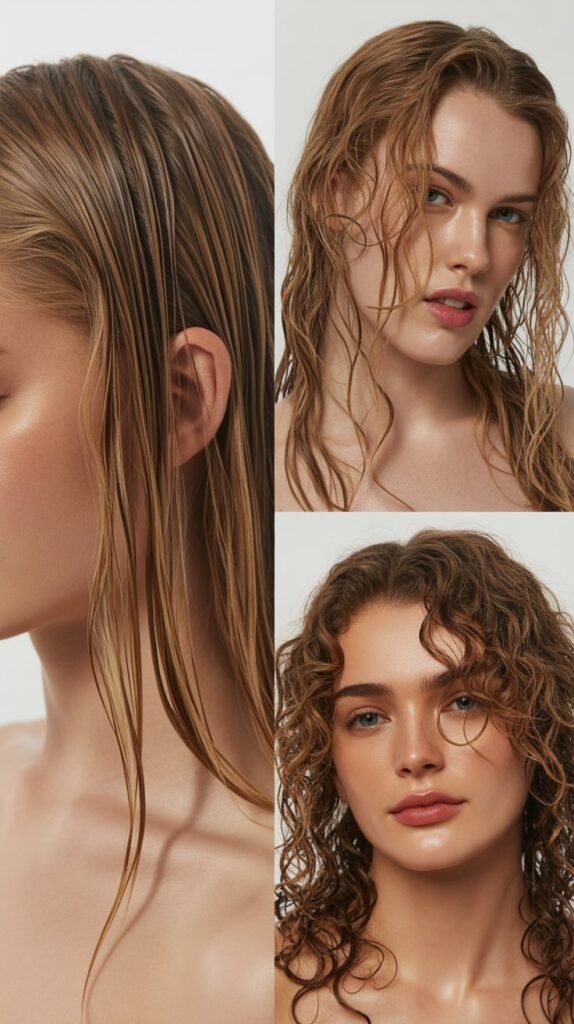
The wet look brings high-fashion edge to short hair with a glossy, just-stepped-out-of-the-shower aesthetic.
This bold styling choice creates a sleek, modern appearance that’s surprisingly easy to achieve and maintain throughout the day.
- Apply generous amounts of wet-look gel or heavy pomade to freshly washed, damp hair.
- Comb through thoroughly to ensure even product distribution from roots to ends.
- Slick hair back or to the side, depending on your preferred direction and face shape.
- Use your fingers or a comb to create intentional texture or keep it perfectly smooth.
- Allow hair to air-dry completely—do not use heat, as this disrupts the wet appearance.
- The style should maintain its glossy, wet appearance throughout the day without looking greasy.
- For extra shine, apply a small amount of finishing oil over the dried style.
22. Braided Headband Effect
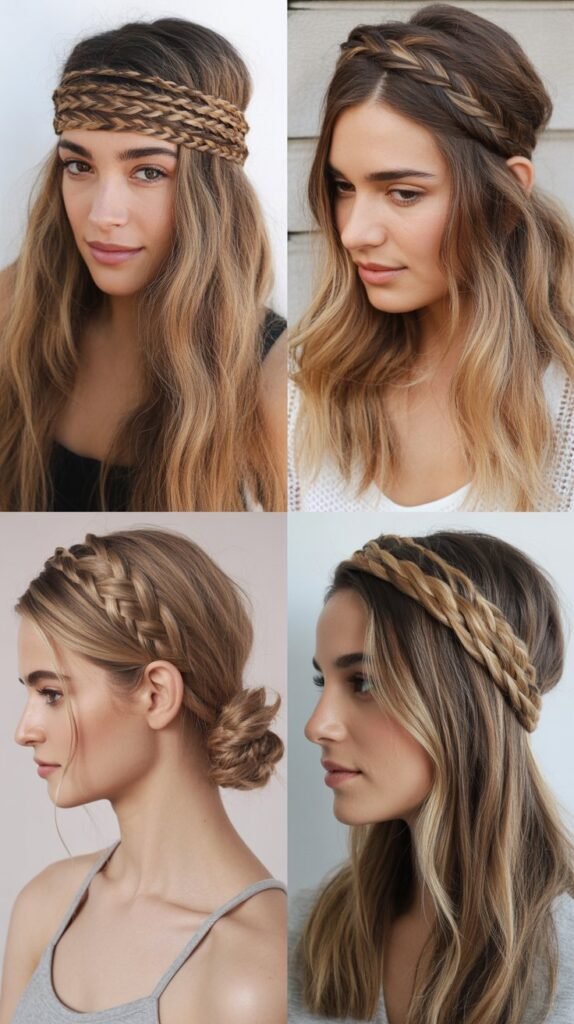
Creating a braided headband with your own short hair adds bohemian charm and romantic detail.
Even with limited length, you can achieve this look by braiding front sections and securing them across your head like a natural headband.
- Take a small section of hair from just above your temple on one side.
- Create a simple three-strand braid with this section, braiding as tightly or loosely as desired.
- Secure the end with a small clear elastic that won’t be visible in the final style.
- Bring the braid across the crown of your head like a headband, positioning it where you’d wear an actual headband.
- Pin the braid securely behind your opposite ear using bobby pins that match your hair color.
- Repeat on the other side for a double-braided effect, or leave asymmetrical for modern styling.
- This romantic look works beautifully for outdoor events, festivals, or casual summer days.
23. Pushed Forward Fringe
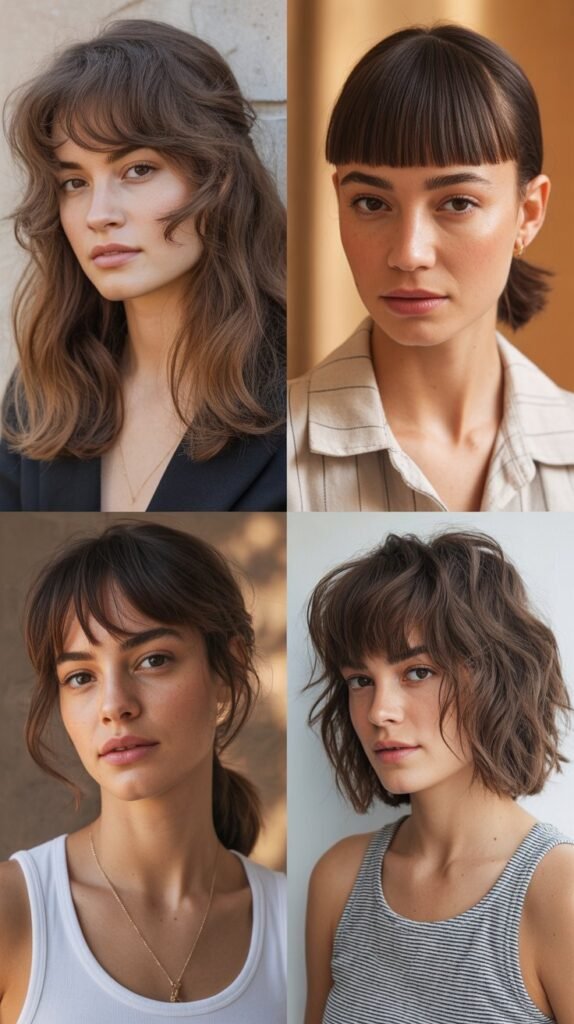
Pushing your fringe or front sections forward creates a youthful, playful look with lots of movement and personality.
This styling technique works especially well for pixie cuts and short crops with defined bangs.
- Apply lightweight styling cream or mousse to your bangs or front section while damp.
- Use a small round brush or your fingers to blow-dry your fringe, directing it forward and slightly upward.
- Create texture by twisting small pieces of your fringe in different directions for a piecey effect.
- For extra volume at the roots, hold your fringe straight up while blow-drying, then push forward.
- Use a small amount of pomade or wax on your fingertips to define individual pieces and create separation.
- Avoid making it too uniform—random, organic placement looks more natural and modern.
- This playful style adds youthful energy and works particularly well for casual, everyday wear.
24. Asymmetrical Styling
Asymmetrical styling involves deliberately creating different looks on each side of your head, resulting in dynamic, fashion-forward aesthetics.
This approach celebrates the architectural possibilities of short hair and allows for creative expression.
- Decide which side will be sleek and which will have volume or texture—contrast is key.
- On the sleek side, apply gel or pomade and comb hair flat against your head or behind your ear.
- On the textured side, apply texturizing products and create volume, waves, or tousled texture.
- You can also vary techniques: slick one side back while leaving the other side with a deep side part and volume.
- Use bobby pins to secure the sleek side behind your ear if needed for all-day hold.
- The goal is intentional imbalance that looks artful rather than accidentally messy.
- This avant-garde approach is perfect for creative moms who love making bold style statements.
25. Natural Air-Dry with Enhancement
Embracing your hair’s natural texture while using strategic products to enhance it creates the ultimate low-maintenance style.
This approach celebrates what your hair naturally wants to do, making mornings easier while still looking polished.
- Start with freshly washed hair and apply leave-in conditioner while still soaking wet.
- Add a curl-enhancing cream if you have natural waves, or texturizing spray for straight hair.
- Scrunch your hair with your hands if wavy, or simply run fingers through if naturally straight.
- Allow hair to air-dry completely without touching it—excessive manipulation creates frizz.
- Once dry, apply a tiny amount of finishing oil or serum to smooth any flyaways.
- Use your fingers to gently separate and define any natural texture that formed during drying.
- This method celebrates your natural hair pattern while making it look intentionally styled and polished.
Helpful Styling Tips for Busy Moms
| Time-Saving Strategy | Description | Best For |
|---|---|---|
| Night Before Prep | Apply products before bed and sleep on it for effortless morning styling | Textured and wavy styles |
| Dry Shampoo Refresh | Use dry shampoo to add volume and extend time between washes | All hair types, especially fine hair |
| Multi-Use Products | Choose products that provide hold, texture, and shine simultaneously | Quick morning routines |
| Strategic Accessories | Keep collection of clips, pins, and headbands for instant style variation | All occasions and styles |
| Simplified Routine | Master 3-5 go-to styles and rotate them throughout the week | Busy schedules |
Product Recommendations and Styling Tools
Having the right tools makes achieving these hairstyles significantly easier and faster. Investing in quality products specifically designed for short hair will transform your styling experience and help your looks last all day.
- Texturizing spray or sea salt spray adds grit and hold while creating beachy, tousled texture perfect for casual styles.
- Strong-hold gel or pomade is essential for sleek styles, wet looks, and any hairstyle requiring serious staying power.
- Lightweight styling cream provides definition and moisture without weighing down short hair or creating greasiness.
- Small barrel curling iron (3/4 to 1-inch) creates appropriately sized curls for short hair without overwhelming your length.
- Quality flat iron with adjustable temperature settings ensures smooth, sleek results without heat damage.
- Fine-tooth comb and rattail comb help create precise parts and smooth sections essential for polished styles.
- Bobby pins in multiple colors (matching your hair color and metallics) provide functional hold and decorative options.
- Round brush in small to medium size adds volume at roots and helps direct hair while blow-drying.
- Flexible-hold hairspray maintains your style throughout the day without creating stiff, crunchy texture.
- Heat protectant spray is absolutely essential before using any hot tools to prevent damage and maintain hair health.
Maintaining Your Short Hairstyle
Keeping your short hairstyle looking fresh requires regular maintenance and proper care. Following these guidelines ensures your cut maintains its shape and your hair stays healthy enough to style easily.
- Schedule regular trims every 4-6 weeks to maintain your short haircut’s shape and prevent it from looking grown-out or unintentional.
- Use sulfate-free shampoo designed for your hair type to cleanse without stripping natural oils that short hair needs for texture.
- Deep condition weekly to maintain moisture and prevent dryness, especially if you use heat styling tools frequently.
- Protect hair while sleeping by using a silk or satin pillowcase that reduces friction and prevents bedhead.
- Avoid over-washing which strips natural oils—most short hairstyles look better with a day or two of natural oils.
- Rotate your styling techniques to prevent heat damage and give your hair breaks from intensive styling.
- Stay hydrated and maintain a healthy diet as hair health reflects overall wellness and affects how well your hair holds styles.
Conclusion
The beauty of 25 Easy Hairstyles for Moms with Short Hair That Are Fast and Stylish lies in their versatility and practicality for real life.
Short hair doesn’t mean limited options—in fact, it opens up a world of quick, stylish possibilities that fit seamlessly into a busy mom’s schedule.
From sleek and professional to tousled and casual, these hairstyles prove that you can look polished and put-together in just minutes each morning.
The key is finding the techniques that work best with your specific hair texture, face shape, and personal style,
