Imagine transforming your long hair with beautiful, salon-quality layers without spending hours at a stylist’s chair or draining your wallet.
A 10-Minute Haircut at Home: Long Layered Haircut is not just a dream but an achievable reality that thousands of people are mastering in their own bathrooms.
Whether you’re dealing with lifeless, flat hair that needs dimension or simply want to refresh your look between salon visits, learning to cut your own layers can be a game-changer.
This comprehensive guide will walk you through every step of creating gorgeous, professional-looking layers right at home, from gathering the right tools to executing precise cutting techniques that work for various hair types and lengths.
You’ll discover the secrets hairstylists use to create that coveted cascading effect, learn how to avoid common mistakes that lead to uneven cuts, and gain the confidence to maintain your hairstyle whenever you need a quick refresh.
By the end of this article, you’ll have all the knowledge needed to give yourself a stunning layered haircut that looks like you just walked out of an expensive salon, all in just ten minutes from start to finish.
1. Essential Tools You Need for Your Home Layering Session
Before you pick up those scissors, having the right equipment makes the difference between a professional-looking cut and a disaster you’ll regret.
The foundation of any successful at-home haircut starts with proper preparation and quality tools that allow you to work efficiently and safely.
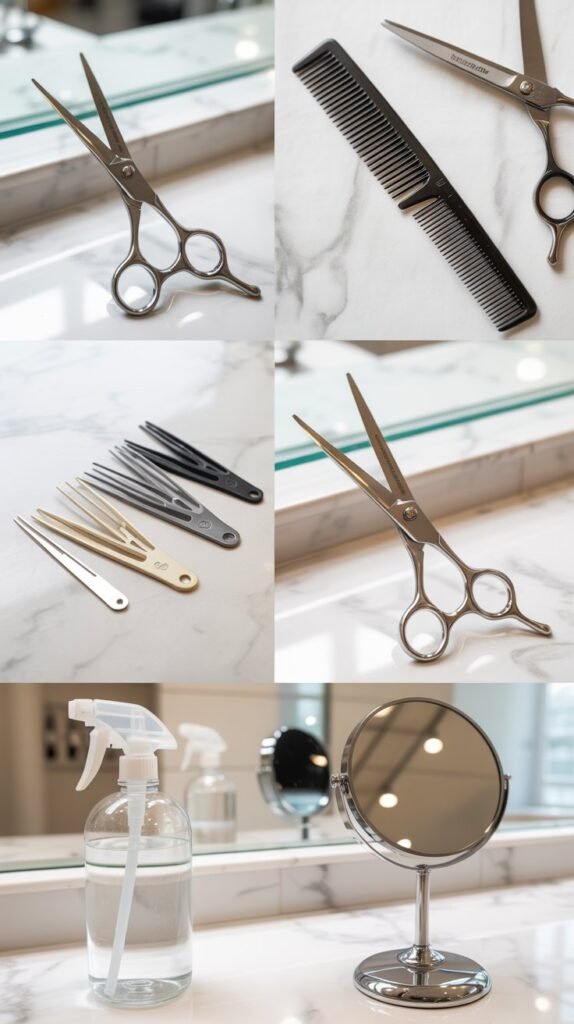
- Professional hair cutting shears with sharp, stainless steel blades measuring between 5.5 to 6.5 inches are essential because regular household scissors crush hair strands instead of cleanly cutting them.
- A fine-tooth comb helps you section hair evenly and detangle knots that could cause uneven cutting if left in place during the process.
- Multiple hair clips or sectioning clamps keep your hair organized and prevent you from accidentally cutting sections you’re not working on at that moment.
- A spray bottle filled with clean water allows you to dampen your hair slightly, making it easier to control and cut with precision.
- A large mirror positioned in front of you and a handheld mirror for checking the back ensures you can see all angles of your work throughout the cutting process.
- A cape or old towel draped around your shoulders protects your clothing from hair clippings and makes cleanup significantly easier afterward.
- Hair elastics or scrunchies help you create the ponytail method, which is one of the most popular techniques for achieving layered cuts at home.
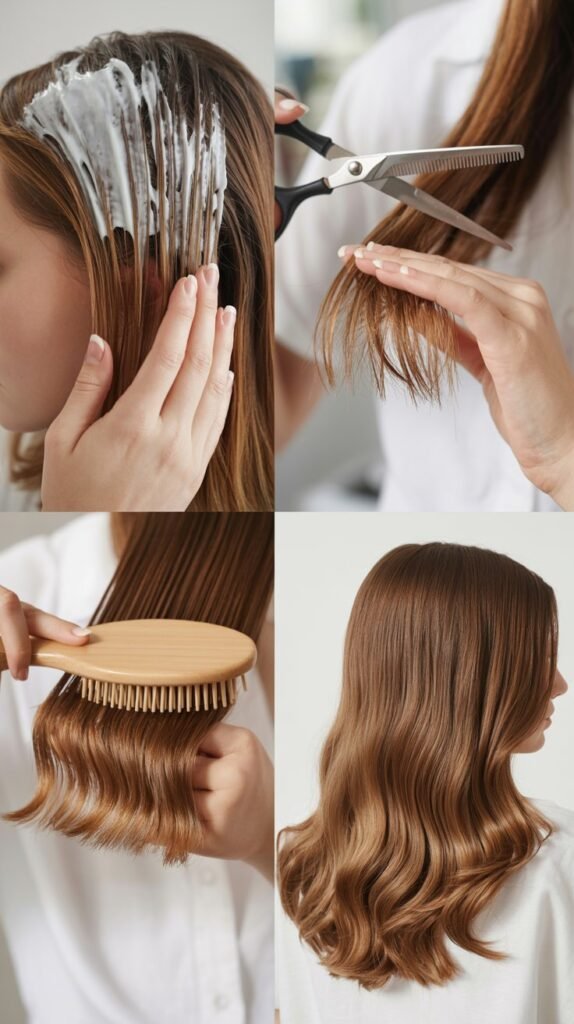
2. Preparing Your Hair: The Critical First Step
Proper hair preparation determines whether your layers will look seamless and professional or choppy and uneven.
Taking time to prepare your hair correctly sets you up for success and makes the actual cutting process much smoother and faster.
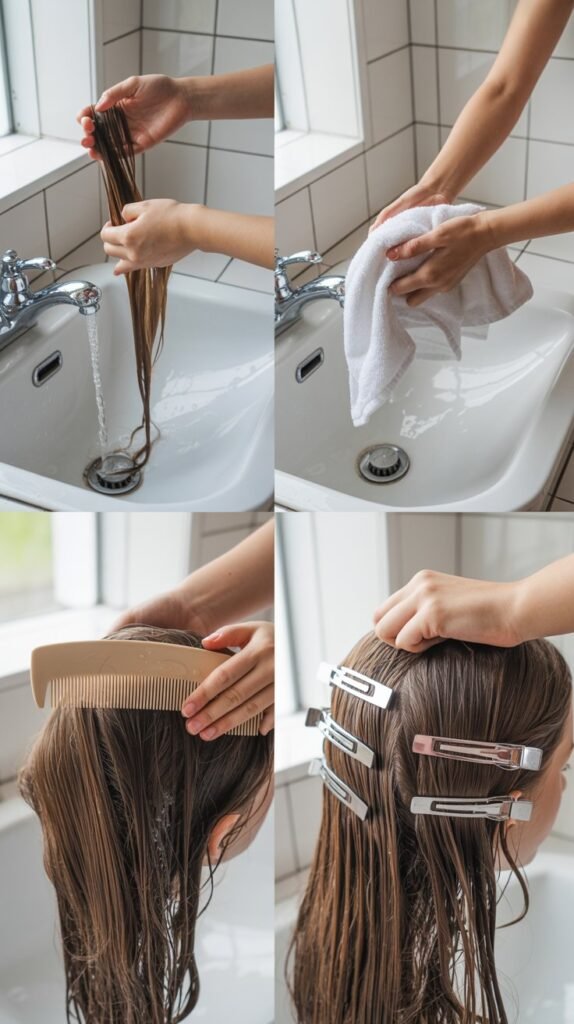
- Wash your hair with your regular shampoo and conditioner to remove any product buildup, oils, or dirt that could interfere with clean cutting lines.
- Towel-dry your hair until it’s damp but not dripping wet, as slightly moist hair is easier to control and cut than completely dry or soaking wet hair.
- Apply a leave-in conditioner or detangling spray if your hair tends to be knotty, ensuring your comb glides smoothly through every section without snagging.
- Comb through your entire head of hair from roots to ends using your fine-tooth comb, removing all tangles and ensuring hair lies naturally in its growth pattern.
- Part your hair exactly as you normally wear it, whether that’s a center part, side part, or no part at all, because cutting along your natural part ensures the most flattering results.
- Section your hair into manageable portions by dividing it from ear to ear across the crown and clipping the top section away from the bottom sections.
- Check that your hair has consistent moisture throughout by lightly misting any sections that have started to dry before you begin cutting.
3. The Ponytail Method: Fastest Technique for Beginners
The ponytail method has become wildly popular because it delivers impressive layered results with minimal risk of making major mistakes.
This technique works particularly well for those attempting their first home haircut and want a foolproof approach that creates uniform layers.
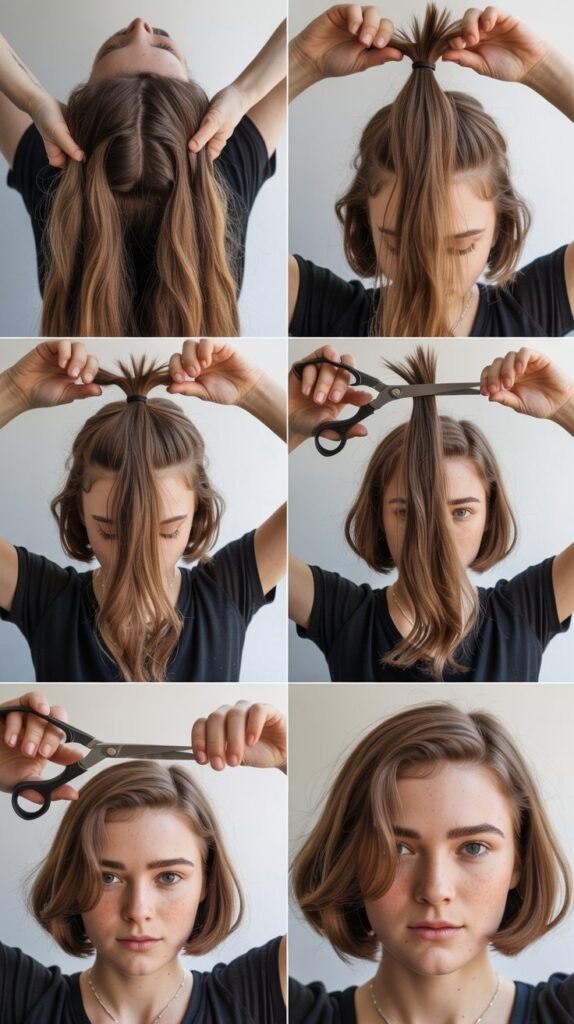
- Flip your head upside down so you’re looking at the floor, allowing gravity to pull all your hair forward and making it easier to gather every strand.
- Brush or comb all your hair forward toward your face, ensuring there are no bumps or sections left behind that could create uneven layers.
- Secure all your hair into a single, high ponytail at the very top front of your head, right at your hairline where your forehead meets your scalp.
- Pull the ponytail straight up toward the ceiling while standing upright, making sure the elastic is positioned at the exact spot where you want your shortest layers to begin.
- Hold the ponytail taut between your fingers at the length where you want to cut, typically between one to three inches from the ends depending on how much layering you desire.
- Cut straight across the ponytail in one smooth motion with your sharp shears, keeping the scissors perpendicular to the hair shaft for the cleanest cut.
- Remove the elastic and shake out your hair to reveal beautiful, cascading layers that frame your face and add tremendous volume throughout.
- Trim any obvious uneven pieces using point-cutting technique, where you hold scissors vertically and make small snips into the ends rather than cutting straight across.
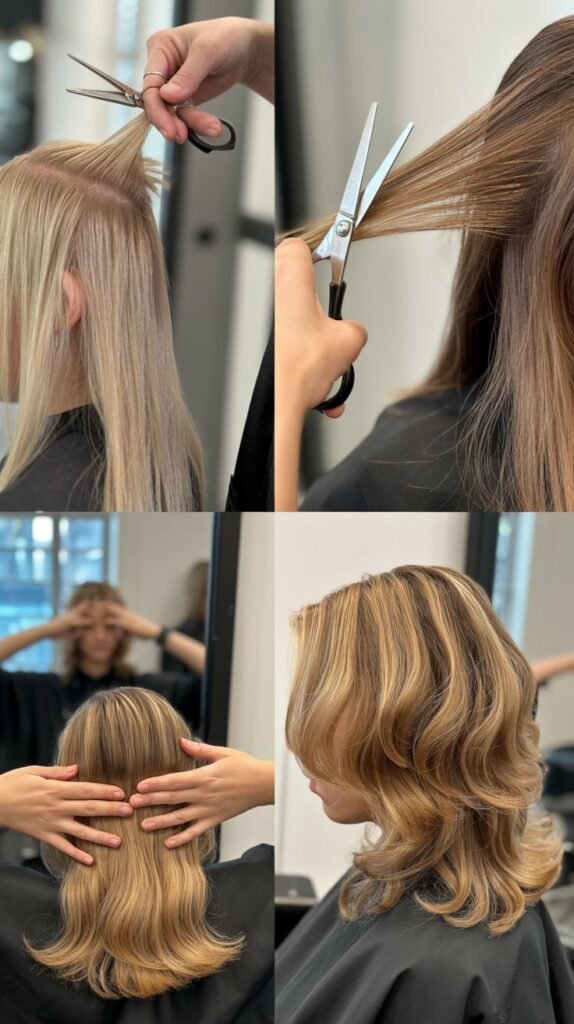
4. The Twist and Slide Technique for Advanced Layering
For those ready to take their home cutting skills to the next level, the twist and slide method creates more customized and sophisticated layers.
This technique requires slightly more skill but offers greater control over the final shape and provides more dramatic layering effects.
- Divide your hair into four quadrants by creating a part from forehead to nape and another from ear to ear across the crown.
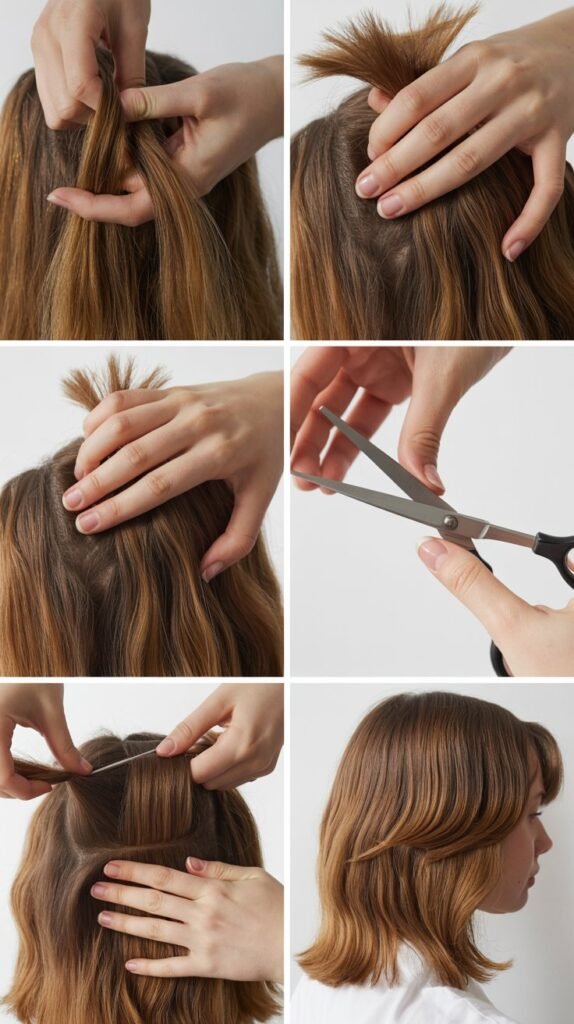
- Take a two-inch section of hair from the top layer, comb it smooth, and twist it clockwise about three to four times until the hair rope feels firm.
- Slide your fingers down the twisted section to the point where you want to create a layer, typically about two to four inches from the bottom depending on your desired effect.
- Hold the twisted section firmly between your index and middle fingers, using your fingers as a cutting guide for a straight line.
- Cut the hair just below your fingers at a slight angle, which creates a softer, more blended layer than cutting completely straight across.
- Untwist the section and check the layer by comparing it to surrounding hair, making small adjustments if needed before moving to the next section.
- Repeat this process throughout all four quadrants of your head, working methodically from one side to the other to ensure consistency.
- The twisting naturally creates different lengths within each section because outer strands of the twist extend further than inner strands, producing beautifully blended layers.
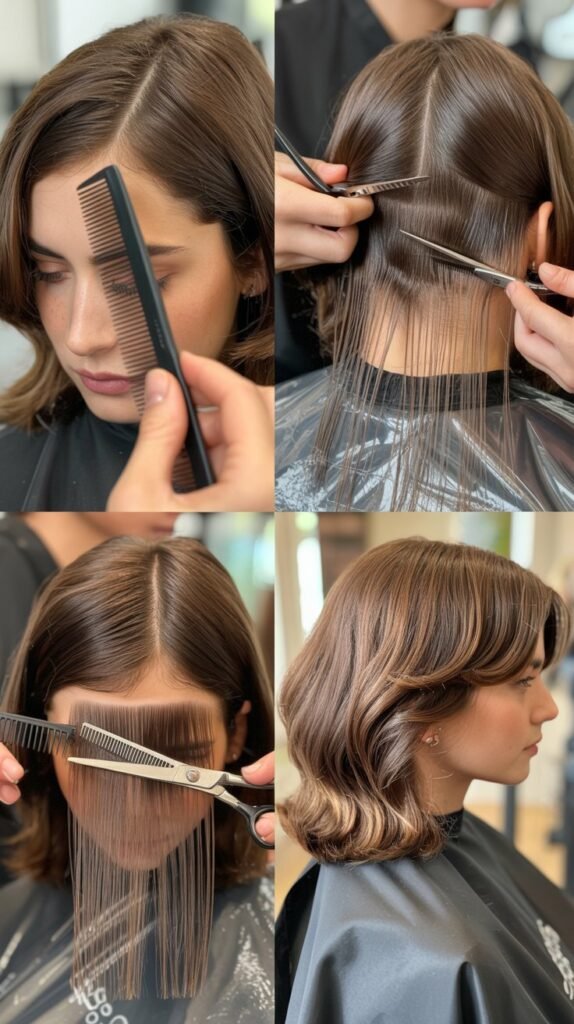
5. Face-Framing Layers: Adding That Professional Touch
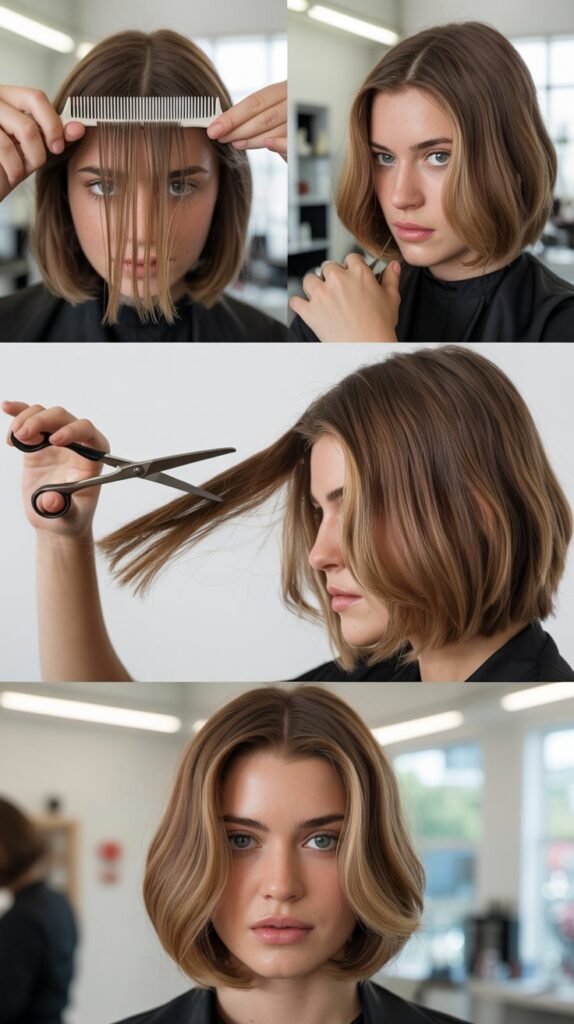
Face-framing layers are what separate amateur cuts from professional-looking results because they highlight your facial features and create a polished, intentional appearance.
These strategic front pieces require special attention but make an enormous difference in the overall finished look.
- Section out the front portions of your hair on both sides of your face, typically taking pieces that are about one to two inches wide from your part to your temples.
- Comb these front sections forward over your face and decide where you want the shortest face-framing pieces to fall, whether that’s at your cheekbone, jawline, or chin.
- Hold the section between your fingers at the desired length and angle your fingers downward toward your chin to create a diagonal cutting line that blends with the rest of your layers.
- Cut beneath your fingers using point-cutting technique, which involves holding your scissors vertically and making small upward snips into the hair rather than one blunt cut.
- Check both sides for symmetry by combing the face-framing pieces forward and comparing their lengths, making small adjustments to ensure they match perfectly.
- Create additional shorter pieces within the face-framing sections by taking smaller subsections and cutting them slightly shorter than the first cut, adding extra dimension.
- Blend the face-framing layers into the rest of your hair by taking sections from behind the front pieces and cutting at a gradual angle that connects smoothly.
- Remember that face-framing layers should enhance your face shape, so adjust the angle and length based on whether you have a round, oval, square, or heart-shaped face.
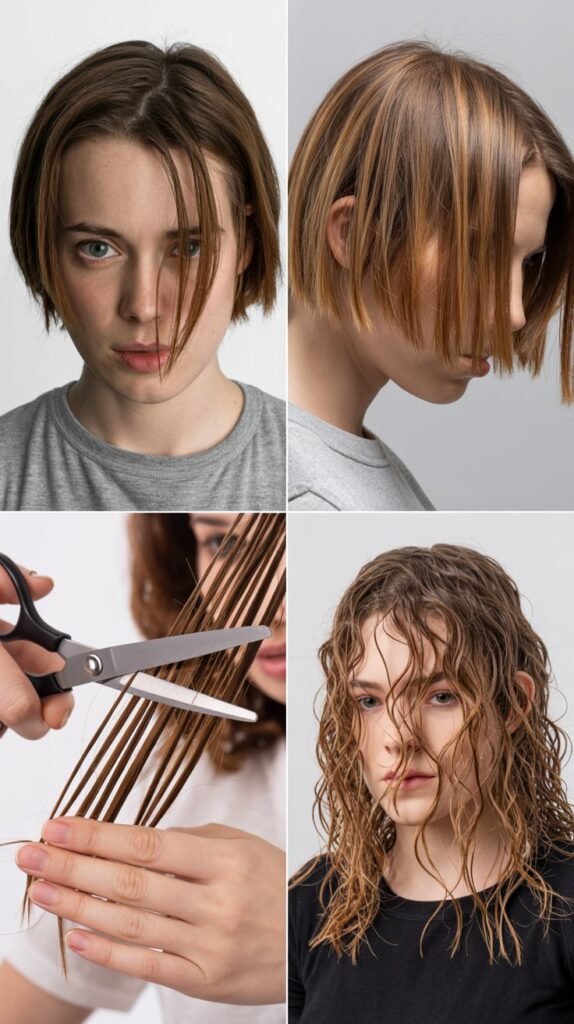
6. Texturizing and Thinning: Removing Bulk and Adding Movement
After creating your basic layer structure, texturizing techniques remove excess weight and add the movement that makes hair look dynamic and alive.
This step transforms a basic layered cut into a hairstyle with professional polish and dimension that catches light beautifully.
- Point-cutting involves holding your scissors vertically and making small, delicate cuts into the ends of your layers, creating a soft, feathered edge instead of a blunt line.
- Work through each layer systematically, taking small sections and making tiny vertical snips no more than one-eighth to one-quarter inch into the ends.
- Thinning shears can remove bulk from thick hair by cutting into sections about two inches from the ends, but use them sparingly to avoid creating holes or choppy sections.
- Hold sections of hair at a 45-degree angle away from your head and make cuts at different depths throughout each section to create varied lengths that add natural-looking texture.
- Avoid thinning or texturizing too close to your roots because this creates frizzy, difficult-to-manage hair that sticks up rather than lying smoothly.
- Focus your texturizing efforts on the mid-lengths and ends of your hair where bulk tends to accumulate and where movement is most visible.
- Check your work in natural lighting if possible because artificial bathroom lighting can make hair appear different than it looks in daylight conditions.
- If you have naturally curly or wavy hair, texturize less aggressively than you would for straight hair because curls naturally create their own texture and movement.
7. Common Mistakes to Avoid During Your Home Haircut
Understanding what not to do is just as important as knowing the correct techniques because certain mistakes can ruin your entire haircut.
Learning from others’ errors saves you from potentially disastrous results that could take months to grow out and correct.
- Cutting too much length at once is the most common and regrettable mistake because you can always cut more hair but cannot magically make it grow back instantly.
- Starting with dry hair leads to uneven cuts because dry hair shrinks up, especially curly or wavy hair, making it appear longer than it actually is when styled.
- Using regular household scissors instead of professional shears crushes and damages the hair shaft, creating split ends and a ragged appearance that looks obviously homemade.
- Cutting all your hair the same length when attempting layers defeats the entire purpose and results in a blunt, one-length cut without any dimension or movement.
- Pulling sections too tightly while cutting can make pieces shorter than intended because hair naturally has some elasticity that extends when pulled.
- Cutting when you’re tired, rushed, or emotionally upset increases the likelihood of making poor decisions you’ll regret once you’ve calmed down.
- Failing to check your work from all angles means you might miss obvious unevenness on the sides or back that you cannot see without proper mirror positioning.
- Cutting hair while it’s soaking wet causes longer-than-expected results because wet hair stretches and appears longer than it will when dry.
8. Styling Your New Layers: Making Them Look Their Best
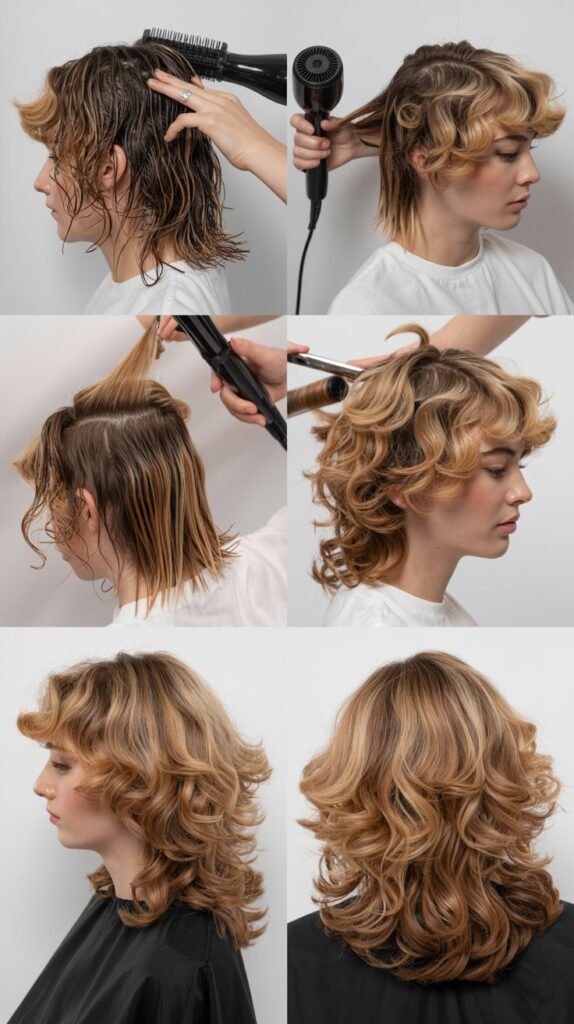
Creating beautiful layers is only half the battle because how you style them determines whether they look professionally done or obviously self-cut.
Proper styling techniques enhance your layers and make them work with your hair’s natural texture rather than against it.
- Blow-dry your layers using a round brush to create volume at the roots and smooth, polished ends that showcase the dimensional cutting you’ve created.
- Apply a heat protectant spray before using any hot tools to prevent damage that could ruin your fresh haircut and cause split ends to develop quickly.
- Use a styling product appropriate for your hair type, such as mousse for fine hair needing volume or smoothing cream for thick hair requiring control.
- Curl or wave your layers with a curling iron or flat iron, wrapping sections away from your face to emphasize the face-framing layers and create movement.
- Finish with a light-hold hairspray to maintain your style without making it stiff or crunchy, preserving the natural movement of your layers.
- Experiment with different parting positions because layers look dramatically different when worn with a center part versus a deep side part.
- Consider air-drying occasionally to see how your layers behave naturally, which helps you understand if you need to make any adjustments during your next trim.
- Schedule regular maintenance trims every six to eight weeks to keep your layers looking fresh and prevent them from growing out into an unflattering shape.
9. Troubleshooting Uneven Cuts and Fixing Mistakes
Even experienced home haircutters occasionally make mistakes that need correction, so knowing how to fix common problems saves you from panic and potential salon visits.
Most minor errors can be remedied with careful adjustments that blend away imperfections.
- Check for unevenness by pulling sections from both sides of your head forward over your shoulders and comparing their lengths in a mirror under good lighting.
- Fix slightly uneven layers by identifying the shorter side and carefully trimming the longer side to match rather than continuing to cut both sides shorter.
- Blend obvious choppy areas by using point-cutting technique on the problematic section, making small vertical snips that soften harsh lines and create gradual transitions.
- Address pieces that stick out oddly by lightly misting them with water, combing them into place, and making tiny adjustments while the hair is controlled.
- Seek professional help if you’ve made a major mistake like cutting one side significantly shorter than the other or removing too much length from a prominent section.
- Wait at least 24 hours before attempting to fix any perceived problems because hair often settles differently once completely dry and styled naturally.
- Take photos of your hair from all angles immediately after cutting so you can objectively assess the results rather than relying on potentially distorted mirror views.
- Remember that small imperfections usually aren’t noticeable to others and will grow out within a few weeks, so avoid the temptation to keep cutting in an attempt to achieve absolute perfection.
10. Maintaining Your Layers Between Home Haircuts
Proper maintenance keeps your layers looking fresh and professionally done between cutting sessions while preventing damage that could undermine your hard work.
A good maintenance routine extends the life of your haircut and keeps your hair healthy enough for continued home cutting.
- Trim your ends every four to six weeks to remove split ends before they travel up the hair shaft and create frizzy, damaged-looking layers.
- Use a deep conditioning treatment weekly to maintain hair health and keep your layers smooth, shiny, and manageable regardless of your hair type.
- Minimize heat styling when possible to prevent damage that makes layers look dry and lifeless rather than bouncy and dimensional.
- Sleep on a silk or satin pillowcase to reduce friction that causes tangles and breakage, especially important for maintaining face-framing layers.
- Protect your hair from environmental damage by wearing hats in strong sun or covering hair in chlorinated pools and salt water.
- Brush your hair gently using a wide-tooth comb or brush specifically designed for detangling, starting from the ends and working upward to prevent breakage.
- Avoid washing your hair daily because over-washing strips natural oils that keep layers looking healthy and prevents your scalp from producing excess oil.
- Get professional trims every few months even if you’re primarily cutting your own hair because stylists can correct any gradually developing shape issues and provide objective feedback.
Mastering A 10-Minute Haircut at Home: Long Layered Haircut opens up a world of freedom and confidence that transforms your relationship with your hair and your wallet.
Throughout this guide, you’ve learned the professional techniques that stylists use, from selecting the proper tools to executing precise cuts using methods like the ponytail technique and twist-and-slide approach.
You’ve discovered how to create beautiful face-framing layers that enhance your features, add essential texture and movement through point-cutting, and avoid the common pitfalls that lead to regrettable results.
The knowledge you’ve gained about styling your new layers and fixing minor mistakes means you’ll never feel helpless when your hair needs a quick refresh between professional appointments.
By incorporating proper maintenance routines and understanding how to troubleshoot issues as they arise, you’re now equipped to keep your long layered haircut looking salon-fresh for weeks or even months at a time.
The money you’ll save over time by cutting your own layers adds up significantly, but more importantly, you’ve gained a valuable skill that provides independence and creative control over your appearance.
Remember that practice makes perfect, so don’t be discouraged if your first attempt isn’t absolutely flawless, because each time you cut your hair, your technique will improve and your confidence will grow.
With these comprehensive instructions and techniques at your fingertips, you’re ready to create stunning, professional-quality layers that will have everyone asking where you get your hair done, and you can proudly say you did it yourself in just ten minutes at home.