Have you ever dreamed of achieving salon-quality layered hair at home without the complexity of professional techniques? Learning how to cut perfect layers in one easy step can transform your hairstyling routine and save you countless trips to the salon.
Whether you’re dealing with flat, lifeless hair or simply want to add dimension and movement, mastering this simple technique will give you the confidence to create beautiful layers whenever you need them.
This article will guide you through everything you need to know about cutting perfect layers using one straightforward method, from understanding what makes layers work to executing the technique flawlessly and maintaining your new style.
You’ll discover the essential tools required, learn the step-by-step process, explore variations for different hair types, and uncover professional tips that will help you avoid common mistakes while achieving stunning results every single time.
1. Understanding the Basics of Hair Layers
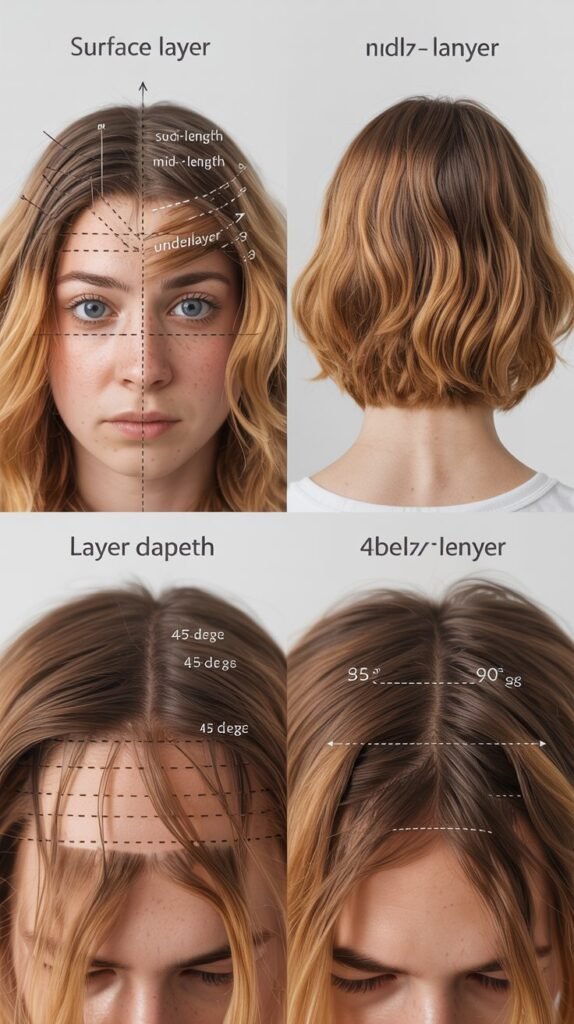
Before diving into the cutting technique, it’s crucial to understand what hair layers actually are and why they work so well for creating volume and movement.
Layers are sections of hair cut at different lengths throughout your head, creating a cascading effect that adds dimension and reduces bulk.
- Hair layers work by removing weight from specific sections while maintaining length in others, which allows your hair to move more freely and naturally.
- The basic principle behind layering involves creating shorter pieces on top that gradually blend into longer pieces underneath, forming a seamless transition.
- Different layer styles serve different purposes—face-framing layers highlight your features, while internal layers add body without changing the overall silhouette.
- Understanding your hair type is essential because fine hair benefits from fewer, strategic layers while thick hair can handle more aggressive layering to reduce bulk.
- The angle at which you cut determines the intensity of your layers, with steeper angles creating more dramatic differences in length.
- Proper layering can enhance your natural hair texture, whether it’s straight, wavy, or curly, by allowing each strand to fall into its natural pattern.
2. Essential Tools You’ll Need
Gathering the right tools before you begin is half the battle when it comes to cutting perfect layers at home.
Professional-quality tools make a significant difference in achieving clean, precise cuts.
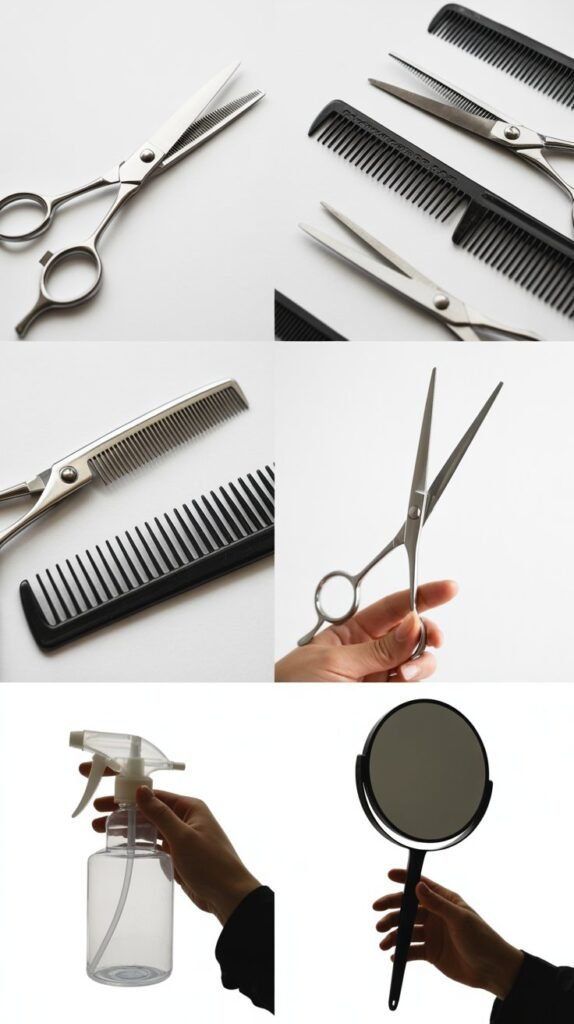
- Sharp haircutting shears are absolutely non-negotiable—using regular scissors can cause split ends and uneven cuts that ruin your results.
- A fine-tooth comb helps you section hair cleanly and ensures you’re working with smooth, tangle-free sections during the cutting process.
- Hair elastics or clips are necessary for securing your hair in the proper position, which is the foundation of this one-step layering technique.
- A spray bottle filled with water keeps your hair damp throughout the cutting process, making it easier to cut evenly and see the true length.
- A handheld mirror allows you to check the back and sides of your head, ensuring symmetry and catching any unevenness before it’s too late.
- Having a cape or old towel protects your clothing from hair clippings and makes cleanup considerably easier after you’re finished.
3. The One-Step Ponytail Method Explained
The ponytail method is the revolutionary one-step technique that allows anyone to cut perfect layers at home with minimal effort.
This approach uses gravity and strategic positioning to create naturally graduated layers.
- Begin by flipping your head upside down and brushing all your hair forward toward your forehead, ensuring every strand is smooth and tangle-free.
- Gather all your hair into a high ponytail at the very top of your head, positioning it at your forehead hairline for maximum layering effect.
- Secure the ponytail tightly with a hair elastic, making sure no bumps or loose sections exist that could create uneven layers.
- Slide a second elastic down the length of your ponytail to mark where you want to cut, typically 2-3 inches from the ends for subtle layers.
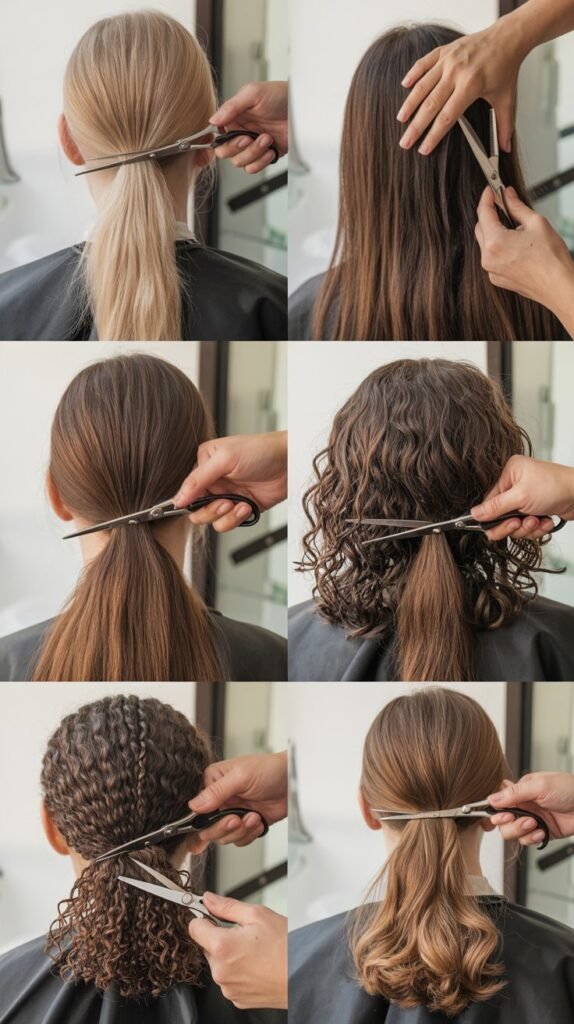
- Hold the ponytail straight up perpendicular to your head and cut straight across just above the elastic marker with sharp scissors.
- Release the ponytail and shake out your hair to reveal beautifully graduated layers that frame your face and add instant volume.
- The magic of this method lies in how the hair’s natural fall from the high ponytail position creates shorter layers on top and longer layers underneath.
4. Preparing Your Hair for the Perfect Cut
Proper preparation ensures your layers turn out even and professional-looking rather than choppy or unbalanced.
Taking time to prep your hair correctly will make the actual cutting process much smoother.
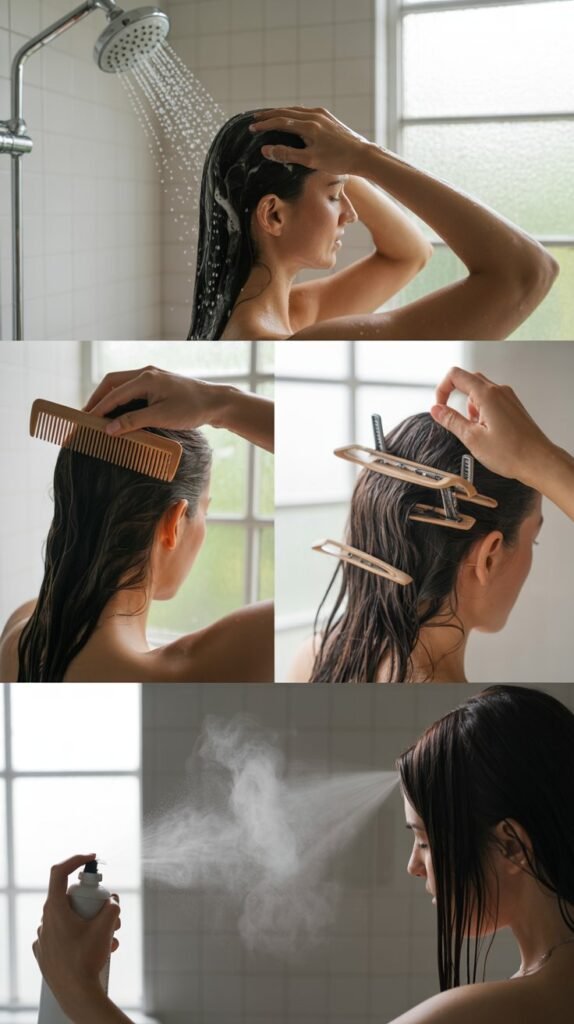
- Wash your hair thoroughly with shampoo and conditioner, then towel-dry until it’s damp but not dripping wet for optimal cutting conditions.
- Detangle completely using a wide-tooth comb or brush, working from the ends upward to remove all knots without causing breakage.
- Apply a small amount of leave-in conditioner or detangling spray to make your hair more manageable and easier to section cleanly.
- Blow-dry your hair about 80% dry if you prefer working with slightly damp hair, as this gives you better control over the final length.
- Section out any bangs or face-framing pieces you don’t want to include in the layered ponytail, securing them away with clips.
- Check your hair’s natural part and growth patterns so you can account for how your layers will fall once your hair is completely dry and styled.
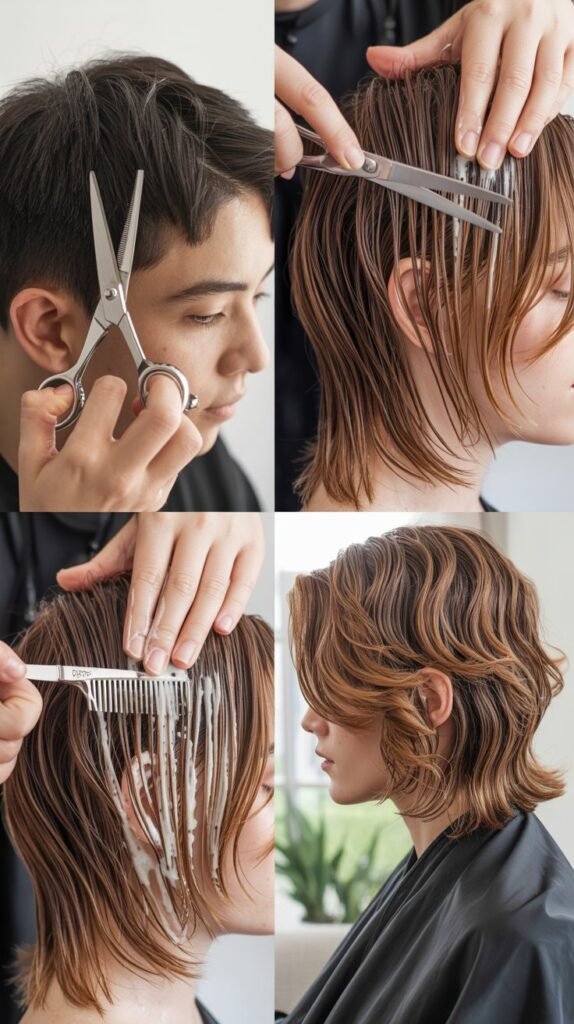
5. Step-by-Step Cutting Instructions
Following precise instructions ensures you achieve the perfect layered look without any mistakes or regrets.
This detailed breakdown will walk you through each critical moment of the cutting process.
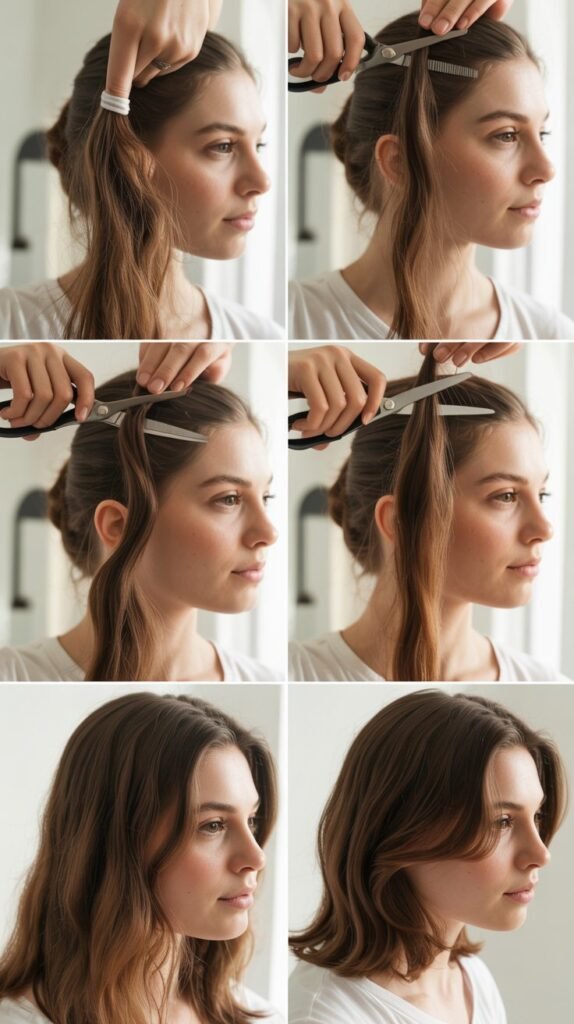
- Position yourself in front of a large mirror with good lighting so you can see exactly what you’re doing throughout the entire process.
- Flip your head completely upside down and brush all hair forward, feeling with your hands to ensure no sections are left behind or sticking out awkwardly.
- Gather your hair at the highest point of your head where your forehead meets your scalp, creating tension by pulling the ponytail taut.
- Secure with a strong elastic band that won’t slip, checking that the ponytail is centered and positioned exactly at your hairline for symmetrical results.
- Smooth the ponytail length with your comb to remove any bumps or irregularities that could translate into uneven layers.
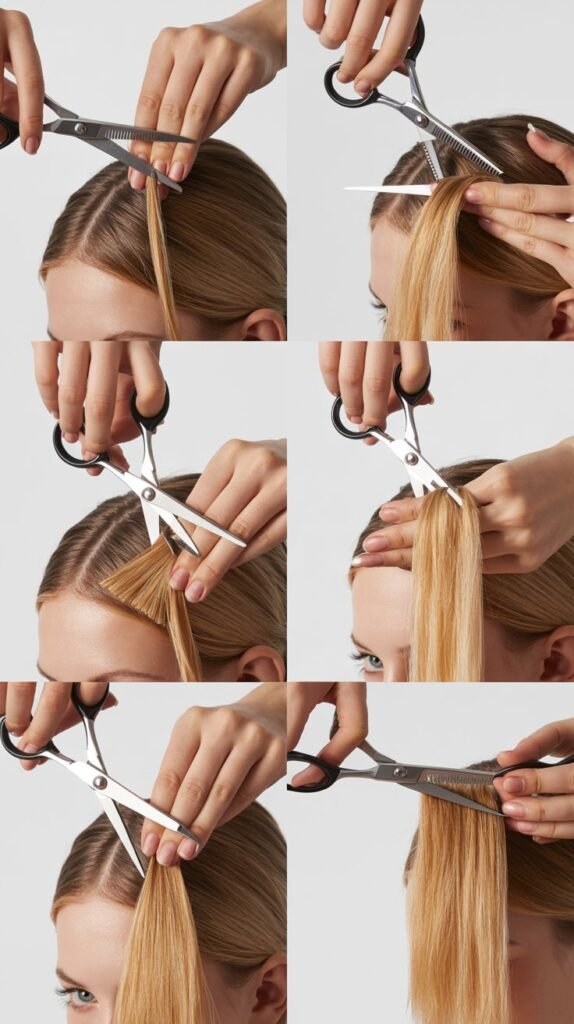
- Place your fingers or a second elastic at the desired cutting point, typically 1-3 inches from the ends depending on how dramatic you want your layers.
- Hold the ponytail straight up at a 90-degree angle from your head and cut straight across in one smooth motion with sharp shears.
- Remove the elastic and flip your head back up, then shake your hair gently to allow the layers to fall naturally into place.
- Check both sides in the mirror for symmetry and make tiny adjustments if needed by sectioning and trimming individual strands.
6. Adjusting the Technique for Different Hair Types
Every hair type responds differently to layering, so understanding how to modify the basic technique ensures optimal results for your specific texture.
Customizing the approach prevents disappointment and maximizes the flattering effect of your layers.
Fine Hair Adjustments:
- Cut smaller amounts (1-2 inches maximum) to avoid creating too much separation that makes fine hair look thinner.
- Position the ponytail slightly lower on your head to create more subtle, less dramatic layers that add volume without removing too much density.
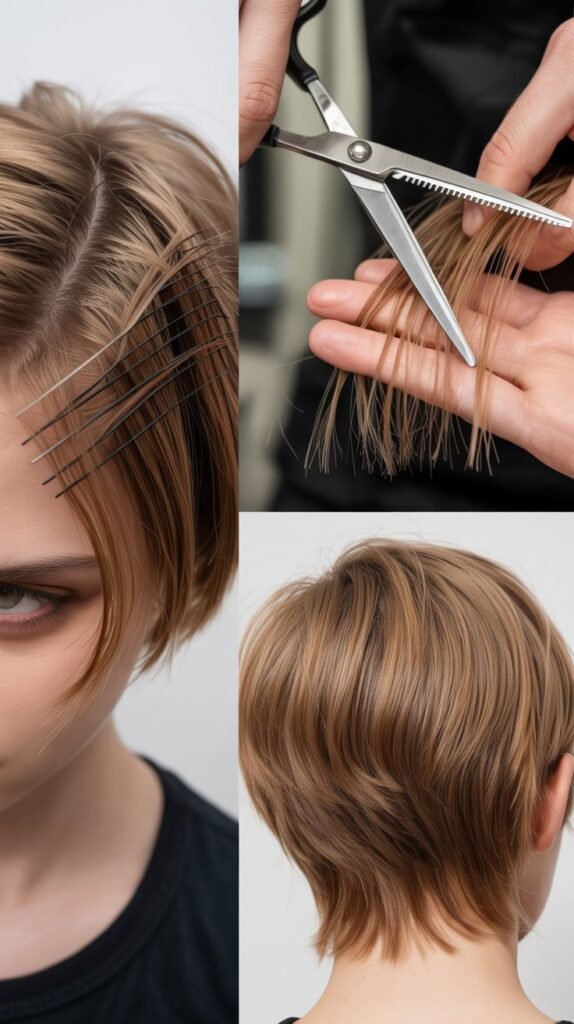
- Consider point-cutting (cutting into the ends at an angle) rather than blunt-cutting to create softer, less obvious layers.
Thick Hair Modifications:
- You can afford to cut more length (2-4 inches) since thick hair has plenty of volume and density to work with.
- Position the ponytail at the very highest point and pull tightly to create more aggressive layers that significantly reduce bulk.
- Use a razor or thinning shears on the cut ends to remove additional weight and create more movement throughout.
Curly Hair Considerations:
- Cut less length than you think you need (1-2 inches maximum) because curly hair springs up significantly when dry.
- Work with completely dry hair or account for 1-2 inches of shrinkage when cutting damp curls to avoid ending up too short.
- Twist individual curl sections and cut into them vertically rather than straight across to maintain curl pattern integrity.
7. Common Mistakes to Avoid
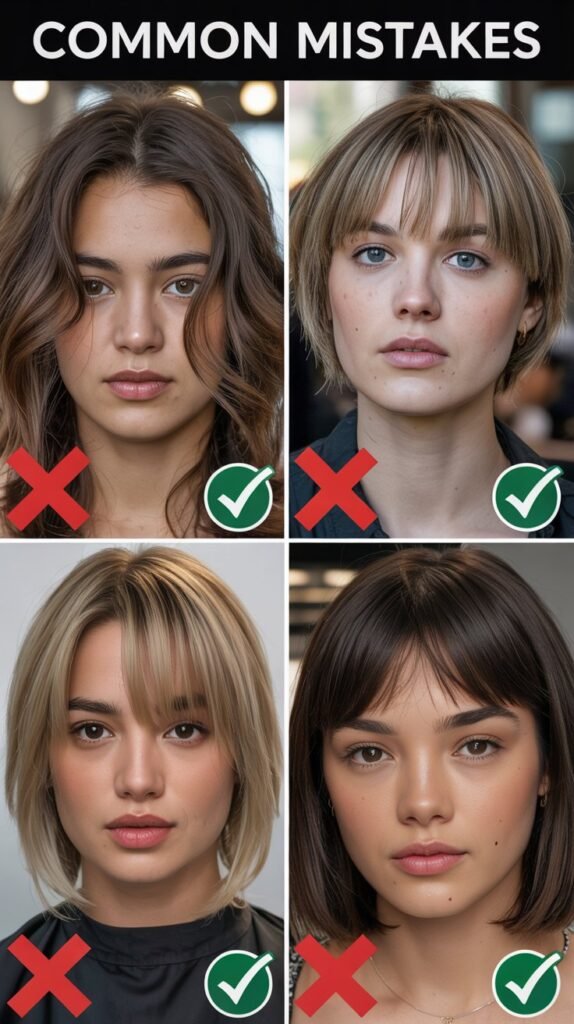
Even with a simple technique, certain errors can derail your layering efforts and lead to disappointing results.
Being aware of these pitfalls helps you navigate the process successfully.
- Cutting too much length at once is the most common mistake—always start conservative since you can cut more but cannot add hair back.
- Positioning the ponytail too low or too far back on your head creates minimal layering effect and defeats the purpose of the technique.
- Using dull scissors creates ragged, uneven cuts that damage hair and make your layers look choppy rather than smooth and blended.
- Failing to secure the ponytail tightly enough allows hair to slip and shift during cutting, resulting in uneven or lopsided layers.
- Cutting at an angle rather than straight across the ponytail produces diagonal layers that don’t blend properly when your hair is down.
- Forgetting to account for your hair’s natural part means layers may fall awkwardly when styled in your usual way.
- Rushing through the preparation and sectioning stages leads to bumpy ponytails that translate directly into uneven layers throughout your hair.
8. Styling Your New Layers
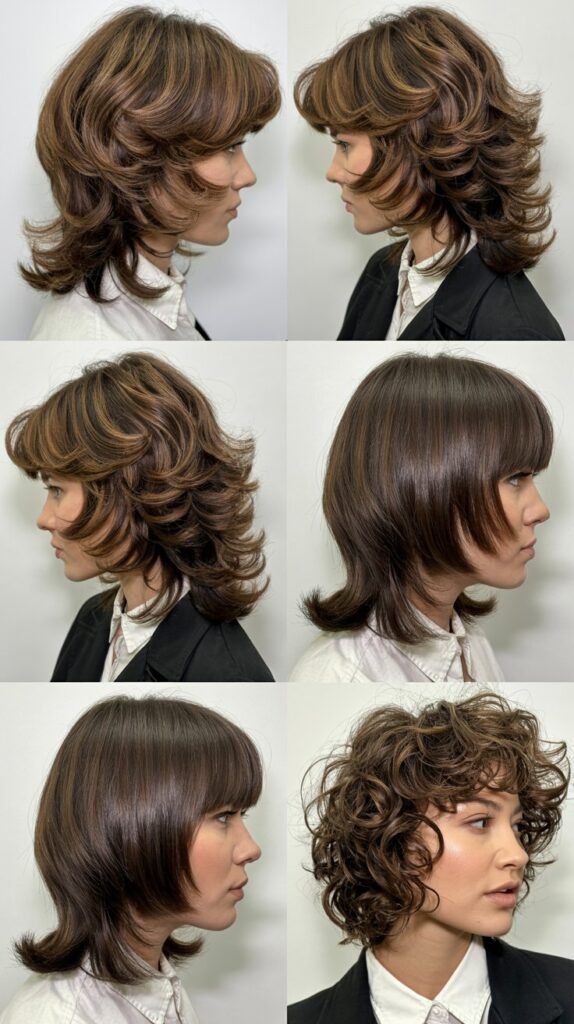
Once you’ve cut your perfect layers, knowing how to style them properly brings out their full potential and showcases the dimension you’ve created.
The right styling techniques make the difference between okay layers and absolutely stunning ones.
- Apply a volumizing mousse or spray to damp hair at the roots to enhance the lift and movement your new layers naturally provide.
- Blow-dry your hair upside down using a round brush to emphasize the graduated effect and create maximum volume at the crown.
- Use a curling iron or flat iron to add loose waves or bends to your layers, which highlights the different lengths and creates beautiful texture.
- Finish with a light-hold hairspray or texturizing spray to maintain the movement and prevent your layers from falling flat throughout the day.
- Experiment with different partings to see how your layers frame your face from various angles and create different looks.
- Consider adding subtle highlights or lowlights that emphasize the dimensional effect of your layers and make them even more noticeable.
9. Maintaining Your Layered Haircut
Proper maintenance keeps your layers looking fresh and prevents them from growing out awkwardly or losing their shape.
Regular upkeep ensures your DIY haircut continues to look salon-quality.
- Trim your layers every 8-12 weeks using the same ponytail method to maintain the shape and prevent split ends from traveling up the hair shaft.
- Deep condition your hair weekly to keep the ends healthy and prevent the dryness that makes layers look frizzy and unkempt.
- Use heat protectant spray before styling with hot tools to preserve the integrity of your hair and prevent damage to the delicate layered ends.
- Sleep on a silk or satin pillowcase to reduce friction that causes tangles and breakage in your layered hair while you sleep.
- Avoid over-washing your hair, which strips natural oils that keep layers looking smooth and shiny rather than rough and dull.
- Schedule professional trims every 3-4 months if you want to maintain the shape perfectly or need help blending any sections that grew out unevenly.
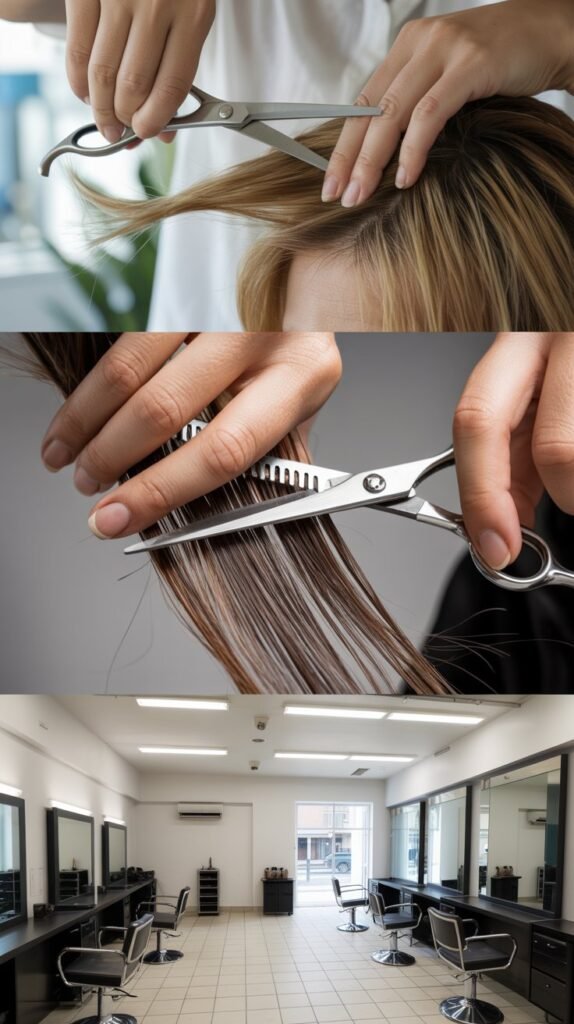
10. Troubleshooting Uneven Results
Sometimes even with careful execution, your layers might not turn out exactly as planned, but most issues can be easily fixed.
Knowing how to troubleshoot gives you the confidence to make corrections without panic.
- If one side appears shorter than the other, identify the longer side and carefully trim small amounts until both sides match perfectly.
- When layers seem too choppy or disconnected, use thinning shears or point-cutting techniques to blend the harsh lines and create smoother transitions.
- For layers that turned out too short, embrace styling techniques like curling or waving to add length visually while you wait for regrowth.
- If you notice pieces that were missed in the original ponytail, isolate them and cut to match the surrounding layer length for consistency.
- When layers lack movement or fall flat, consider cutting slightly more length or adding texture with a razor to remove additional weight.
- Should you feel completely unsatisfied with the results, visit a professional stylist who can assess the situation and make corrections or adjustments to improve the outcome.
11. Variations of the One-Step Method
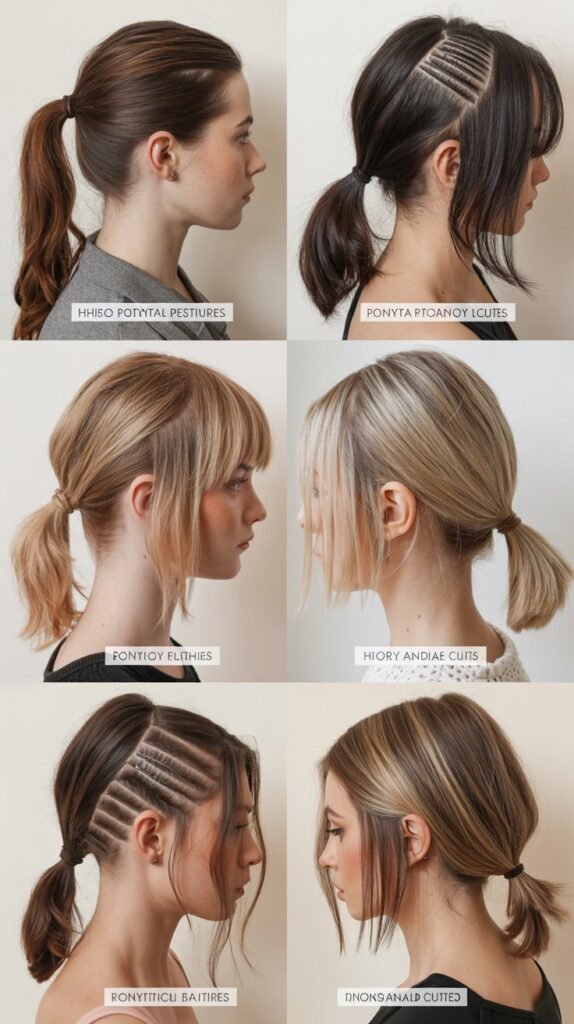
Once you’ve mastered the basic technique, experimenting with variations allows you to create different layering effects to suit your preferences.
These modifications expand your hairstyling repertoire significantly.
- The low ponytail variation positions the hair at the nape of your neck and creates more subtle, longer layers that maintain overall length.
- Side ponytail layering places the ponytail at one side of your head and produces asymmetrical, edgy layers for a more dramatic, modern look.
- Multiple ponytail sectioning divides your hair into two or three ponytails at different heights and creates more customized layer placement throughout.
- The twist-and-cut method involves twisting the ponytail before cutting, which creates softer, more textured layers with a lived-in appearance.
- Diagonal cutting across the ponytail at a 45-degree angle produces graduated layers with more extreme length variation from shortest to longest.
- Face-framing mini ponytails take just the front sections and layer them separately to create specific pieces that highlight your facial features beautifully.
12. Professional Tips from Experienced Stylists
Learning insider secrets from professional hairstylists elevates your DIY layering from amateur to expert level.
These tips represent years of accumulated knowledge and experience in the beauty industry.
- Always cut less than you think you need initially because you can make additional cuts but cannot reattach hair once it’s removed.
- Work in natural daylight whenever possible since artificial lighting can distort your perception of evenness and create shadows that hide mistakes.
- Take breaks during the cutting process to step away and return with fresh eyes that catch imperfections you might have missed initially.
- Record yourself or take photos from multiple angles before cutting so you can reference your starting point if corrections become necessary.
- Keep your scissors perpendicular to the ponytail and use one smooth, decisive cut rather than multiple choppy snips that create jagged edges.
- Consider the seasonality of your haircut since hair grows faster in summer and you might need more frequent trims during warmer months.
- Trust your instincts about what looks right for your face shape and personal style rather than strictly following rules that might not suit you.
- Practice the motion and positioning without actually cutting first, especially if this is your inaugural attempt at DIY layers.
Conclusion
Mastering how to cut perfect layers in one easy step empowers you to take control of your hairstyle and achieve professional-looking results from the comfort of your home.
This simple ponytail method has transformed the way countless people approach hair layering, making what once seemed like an intimidating professional service accessible to everyone regardless of skill level.
By understanding the fundamentals of layering, gathering the right tools, following the step-by-step instructions carefully, and avoiding common pitfalls, you can create beautiful, dimensional layers that add movement, volume, and style to your hair.
Remember that practice makes perfect, and even if your first attempt isn’t flawless, the beauty of hair is that it grows back and gives you endless opportunities to refine your technique.
Whether you’re looking to save money on salon visits, gain independence in your hair care routine, or simply enjoy the satisfaction of creating your own style, this one-step method provides everything you need to cut perfect layers confidently and successfully every single time.