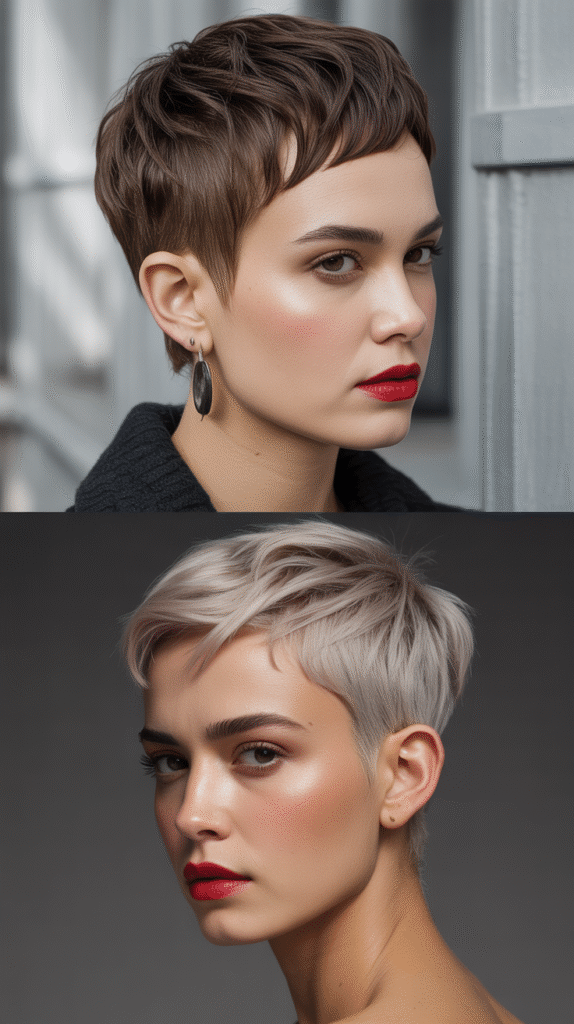
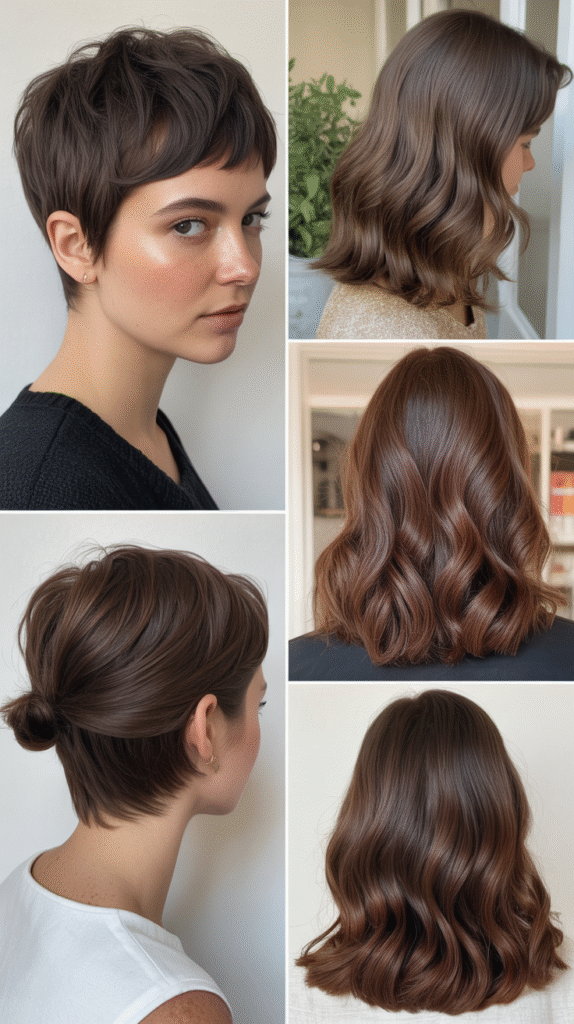
Transitioning from a pixie cut can feel like navigating uncharted waters, but what if you could make every awkward growth stage look intentionally stylish?
The journey from short to long doesn’t have to be filled with bad hair days and constant hat-wearing.
Whether you’re growing out your pixie by choice or simply ready for a change, this comprehensive guide reveals 64 strategic hairstyles designed specifically to flatter every phase of the growing-out process.
From the initial stages when your hair barely covers your ears to that challenging shoulder-length phase, you’ll discover styling techniques, cuts, and tricks that transform what many consider the “worst” part of hair growth into your most versatile styling period yet.
These aren’t temporary fixes or complicated updos requiring professional help—these are realistic, everyday styles that work with your hair’s natural texture and length, making the transition seamless and even exciting.
Get ready to embrace your growing pixie with confidence, knowing that each week brings new styling possibilities rather than frustration.
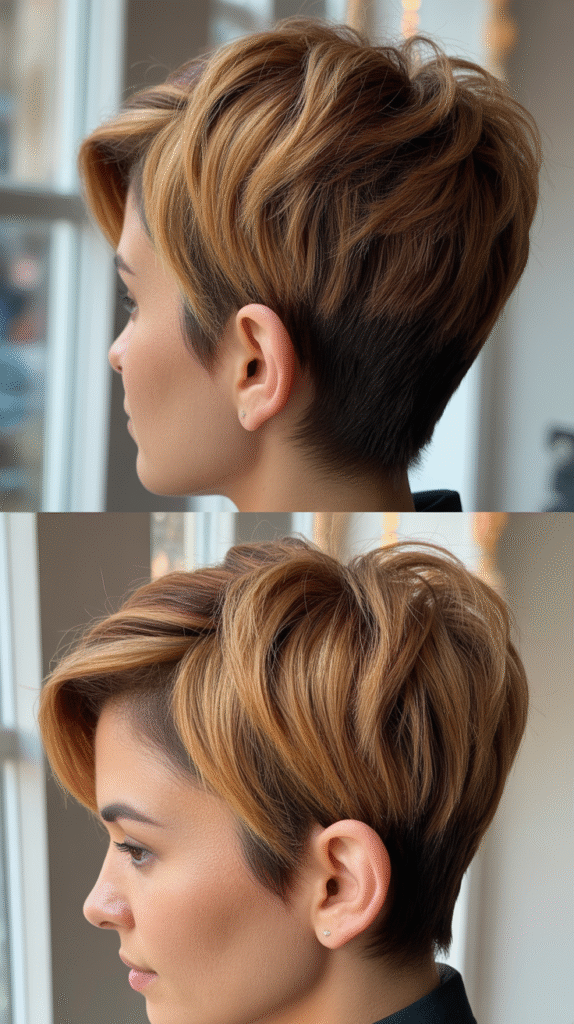
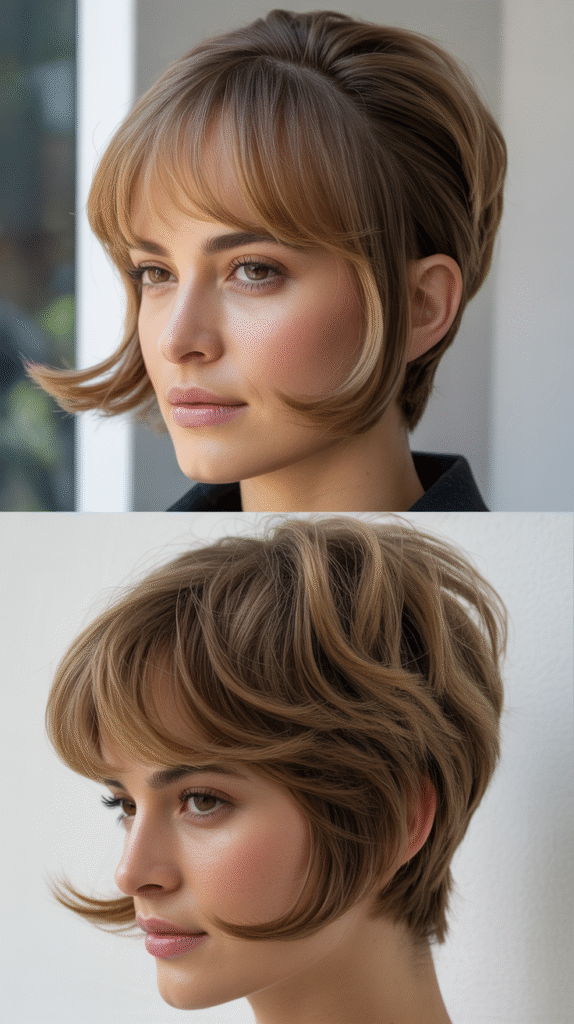
1. The Textured Side-Swept Pixie Grow-Out
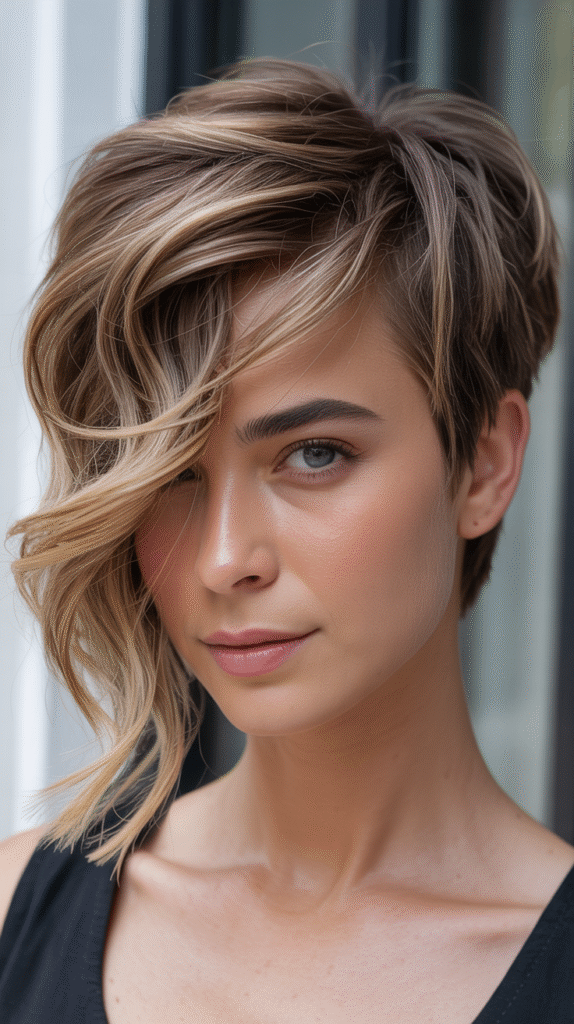
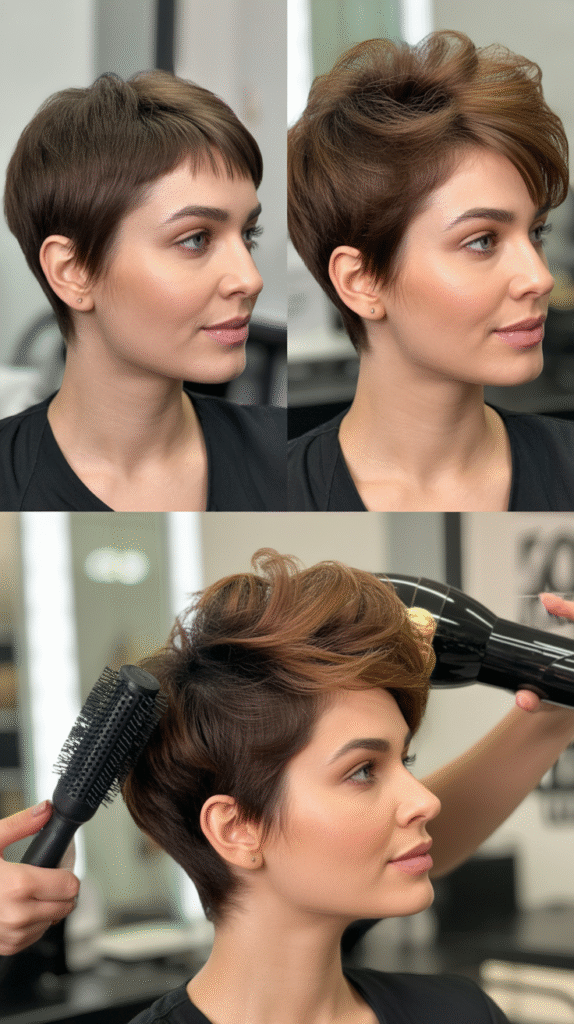
When your pixie first starts growing, texture becomes your greatest ally in creating intentional style rather than awkward length.
This approach works particularly well during weeks 4-12 of growth when your hair is just beginning to lose its structured shape.
- Apply a texturizing spray or sea salt spray to damp hair to enhance natural movement and create separation between strands.
- Use your fingers to push hair dramatically to one side while blow-drying, creating volume at the root and a soft sweep across the forehead.
- The longer top section falls naturally across the shorter sides, creating an asymmetrical look that appears deliberate rather than uneven.
- Add a small amount of pomade or wax to the ends for piece-y definition that draws attention away from uneven lengths.
- This style works exceptionally well for those with naturally wavy or slightly curly hair, as the texture helps blend different growth stages.
- The side-swept approach elongates the face and creates a sophisticated silhouette that works for both professional and casual settings.
2. The Slicked-Back Wet Look
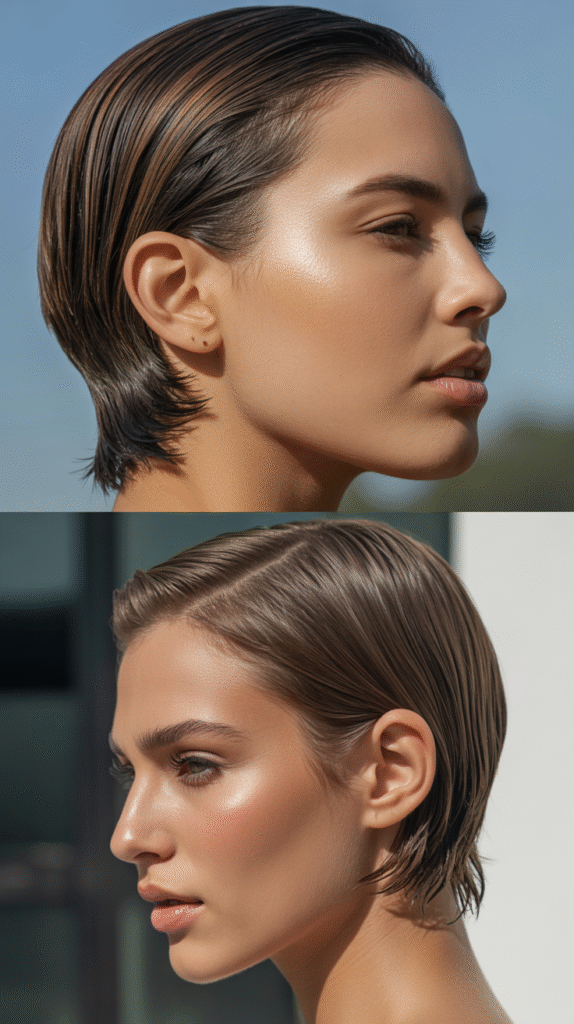
Embracing the wet-look aesthetic during your pixie grow-out phase offers a chic solution that minimizes the appearance of awkward lengths while looking fashion-forward.
- Start with damp hair and apply a generous amount of strong-hold gel from roots to ends, distributing evenly.
- Use a fine-tooth comb to slick hair straight back from the hairline, smoothing down any flyaways or uneven pieces.
- The wet look creates uniformity across different hair lengths, making growth stages appear intentional rather than accidental.
- This style works particularly well for straight to slightly wavy hair textures and holds up throughout the day with minimal touch-ups.
- For added dimension, create a deep side part before slicking back, which adds visual interest without requiring additional length.
- The sleek aesthetic pairs beautifully with bold earrings and draws attention to facial features rather than hair inconsistencies.
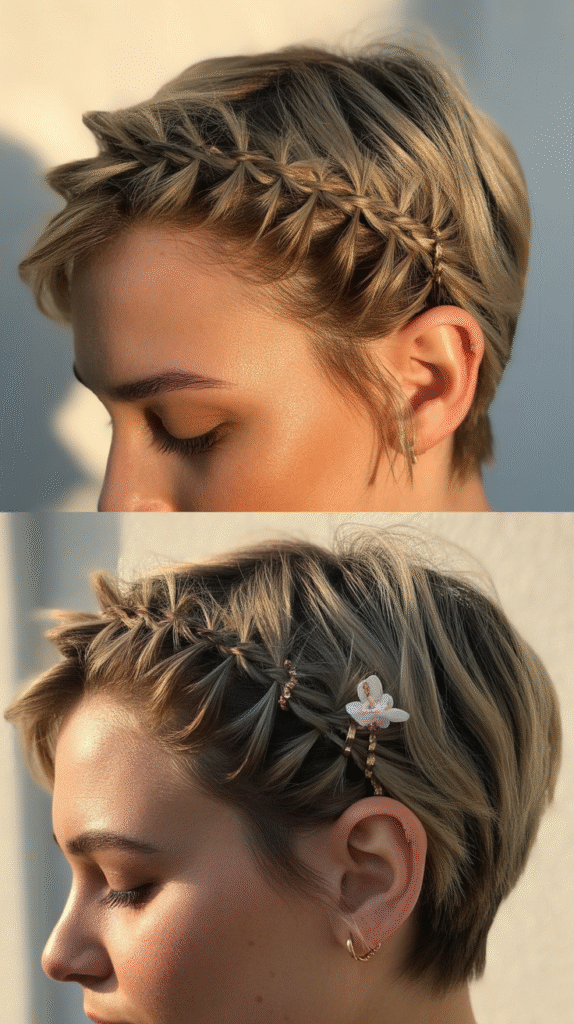
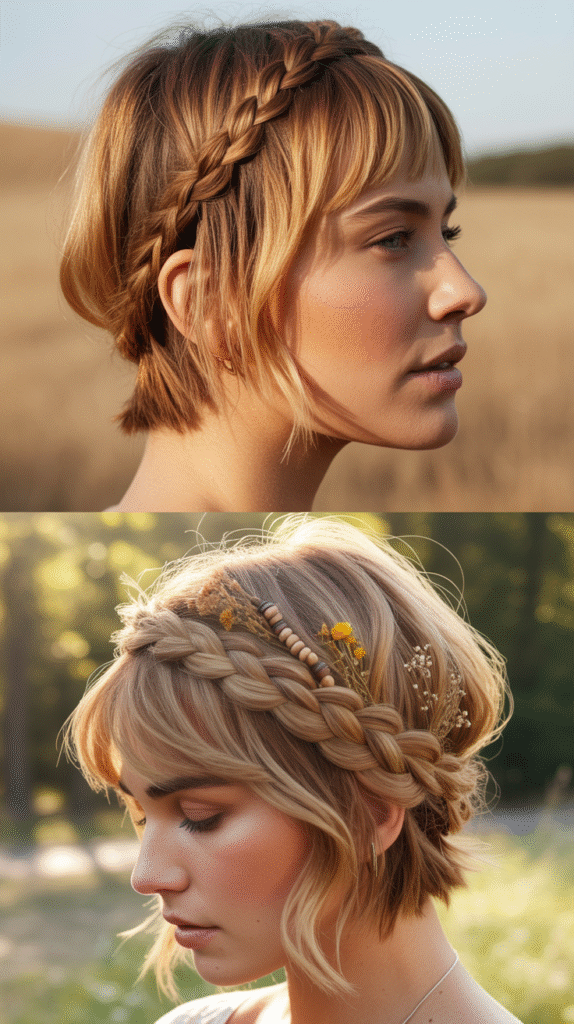
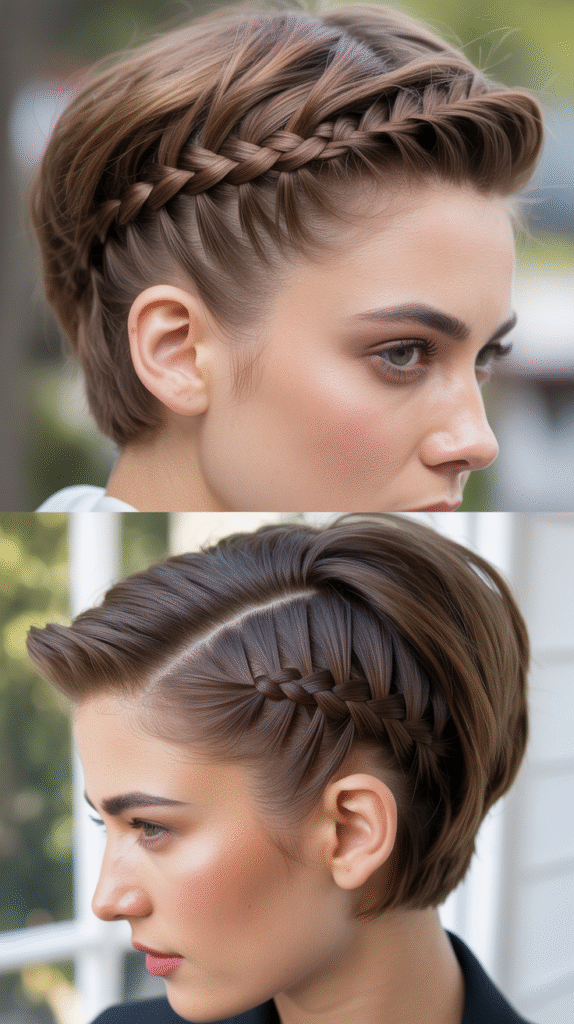
3. The Accessorized Headband Style
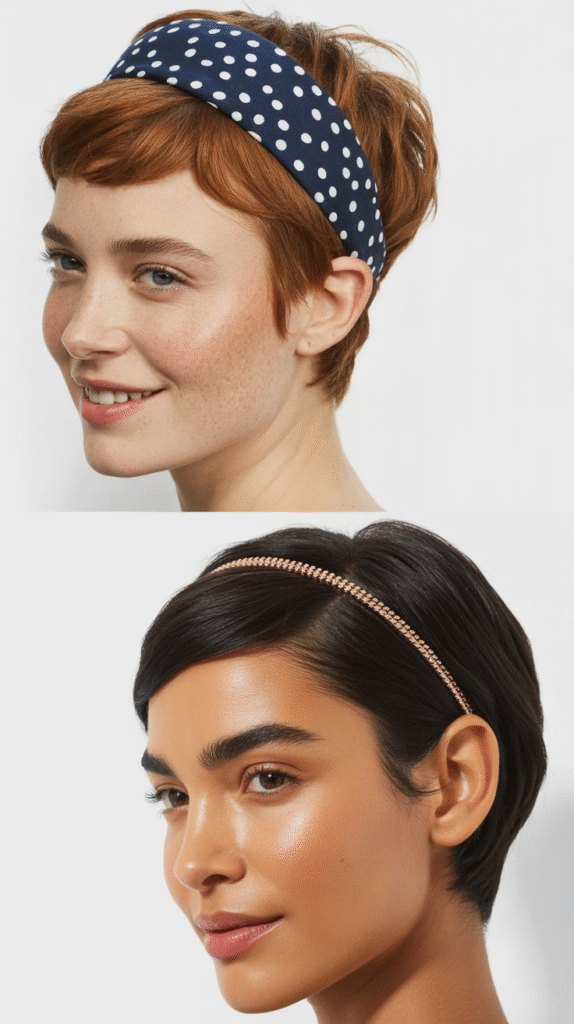
Strategic accessory placement transforms growing pixie hair from awkward to adorable, with headbands offering both practical and aesthetic benefits during the transition.
- Choose headbands that sit approximately one to two inches back from your natural hairline for the most flattering placement.
- Push growing-out bangs and side sections back with the headband, allowing the crown area to maintain volume and texture.
- Fabric headbands work best for casual looks, while metallic or embellished options elevate the style for evening occasions.
- Tease the crown section slightly before applying the headband to create lift and prevent the flat appearance that can occur during growth phases.
- This approach works across all hair textures and provides a solution for days when washing and styling feel overwhelming.
- Experiment with headband width—wider bands cover more awkward length transitions, while thinner bands offer subtle control.
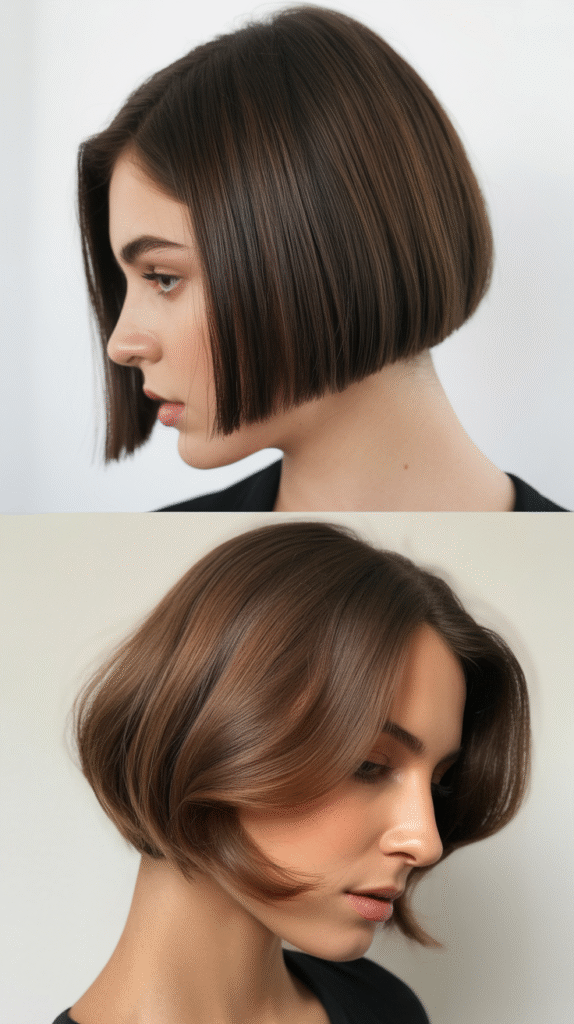
4. The Micro-Bob Transition Cut
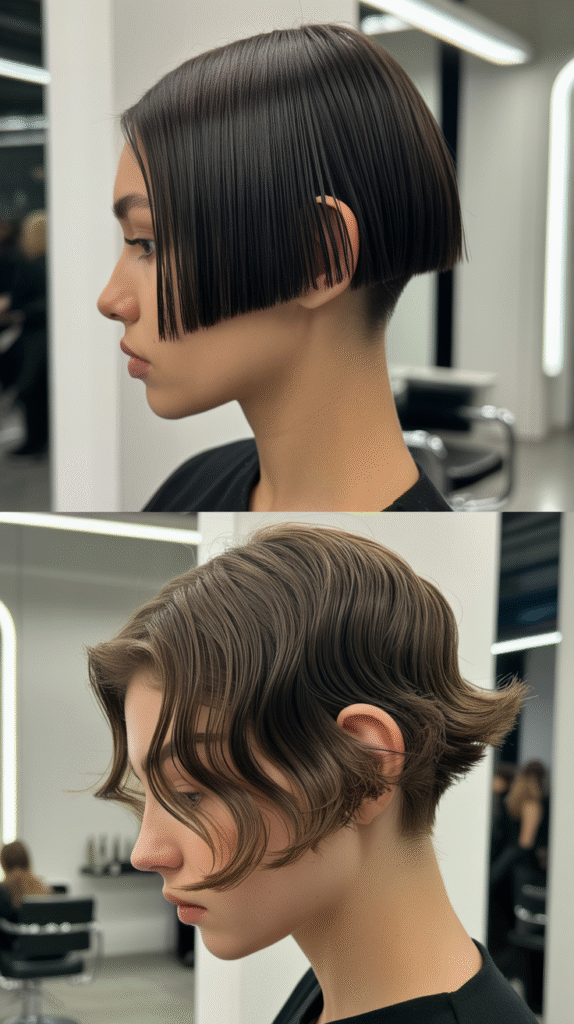
Strategic trimming during the grow-out process creates intentional shapes rather than letting hair grow wildly in all directions, with the micro-bob serving as the perfect intermediate stage.
- Request that your stylist maintain shorter layers in the back while allowing the front sections to grow longer, creating an A-line silhouette.
- The micro-bob typically hits between the ear and chin, offering enough length to tuck behind ears while maintaining a polished appearance.
- This cut works particularly well for those with thick hair, as it removes weight without sacrificing the growing length at the front.
- Regular trims every 6-8 weeks maintain the shape while allowing overall length to increase gradually toward your long-hair goal.
- The angled bob creates the illusion of longer hair in the front, psychologically easing the transition period.
- This style can be worn sleek and straight for professional settings or tousled and textured for casual occasions.
5. The Forward-Swept Fringe Focus
Directing attention toward a growing fringe creates a focal point that distracts from uneven lengths throughout the rest of your growing pixie cut.
- Use a round brush while blow-drying to direct all top and front hair forward toward the face, creating volume and intentional direction.
- The forward movement helps longer top sections appear cohesive with shorter side growth, blending awkward transitions.
- Apply a lightweight styling cream to the fringe area for definition without heaviness that could flatten the look.
- This approach works exceptionally well for heart-shaped and oval faces, as the fringe softens the forehead and draws focus to eyes.
- For straight hair, use a flat iron to create smooth, polished forward movement; for wavy hair, embrace natural texture for a softer appearance.
- The forward-swept fringe can be styled to the side or center-parted as growth continues, offering versatility throughout the transition.
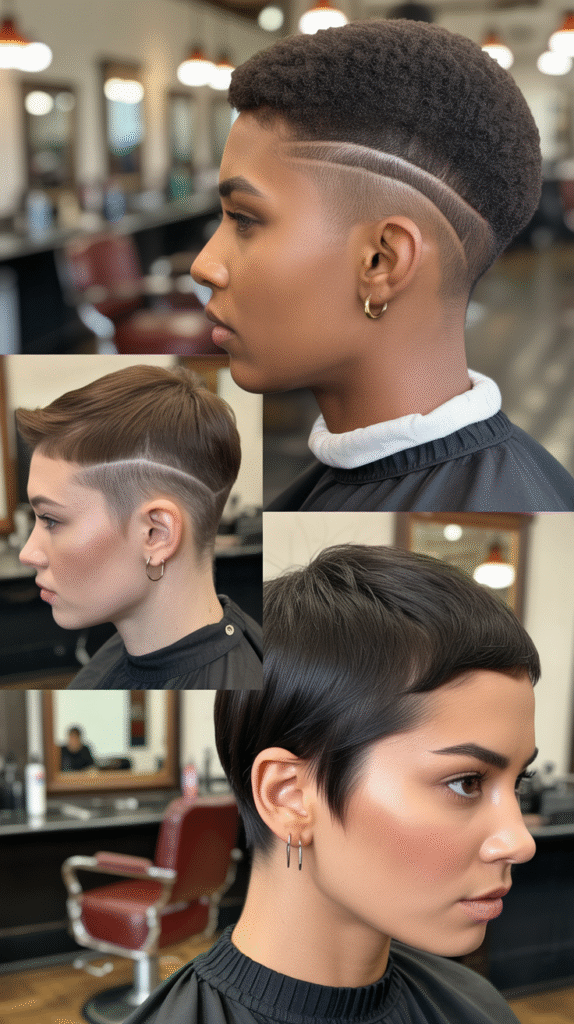
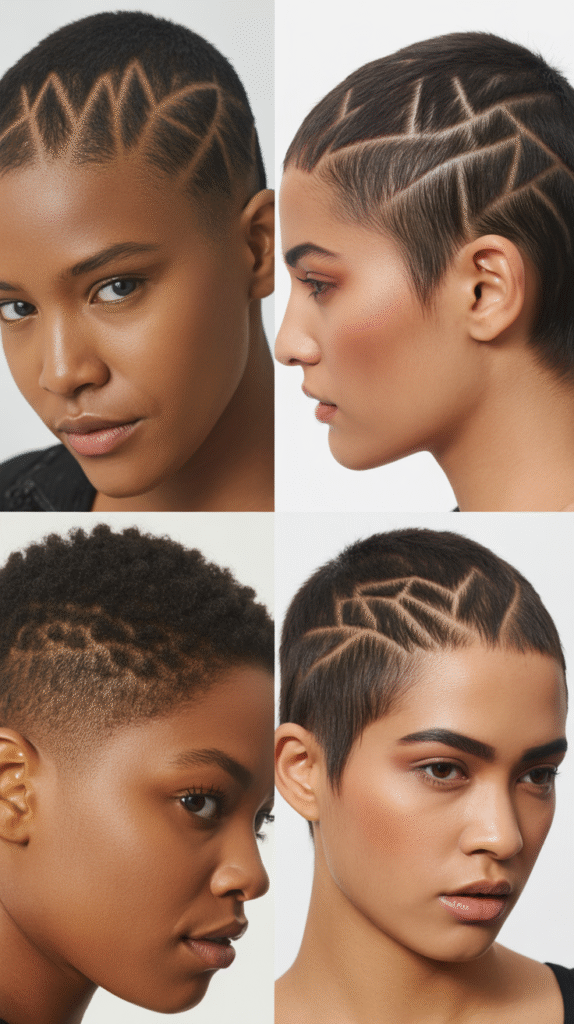
6. The Undercut Maintenance Strategy
Maintaining or refreshing an undercut during the pixie grow-out phase provides stark contrast that makes growing sections appear more intentional and styled.
- Keep the undercut area trimmed every 3-4 weeks while allowing top and front sections to grow without interruption.
- The dramatic difference between short-shaved sides and longer top creates an intentional style statement rather than an awkward in-between phase.
- This approach works particularly well for those with thick hair, as removing side bulk makes the growing top section easier to manage.
- Style the longer top section in various ways—slicked back, textured forward, or side-swept—while the undercut remains consistently short.
- The undercut strategy extends the “cool factor” of your pixie while transitioning, maintaining edge throughout the growth process.
- Consider creative undercut patterns or designs during this phase to add visual interest and personalization to your growing style.
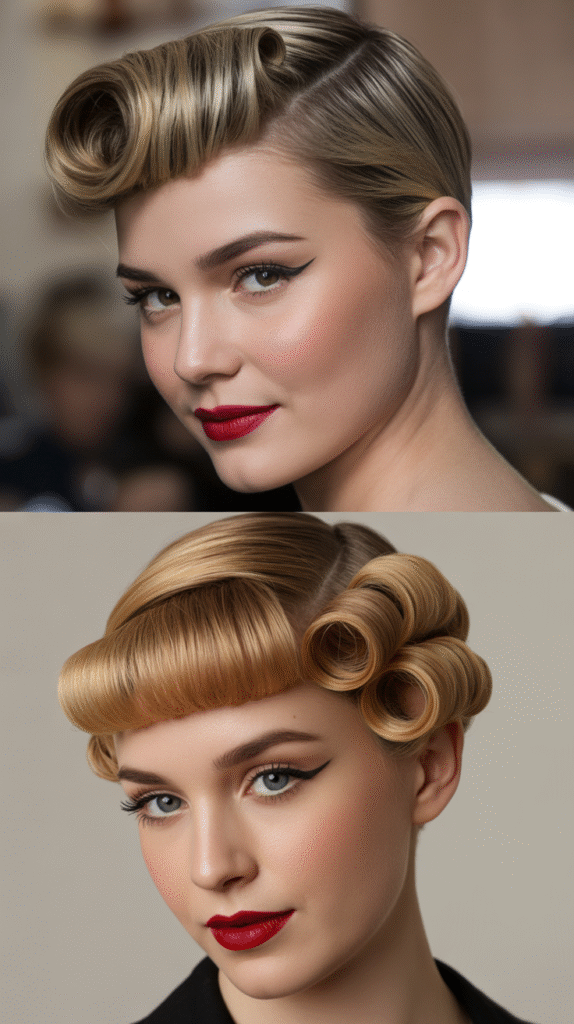
7. The Pin Curl Revival
Vintage-inspired pin curls offer a glamorous solution for managing growing pixie hair, adding dimension and control to awkward lengths.
- Section slightly damp hair into small pieces and wrap each around your finger, securing against the scalp with bobby pins.
- Allow curls to dry completely—either air-dry or use a diffuser—before carefully removing pins and separating curls with fingers.
- Pin curls add substantial volume to growing hair, creating the appearance of fuller, more intentional styling.
- This technique works across all hair textures, though those with naturally straight hair may need stronger styling products for hold.
- Focus pin curls around the face and crown for maximum impact, leaving the shorter back sections smooth for contrast.
- The vintage aesthetic pairs beautifully with classic clothing styles and offers a special-occasion option during the transition period.
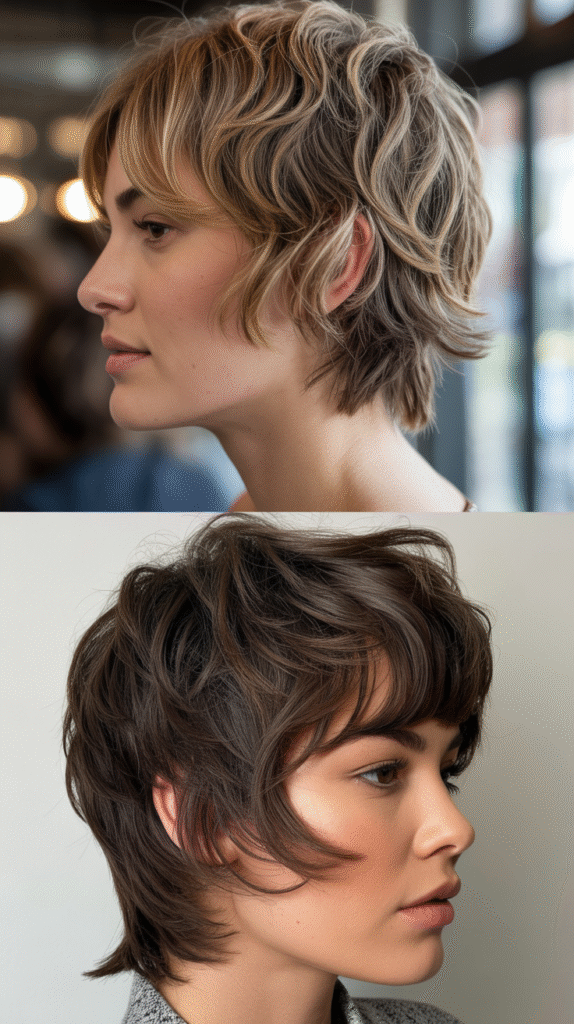
8. The Messy Shag Approach
Embracing controlled chaos through a shag-inspired cut makes uneven growth appear intentionally textured and fashion-forward.
- Request that your stylist add choppy layers throughout, creating varied lengths that work with rather than against the natural grow-out pattern.
- The shag aesthetic thrives on imperfection, making it ideal for the transitional period when hair grows at different rates.
- Use a texturizing spray and scrunch hair while drying to enhance natural wave and create piece-y separation.
- This low-maintenance style requires minimal daily styling—simply scrunch product through and allow natural texture to shine.
- The shag works particularly well for wavy and curly hair types, as natural texture amplifies the deliberately undone appearance.
- Regular trims to maintain the shag shape allow continued length growth while keeping the style looking intentional.
9. The Half-Up Micro Bun
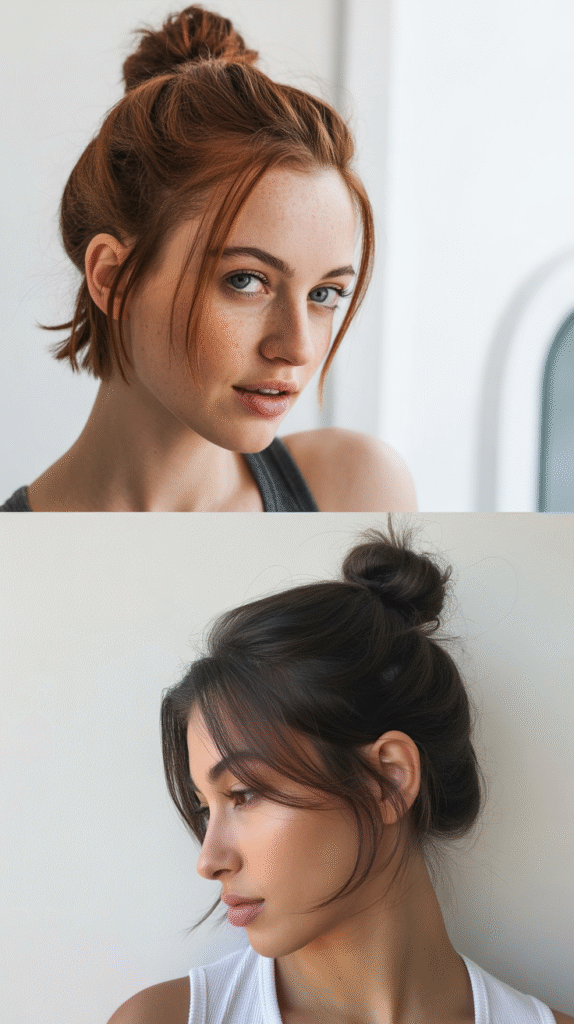
Once your pixie reaches that magical length where some sections can be gathered, the half-up bun provides a trendy solution for managing growth.
- Gather the longest sections from the crown and top of head, typically 2-4 months into growth, and secure with a small elastic.
- Twist the gathered hair and wrap it around itself to create a tiny bun or top knot, securing with bobby pins.
- Leave shorter side sections down to frame the face, creating a deliberate contrast between secured and loose hair.
- This style works exceptionally well for second-day hair when natural texture and volume provide better grip and hold.
- The half-up approach keeps hair off the face for practical reasons while showcasing the growing length in a styled manner.
- Experiment with bun placement—higher positioning creates a playful look, while lower placement offers sophisticated elegance.
10. The Deep Side Part Drama
Creating an exaggerated side part transforms growing pixie hair by redistributing volume and creating asymmetrical interest that distracts from uneven lengths.
- Use a tail comb to create a precise part that sits approximately two to three inches from the center of your head.
- Blow-dry the heavier side with a round brush to create maximum volume and lift at the roots.
- Smooth the lighter side flat against the head using tension and a paddle brush while drying for sleek contrast.
- The dramatic part creates visual interest and makes the growing process appear intentional rather than unkempt.
- This styling technique works across all hair textures, though naturally straight hair shows the most dramatic contrast between sides.
- Secure the lighter side behind the ear with bobby pins or a decorative clip for additional interest and face-framing appeal.
11. The Curling Iron Wave Technique
Adding artificial waves to growing pixie hair creates movement and dimension that camouflages uneven lengths while appearing effortlessly styled.
- Use a small-barrel curling iron (3/4 to 1 inch) to wrap small sections of hair, holding for 5-7 seconds before releasing.
- Alternate curl directions throughout the head to create natural-looking movement rather than uniform ringlets.
- Allow curls to cool completely before running fingers through them to break up the curls into soft waves.
- The wave technique adds substantial volume to growing hair, making it appear fuller and more intentionally styled.
- This approach works particularly well for fine or thin hair that may appear limp during the awkward growth stages.
- Finish with a flexible-hold hairspray to maintain wave pattern throughout the day without creating stiffness or crunchiness.
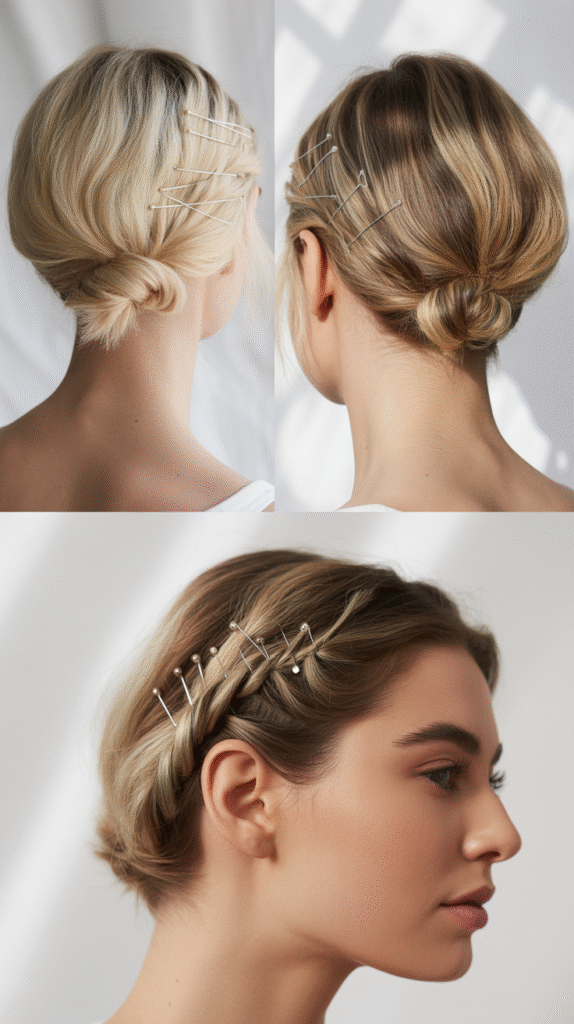
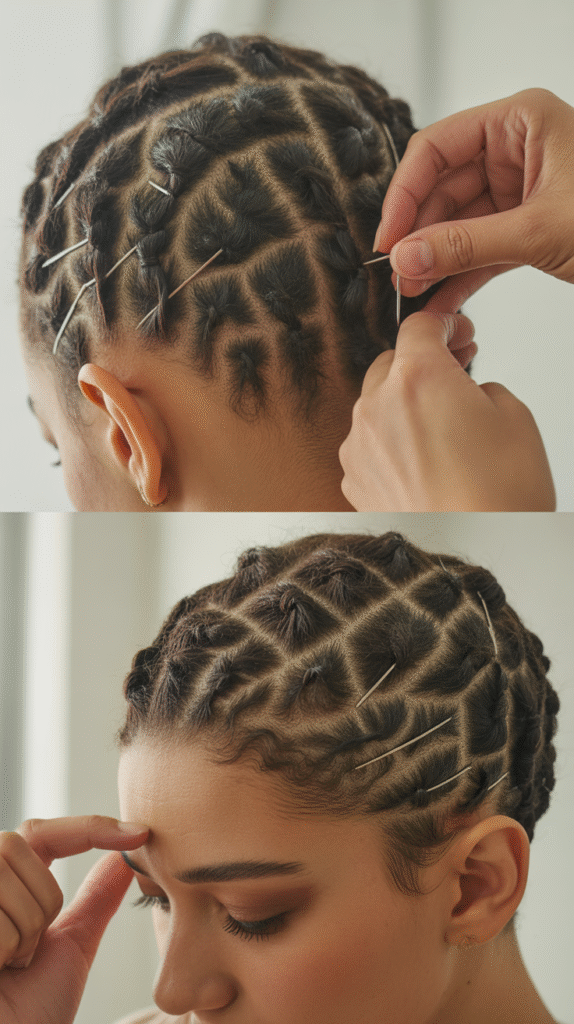
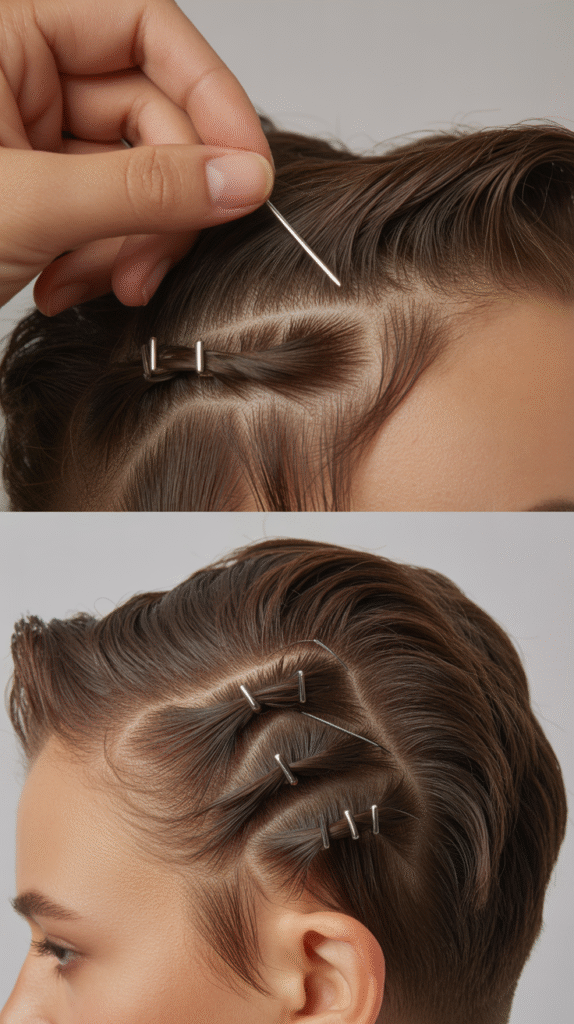
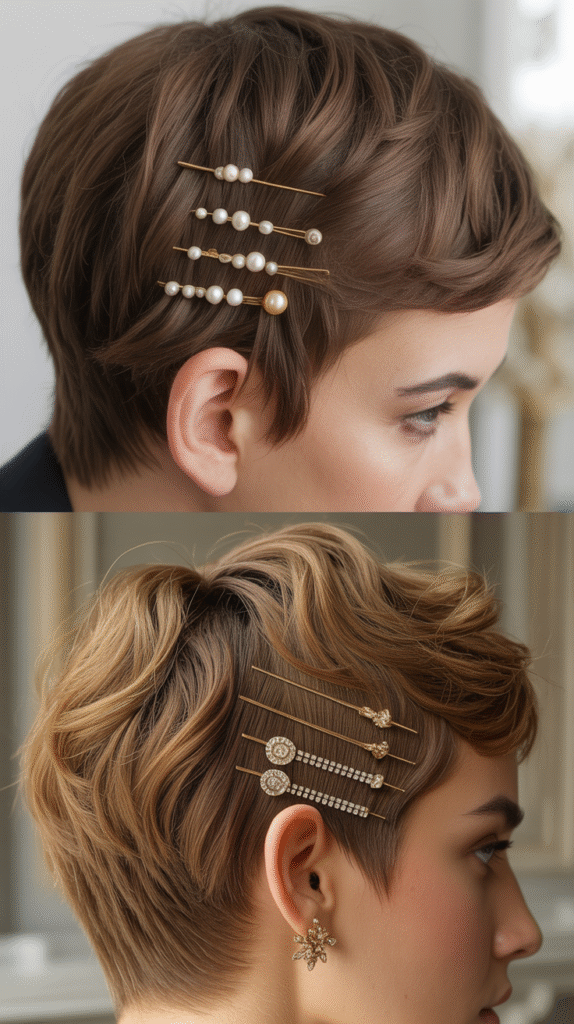
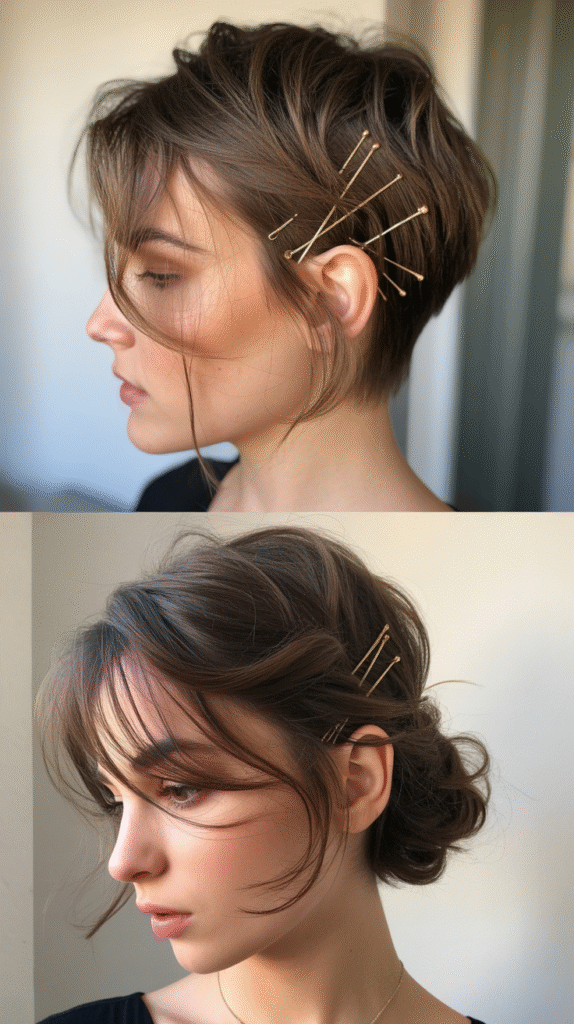
12. The Bobby Pin Art Installation
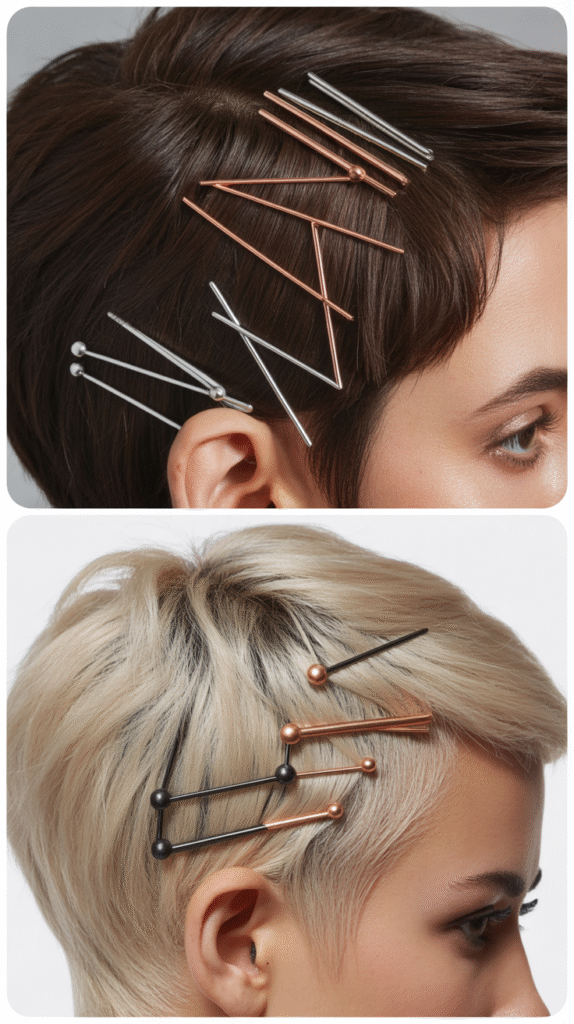
Transforming functional bobby pins into decorative elements creates visual interest while controlling awkward growth phases with style.
- Select decorative bobby pins in metallic finishes, colors, or patterns that complement your personal style and outfit.
- Use pins to secure growing-out sections while creating patterns—parallel lines, X-shapes, or scattered placement.
- This approach provides practical hair control while making a deliberate fashion statement that draws positive attention.
- Bobby pin art works across all hair textures and requires only minutes to execute each morning.
- Experiment with pin placement on different areas—along the side part, at the temples, or throughout the crown for varied looks.
- The functional-meets-decorative approach acknowledges the transition period while embracing it as an opportunity for creative expression.
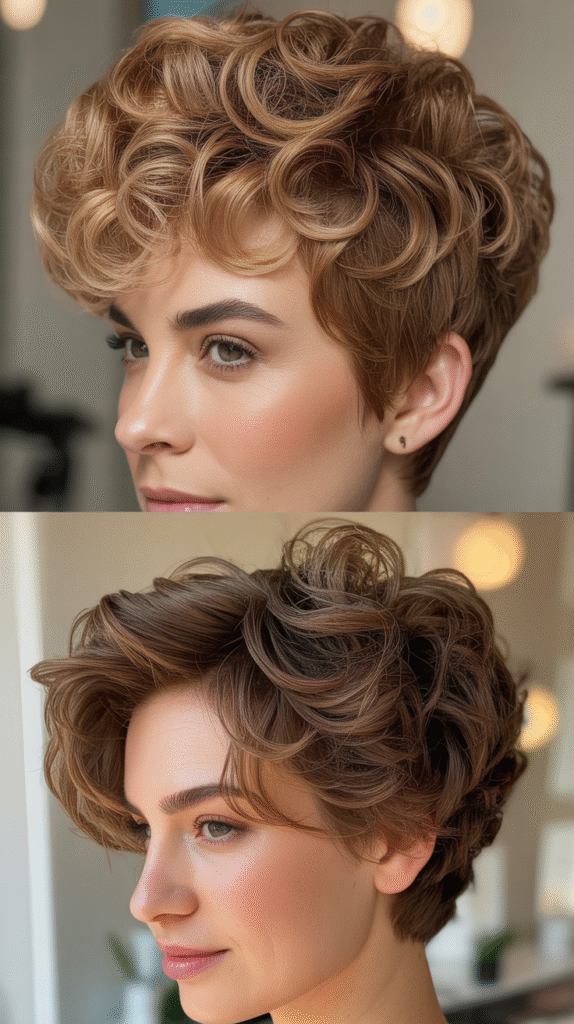
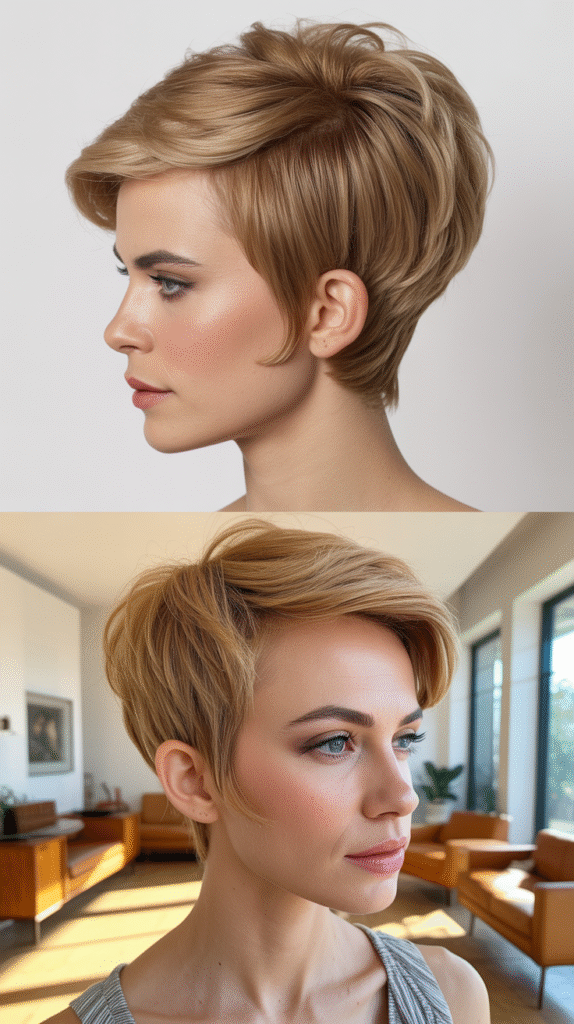
13. The Pompadour Volume Boost
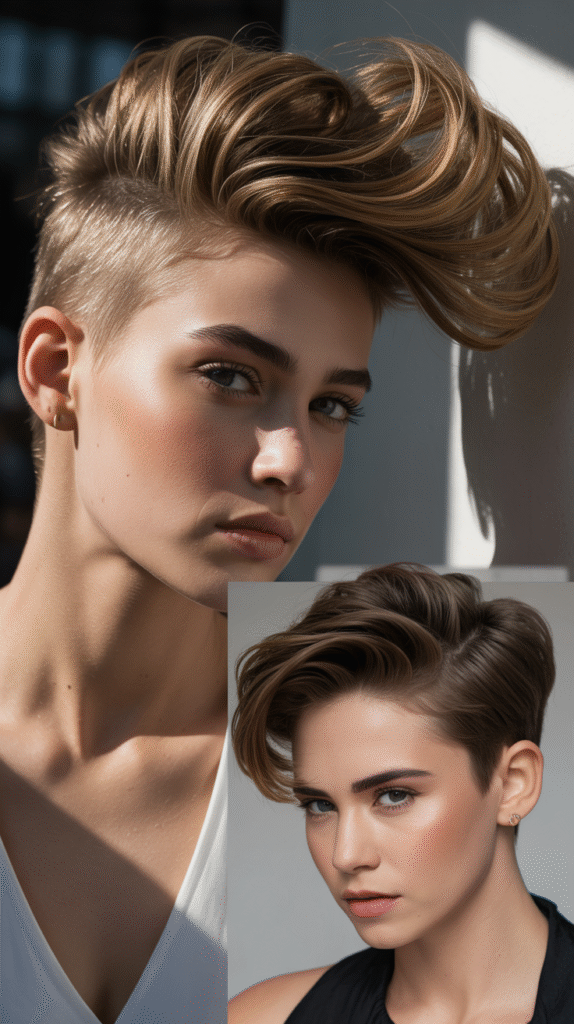
Creating exaggerated volume at the front hairline through pompadour styling makes growing pixie hair appear intentionally retro and fashion-forward.
- Blow-dry front sections upward and back using a round brush to create maximum lift and volume at the roots.
- Use a teasing comb to backcomb the underside of the front section for additional height and structure.
- Smooth the top layer over the teased section and secure with bobby pins or hairspray for lasting hold.
- The pompadour draws attention upward and away from sides and back where growth may appear more awkward or uneven.
- This bold styling choice works particularly well for special occasions, creative professional environments, or anyone embracing vintage aesthetics.
- Pair the dramatic front volume with sleek sides for maximum contrast and intentional styling appearance.
14. The Miniature French Twist
As your pixie grows long enough to manipulate, adapting the classic French twist to shorter lengths provides elegant sophistication during the transition.
- Gather all accessible hair at the back of the head and twist upward, tucking the ends under and securing with bobby pins.
- The miniature version accommodates shorter lengths while creating the illusion of a classic updo style.
- Use strong-hold hairspray to smooth any flyaways and create a polished finished appearance despite limited length.
- This style works beautifully for professional settings, formal events, or any occasion requiring a more refined aesthetic.
- The French twist approach may require more pins than traditional versions due to shorter lengths and multiple growth stages.
- Even if some shorter pieces escape the twist, frame them around the face as intentional tendrils for a softer, romantic appearance.
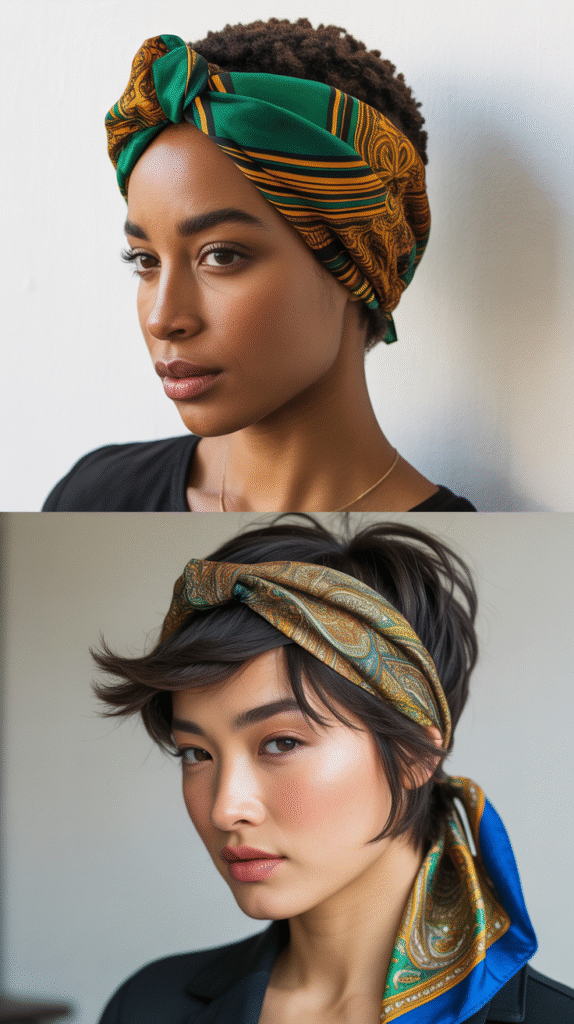
15. The Bandana Integration
Incorporating bandanas into your growing pixie styling provides both practical length management and a pop of color or pattern that elevates the overall look.
- Fold a bandana into a long strip and position it like a headband, tying at the top or bottom depending on desired aesthetic.
- The bandana covers growing-out sections while adding personality and visual interest through color and pattern selection.
- Experiment with different folding widths—wider coverage for more dramatic looks, narrower strips for subtle accent.
- This approach works across all hair textures and provides options for coordinating with outfits through bandana selection.
- The vintage-inspired bandana style pairs particularly well with the pin-up aesthetic, creating cohesive retro-inspired looks.
- Leave hair loose underneath the bandana for casual styling or slick it back for a more polished, refined appearance.
16. The Faux Hawk Revival
Maintaining or creating a faux hawk effect during the grow-out phase keeps the edgy aesthetic of your pixie while accommodating increasing length.
- Apply strong-hold gel or pomade to the center section of hair from front to back crown area.
- Use fingers or a comb to push this center section upward, creating a ridge or spike effect along the centerline.
- Keep side sections slicked down or flat against the head for maximum contrast with the raised center.
- The faux hawk accommodates growing length by utilizing increased height potential as hair lengthens over time.
- This bold style works particularly well for casual settings, creative industries, or anyone maintaining an alternative aesthetic during transition.
- Adjust the height of the faux hawk based on occasion—dramatic spikes for evening or weekends, subtle lifts for professional environments.
17. The Twist and Pin Method
Creating small twists throughout growing pixie hair provides texture control while accommodating multiple length stages in a cohesive style.
- Section hair into small pieces and twist each section from root to end before securing against the scalp with bobby pins.
- The twisting technique works with varied lengths, as each section is handled individually and secured at its maximum length.
- Create patterns with twist placement—all directed backward, radiating from a center point, or placed randomly for artistic effect.
- This approach works exceptionally well for naturally textured or curly hair, as it enhances natural curl patterns while providing control.
- The twist and pin method offers a protective styling option that minimizes daily manipulation and heat styling during the growth phase.
- Remove pins after several hours or overnight to reveal defined waves and texture throughout the growing hair.
18. The Slick Side with Volume Top
Creating contrast between sleek sides and voluminous top sections makes growing pixie hair appear deliberately styled rather than awkwardly transitioning.
- Apply gel to side sections and comb flat against the head for a polished, controlled appearance.
- Use volumizing mousse or powder on the top section, then blow-dry with a round brush to create maximum lift and texture.
- The stark contrast between sleek and voluminous sections creates intentional styling that acknowledges and works with varied growth lengths.
- This versatile approach transitions easily from professional daytime settings to casual evening occasions with minimal adjustment.
- The technique works across hair textures, though those with naturally curly hair may need stronger products for sleek side control.
- Adjust the volume degree based on personal comfort and occasion—subtle lift for conservative environments, dramatic height for creative settings.
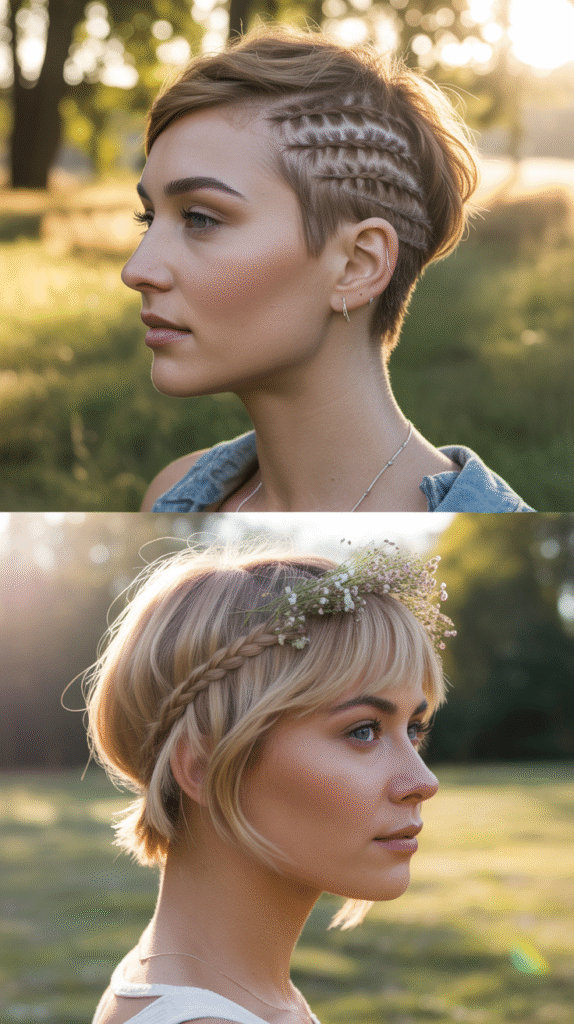
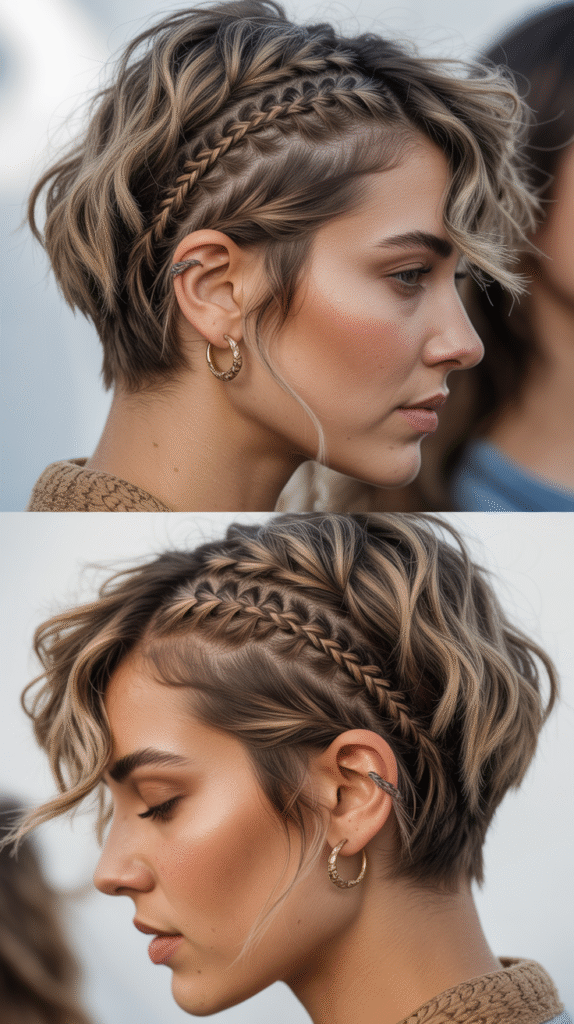
19. The Baby Braids Accent
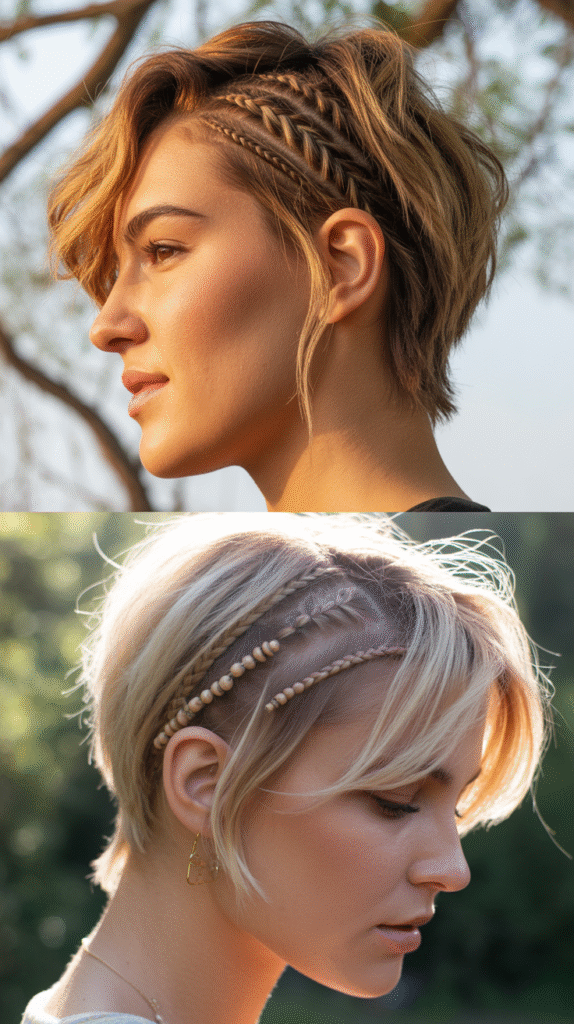
Incorporating tiny braids into growing pixie hair adds visual interest while controlling specific sections that may be growing awkwardly.
- Create one or more tiny braids along the hairline, temple area, or throughout the top section using small hair sections.
- These micro braids serve both aesthetic and practical purposes—adding detail while controlling pieces that might otherwise stick out awkwardly.
- The boho-inspired braid accents work particularly well for casual, creative, or festival-style aesthetics during the transition period.
- Even with limited length, small sections can typically be braided once hair reaches approximately 2-3 inches in specific areas.
- Secure braid ends with small clear elastics or bobby pins, incorporating them into the overall style seamlessly.
- This technique works across all hair textures, with naturally textured hair often holding braids better without additional product.
20. The Wet-to-Dry Scrunch Method
Allowing hair to air-dry while scrunching creates natural texture that works with rather than against the varied lengths of growing pixie hair.
- Apply curl-enhancing cream or mousse to soaking wet hair immediately after washing.
- Scrunch hair upward toward the scalp repeatedly, encouraging natural wave or curl patterns to form.
- Allow hair to air-dry completely without touching it, which prevents frizz while maximizing natural texture.
- This low-manipulation method works particularly well for wavy and curly hair types, embracing natural patterns during growth.
- The scrunch method creates volume and movement that camouflages uneven lengths through intentional texture rather than structured styling.
- This approach requires minimal time and product investment while providing consistently good results throughout the transition period.
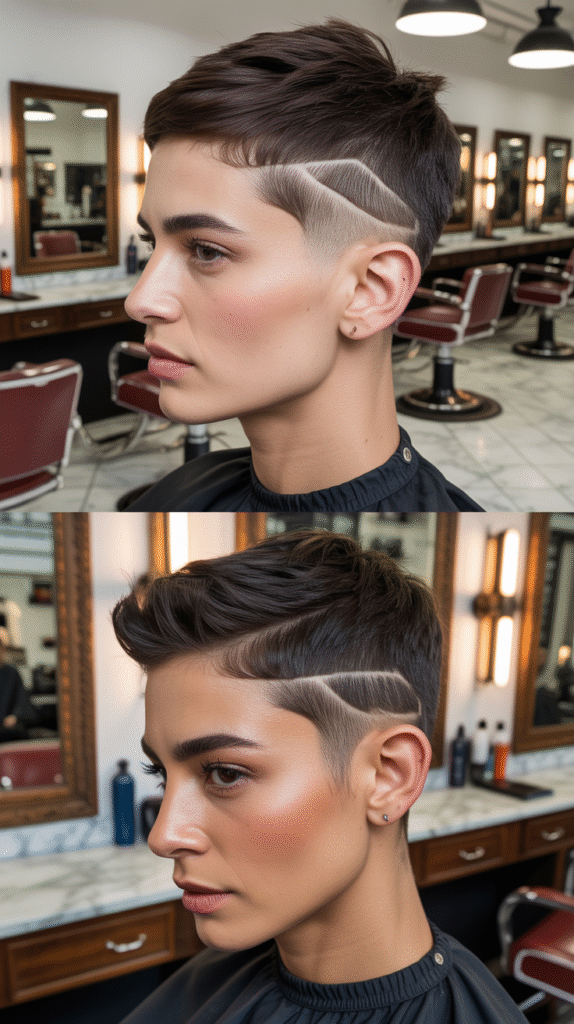
21. The Strategic Clipper Maintenance
Regularly maintaining specific areas with clippers while allowing others to grow creates intentional shape throughout the awkward pixie grow-out phase.
- Visit a stylist every 4-6 weeks to maintain clean lines at the nape and around the ears while leaving top and crown sections untouched.
- This maintenance approach keeps the overall silhouette looking intentional rather than overgrown or unkempt during transition.
- The contrast between maintained short areas and deliberately growing sections creates an undercut-adjacent aesthetic without commitment.
- Request specific guard lengths from your stylist to ensure consistency across maintenance appointments during the months-long grow-out process.
- This strategy works particularly well for those growing out pixies for specific length goals who want to maintain professionalism during the journey.
- The regular maintenance prevents the “mullet effect” that can occur when back sections grow faster than front and top areas.
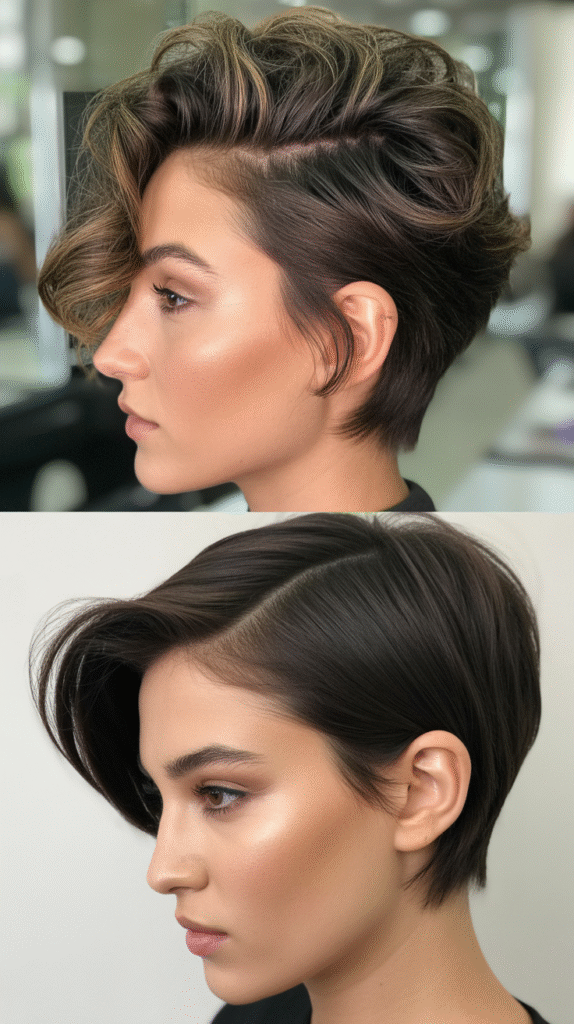
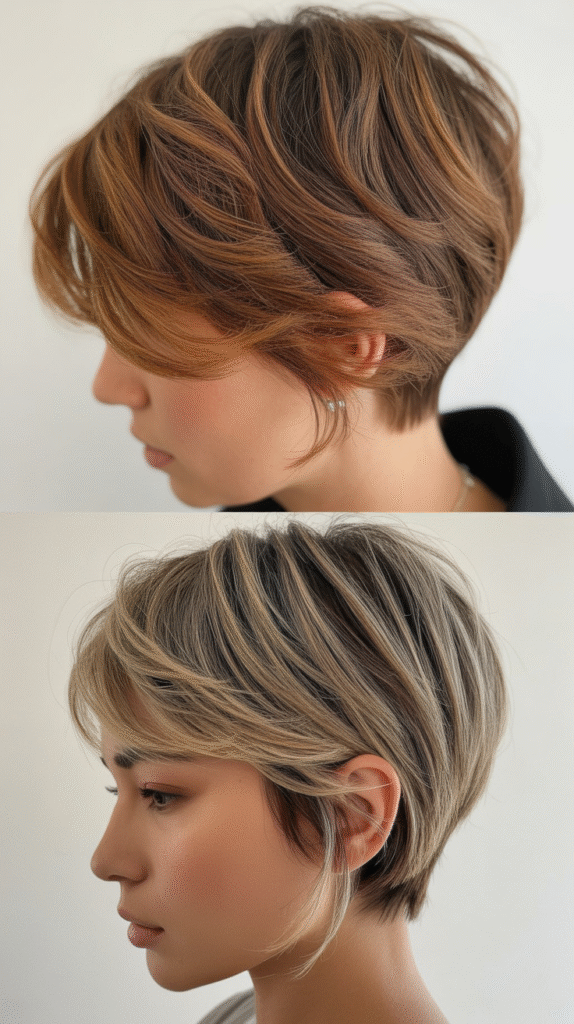
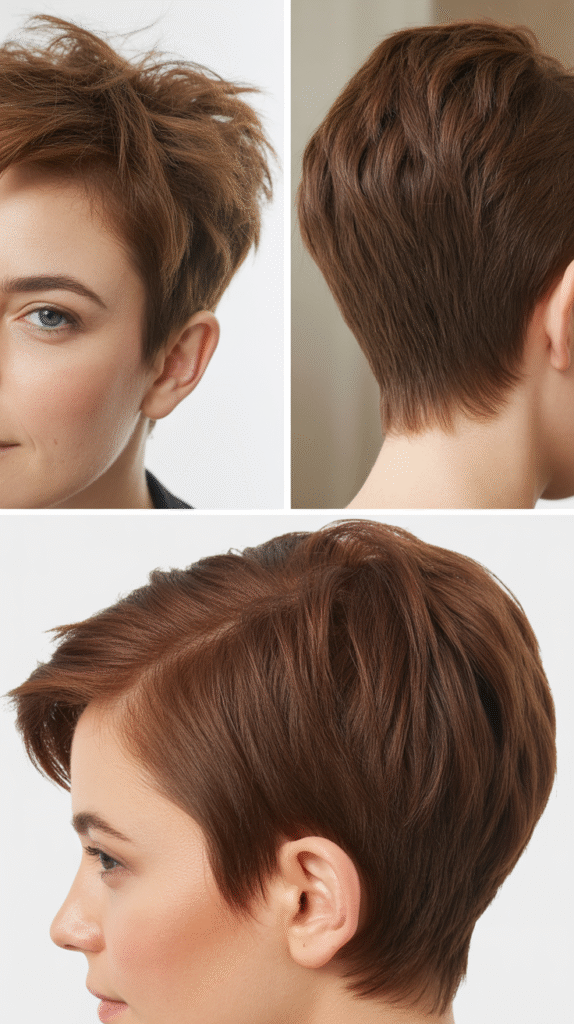
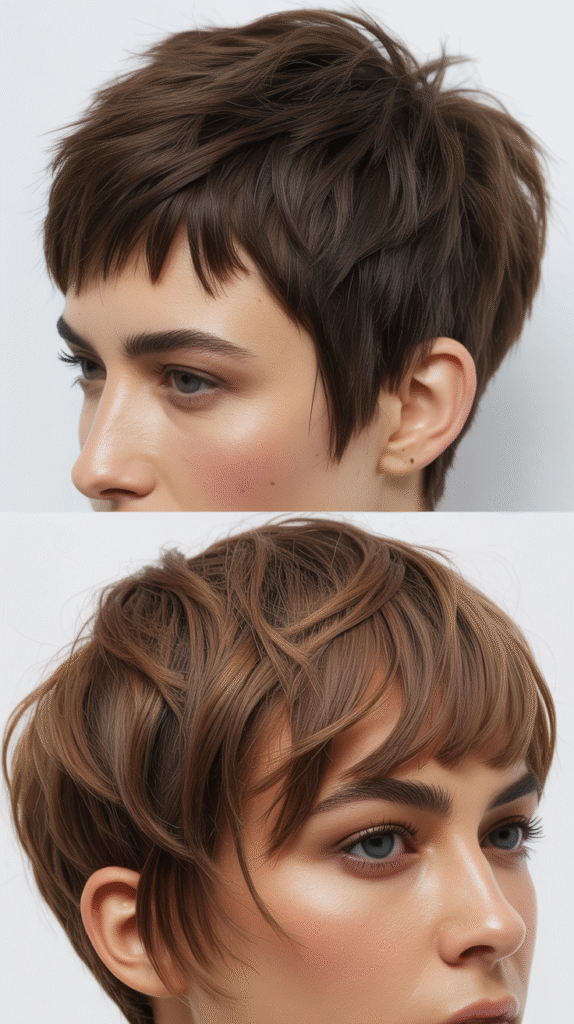
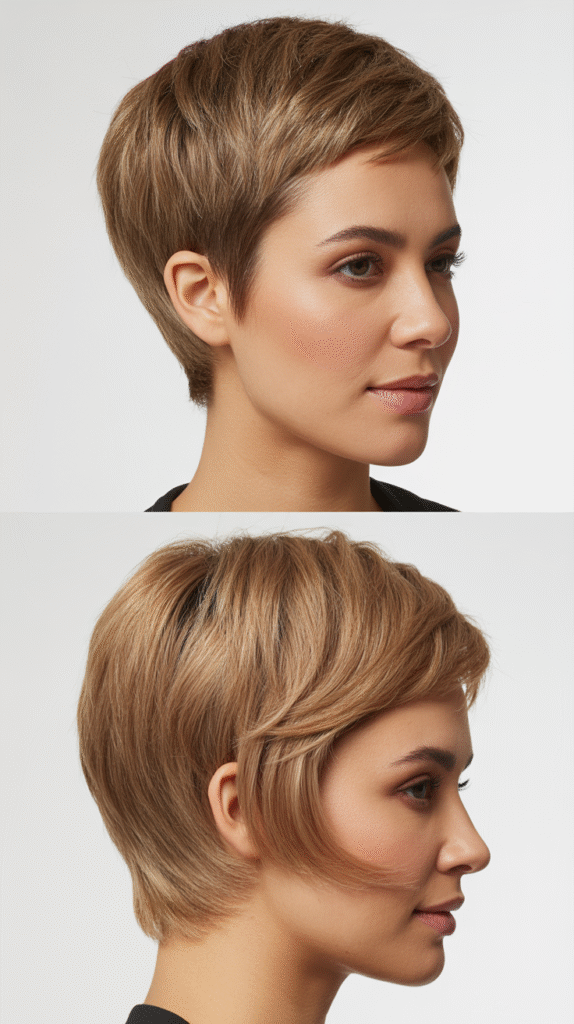
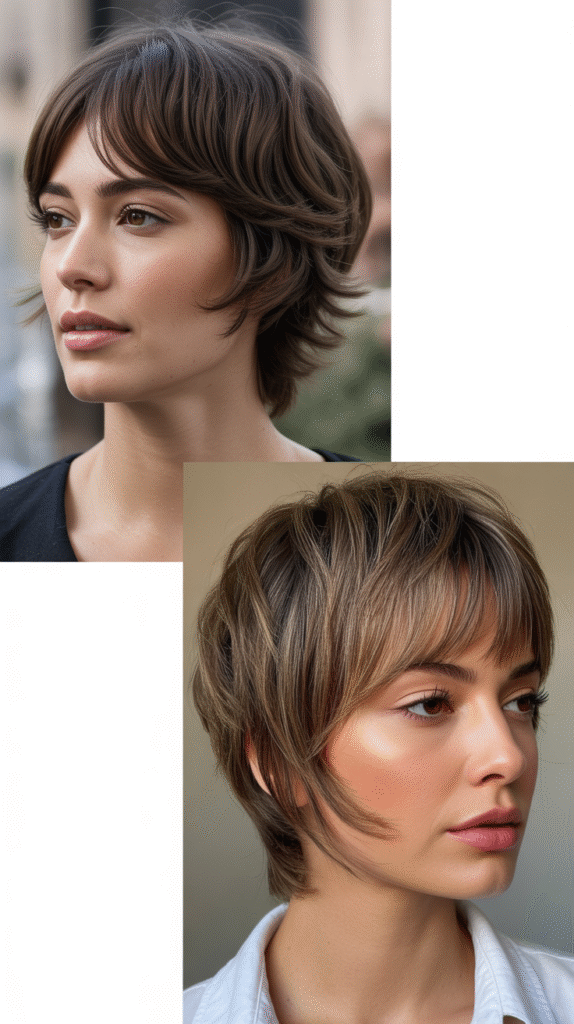
22. The Textured Crop Transformation
Converting your growing pixie into a textured crop cut provides a fresh intermediate style that acknowledges increased length while maintaining short-hair coolness.
- Request that your stylist create choppy, textured layers throughout, removing weight without sacrificing the growing length.
- The crop maintains short hair aesthetic while accommodating 3-6 months of pixie growth, serving as a perfect transition style.
- This cut works exceptionally well for thick hair types, as the texturizing removes bulk while creating movement and dimension.
- Style the textured crop with fingers and product rather than brushes for an effortlessly cool, deliberately undone appearance.
- The crop phase allows you to maintain the confidence and edge of short hair while actively growing toward your length goals.
- Regular trims every 6-8 weeks maintain the textured crop shape while allowing strategic length increase in specific areas.
23. The Finger Wave Elegance
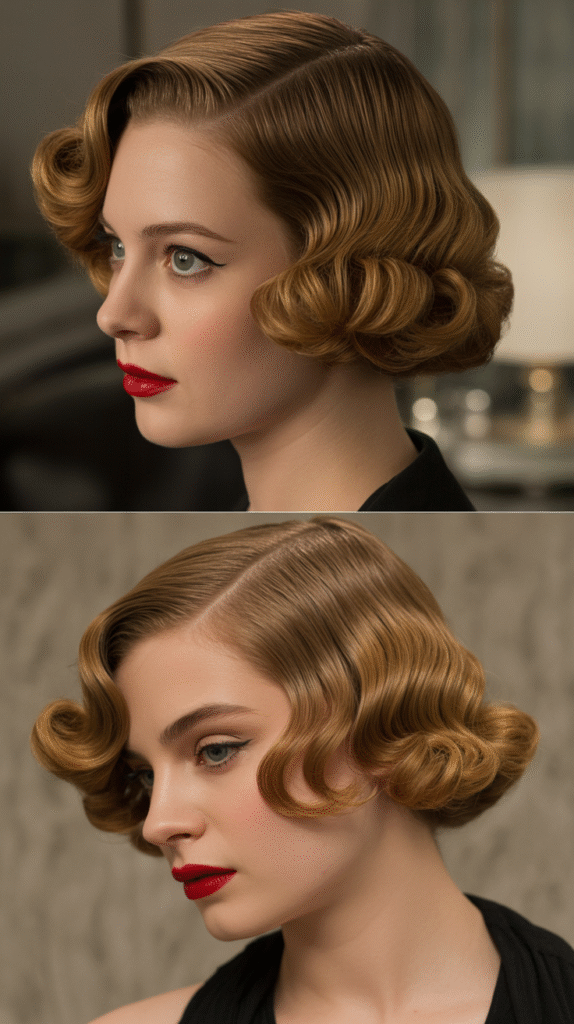
Adapting vintage finger waves to growing pixie hair creates elegant, sophisticated styling that manages length through deliberate pattern and shine.
- Apply strong-hold gel to damp hair and use fingers or a comb to create S-shaped waves by pressing hair into curved patterns.
- The structured wave pattern accommodates varied lengths by incorporating all available hair into the overall design.
- Secure waves with clips while drying to ensure pattern retention, creating lasting hold throughout the day.
- This dramatic styling choice works beautifully for special occasions, themed events, or anyone embracing vintage aesthetics during transition.
- The finger wave technique requires practice but delivers show-stopping results that transform awkward growth into intentional artistry.
- The glossy, structured appearance pairs beautifully with elegant clothing and creates a cohesive vintage-inspired overall presentation.
24. The Crown Braid Halo
Once growth reaches sufficient length in the crown area, creating a small braid that wraps around the head provides bohemian charm while controlling length.
- Separate a section of hair from the front hairline, moving across the crown to the opposite side, creating a curved path.
- Braid this section using a traditional three-strand or dutch braid technique, incorporating length as you move across the head.
- Secure the braid end with a small elastic and tuck it behind the ear or secure it with bobby pins for seamless integration.
- The crown braid works with varied lengths throughout the rest of the head, making it ideal for the 4-8 month growth period.
- Leave remaining hair loose and textured beneath the braid for a soft, romantic appearance that embraces the transition period.
- This style works across all hair textures, with naturally textured hair often holding braids better and creating fuller-looking crown details.
25. The Product-Heavy Sculpting
Embracing styling products to sculpt and mold growing pixie hair into deliberate shapes creates artistic, fashion-forward looks during transition.
- Use strong-hold pomades, waxes, or clays to manipulate hair into specific shapes, directions, or patterns.
- The heavy product approach provides complete control over unruly growth stages, allowing you to create magazine-worthy styling despite awkward lengths.
- Experiment with different textures—sleek and shiny with gels, matte and textured with clays, or piece-y separation with waxes.
- This technique works particularly well for special occasions, photo opportunities, or fashion-forward environments where bold styling is appreciated.
- The sculptural approach requires product investment but delivers consistent, reliable results regardless of natural texture or growth patterns.
- Properly cleanse hair regularly to prevent product buildup, which can weigh down growing hair and create scalp issues.
26. The Graduated Lob Transition
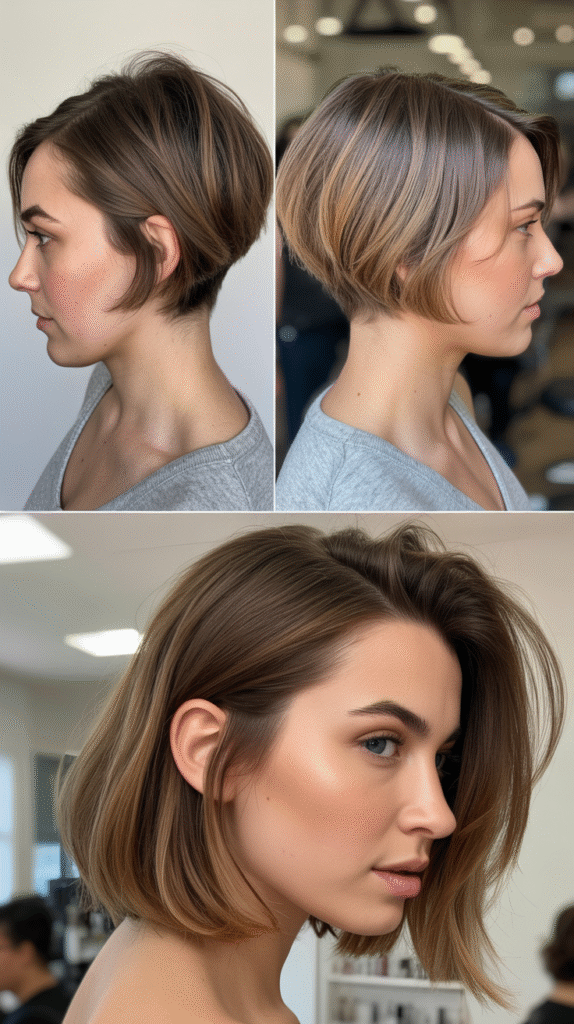
Strategic cutting that creates a graduated bob shape serves as an excellent intermediate goal during the pixie-to-long journey.
- Request that your stylist create a graduated shape where hair is longest at the front jawline and gradually shorter toward the back nape.
- This intentional cut typically occurs 6-12 months into the grow-out process when sufficient length allows for bob styling.
- The graduated lob provides structure and intention to the growing process, transforming awkward length into a trendy, wearable style.
- This cut works across all hair textures and face shapes, with adjustments to angle and length customizing the look for individual features.
- The lob phase offers numerous styling options—sleek and straight, wavy and textured, or tucked behind ears for varied appearances.
- Regular trims maintain the graduated shape while allowing continued length growth toward longer hair goals.
27. The Zigzag Part Adventure
Creating a zigzag part instead of traditional straight parts adds visual interest and disguises uneven growth through pattern distraction.
- Use a tail comb to create a zigzag pattern when parting hair, alternating the direction every half inch to inch along the part line.
- The zigzag breaks up the visual line of the scalp and creates texture that distracts from any uneven length distributions.
- This playful approach works particularly well for casual, creative, or youthful aesthetics during the transition period.
- The zigzag part requires only seconds to create but delivers a distinctive look that makes ordinary growing hair appear intentionally styled.
- Experiment with zigzag amplitude—small tight patterns for subtle effect, larger patterns for dramatic visual impact.
- This technique works across all hair colors, with high-contrast hair colors (very dark or very light) showing the most dramatic effect.
28. The Mousse and Diffuse Volume

Using mousse and diffuser-drying creates maximum volume that makes growing pixie hair appear fuller and more intentionally styled than its actual length.
- Apply volumizing mousse to soaking wet hair, working it through from roots to ends for complete coverage.
- Flip head upside down and use a diffuser attachment on low heat and low speed to dry hair while encouraging maximum volume.
- The diffuser drying method enhances natural texture while creating lift that disguises any uneven growth patterns through overall fullness.
- This approach works exceptionally well for naturally wavy or curly hair types, amplifying natural patterns into voluminous styling.
- The increased volume creates the appearance of thicker, fuller hair during stages when growth may appear thin or scraggly in certain areas.
- Finish by flipping head upright and using fingers to arrange the voluminous texture into the desired final shape.
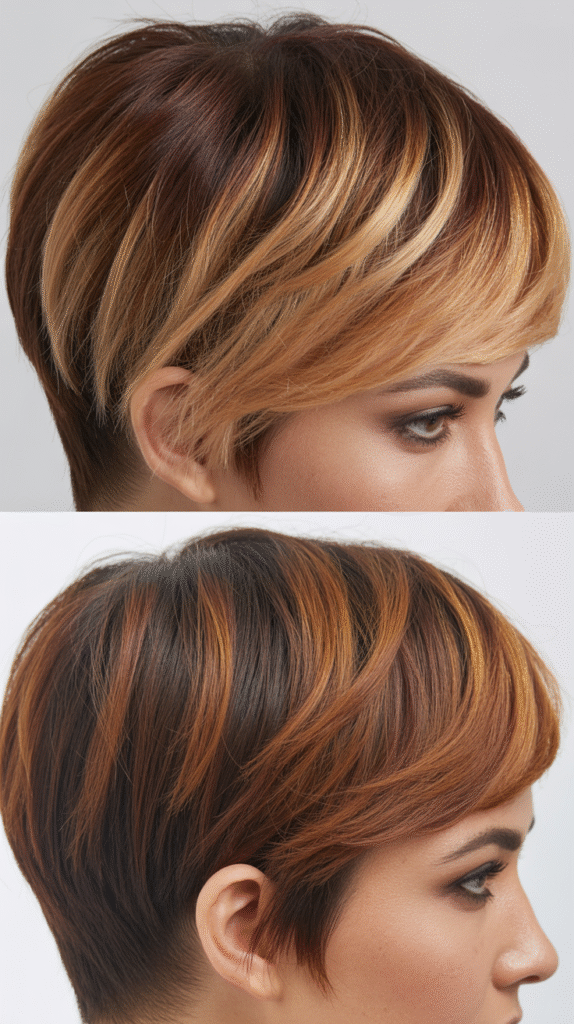
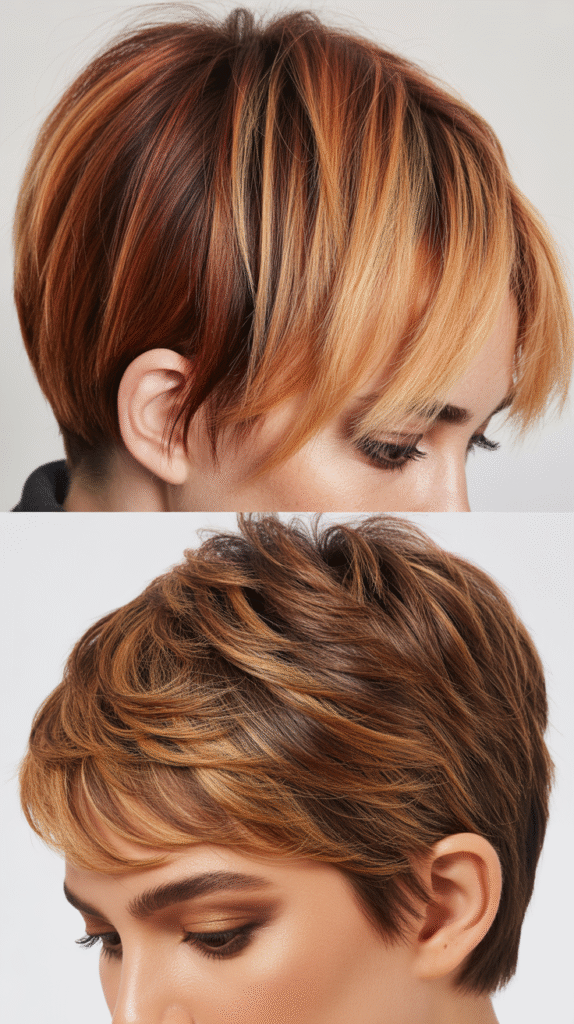
29. The Strategic Highlight Placement
Adding highlights or color dimension to growing pixie hair creates visual interest that distracts from uneven lengths and awkward growth patterns.
- Consult with a colorist about strategic highlight placement that adds dimension around the face and throughout the crown area.
- Color variation creates the illusion of texture and fullness, making growing hair appear more deliberately styled and salon-fresh.
- Face-framing highlights draw attention forward and upward, away from back sections that may be growing less elegantly.
- The color distraction technique works across all base colors and can be subtle or dramatic based on personal preference.
- Consider balayage or babylight techniques that create natural-looking dimension rather than uniform color throughout.
- Regular color maintenance appointments provide opportunities to discuss grow-out progress and make strategic cutting adjustments simultaneously.
30. The Rolled Bangs Retro
Creating rolled bangs in the front sections while leaving the rest textured provides vintage charm that celebrates rather than hides the grow-out process.
- Section the front hairline area and apply setting lotion or mousse for hold and structure.
- Roll the front section under or over itself using a round brush while blow-drying, creating a structured curved shape.
- Secure the roll with bobby pins at the base, tucking pins invisibly for a polished finished appearance.
- Leave the remaining hair textured and casual, creating an intentional contrast between structured front and effortless rest.
- This styling works particularly well for those with sufficient front length, typically appearing 4-6 months into the grow-out process.
- The rolled bangs provide a signature look that makes the transition period feel like an intentional style choice rather than a waiting game.
31. The Mini Space Buns
Creating two small buns on top of the head offers a playful, youthful solution for managing growing pixie hair with personality.
- Part hair down the center and gather the longest sections from each side of the crown area.
- Twist each section and wrap around itself to create small buns, securing with bobby pins and elastics.
- Leave shorter sections around the sides and back loose, allowing natural texture to frame the face beneath the buns.
- This playful style works well for casual settings, festivals, or anyone embracing a youthful, fun aesthetic during transition.
- The space buns accommodate the awkward 4-8 month growth period when some sections are long enough to secure but others remain too short.
- Adjust bun tightness and height based on personal comfort—higher and tighter for athletic activities, lower and looser for casual everyday wear.
32. The Swept-Forward Styling
Directing all hair forward toward the face creates volume and an intentional bowl-cut-adjacent silhouette that works during specific growth stages.
- Use a round brush while blow-drying to direct all hair sections forward, creating curve and volume that moves toward the face.
- The forward direction helps uneven back sections blend with longer front areas, creating a cohesive rounded silhouette.
- Apply styling cream or light pomade to create definition and piece-y texture throughout the forward-swept sections.
- This approach works particularly well during the 3-6 month growth phase when establishing new shape direction.
- The swept-forward style creates a bold, fashion-forward appearance that makes the transition feel intentional rather than accidental.
- Pair this styling with bold makeup to create a cohesive, editorial-inspired overall aesthetic that embraces the transitional length.
33. The Asymmetrical Bob Evolution
Embracing an asymmetrical bob as an intermediate style during the grow-out provides a trendy, intentional look that works with uneven growth patterns.
- Request that your stylist create or enhance existing length differences, making one side intentionally longer than the other.
- The asymmetrical approach transforms accidental uneven growth into deliberate styling choice, reframing the narrative of the transition.
- This cut typically works best 8-12 months into the grow-out process when sufficient length allows for dramatic side-to-side variation.
- Style the longer side with volume and texture while keeping the shorter side sleek and tucked for maximum contrast.
- The asymmetrical bob works across all hair textures and provides numerous daily styling options based on mood and occasion.
- This intermediate style can be maintained for months or gradually evened out as growth continues toward ultimate length goals.
34. The Scarf Wrap Technique
Incorporating silk or satin scarves into growing pixie styling provides both protective benefits and aesthetic appeal during the transition.
- Fold a square scarf into a triangle or rectangle and position it at the nape or front hairline, wrapping around the head.
- The scarf covers growing-out sections while protecting hair from environmental damage and reducing daily manipulation needs.
- Tie the scarf at various positions—top knot, side bow, or back tie—for different aesthetic effects and style versatility.
- This approach works particularly well for those prioritizing hair health during growth, as it reduces heat styling and mechanical damage.
- Experiment with different scarf materials, patterns, and colors to coordinate with outfits and create varied looks throughout the week.
- The scarf technique accommodates all growth stages and hair textures, providing consistent styling solution from pixie through medium lengths.
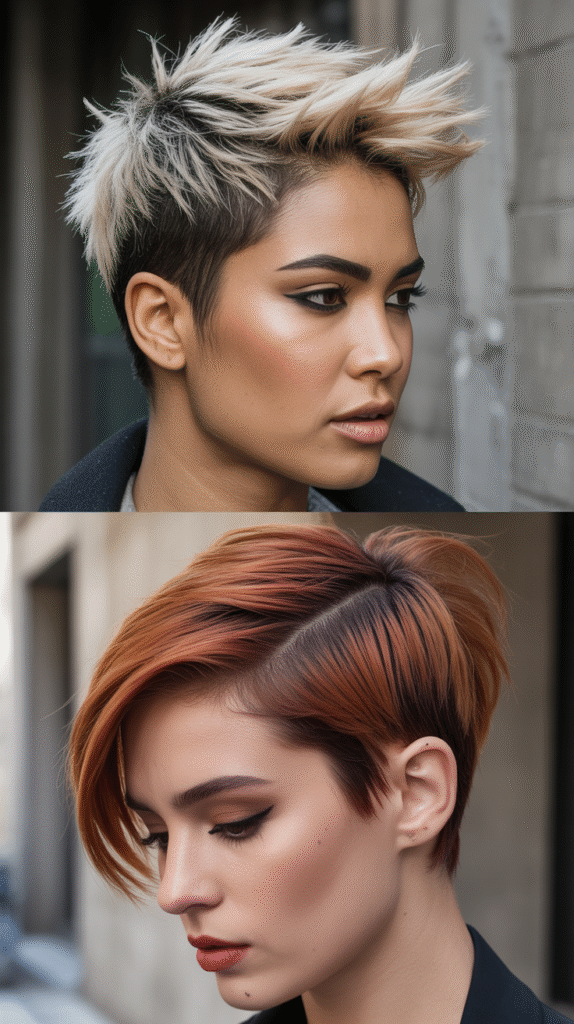
35. The Structured Gel Spikes
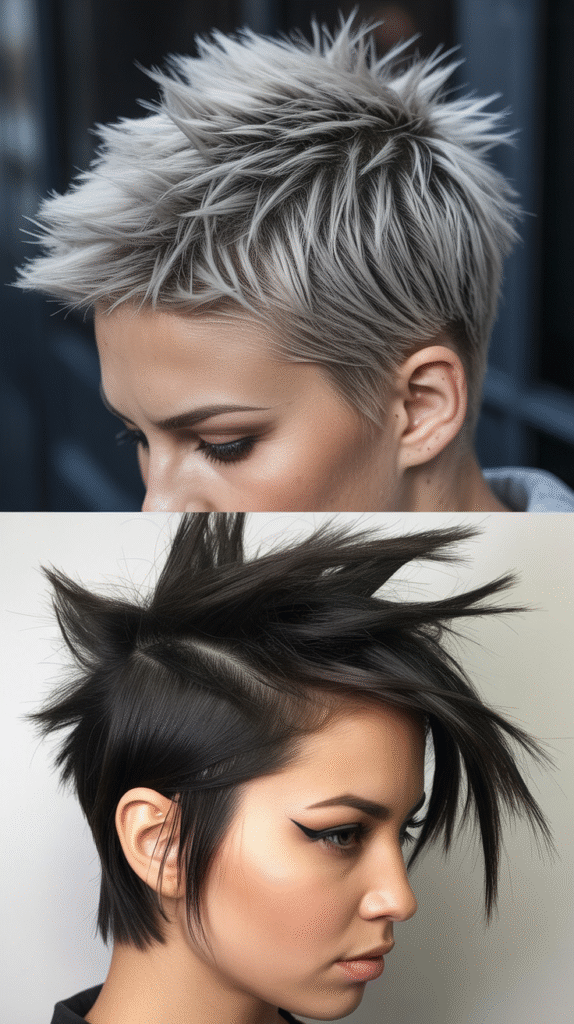
Creating intentional spikes with strong-hold gel maintains the edgy aesthetic of your original pixie while accommodating increased length through height.
- Apply strong-hold gel to damp hair, using fingers to pull small sections upward into individual spikes.
- The spiking technique accommodates growing length by utilizing increased height potential as hair lengthens over time.
- Create varied spike sizes and directions throughout the head for natural-looking texture rather than uniform structured spikes.
- This bold approach works particularly well for maintaining alternative aesthetics during the transition period.
- The gel-spiked style holds throughout the day and works across most hair textures, though naturally straight hair often spikes most dramatically.
- Adjust spike intensity based on setting—aggressive spikes for casual or creative environments, subtle texture for professional settings.
36. The Behind-the-Ear Tuck
The simple act of tucking growing sections behind ears creates immediate polish and reveals facial features while managing awkward lengths.
- Allow top sections to fall naturally while deliberately tucking side sections behind both ears, securing with bobby pins if needed.
- The ear-tuck creates instant facial framing and draws attention to earrings, bone structure, and eyes rather than hair transition.
- This effortless technique works across all hair textures and requires no special products or tools for daily execution.
- The behind-ear tuck provides a quick solution for professional settings or occasions requiring a more polished, put-together appearance.
- Secure tucked sections with small bobby pins matching your hair color for hold that lasts throughout the day without visible hardware.
- This approach works particularly well during the 3-9 month growth period when side sections become long enough to tuck but haven’t reached bob length.
37. The Texturizing Powder Application
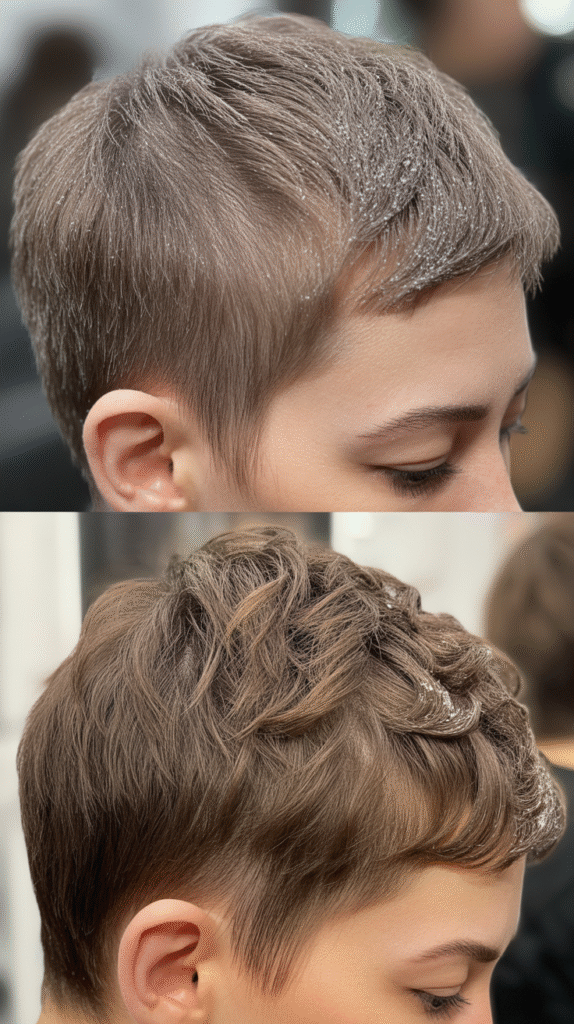
Using root-lifting and texturizing powders creates the appearance of fuller, more voluminous hair that disguises thin or awkward growth stages.
- Apply texturizing powder directly to roots in the crown area, using fingers to work it through and create immediate lift and fullness.
- The powder absorbs oil while creating grip and texture that makes growing hair appear thicker and more styled than its natural state.
- This product works exceptionally well for fine or thin hair types that may appear particularly sparse during transitional growth stages.
- Focus application on the crown and top sections where maximum volume creates the most significant visual impact.
- The matte finish created by texturizing powder gives hair a natural, lived-in appearance rather than overly styled or product-heavy look.
- Use sparingly to avoid buildup and white residue, starting with small amounts and adding more only as needed.
38. The Twisted Crown Detail
Creating small twists around the crown hairline adds visual interest while controlling the pieces most likely to stick out awkwardly during growth.
- Section small pieces along the front hairline and temples, twisting each from root to end before securing with small bobby pins.
- The twisted crown creates a delicate, feminine detail that transforms functional hair control into decorative styling element.
- Leave the remaining hair loose and textured beneath the twisted sections for soft, romantic overall appearance.
- This technique works across all hair textures, though naturally textured or curly hair often creates fuller-looking twists with better hold.
- The twisted crown approach works particularly well for special occasions, dates, or any time a softer, more romantic aesthetic is desired.
- Combine with loose waves throughout the rest of the hair for a cohesive bohemian-inspired look during the transition period.
39. The Blow-Out Brush Technique
Using a hot air brush tool creates salon-quality blowouts at home, managing growing pixie hair with smooth, polished results.
- Section hair and use the hot air brush on each section, rotating the barrel under to create smooth curves and eliminate any awkward bends.
- The blow-out brush simultaneously dries and styles, saving time while delivering polished results that make growth appear intentional.
- Focus on creating volume at roots while smoothing the lengths, which creates a balanced silhouette during transitional stages.
- This tool works particularly well for those with naturally wavy or slightly frizzy hair who desire sleeker styling during the grow-out process.
- The blow-out technique provides a professional appearance suitable for work environments and formal occasions throughout the transition.
- Regular blow-out styling requires heat protectant application to maintain hair health while using thermal tools frequently during the months-long process.
40. The Piecey Separation Method

Creating intentional piece-y texture through product application and styling makes growing pixie hair appear deliberately textured rather than awkwardly uneven.
- Apply a small amount of styling wax or pomade to fingertips and run through hair, pinching and twisting small sections.
- The piecey technique creates defined separation that adds dimension and visual interest to growing hair.
- This approach works particularly well for straight hair types that might otherwise appear flat or lifeless during transition stages.
- The separated texture creates movement and makes hair appear to have more volume and fullness than smooth styling would provide.
- Use products sparingly to avoid greasy appearance, starting with minimal amounts and adding more only as needed for desired effect.
- The piecey separation method works for both casual and professional settings, adjusting the degree of texture based on environment.
41. The Retro Flip-Out
Creating outward flips at the ends using a round brush or flat iron provides a playful, retro-inspired look during the awkward growth stages.
- Use a round brush while blow-drying or a flat iron on dry hair to curl ends outward, away from the face.
- The retro flip adds personality and intentional styling to growing hair, transforming awkward length into vintage-inspired fashion statement.
- This technique works best once hair reaches chin length or slightly below, typically 9-15 months into the grow-out process.
- The flip-out creates volume and movement that makes hair appear fuller and more styled than leaving ends straight would achieve.
- Pair the retro flip with a headband or hair accessories for a cohesive vintage-inspired overall aesthetic.
- This styling works across most hair textures, though naturally straight to slightly wavy hair holds the outward curl most reliably.
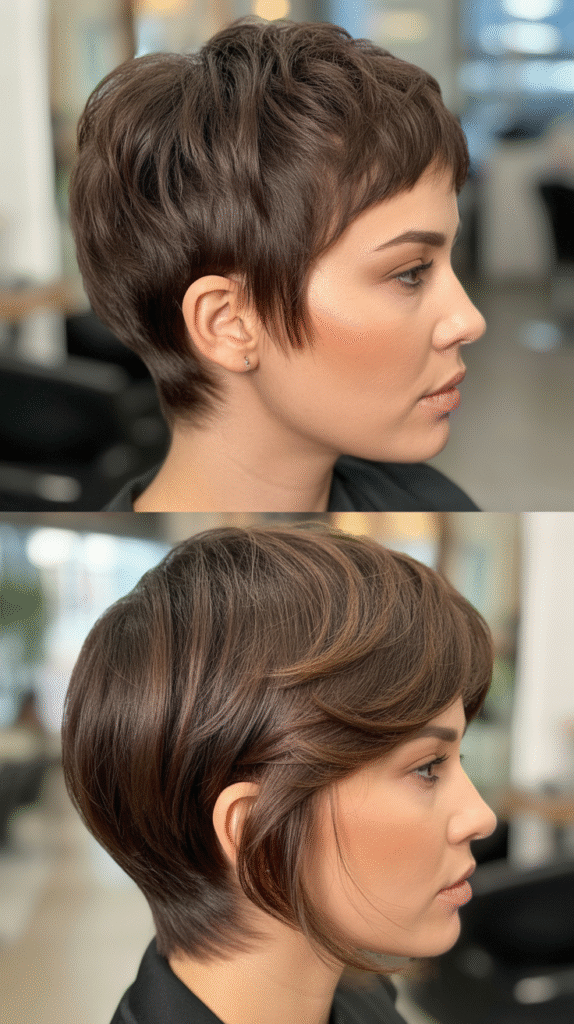
42. The Layered Pixie Evolution
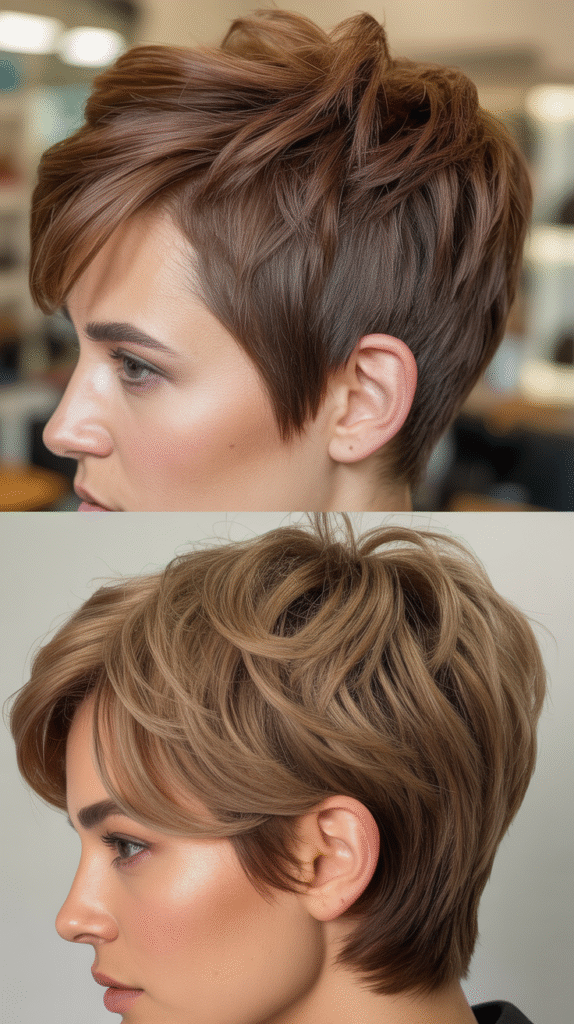
Adding layers throughout growing pixie hair creates movement and removes weight, making the transition appear more intentional and less bulky.
- Request that your stylist add layers throughout, creating shorter pieces on top that gradually lengthen toward the bottom and back.
- The layered approach removes weight and bulk that can accumulate during the growth process, keeping hair feeling fresh and intentional.
- Layers create natural movement and prevent the “growing-out mullet” effect that can occur when all sections grow at equal rates.
- This cut typically happens 4-8 months into the process and may require refreshing every 6-8 weeks to maintain shape.
- The layered pixie evolution provides more styling versatility than one-length growth, allowing for various textures and shapes.
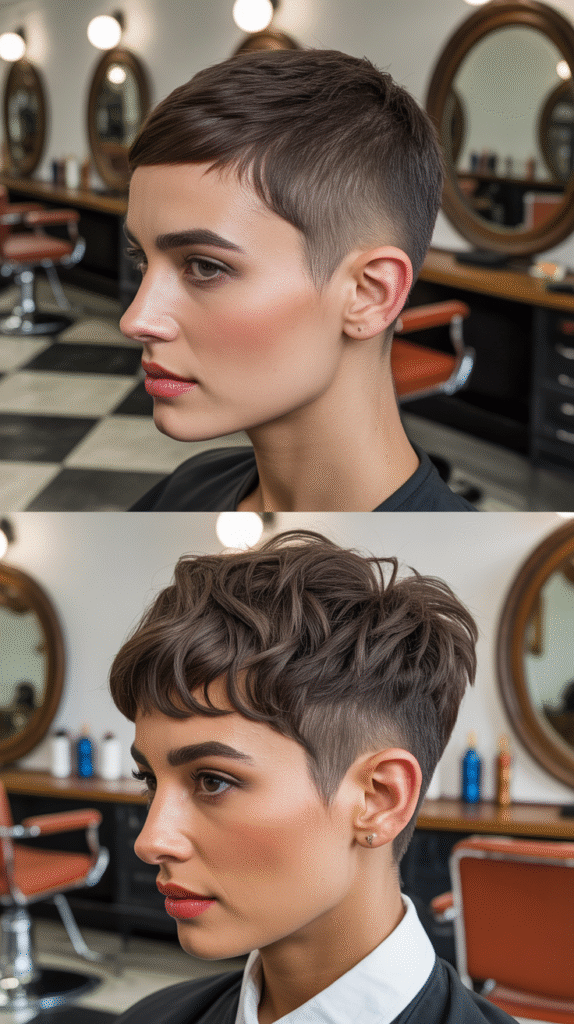
- This intermediate style works across all hair textures, with adjustments to layer placement customizing the look for individual hair behavior.
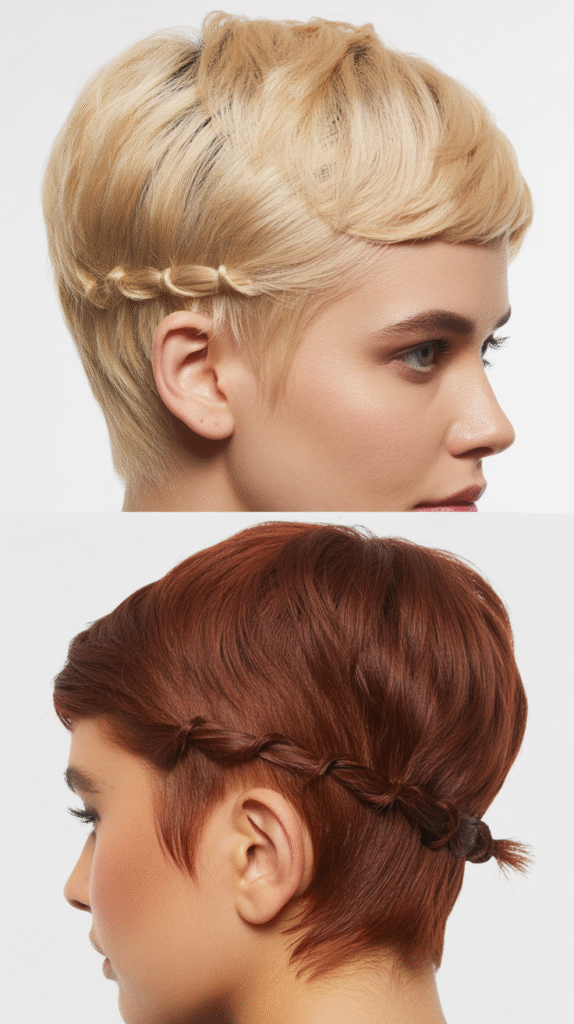
43. The Braided Headband Alternative
Creating a small braid from one side across the crown to the other serves as a natural headband while controlling growing front sections.
- Section hair from above one ear, braid across the crown to above the opposite ear, incorporating hair along the path.
- The braided headband controls growing-out fringe and face-framing pieces while creating a pretty detail that appears deliberately styled.
- Secure the braid end with a bobby pin behind the ear or incorporate it into loose hair for seamless integration.
- This technique works once front sections reach sufficient length, typically 5-8 months into the growth process.
- Leave remaining hair loose and textured beneath the braided headband for a soft, romantic overall appearance.
- The braided headband approach works across all hair textures, with naturally textured hair often creating fuller-looking braids with better natural hold.
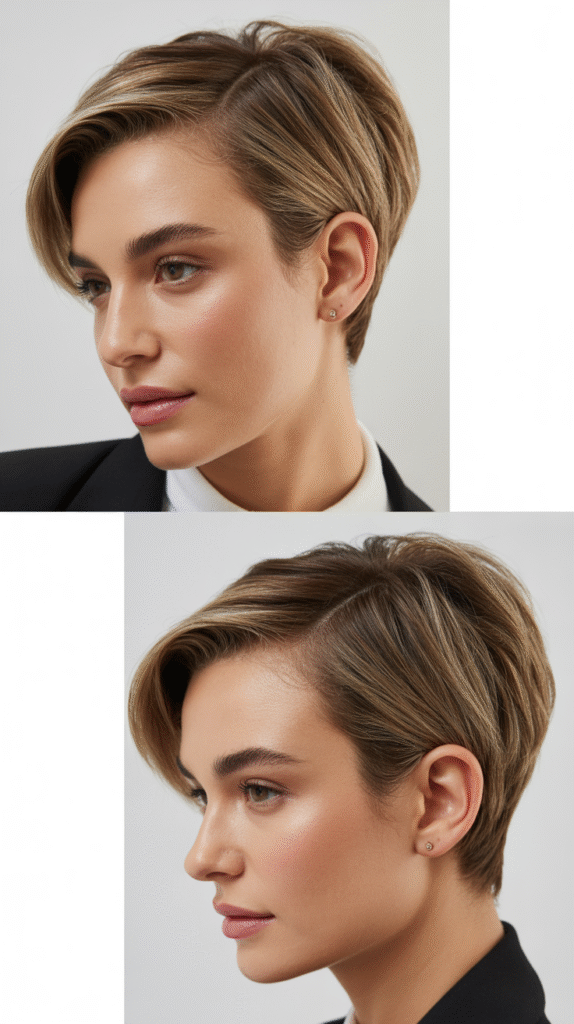
44. The Straight and Sleek Approach
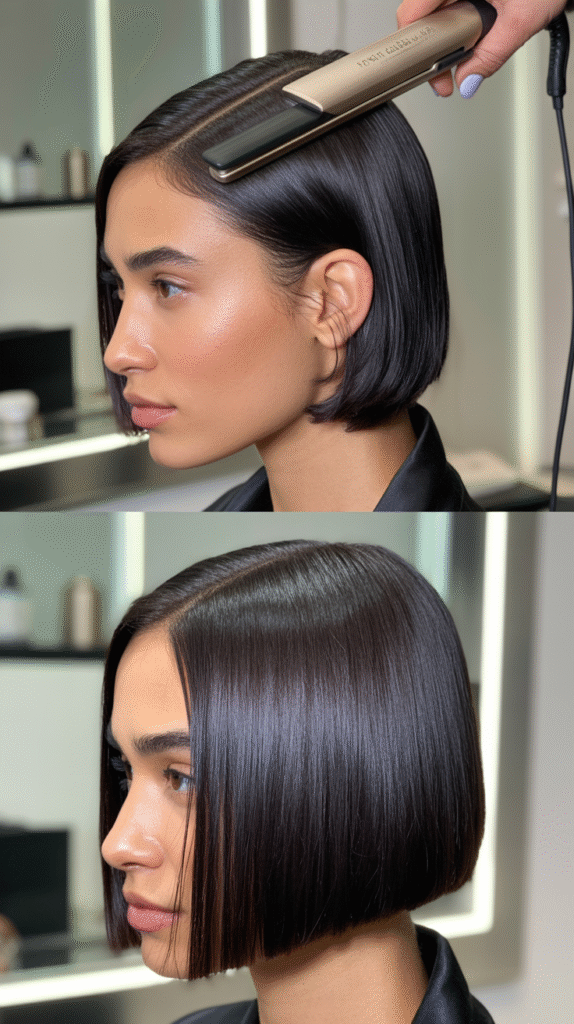
Using a flat iron to create perfectly straight, sleek hair during the grow-out makes lengths appear uniform and intentionally styled.
- Apply heat protectant to dry hair and section into small pieces for thorough flat iron coverage.
- Run the flat iron slowly through each section, creating completely straight, smooth hair that appears uniform regardless of growth stages.
- The sleek approach creates a polished, professional appearance suitable for formal environments and special occasions during transition.
- This styling technique works across all hair textures, providing consistent results that make hair appear well-maintained and intentional.
- The straight styling can last multiple days with proper nighttime care, reducing daily heat styling requirements throughout the week.
- Apply a small amount of shine serum after straightening to enhance glossiness and create a salon-fresh finished appearance.
45. The Textured Fringe Focus
Creating or enhancing a textured fringe during the grow-out provides a focal point that distracts from other areas still in transition.
- Request that your stylist create or enhance a fringe area, cutting it to eye-grazing or just-above-eye length with textured, piece-y ends.
- The fringe draws attention forward and creates a strong style statement that makes the growing process appear deliberate.
- Style the fringe with texturizing product and fingers for a deliberately undone, effortlessly cool appearance.
- This approach works particularly well for those with straight to slightly wavy hair, as natural texture enhances the piece-y fringe effect.
- The textured fringe can be swept to the side, worn forward, or pinned back on days when a different look is desired.
- Maintain fringe length with mini trims every 4-6 weeks while allowing the rest of the hair to grow uninterrupted toward length goals.
46. The Root Smudge Color Technique
Using root smudging color technique adds dimension that disguises regrowth and makes the overall growing process appear more intentional.
- Consult with a colorist about blending darker roots with lighter lengths through smudging technique, creating a natural gradient.
- The root smudge makes new growth appear intentional rather than neglected, extending time between color appointments during the transition.
- This coloring approach adds depth and dimension that creates the illusion of fuller, more textured hair throughout the growing stages.
- The technique works across all base colors, from platinum blondes to dark brunettes, customized to individual coloring needs.
- Root smudging typically requires less maintenance than all-over color, making it ideal for the months-long transition period.
- The dimensional color effect pairs beautifully with textured styling, enhancing the appearance of movement and fullness.
47. The Voluminous Blowout Method
Creating maximum volume through proper blow-drying technique makes growing pixie hair appear fuller and more intentionally styled.
- Section hair and blow-dry each piece with a round brush, rolling the brush under while directing heat at roots for maximum lift.
- The volumizing blow-dry creates fullness that disguises any thin or awkward growth areas through overall increased dimension.
- Focus on lifting roots rather than smoothing lengths, which creates a balanced, voluminous silhouette during transitional stages.
- This technique works across all hair textures, with adjustments to brush size and technique customizing results for individual hair behavior.
- The voluminous blowout provides a polished appearance suitable for professional and social occasions throughout the transition period.
- Apply volumizing mousse to damp hair before blow-drying to enhance and extend the voluminous effect throughout the day.
48. The Quiff-Inspired Front

Creating a quiff-style lift at the front hairline adds height and drama while accommodating growing length through vertical styling.
- Apply strong-hold product to the front section and blow-dry while pushing hair upward and slightly back, creating volume and height.
- The quiff accommodates growing front length by utilizing increased height potential, making longer sections appear intentionally styled rather than overgrown.
- This bold styling works particularly well for those maintaining an edgy or alternative aesthetic throughout the transition period.
- The quiff can be adjusted in height based on setting—dramatic lift for casual environments, subtle lift for professional contexts.
- This technique works best for straight to slightly wavy hair textures that hold structured shapes with product support.
- Secure the quiff with strong-hold hairspray to maintain height and shape throughout the day without constant maintenance.
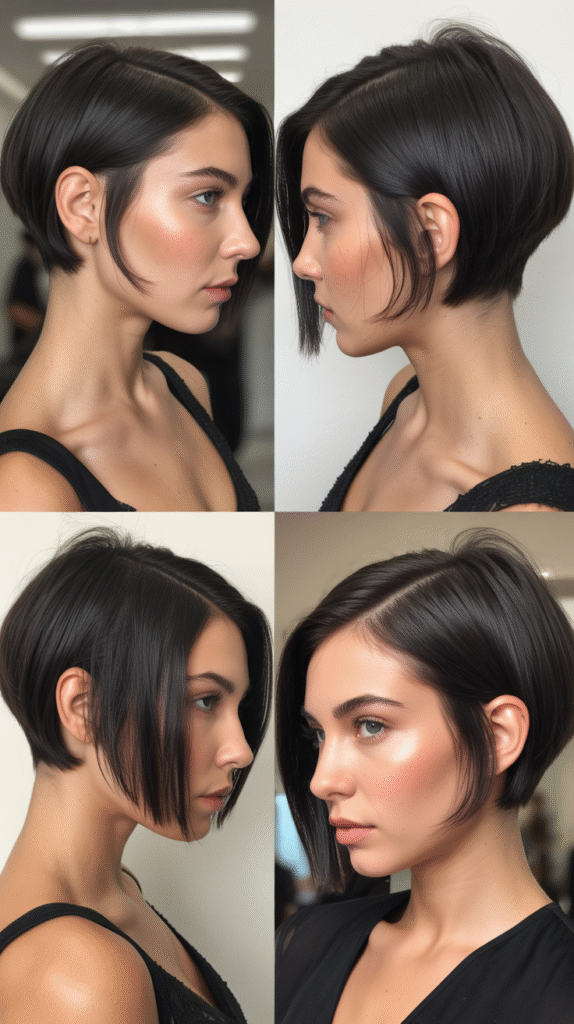
49. The Ear-Grazing Bob Transition
Allowing hair to grow to ear-grazing length creates the classic bob silhouette, serving as a major milestone in the pixie grow-out journey.
- Request that your stylist create a clean bob line at ear level, evening out any remaining length differences from the pixie stage.
- The ear-grazing bob typically appears 10-14 months into the grow-out process and marks a significant transition from short to medium length.
- This classic cut works across all hair textures and face shapes, providing a timeless, wearable style during the transition.
- The bob length offers numerous styling options—straight and sleek, wavy and textured, or tucked behind ears for versatility.
- This milestone cut may feel like starting fresh after months of growing, providing renewed styling motivation toward longer length goals.
- Maintain the bob shape with trims every 6-8 weeks while continuing to grow length toward the next transitional stage.
50. The Colored Hair Extensions Addition
Incorporating temporary or permanent hair extensions adds instant length and volume while maintaining the growth underneath.
- Consult with an extension specialist about clip-in, tape-in, or other extension types appropriate for your current hair length and goals.
- Extensions provide immediate length satisfaction during the months-long natural growth process, offering styling versatility while underneath hair grows.
- Choose extensions that closely match natural hair color and texture for seamless blending, or embrace contrasting colors for intentional highlight effect.
- This approach works best once hair reaches at least 3-4 inches in length, providing sufficient natural hair to blend and support extensions.
- Extensions require maintenance and adjustment as natural hair grows, typically every 6-8 weeks depending on extension type selected.
- The extension option allows experimentation with longer styles before natural hair reaches those lengths, helping confirm long-hair goals.
51. The Messy Bun Evolution
Once hair reaches sufficient length in the crown area, creating a messy bun provides casual styling that celebrates growth progress.
- Gather the longest sections from the crown and top of head, twisting and wrapping into a loose, deliberately messy bun.
- The messy bun accommodates varied lengths by incorporating whatever hair reaches, while shorter pieces naturally fall to frame the face.
- This casual styling works particularly well for second-day hair, athletic activities, or any casual occasion throughout the transition.
- Secure the bun with an elastic and bobby pins, intentionally leaving some texture and looseness for an effortlessly cool appearance.
- Pull a few face-framing pieces out deliberately to soften the overall look and create a more romantic, less structured aesthetic.
- The messy bun typically becomes achievable 8-12 months into growth, marking a significant milestone in the pixie-to-long transition journey.
52. The Curtain Bang Development
Creating or growing out curtain bangs provides a trendy focal point that frames the face while the rest of the hair transitions.
- Request that your stylist create or enhance center-parted fringe that falls to each side of the face, framing features symmetrically.
- The curtain bang trend works beautifully during the grow-out phase, utilizing the natural front-to-back length difference that occurs during transition.
- Style curtain bangs with a round brush, curving them away from the center part to create the characteristic face-framing sweep.
- This approach works across most hair textures, with slight adjustments to cutting technique customizing the look for individual hair behavior.
- Curtain bangs can be swept to the side, pinned back, or styled forward based on daily preference and occasion throughout the transition.
- Maintain curtain bang length with mini trims every 4-6 weeks while allowing surrounding hair to grow uninterrupted toward overall length goals.
53. The Layered Lob Achievement
Reaching the layered lob (long bob) length represents a major transition milestone, offering maximum styling versatility after months of growth.
- Request that your stylist create layers throughout the lob length, typically falling between chin and shoulders, for movement and dimension.
- The layered lob typically appears 12-18 months into the grow-out process and provides the most styling options of any transitional stage.
- This versatile length can be worn straight, wavy, curly, half-up, fully-up, or in countless other configurations based on occasion and mood.
- The lob works across all hair textures and face shapes, serving as an ideal stopping point or continued transition toward longer lengths.
- Layers throughout the lob create movement and prevent the heavy, blunt appearance that can occur when growing from shorter styles.
- Maintain the layered lob shape with trims every 6-8 weeks, or continue growing while maintaining face-framing layers for continued transition.
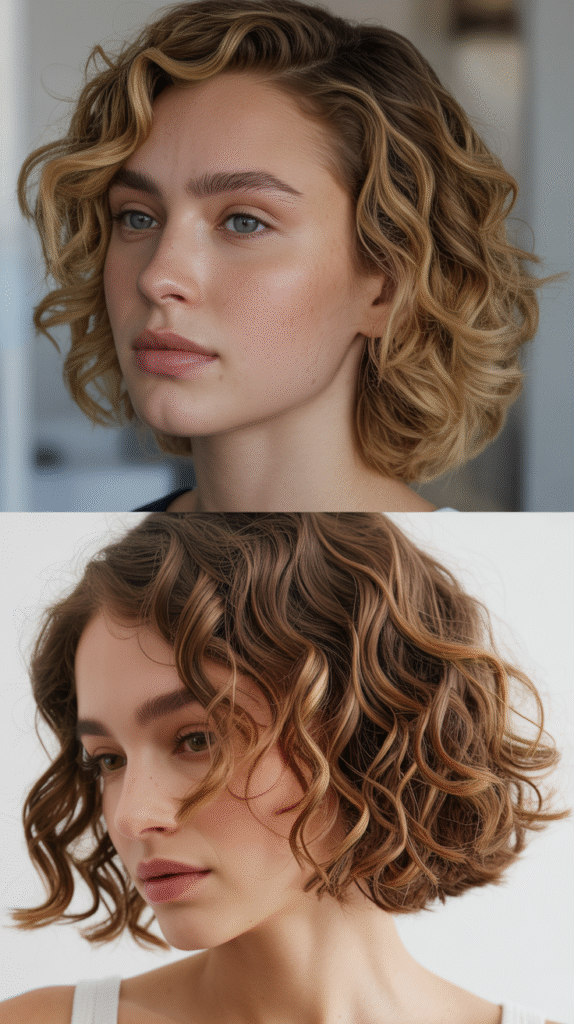
54. The Soft Wave Pattern
Creating soft, natural-looking waves throughout growing hair adds dimension and movement that flatters the transitional lengths beautifully.
- Use a large-barrel curling iron or wand to create loose waves throughout hair, wrapping sections around the barrel in alternating directions.
- Allow waves to cool completely before running fingers through them to break up the curl pattern into soft, natural-looking waves.
- The wave pattern adds visual interest and volume that makes growing hair appear more intentionally styled and polished.
- This technique works across all hair textures, providing consistently beautiful results that flatter the various awkward growth stages.
- Soft waves work for both casual and formal occasions, offering versatile styling throughout the extended transition period.
- Apply a light-hold hairspray after creating waves to maintain pattern throughout the day without creating stiffness or unnatural texture.
55. The French Pin Arrangement
Using decorative French pins to secure and style growing sections combines functionality with Parisian-inspired aesthetic appeal.
- Select decorative French pins or embellished bobby pins that complement personal style and can serve as jewelry-like hair accessories.
- Use pins to secure growing-out sections while creating patterns or arrangements that add visual interest to the overall style.
- This approach transforms necessary hair control into a fashion statement, making the transition period feel special rather than frustrating.
- French pin styling works across all hair textures and growth stages, providing consistent solution from early pixie through medium lengths.
- Experiment with pin placement—clustered on one side, scattered throughout, or used to create specific patterns for varied daily looks.
- The decorative pin approach requires minimal time investment while delivering polished results appropriate for professional and social occasions.
56. The Textured Shag Evolution
Transforming growing pixie hair into a textured shag cut provides an on-trend intermediate style that celebrates rather than hides the transition.
- Request that your stylist create a heavily layered shag with shorter layers throughout the crown and longer layers toward the perimeter.
- The shag aesthetic thrives on texture and movement, making it ideal for managing the varied lengths that occur during transition stages.
- This cut typically works best 6-12 months into growth when sufficient length allows for the characteristic shag layering throughout.
- Style the shag with texturizing products and fingers for an effortlessly cool, rock-and-roll-inspired appearance during the transition period.
- The shag works particularly well for naturally wavy or curly hair, as natural texture amplifies the deliberately undone aesthetic.
- Regular shag maintenance every 6-8 weeks keeps the style looking intentional while allowing continued length growth toward longer goals.
57. The Sleek Low Ponytail

Once sufficient length is achieved, gathering hair into a sleek low ponytail provides polish and sophistication during the later transition stages.
- Apply gel or smoothing cream to hair and brush everything back toward the nape, gathering into a low ponytail at the base of the skull.
- The low ponytail works once hair reaches approximately chin length or longer, typically 12-18 months into the grow-out journey.
- Smooth any flyaways with additional gel or hairspray, creating a polished appearance suitable for professional and formal settings.
- Leave face-framing pieces out deliberately for a softer look, or slick everything back completely for maximum sophistication and edge.
- This styling accommodates shorter underlayers by securing them with additional bobby pins or leaving them to create soft texture around the ponytail base.
- The sleek low ponytail represents a significant milestone, demonstrating that hair has successfully transitioned from pixie to medium-length styling options.
58. The Braided Accent Integration
Incorporating small braids throughout growing hair as accent pieces adds visual interest while celebrating the increasing length and styling possibilities.
- Create small braids in random sections throughout hair, leaving most hair loose and textured for contrast with structured braids.
- The accent braids add visual detail that makes growing hair appear more styled and intentionally boho-inspired rather than unkempt.
- This approach works once hair reaches sufficient length for braiding, typically 4-6 months into the transition depending on starting length.
- Leave braids in for multiple days as a low-maintenance styling option, or remove and re-braid in different locations for varied daily looks.
- Accent braiding works across all hair textures, with naturally textured or curly hair often holding braids better without additional product.
- Combine accent braids with loose waves throughout the rest of hair for a cohesive bohemian-inspired overall aesthetic during transition.
59. The Graduated Color Technique
Using graduated color techniques like ombré or balayage adds dimension that celebrates increasing length while disguising awkward growth stages.
- Consult with a colorist about creating color graduation from roots to ends, with lighter or different tones toward the perimeter.
- The color dimension draws attention to length achievement rather than growth awkwardness, celebrating the transition progress visually.
- Graduated coloring requires less maintenance than all-over color, as new growth blends naturally with the darker root area.
- This approach works across all base colors and hair textures, providing customized dimensional coloring appropriate for individual preferences.
- The color technique adds depth that creates the illusion of fuller, more textured hair throughout the various growth stages.
- Graduated coloring paired with layers creates maximum dimension and movement, making growing hair appear thick, healthy, and deliberately styled.
60. The Twisted Half-Up Style

Creating twists on each side and securing them at the back creates a romantic half-up style that manages growing front sections gracefully.
- Section hair from the temples on each side and twist back toward the crown, securing where the twists meet with bobby pins.
- The twisted half-up accommodates varied lengths by incorporating whatever hair reaches into the twists while leaving shorter pieces loose beneath.
- This romantic styling works well for special occasions, dates, or any time a softer, more feminine aesthetic is desired during transition.
- Leave the remaining hair loose and wavy beneath the twisted sections for a soft, effortless overall appearance.
- The twisted half-up typically becomes achievable 6-10 months into growth when side sections reach sufficient length for manipulation.
- This versatile style can be adjusted tighter for secure all-day hold or looser for a softer, more relaxed casual appearance.
61. The Piece-y Updo Attempt
Creating a deliberately messy, piece-y updo with growing hair celebrates progress while accommodating sections that won’t yet reach the gathering point.
- Gather as much hair as possible into a loose bun or twist at the crown or back of head, securing with bobby pins and elastics.
- Allow shorter sections that don’t reach the updo to fall naturally around the face and nape as intentional piece-y texture.
- The imperfect updo embraces the transitional nature of growing hair, making it appear deliberately undone rather than accidentally messy.
- Spray the loose pieces with light-hold hairspray and use fingers to create soft texture and movement around the secured updo.
- This styling works particularly well for casual occasions and second-day hair when natural texture provides better hold for securing.
- The piece-y updo represents progress toward complete updos, celebrating length achievement during the 10-16 month transition period.
62. The Side-Braided Sweep
Creating a braid that starts at one temple and sweeps across to secure behind the opposite ear provides elegant control and visual interest.
- Section hair from one temple area and create a braid that travels across the front hairline toward the opposite ear.
- The side-braided sweep controls growing-out fringe and face-framing sections while creating a beautiful detail that draws positive attention.
- Secure the braid end behind the opposite ear with bobby pins, integrating it seamlessly into loose hair for natural-looking styling.
- Leave remaining hair loose and textured beneath the braid for soft, romantic overall appearance during the transition period.
- This technique works once front and side sections reach sufficient length, typically 6-9 months into the grow-out process.
- The side braid can be tight and structured for secure all-day hold or loose and relaxed for softer, more casual aesthetic.
63. The Shoulder-Length Achievement
Reaching shoulder length represents the final major milestone in the pixie grow-out journey, offering maximum styling versatility and options.
- This significant milestone typically occurs 16-24 months after starting the pixie grow-out journey, depending on individual hair growth rates.
- Shoulder length offers unlimited styling possibilities—up, down, half-up, braided, straight, curly, or any combination of techniques and approaches.
- Request that your stylist trim any remaining unevenness or damage from the transition period, creating a healthy baseline for continued growth or maintenance.
- Celebrate this achievement by experimenting with styling options that were impossible during shorter stages—full ponytails, complete braids, and elaborate updos.
- The shoulder-length stage provides natural stopping point for those satisfied with medium length, or serves as final transition toward long hair goals.
- This length works across all hair textures and face shapes, offering versatility and options that reward the patience required during the months-long journey.
64. The Maintenance and Care Philosophy
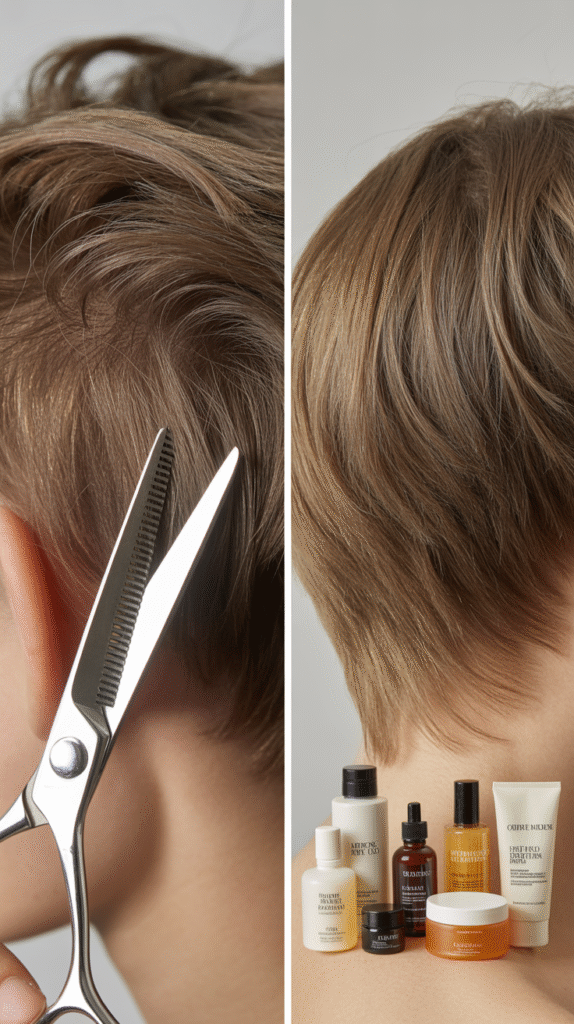
Understanding proper maintenance and care throughout the grow-out journey ensures healthy hair that reaches its full length potential successfully.
- Schedule regular trims every 6-8 weeks to maintain shape and remove any split ends while allowing overall length to increase gradually.
- Use deep conditioning treatments weekly to maintain hair health and prevent damage during the extended growing process.
- Minimize heat styling when possible, embracing natural texture and air-drying to reduce stress on growing hair throughout the transition.
- Take hair-healthy vitamins or supplements if appropriate for your health situation, supporting optimal growth rates from within.
- Be patient with the process—hair typically grows 4-6 inches per year, making the pixie-to-long journey a significant time investment.
- Photograph progress regularly to maintain motivation during difficult transition stages when growth seems invisible on a daily basis.
Pixie Grow-Out Timeline Table
| Growth Stage | Approximate Timeline | Length Description | Best Styling Approaches | Key Challenges |
|---|---|---|---|---|
| Early Growth | 0-3 months | Just beyond pixie shape | Textured styling, gels, accessories | Losing structured shape |
| Awkward Phase 1 | 3-6 months | Ear-covering length | Strategic cuts, headbands, pins | Uneven growth patterns |
| Micro-Bob Stage | 6-9 months | Chin-grazing length | Angled bobs, texture, half-ups | Side growth slower than front |
| Extended Bob | 9-12 months | Between chin and shoulders | Bobs, waves, small updos | Maintaining shape during growth |
| Shoulder-Grazing | 12-18 months | Reaching shoulders | Full styling versatility begins | Awkward “just-past-shoulders” stage |
| Beyond Shoulders | 18-24 months | Past shoulders | All styling options available | Maintaining health during length |
The journey from pixie to long hair requires patience, creativity, and strategic styling throughout every stage of growth.
The 64 Easy Grow Pixie Hairstyles That Look Good Growing Out detailed in this guide transform what many consider the most challenging hair transition into an opportunity for experimentation and style evolution.
Rather than viewing the grow-out period as months of awkward hair days, these approaches celebrate each length stage with intentional styling that makes you look polished and put-together throughout the entire process.
From the initial weeks when texture and product become your best friends, throughthe milestone bob and lob stages, to finally achieving shoulder length and beyond—every phase offers unique styling possibilities that work with rather than against your hair’s natural growth pattern.
Remember that everyone’s hair grows at different rates, and what matters most is finding the techniques and styles that make you feel confident during your personal transition timeline.
With the right cuts, styling methods, and mindset, growing out a pixie cut becomes an exciting journey of transformation rather than a frustrating waiting period.
